
Baked Crunchy Hot Honey Chicken is the answer to your weeknight dinner prayers, a dish that’s surprisingly easy to make but tastes like it came straight from your favorite gourmet restaurant. If you’ve ever craved that irresistible combination of sweet, spicy, and satisfyingly crispy textures, you’re in for a treat. This isn’t just another baked chicken recipe; it’s a flavor explosion that will have everyone at your table asking for seconds. What makes this Baked Crunchy Hot Honey Chicken so special? It’s the magic that happens when tender, juicy chicken meets a fiery hot honey glaze, all coated in a perfectly seasoned, ultra-crispy breading that bakes up golden brown and delicious. We’re talking about a symphony of taste and texture that’s both comforting and exciting, making it an instant family favorite.

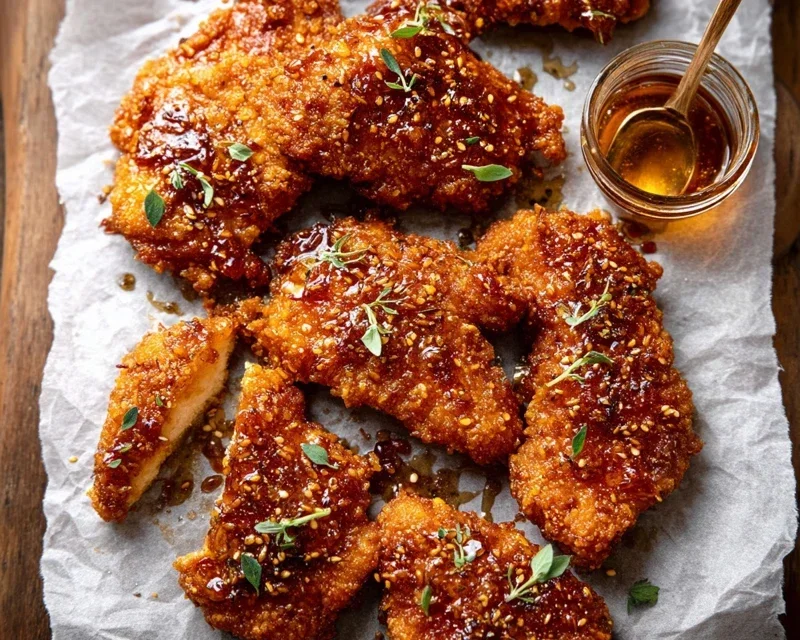
Baked Crunchy Hot Honey Chicken
Get ready for a flavor explosion that’s both satisfyingly crunchy and delightfully sweet and spicy! This Baked Crunchy Hot Honey Chicken recipe is a game-changer for weeknight dinners or impressing guests. We’re taking classic crispy chicken to a whole new level with a luscious, spicy honey glaze that will have everyone beggin extractg for seconds. Forget greasy fried chicken; this baked version delivers all the flavor and crunch with a fraction of the fuss and a healthier profile. The secret lies in a simple yet brilliant crunchy coating and a homemade hot honey sauce that’s incredibly easy to whip up. Let’s get cooking!
Ingredients:
Cooking Instructions:
Phase 1: Preparing the Crunchy Coating
The key to achieving that incredible crunch without frying is a clever combination of crushed cornflakes and savory seasonings. First, let’s get our cornflake coating ready. Take your 6 cups of cornflakes and place them in a large zip-top bag or a food processor. If using a zip-top bag, seal it tightly and then use a rolling pin or a sturdy bottle to crush the cornflakes into fine crum extractbs. You want a texture that’s fine enough to coat the chicken evenly, but with a little bit of texture remaining for that signature crunch. If you prefer to use a food processor, pulse the cornflakes until you achieve the desired consistency. Don’t over-process them into dust; a slightly coarser crum extractb is actually preferable for texture.
Once your cornflakes are crushed, transfer them to a shallow dish or pie plate. Now, it’s time to add the flavor boosters. To the crushed cornflakes, add 1/4 cup of grated parmesan cheese for a subtle salty and umami kick, 1 teaspoon of smoked paprika for a warm, smoky depth, 1/2 teaspoon of onion powder for a sweet and savory base, and 1/2 teaspoon of garlic powder for that essential aromatic punch. Give everything a good whisk with a fork to ensure the seasonings are evenly distributed throughout the cornflake mixture. This creates a beautifully seasoned and incredibly crispy crust for our chicken.
Phase 2: Preparing the Chicken for Coating
Next, let’s get our chicken ready for its delicious makeover. We’ll be using 2 pounds of chicken breast tenderloins. If you can’t find tenderloins, you can also use boneless, skinless chicken breasts cut into strips about 1 inch wide. It’s important that the chicken pieces are roughly the same size so they cook evenly. Pat the chicken tenderloins thoroughly dry with paper towels. This step is crucial because moisture on the surface of the chicken will prevent the coating from adhering properly and will steam the chicken instead of allowing it to crisp up.
Now, let’s prepare our wet ingredients for the egg wash. In a medium bowl, whisk together 2 large eggs with 2 tablespoons of your favorite hot sauce. The hot sauce not only adds a subtle layer of heat to the chicken itself but also helps the cornflake mixture stick. Whisk vigorously until the eggs and hot sauce are well combined. You can adjust the amount of hot sauce here depending on your spice preference.
Phase 3: Coating the Chicken
This is where the magic happens! We’re going to double-dip our chicken for maximum crunch. Take one chicken tenderloin at a time and dip it into the beaten egg mixture, ensuring it’s fully coated. Let any excess egg drip back into the bowl. Then, carefully place the coated chicken tenderloin into the prepared cornflake mixture. Press down gently and evenly on both sides to ensure the cornflakes adhere well. You want a thick, even coating of the seasoned cornflakes. If some pieces don’t stick initially, you can go back and press them into the mixture.
Repeat this process for all of your chicken tenderloins, placing the coated chicken on a clean plate or baking sheet as you go. Ensure there’s a little space between each piece so they don’t stick together and can cook evenly.
Phase 4: Baking the Chicken
Preheat your oven to 400°F (200°C). Line a large baking sheet with parchment paper for easy cleanup. Arrange the coated chicken tenderloins in a single layer on the prepared baking sheet. Drizzle the chicken generously with extra virgin extract olive oil. This olive oil is essential for achieving that golden-brown, crispy finish. You can use a spray oil or carefully drizzle it over the chicken. Make sure to get an even coating of oil as this will help the cornflakes toast and become wonderfully crunchy.
Bake for 18-22 minutes, or until the chicken is cooked through and the coating is golden brown and crispy. The exact cooking time will depend on the thickness of your chicken tenderloins and your oven. You’ll know they’re ready when the internal temperature reaches 165°F (74°C) and the coating is a beautiful, crisp golden.
Phase 5: Making the Hot Honey Glaze and Finishing
While the chicken is baking, let’s prepare our irresistible hot honey glaze. In a small saucepan, combine 1/2 cup of honey, 2-3 tablespoons of hot sauce (adjust to your spice level), 1-3 teaspoons of cayenne pepper for an extra kick, 3/4 teaspoon of chipotle chili powder for smoky heat, 1/2 teaspoon of garlic powder, and 1/2 teaspoon of onion powder.
Place the saucepan over medium-low heat and stir constantly. We’re not looking to boil this, just to gently warm it through and allow the flavors to meld together. Simmer for about 2-3 minutes, stirring occasionally, until the sauce is slightly thickened and fragrant. Be careful not to overheat or burn the honey. Remove from heat and set aside.
Once the chicken is baked and golden brown, carefully remove the baking sheet from the oven. Immediately, while the chicken is still hot, drizzle or brush the prepared hot honey glaze generously over the crispy chicken tenderloins. The heat from the chicken will help the glaze adhere beautifully and create that sticky, sweet, and spicy coating we’re after. You can do this directly on the baking sheet. Let the chicken sit for a minute or two to allow the glaze to set slightly before serving.
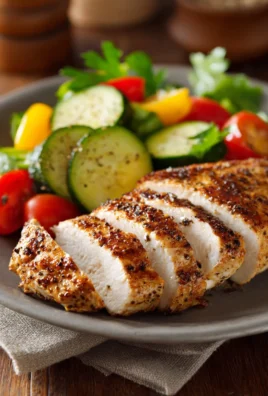
Serve your Baked Crunchy Hot Honey Chicken immediately with your favorite sides. This dish is fantastic with a simple salad, roasted vegetables, or even some fluffy rice. Enjoy the incredible crunch and the amazing sweet and spicy flavor combination!
Conclusion:
There you have it – the ultimate guide to making Baked Crunchy Hot Honey Chicken! This recipe truly delivers on its promise of incredible flavor and satisfying texture, without the fuss of deep frying. The combination of crispy coating and the sweet, spicy kick of hot honey is simply irresistible, making it a surefire hit for any meal. Whether you’re looking for a weeknight dinner that’s impressive yet easy, or a crowd-pleasing appetizer for your next gathering, this Baked Crunchy Hot Honey Chicken is your answer. I encourage you to give it a try; you won’t be disappointed by the explosion of taste and the perfectly crunchy bite.
For serving, I love pairing this chicken with a crisp coleslaw to balance the richness, some fluffy mashed potatoes, or even a simple side salad. If you’re feeling adventurous, consider these variations: try adding a pinch of smoked paprika to the breading for an extra layer of flavor, or experiment with different types of honey, like a wildflower honey for a more nuanced sweetness. You could also swap the chicken thighs for breasts, though you might need to adjust the baking time slightly to ensure they cook through without drying out.
Frequently Asked Questions about Baked Crunchy Hot Honey Chicken:
Can I make the hot honey sauce ahead of time?
Absolutely! You can easily prepare your hot honey sauce a day or two in advance and store it in an airtight container in the refrigerator. Just warm it up gently before drizzling it over your freshly baked chicken.
What if I don’t have hot sauce?
No problem! If you don’t have hot sauce on hand, you can create a similar heat by adding a pinch of cayenne pepper or red pepper flakes directly to your honey. Start with a small amount and add more to achieve your desired level of spice.
How can I ensure my chicken coating is extra crispy?
For maximum crispiness, make sure your chicken pieces are patted thoroughly dry before coating. Also, avoid overcrowding the baking sheet, as this allows for better air circulation, leading to a crispier finish. You can even flip the chicken halfway through baking for an evenly golden-brown crust.
Baked Crunchy Hot Honey Chicken
Crispy, oven-baked chicken tenderloins coated in a spicy-sweet hot honey glaze. A crowd-pleasing and relatively healthy alternative to fried chicken.
Ingredients
-
6 cups cornflakes
-
1/4 cup grated parmesan cheese
-
1 teaspoon smoked paprika
-
1/2 teaspoon onion powder
-
1/2 teaspoon garlic powder
-
2 large eggs, beaten
-
2 tablespoons hot sauce
-
2 pounds chicken breast tenderloins
-
extra virgin olive oil, for drizzling
-
1/2 cup honey
-
2-3 tablespoons hot sauce
-
1-3 teaspoons cayenne pepper
-
3/4 teaspoon chipotle chili powder
-
1/2 teaspoon garlic powder
-
1/2 teaspoon onion powder
Instructions
-
Step 1
Preheat oven to 400°F (200°C). Line a baking sheet with parchment paper. -
Step 2
In a shallow dish, crush the cornflakes into fine crumbs. Stir in the grated parmesan cheese, smoked paprika, 1/2 teaspoon onion powder, and 1/2 teaspoon garlic powder. -
Step 3
In another shallow dish, whisk together the beaten eggs and 2 tablespoons of hot sauce. -
Step 4
Dip each chicken tenderloin first into the egg mixture, ensuring it’s fully coated, then dredge it in the cornflake mixture, pressing gently to adhere. -
Step 5
Arrange the coated chicken tenderloins on the prepared baking sheet. Drizzle generously with extra virgin olive oil. -
Step 6
Bake for 20-25 minutes, flipping halfway through, until the chicken is golden brown and cooked through. -
Step 7
While the chicken bakes, prepare the hot honey glaze: In a small saucepan over low heat, combine the honey, 2-3 tablespoons hot sauce, cayenne pepper, chipotle chili powder, 1/2 teaspoon garlic powder, and 1/2 teaspoon onion powder. Stir until well combined and warmed through. -
Step 8
Once the chicken is cooked, remove it from the oven and brush generously with the hot honey glaze. Return to the oven for an additional 2-3 minutes to allow the glaze to set.
Important Information
Nutrition Facts (Per Serving)
It is important to consider this information as approximate and not to use it as definitive health advice.
Allergy Information
Please check ingredients for potential allergens and consult a health professional if in doubt.

Leave a Comment