
Brown Butter Brookies are an absolute game-changer when it comes to decadent desserts. If you’ve ever found yourself torn between the rich chegrape juicess of a brownie and the sweet, buttery bliss of a chocolate chip cookie, then you, my friend, are ready for this masterpiece. We’re talking about taking two beloved classics and mergin extractg them into one unforgettable treat. The secret weapon in these Brown Butter Brookies? The magical transformation that happens when butter is gently browned. It unlocks an unbelievably nutty, caramelized aroma and flavor that elevates both the brownie and cookie layers to an entirely new level. This isn’t just a dessert; it’s an experience, a warm hug in edible form that will have everyone beggin extractg for the recipe. Get ready to ditch your usual go-to and welcome these irresistible Brown Butter Brookies into your dessert rotation.
Brown Butter Brookies
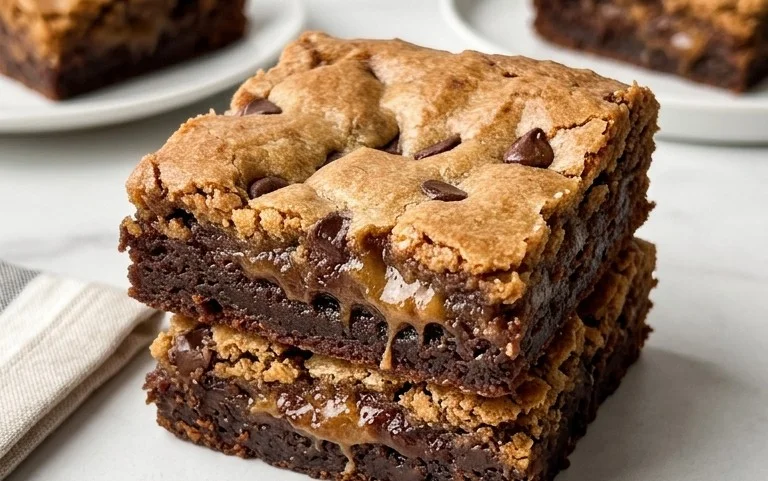
Get ready to elevate your dessert game with these incredible Brown Butter Brookies! This recipe is a harmonious marriage of rich, fudgy brownies and chewy, buttery chocolate chip cookies, all infused with the nutty, toasty magic of browned butter. The result is a dessert that’s both sophisticated and utterly comforting, perfect for satisfying any sweet craving. Prepare to impress yourself and anyone lucky enough to snag a bite.
Ingredients:
Instructions:
Step 1: Browning the Butter for the Cookie Layer
We’re starting with the magic ingredient: brown butter. In a light-colored saucepan over medium heat, melt the 14.5 tablespoons of salted butter. Keep a close eye on it as it melts. It will foam, and then you’ll start to see golden-brown specks appear at the bottom of the pan. Swirl the pan occasionally to ensure even browning. Once it smells nutty and toasted (this usually takes about 5-8 minutes), immediately remove it from the heat and pour it into a heatproof bowl to stop the cooking process. This will prevent the butter from burning and becoming bitter. Let it cool slightly.
Step 2: Crafting the Perfect Cookie Dough
In a large bowl, combine the slightly cooled browned butter with the packed dark brown sugar and granulated sugar. Whisk vigorously until the mixture is well combined and slightly lighter in color. Now, add the 2 large eggs, one at a time, whisking thoroughly after each addition until fully incorporated. Stir in the 1 and 1/2 teaspoons of vanilla extract. In a separate medium bowl, whisk together the 3 cups of all-purpose flour, 1 teaspoon of baking soda, 1 teaspoon of baking powder, and 1/2 teaspoon of salt. Gradually add the dry ingredients to the wet ingredients, mixing on low speed or with a spatula until just combined. Be careful not to overmix. Finally, fold in the 1 and 1/2 cups of chocolate chips. Cover the dough and chill it in the refrigerator for at least 30 minutes while you prepare the brownie batter. This chilling step helps prevent the cookies from spreading too much during baking.
Step 3: Preparing the Rich Brownie Batter
In a medium saucepan, melt the remaining 3/4 cup of salted butter (the cubed amount) over low heat. Once melted, remove from heat and stir in the 4 ounces of chopped semi-sweet chocolate (or chocolate chips) until smooth and completely melted. You can also do this in a microwave-safe bowl, heating in 30-second intervals and stirring in between until smooth. In a large bowl, whisk together the 1/4 cup of vegetable oil and the 3/4 cup of cocoa powder until you have a smooth paste. This step is crucial for evenly distributing the cocoa and avoiding lumps. Add the melted chocolate and butter mixture to the cocoa paste and whisk until combined. Now, add the 3 large eggs to this chocolate mixture, one at a time, whisking well after each addition. Don’t overmix; just ensure everything is incorporated.
Step 4: Assembling the Brookies
Preheat your oven to 350°F (175°C). Line a 9×13 inch baking pan with parchment paper, leaving an overhang on the sides to easily lift the brookies out later. For the cookie layer, remove the chilled cookie dough from the refrigerator. You can either drop spoonfuls of the dough randomly over the bottom of the prepared baking pan, or you can gently press about two-thirds of the dough into an even layer. The latter will create a more defined cookie base. For the brownie layer, pour the prepared brownie batter evenly over the cookie dough. Now, take the remaining cookie dough and drop small spoonfuls or dollops of it over the brownie batter. Don’t worry about making it perfect; the randomness creates a beautiful marbled effect during baking. You can also gently swirl the cookie dough into the brownie batter with a toothpick or skewer for a more pronounced marbled look.
Step 5: Baking and Cooling to Perfection
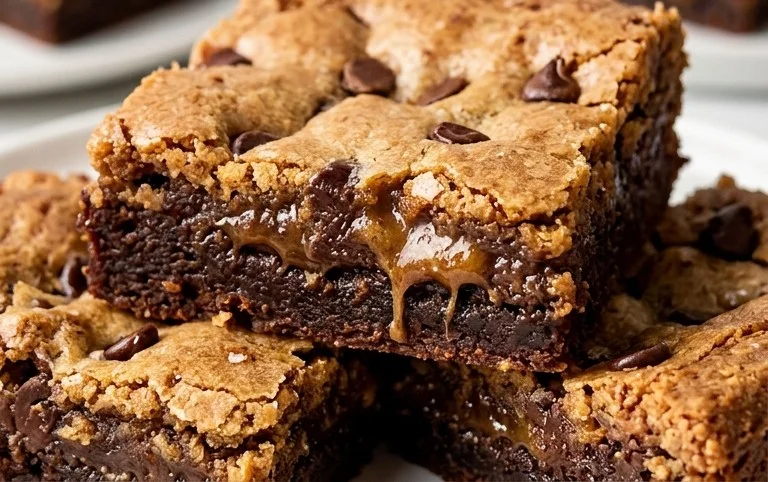
Place the assembled brookies in the preheated oven. Bake for 30-40 minutes, or until the edges are set and a toothpick inserted into the brownie portion comes out with moist crum extractbs attached. The cookie portion should be golden brown and slightly set. Be careful not to overbake, as this will result in dry brookies. Once baked, remove the pan from the oven and let the brookies cool completely in the pan on a wire rack. This cooling process is essential for the brookies to set properly and for the flavors to meld together. Once completely cool, use the parchment paper overhang to lift the entire block out of the pan. Cut into squares and enjoy! These brookies are incredibly rich, so smaller portions are often perfectly satisfying. Store any leftovers in an airtight container at room temperature for up to 3 days, or in the refrigerator for longer storage.
Conclusion:
And there you have it – the ultimate guide to making these incredibly decadent brown butter brookies! This recipe is truly a showstopper because it masterfully combines the rich, nutty depth of perfectly browned butter with the chewy, chocolatey goodness of a classic brownie and the comforting texture of a buttery cookie. It’s the best of both worlds in one glorious pan, guaranteed to impress any dessert lover. I’m so excited for you to try these!
For serving, these brookies are divine on their own, but I love them warm, straight from the oven, with a scoop of vanilla bean ice cream melting into the layers. They also make a fantastic dessert for potlucks or gatherings, easily cut into squares and devoured. Don’t be afraid to get creative with variations! You could add chopped nuts like pecans or walnuts to the brownie batter, swirl in some caramel sauce, or even sprinkle sea salt flakes on top before baking for an extra touch of sophistication. I truly encourage you to give this brown butter brookie recipe a go; you won’t regret it!
Frequently Asked Questions:
Can I make brown butter brookies ahead of time?
Absolutely! Brown butter brookies store wonderfully. Once cooled completely, you can wrap them tightly in plastic wrap and keep them at room temperature for up to 3 days. For longer storage, they can be frozen for up to 2 months. Just thaw at room temperature before enjoying.
My brown butter looks a little burnt, is that okay?
A little bit of brown specks is exactly what you’re aiming for – that’s the milk solids toasting, giving the butter its signature nutty flavor. However, if it smells acrid or is dark brown and clumpy, it might be burnt. If it’s just slightly darker than usual with a strong nutty aroma, you’re likely on the right track for a fantastic brown butter flavor. If you’re unsure, it’s better to start with a fresh batch of butter.
What kind of chocolate chips are best for brown butter brookies?
I personally love using a mix of semi-sweet and dark chocolate chips for a good balance of sweetness and richness. Milk chocolate chips would also work if you prefer a sweeter treat. For an extra gourmet touch, you could even chop up a high-quality chocolate bar.
Brown Butter Brookies
A decadent mashup of chewy chocolate chip cookies and rich brownies, featuring nutty brown butter and layers of chocolatey goodness.
Ingredients
-
14.5 tbsp salted butter (206 grams)
-
3/4 cup dark brown sugar, packed (163 grams)
-
3/4 cup granulated sugar (156 grams)
-
2 large eggs, at room temperature
-
1 and 1/2 tsp vanilla extract
-
3 cups all-purpose flour, spooned & leveled or weighed out (390 grams)
-
1 tsp baking soda
-
1 tsp baking powder
-
1/2 salt
-
1 and 1/2 cups chocolate chips (270 grams)
-
3/4 cup salted butter, cubed (170 grams before browning, 140 grams after)
-
4 ounces semi-sweet chocolate, chopped (113 grams)
-
1/4 cup vegetable oil (55 grams)
-
3/4 cup cocoa powder (63 grams)
-
3 large eggs, at room temperature
Instructions
-
Step 1
For the brownie layer: Melt 3/4 cup salted butter in a saucepan over medium heat. Cook, swirling occasionally, until it turns a deep amber brown and smells nutty. Pour into a heatproof bowl to stop the cooking. Add the chopped semi-sweet chocolate and let it melt into the brown butter, then stir until smooth. -
Step 2
In a separate bowl, whisk together the melted brown butter and chocolate mixture with 1/4 cup vegetable oil, 3 large eggs, and 1 tsp vanilla extract. Whisk in 3/4 cup dark brown sugar and 3/4 cup granulated sugar until combined. Stir in 3/4 cup cocoa powder and 1/2 salt. -
Step 3
For the cookie layer: In a large bowl, cream together 14.5 tbsp salted butter with 3/4 cup dark brown sugar and 3/4 cup granulated sugar until light and fluffy. Beat in 2 large eggs and 1 1/2 tsp vanilla extract. -
Step 4
In a medium bowl, whisk together 3 cups all-purpose flour, 1 tsp baking soda, and 1 tsp baking powder. Gradually add the dry ingredients to the wet ingredients, mixing until just combined. Stir in 1 and 1/2 cups chocolate chips. -
Step 5
Spread the brownie batter evenly into a greased 9×13 inch baking pan. Dollop spoonfuls of the cookie dough over the brownie batter and gently spread to cover as much of the surface as possible, allowing some brownie to peek through. Swirl the two batters together lightly with a knife or skewer. -
Step 6
Bake at 350°F (175°C) for 30-35 minutes, or until a toothpick inserted into the center comes out with moist crumbs attached. Let cool completely in the pan before cutting into bars.
Important Information
Nutrition Facts (Per Serving)
It is important to consider this information as approximate and not to use it as definitive health advice.
Allergy Information
Please check ingredients for potential allergens and consult a health professional if in doubt.
Leave a Comment