
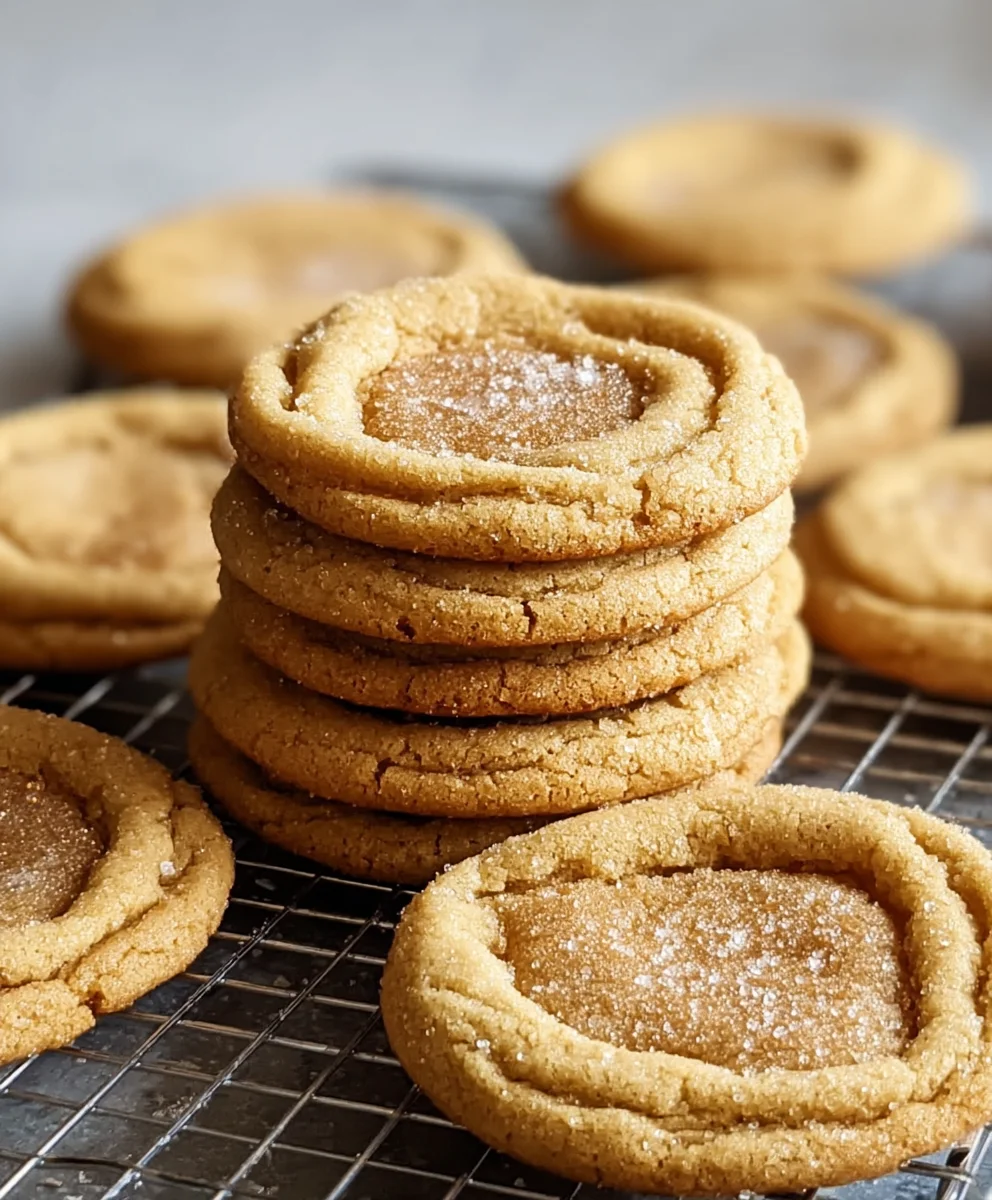
Brown Butter Cookies are more than just a sweet treat; they’re a golden ticket to pure, unadulterated bliss. There’s a certain magic that happens when butter is gently coaxed into a rich, nutty caramel hue, and it’s this transformative process that elevates simple cookies into something truly extraordinary. People adore these delights for their incredibly nuanced flavor profile – a delicate dance between sweet, savory, and that irresistible toasted aroma. What makes our Brown Butter Cookies so special is the perfect balance we strike, ensuring every bite delivers a satisfying chegrape juicess with crispy edges, all infused with that deep, complex brown butter essence that simply melts in your mouth. Get ready to discover your new favorite cookie!
Ingredients:
- 1/2 cup unsalted butter, cut into pieces
- 1/2 cup granulated sugar
- 1/4 cup packed light brown sugar
- 1 large egg, room temperature
- 1 teaspoon vanilla extract
- 1 cup all-purpose flour
- 1/2 teaspoon baking soda
- 1/2 teaspoon salt
- Extra granulated sugar for rolling
Browning the Butter
The foundation of any truly exceptional brown butter cookie is, as the name suggests, perfectly browned butter. This step might seem a little intimidating, but it’s quite straightforward once you get the hang of it and it adds an incredible depth of nutty, caramel-like flavor to our cookies. Start by placing your 1/2 cup of unsalted butter, cut into roughly tablespoon-sized pieces, into a medium, light-colored saucepan. A light-colored pan is crucial because it allows you to easily see the color changes of the butter as it cooks, helping you avoid burning it. Heat the butter over medium heat. You’ll see it melt, then it will begin extract to foam. Continue to stir it gently and consistently with a heatproof spatula or wooden spoon. As the foam subsides, you’ll notice small brown specks starting to appear at the bottom of the pan. This is the milk solids toasting. Keep stirring and watch closely. The butter will transition from a pnon-alcoholic ale yellow to a golden amber, and you’ll smell a wonderfully rich, toasty aroma. This whole process typically takes about 5-8 minutes. Once it reaches a beautiful amber color and smells nutty and delicious, immediately remove the pan from the heat to stop the cooking process. Pour the browned butter into a heatproof bowl to prevent it from continuing to cook in the hot pan. Let it cool slightly for about 10-15 minutes until it’s no longer piping hot but still liquid and warm. This slight cooling is important so it doesn’t scramble the egg in the next step.
Creaming the Sugars and Butter
Now that our gloriously browned butter has cooled slightly, it’s time to build the cookie dough base. In a large mixing bowl, combine the slightly cooled browned butter with the 1/2 cup of granulated sugar and the 1/4 cup of packed light brown sugar. Using an electric mixer (a stand mixer with the paddle attachment or a hand mixer), cream these ingredients together on medium speed for about 2-3 minutes. You’re looking for a mixture that is light, fluffy, and well combined, almost like a paste. The brown sugar adds moisture and a wonderful chegrape juicess to the cookies, complementing the nutty notes of the browned butter beautifully. Scrape down the sides of the bowl periodically with a spatula to ensure everything is incorporated evenly. This creaming process incorporates air into the dough, which contributes to the cookie’s texture and helps them spread just the right amount.
Adding Wet Ingredients and Dry Ingredients
With our sugar and butter mixture perfectly creamed, we’ll now incorporate the wet ingredients. Add the 1 large egg (make sure it’s at room temperature; this helps it emulsify better with the fat) and the 1 teaspoon of vanilla extract to the bowl. Continue to beat on medium speed until everything is thoroughly combined and the mixture is smooth and glossy. It might look slightly curdled at first, but keep mixing, and it will come together. Once the wet ingredients are fully incorporated, it’s time to add the dry ingredients. In a separate medium bowl, whisk together the 1 cup of all-purpose flour, the 1/2 teaspoon of baking soda, and the 1/2 teaspoon of salt. Whisking these dry ingredients together ensures that the leavening agent (baking soda) and salt are evenly distributed throughout the flour, preventing pockets of saltiness or uneven rising in your cookies. Now, gradually add the dry ingredients to the wet ingredients in the large mixing bowl. Mix on low speed just until the flour streaks disappear. Be careful not to overmix at this stage; overmixing can develop the gluten in the flour too much, resulting in tough cookies. We want tender, chewy cookies!
Chilling and Shaping the Dough
This is a crucial step for achieving the perfect texture and preventing excessive spreading. Cover the bowl with plastic wrap, pressing it directly onto the surface of the dough to prevent a skin from forming, and refrigerate the dough for at least 30 minutes, or ideally for 1-2 hours. Chilling the dough allows the flour to hydrate fully and the flavors to meld, and it also solidifies the fat, which helps the cookies maintain their shape and prevents them from spreading too thin during baking. While the dough is chilling, preheat your oven to 375°F (190°C) and line two baking sheets with parchment paper. This makes for easy cleanup and prevents the cookies from sticking. Once the dough is chilled, place some extra granulated sugar into a shallow bowl. Scoop the chilled cookie dough into balls, about 1 to 1.5 tablespoons in size. Roll each dough ball gently between your palms to form a smooth sphere. Then, roll each dough ball generously in the extra granulated sugar, coating it completely. This sugar coating will create a delightful crisp exterior and a beautiful sparkle on the finished cookies. Place the sugar-coated dough balls onto the prepared baking sheets, leaving about 2 inches of space between each cookie to allow for spreading.
Baking the Brown Butter Cookies
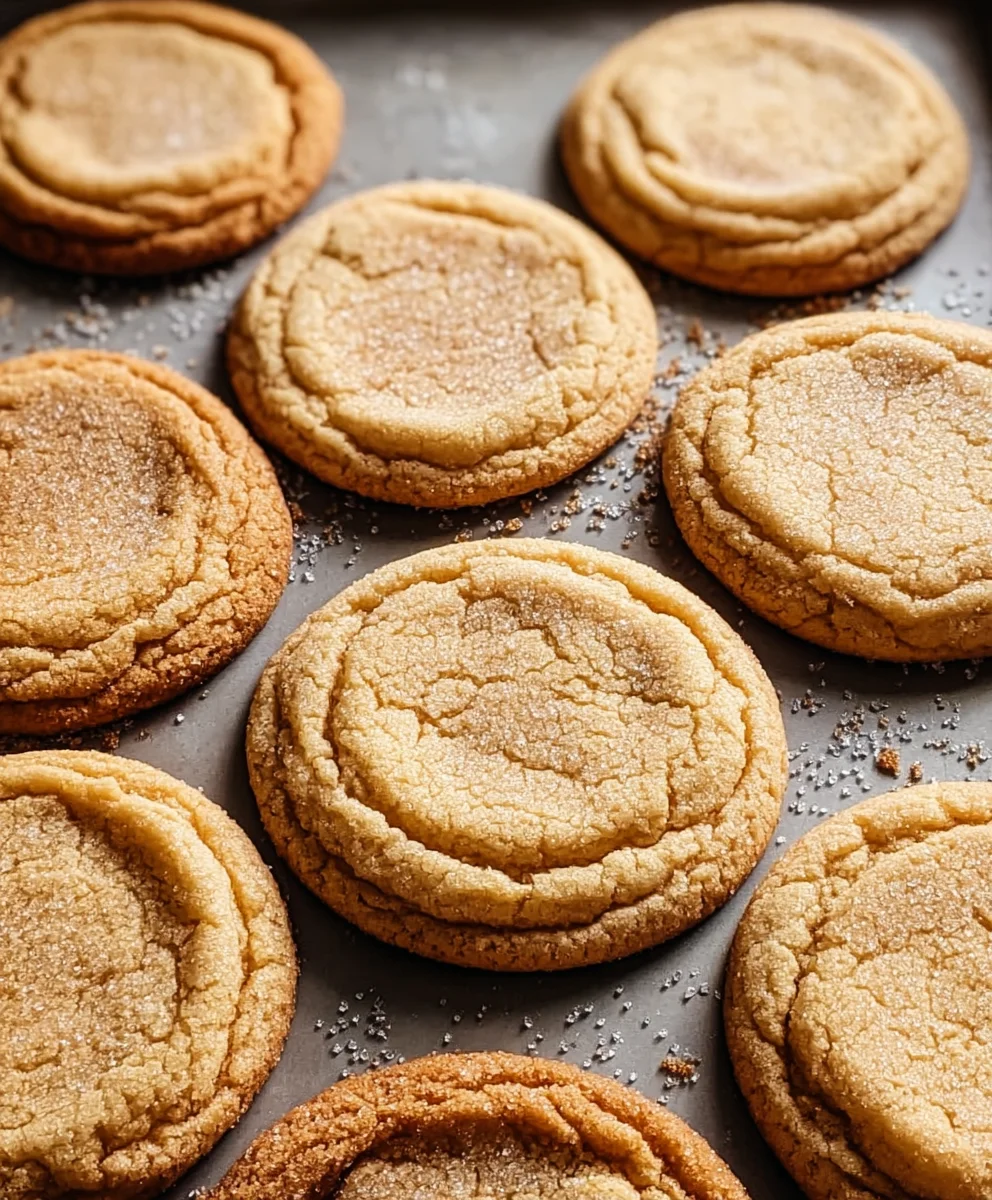
Now for the moment of truth! Place the baking sheets into your preheated oven. Bake for 10-12 minutes, or until the edges of the cookies are lightly golden brown and the centers still look slightly soft and underdone. The cookies will continue to set up as they cool on the baking sheet. For a chewier cookie, err on the side of underbaking slightly. If you prefer a crispier cookie, bake for an additional minute or two, but watch them very closely to prevent burning. Once baked, remove the baking sheets from the oven and let the cookies cool on the sheets for about 5 minutes. This allows them to firm up before you attempt to move them. After 5 minutes, carefully transfer the cookies to a wire rack to cool completely. As they cool, you’ll notice their edges becoming beautifully crisp and their centers settling into a wonderfully chewy texture. The aroma filling your kitchen at this point will be absolutely divine, a testament to the magic of browned butter!
Conclusion:
There you have it – the ultimate guide to creating the most delectable Brown Butter Cookies! We’ve walked through each step, from achieving that perfect nutty brown butter aroma to ensuring a chewy, soft center with delightfully crisp edges. These cookies are more than just a treat; they’re a testament to the magic of simple ingredients transformed into something truly special. I hope you feel confident and inspired to whip up a batch of these amazing Brown Butter Cookies in your own kitchen.
These cookies are incredibly versatile. They’re fantastic on their own, but also make a wonderful addition to any dessert platter. Consider serving them alongside a scoop of vanilla bean ice cream for a decadent treat, or sandwich two together with a rich chocolate ganache for an elevated experience. Don’t be afraid to get creative with variations! Adding a sprinkle of sea salt on top before baking enhances the sweetness beautifully. You could also incorporate chopped nuts like walnuts or pecans for added texture, or even a touch of cinnamon for a warmer flavor profile. I truly encourage you to experiment and make these Brown Butter Cookies your own. Happy baking!
Frequently Asked Questions about Brown Butter Cookies:
Q: My brown butter looks a little too dark. Is it ruined?
Don’t worry! A slightly darker brown butter still works beautifully. The key is to avoid burning it completely, which would result in bitter-tasting cookies. As long as it smells nutty and fragrant and doesn’t have black flecks, you’re likely good to go. The color can vary slightly based on your stove and pan, so rely on your senses. If you are concerned, you can try to skim off any burnt bits if visible, but usually, a slightly darker hue is perfectly fine for adding depth of flavor to your Brown Butter Cookies.
Q: Can I make the dough ahead of time?
Absolutely! The dough for Brown Butter Cookies actually benefits from chilling. Once you’ve mixed the dough, cover it tightly and refrigerate it for at least 30 minutes, or up to 2-3 days. Chilling allows the gluten to relax and the flavors to meld, resulting in a richer, more complex taste and a better cookie texture. You can also scoop the dough into balls and freeze them for longer storage, then bake them directly from frozen, adding a few extra minutes to the baking time.
Brown Butter Cookies – The Ultimate Chewy Treat
These brown butter cookies are the ultimate chewy treat, packed with a rich, nutty, caramel-like flavor from perfectly browned butter.
Ingredients
-
1/2 cup unsalted butter, cut into pieces
-
1/2 cup granulated sugar
-
1/4 cup packed light brown sugar
-
1 large egg, room temperature
-
1 teaspoon vanilla extract
-
1 cup all-purpose flour
-
1/2 teaspoon baking soda
-
1/2 teaspoon salt
-
Extra granulated sugar for rolling
Instructions
-
Step 1
Brown the butter: Place butter pieces in a medium, light-colored saucepan over medium heat. Stir consistently until it melts, foams, and small brown specks appear. Continue stirring until it turns golden amber and smells nutty. Immediately remove from heat and pour into a heatproof bowl. Let cool for 10-15 minutes until warm but not piping hot. -
Step 2
Cream sugars and butter: In a large mixing bowl, combine the slightly cooled browned butter with granulated sugar and light brown sugar. Beat with an electric mixer on medium speed for 2-3 minutes until light, fluffy, and well combined. -
Step 3
Add wet and dry ingredients: Add the room temperature egg and vanilla extract to the creamed mixture and beat until smooth and glossy. In a separate bowl, whisk together flour, baking soda, and salt. Gradually add the dry ingredients to the wet ingredients, mixing on low speed just until flour streaks disappear. Do not overmix. -
Step 4
Chill and shape dough: Cover the bowl with plastic wrap, pressing it onto the dough’s surface. Refrigerate for at least 30 minutes, or ideally 1-2 hours. Preheat oven to 375°F (190°C) and line two baking sheets with parchment paper. -
Step 5
Roll dough balls: Scoop chilled dough into 1 to 1.5 tablespoon balls. Roll into smooth spheres and then roll generously in extra granulated sugar. Place coated balls onto prepared baking sheets, leaving 2 inches between cookies. -
Step 6
Bake cookies: Bake for 10-12 minutes, or until edges are lightly golden brown and centers look slightly soft. Let cool on baking sheets for 5 minutes before transferring to a wire rack to cool completely.
Important Information
Nutrition Facts (Per Serving)
It is important to consider this information as approximate and not to use it as definitive health advice.
Allergy Information
Please check ingredients for potential allergens and consult a health professional if in doubt.
Leave a Comment