
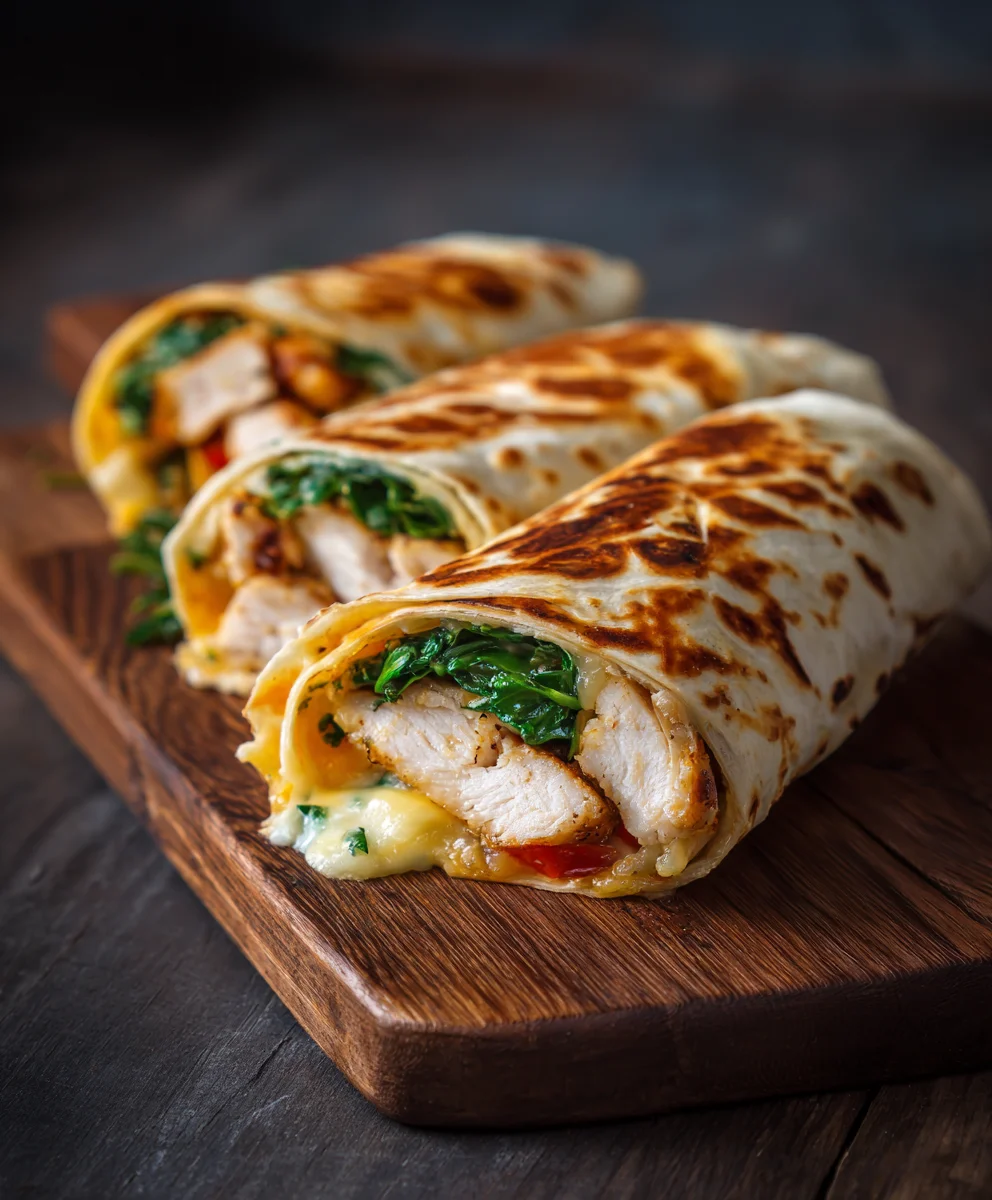
Cheesy Garlic Chicken Wraps are more than just a meal; they’re a culinary experience waiting to delight your senses. Picture this: tender, succulent chicken, lovingly infused with fragrant garlic, then generously enveloped in a luscious, melted cheese blend, all tucked into a perfectly warm, soft tortilla. It’s a symphony of textures and tastes that promises satisfaction with every single bite.
While the concept of wrapping delicious fillings in flatbreads boasts a rich history across countless cultures, our modern take on the ‘wrap’ elevates this ancient tradition with universally beloved flavors. This particular combination—garlic, cheese, and chicken—has rapidly ascended to become a modern classic, celebrated for its irresistible appeal. It’s a testament to how simple, quality ingredients can come together to create something truly extraordinary, embodying the evolution of quick, comforting, and utterly delicious food.
People, myself included, simply adore this dish for countless reasons. Beyond the undeniable deliciousness – that harmonious balance of savory chicken, the pungent warmth of garlic, and the creamy richness of cheese – its popularity stems from its incredible convenience and versatility. Whether you’re searching for a speedy weeknight dinner, a fulfilling lunch on the go, or a crowd-pleasing option for gatherings, Cheesy Garlic Chicken Wraps effortlessly meet every need. They offer a comforting warmth and an explosion of flavor that makes them an instant, enduring favorite for anyone who tries them. I am so excited for you to experience this joy!
Ingredients:
- 1.5 lbs boneless, skinless chicken breasts or thighs, thinly sliced or cut into 1/2-inch cubes
- 10-12 large (10-inch) flour tortillas, soft and pliable
- 8 cloves garlic, freshly minced (divided use)
- 4 tablespoons unsalted butter, divided
- 2 tablespoons olive oil
- 1 large yellow onion, finely diced
- 1 large red bell pepper, finely diced (optional, for color and sweetness)
- 8 oz cream cheese, softened to room temperature
- 1 cup shredded sharp cheddar cheese
- 1 cup shredded Monterey Jack cheese (or a blend of your favorite melting cheeses like mozzarella)
- 1/2 cup sour cream (full-fat for richness)
- 2 tablespoons fresh parsley, chopped, plus more for garnish
- 1 tablespoon fresh chives, chopped (optional, for a subtle oniony kick)
- 1 teaspoon smoked paprika
- 1 teaspoon garlic powder
- 1/2 teaspoon onion powder
- 1/4 teaspoon cayenne pepper (optional, for a touch of heat)
- Salt and freshly ground black pepper to taste
- Juice of 1/2 a lemon (optional, for brightness)
- A drizzle of hot sauce (optional, for an extra layer of flavor)
Preparing the Chicken for Your Cheesy Garlic Chicken Wraps
Creating truly delicious Cheesy Garlic Chicken Wraps starts with perfectly cooked, flavorful chicken. This step is crucial for the overall success of your dish, ensuring every bite is tender and packed with savory goodness.
- First things first, let’s get that chicken prepped. Take your 1.5 lbs of boneless, skinless chicken breasts or thighs and either slice them thinly against the grain, about 1/4-inch thick, or cut them into uniform 1/2-inch cubes. The goal here is consistency in size so everything cooks evenly and quickly. If you’re using chicken breasts, I find that slicing them thin or butterflying them open slightly helps them absorb flavors better and prevents them from drying out. Pat the chicken very dry with paper towels; this is a small but mighty step that helps you achieve a lovely sear later on.
- Next, in a medium bowl, season your prepared chicken generously. I like to use 1 teaspoon of smoked paprika, 1 teaspoon of garlic powder, 1/2 teaspoon of onion powder, a generous pinch of salt, and freshly ground black pepper. If you enjoy a little warmth, now is the time to add 1/4 teaspoon of cayenne pepper. Toss everything together really well, making sure every piece of chicken is coated in those wonderful spices. This seasoning blend will infuse the chicken with a rich, savory flavor that will perfectly complement the cheesy garlic filling.
- Heat 1 tablespoon of olive oil and 1 tablespoon of unsalted butter in a large skillet or frying pan over medium-high heat. You want the pan to be nice and hot before adding the chicken, but not smoking. The butter adds a wonderful richness and helps with browning, while the olive oil prevents the butter from burning too quickly.
- Once the butter is melted and sizzling, add half of your seasoned chicken to the pan in a single layer. Do not overcrowd the pan. Overcrowding will lower the pan’s temperature, causing the chicken to steam instead of sear, and we want beautiful golden-brown pieces here. Cook for 3-4 minutes per side, or until the chicken is cooked through, golden brown, and slightly crispy at the edges. The internal temperature should reach 165°F (74°C).
- Remove the first batch of chicken from the pan and set it aside on a plate. Repeat the process with the remaining chicken, adding another tablespoon of olive oil and butter if needed. Once all the chicken is cooked, you might notice some delicious browned bits, or “fond,” at the bottom of the pan. Don’t discard this! This is pure flavor that we’ll incorporate into our filling.
- If you sliced the chicken thinly, you can leave it as is. If you cubed it, or prefer a more shredded texture, you can quickly chop or shred the cooked chicken into smaller pieces using two forks. This will make it easier to mix into the filling and ensure a good distribution in every bite of your Cheesy Garlic Chicken Wraps. Set the chicken aside while you prepare the glorious cheesy garlic filling.
Crafting the Irresistible Cheesy Garlic Filling
This is where the magic truly happens, transforming simple ingredients into the creamy, savory heart of your Cheesy Garlic Chicken Wraps. The combination of cheeses, fresh garlic, and a hint of tang creates an utterly delightful texture and flavor profile.
- Using the same skillet you used for the chicken (those browned bits are flavor gold!), melt 2 tablespoons of unsalted butter over medium heat. Once shimmering, add your finely diced large yellow onion. Sauté the onion for about 5-7 minutes, stirring occasionally, until it becomes soft, translucent, and fragrant. This step sweetens the onion and forms a fantastic flavor base for our filling.
- If you’re using a red bell pepper, add it to the skillet along with the onions after they’ve had a few minutes to soften. Cook for another 3-5 minutes, until the bell pepper starts to soften slightly but still retains a bit of its vibrant color and crunch. The bell pepper adds a wonderful textural contrast and a touch of sweetness that balances the richness of the cheese and garlic.
- Now, for the star of the show: the garlic! Add 6 of your freshly minced garlic cloves (reserving 2 cloves for later) to the skillet with the softened onions and bell pepper. Stir constantly for about 1 minute, until the garlic becomes incredibly fragrant. Be careful not to burn it, as burnt garlic can taste bitter. The aroma filling your kitchen right now should be absolutely intoxicating.
- Reduce the heat to low. Add the softened 8 oz block of cream cheese to the skillet. Use a wooden spoon or spatula to break it up and stir it into the onion and garlic mixture. Continue stirring until the cream cheese is fully melted and creates a smooth, creamy base. This provides the luxurious texture that makes this filling so decadent.
- Once the cream cheese is smooth, it’s time for the shredded cheeses. Gradually add the 1 cup of shredded sharp cheddar cheese and 1 cup of shredded Monterey Jack cheese (or your chosen blend). Stir continuously until all the cheese is fully melted and incorporated, creating a thick, gooey, and homogeneous mixture. Keep the heat low to prevent the cheese from seizing or separating. You’re aiming for a velvety smooth consistency that will envelop the chicken beautifully.
- Stir in the 1/2 cup of sour cream. This adds a lovely tang and further enhances the creaminess of the filling, preventing it from becoming too heavy. At this point, you can also add a squeeze of lemon juice (about half a lemon’s worth) if you like a little brightness to cut through the richness. Taste the filling and adjust the seasoning with salt and freshly ground black pepper as needed. This is your chance to make it perfect for your palate.
- Finally, fold in your cooked chicken that you set aside earlier. Mix everything gently until the chicken is thoroughly coated in the luscious, cheesy garlic sauce. Stir in the 2 tablespoons of fresh chopped parsley and 1 tablespoon of fresh chopped chives (if using). These fresh herbs add a burst of color and a delightful fresh flavor that elevates the entire filling. Your incredible Cheesy Garlic Chicken Wrap filling is now complete and ready for assembly!
Assembling and Grilling Your Perfect Cheesy Garlic Chicken Wraps
The final steps involve bringing all the delicious components together and giving your Cheesy Garlic Chicken Wraps that irresistible golden, crispy exterior with a perfectly melted, gooey interior. This is where patience pays off for a truly satisfying result.
- Before you start assembling, ensure your large flour tortillas are pliable. If they’ve been in the fridge, you can gently warm them for 10-15 seconds in the microwave, or quickly on a dry skillet, just to make them easier to fold without tearing. This is a crucial step for achieving tightly rolled wraps.
- Lay one tortilla flat on a clean work surface. Spoon about 1/2 to 3/4 cup of the warm cheesy garlic chicken filling onto the center of the tortilla, leaving about a 1-inch border around the edges. Don’t overfill, as it will make it difficult to roll neatly.
- To form your wrap, fold the bottom edge of the tortilla up over the filling. Then, fold in the left and right sides toward the center. Finally, tightly roll the wrap from the bottom up, creating a neat, compact cylinder. The goal is to make it as snug as possible to keep all that delicious filling inside. Repeat this process with the remaining tortillas and filling.
- Now, let’s prepare the garlic butter for the exterior of our wraps. In a small bowl, melt the remaining 1 tablespoon of unsalted butter. Mince the remaining 2 cloves of fresh garlic very finely, or even make a paste, and stir it into the melted butter. This garlic butter will give the outside of your wraps an incredible aroma and flavor boost as they cook.
- Heat a large non-stick skillet or a griddle over medium heat. Lightly brush one side of your assembled Cheesy Garlic Chicken Wraps with the garlic butter.
- Place the buttered side of the wrap down onto the hot skillet. Cook for 3-4 minutes, or until the tortilla is golden brown and slightly crispy. While the first side is cooking, brush the top side of the wrap with more garlic butter.
- Carefully flip the wrap and cook for another 3-4 minutes on the second side, until it’s also golden brown and the cheese inside is thoroughly melted and gooey. You might need to press down gently with a spatula to ensure good contact with the pan and even browning. Repeat this process for all your wraps, working in batches if necessary to avoid overcrowding the pan.
- Once cooked, remove the golden-brown Cheesy Garlic Chicken Wraps from the skillet. For the best presentation and ease of eating, you can slice each wrap in half diagonally. This also gives a peek at the glorious cheesy interior. A final sprinkle of fresh parsley or chives on top can add a lovely finishing touch. These wraps are best enjoyed immediately while the filling is warm and the cheese is perfectly melted.
Conclusion:
Well, friends, we’ve reached the end of our culinary journey, and I genuinely hope you’re as excited as I am about what we’ve discussed today. This recipe for Cheesy Garlic Chicken Wraps isn’t just another dish; it’s a game-changer for your weeknight dinners, your lunchboxes, and your impromptu gatherings. It’s that perfect blend of comfort food and effortless preparation that we all crave, delivering incredible flavor with minimal fuss. I truly believe this is one of those recipes you’ll return to again and again, becoming a staple in your kitchen because of its sheer deliciousness and adaptability.
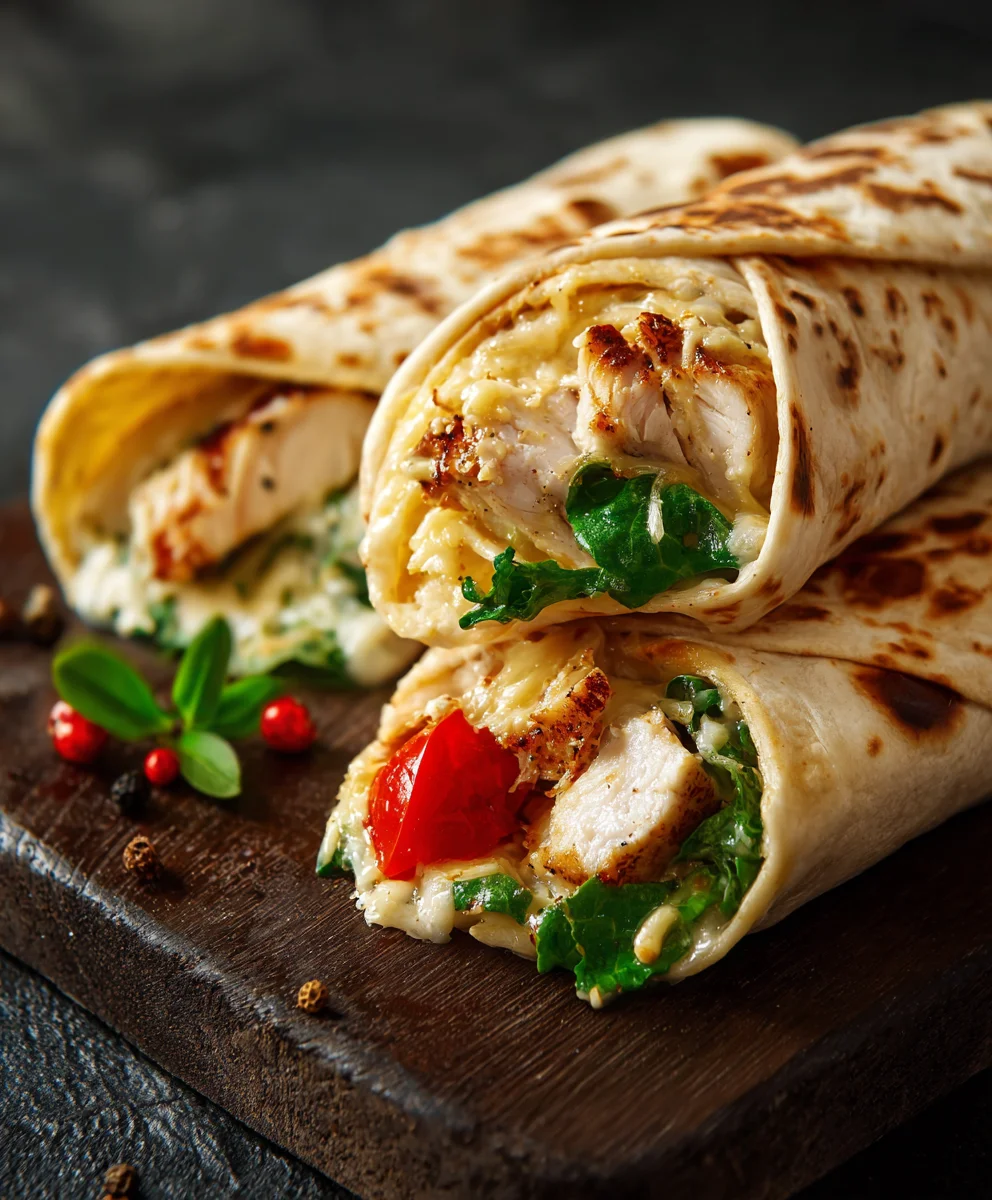
What makes these Cheesy Garlic Chicken Wraps an absolute must-try? Let’s talk about the incredible synergy of flavors first. Imagine tender, seasoned chicken, infused with aromatic garlic, perfectly melted cheese, all snuggled in a warm, soft tortilla. It’s a harmonious combination that hits all the right notes – savory, slightly tangy, incredibly comforting, and utterly satisfying. The garlic isn’t just an afterthought; it’s a vibrant, integral part of the profile, lifting the entire dish and giving it that irresistible allure. Then there’s the cheese, a generous layer of gooey goodness that binds everything together, adding a creamy texture and rich flavor that’s simply irresistible. This isn’t just a wrap; it’s a flavor explosion in every bite.
Beyond the taste, the convenience factor is unparalleled. In our busy lives, finding recipes that deliver gourmet taste without requiring hours in the kitchen is like striking gold. This recipe is designed for exactly that – quick prep, speedy cooking, and minimal cleanup. It’s perfect for those evenings when you’re short on time but still want to put a wholesome, homemade meal on the table. Think about after-school activities, late worknights, or simply when you want to spend less time cooking and more time enjoying. It’s a truly versatile dish that adapts to your schedule, not the other way around. Plus, the ingredients are readily available, making your grocery run a breeze. You won’t be hunting for obscure spices or specialty items; everything you need is likely already in your pantry or easily found at your local supermarket. It’s a testament to how simple ingredients can come together to create something truly spectacular. I’m confident that once you take that first bite, you’ll understand exactly why I’m so enthusiastic about this recipe. It’s delicious, it’s easy, and it’s destined to become a firm favorite.
Elevate Your Cheesy Garlic Chicken Wraps: Serving Suggestions & Creative Variations!
Now, while these wraps are fantastic on their own, part of the joy of cooking is making a recipe truly your own. For serving, I love pairing them with a crisp, refreshing side salad dressed with a light vinaigrette – the acidity cuts through the richness of the cheese beautifully. A bowl of warm tomato soup or a creamy roasted red pepper soup also makes for a delightful and comforting companion, especially on a chilly evening. If you’re looking to turn it into a more substantial meal, consider serving them alongside some seasoned oven-baked potato wedges or a vibrant corn and black bean salsa.
But why stop there? Let’s talk variations!
Spice it Up:
If you like a little heat, try adding a pinch of red pepper flakes to your chicken seasoning, or drizzle a touch of your favorite hot sauce inside the wrap before rolling. For a more intense, smoky kick, a dash of chipotle powder with the other spices works wonders.
Veggie Power:
For an extra nutritional boost and some crunch, finely dice bell peppers, shredded carrots, or even some fresh spinach and sauté them lightly before adding to the chicken mixture. You could even add some finely chopped jalapeños for an extra kick! Sliced red onions, caramelized for a touch of sweetness, can also add depth to the filling.
Herbaceous Twist:
Experiment with different fresh herbs. While garlic is king here, a sprinkle of fresh chopped parsley, cilantro, or even chives can add another layer of flavor and freshness. A little fresh oregano can also complement the chicken and garlic beautifully.
Cheese Swaps:
Don’t be afraid to play with your cheese choice! While mozzarella is classic, a blend of Monterey Jack and cheddar, or even a smoky provolone, could offer exciting new dimensions to your Cheesy Garlic Chicken Wraps. For a bit of sharpness, a sprinkle of aged white cheddar could be magnificent.
Sauce Savvy:
Consider adding a thin layer of a creamy ranch, a zesty Greek yogurt-dill sauce, or even a chipotle mayo inside the wrap for an additional burst of flavor and moisture. This is where you can truly personalize each wrap to suit individual tastes. You could even turn them into “deconstructed” bowls, serving the chicken and cheese mixture over a bed of rice or quinoa, with all the wrap fixings on the side. The possibilities are truly endless!
So, what are you waiting for? I wholeheartedly encourage you to carve out some time in your kitchen soon and give this fantastic Cheesy Garlic Chicken Wraps recipe a try. I promise you won’t be disappointed. It’s a recipe that delivers on flavor, convenience, and pure eating enjoyment. Once you’ve whipped up your batch, I would absolutely love to hear about your experience! Did you stick to the original recipe, or did you put your own spin on it with some of the variations we discussed? Did your family love it as much as mine does? Please, share your culinary adventures in the comments below or tag me on social media. Your feedback and creativity inspire me, and I can’t wait to see your delicious creations. Happy cooking, and enjoy every single savory, cheesy, garlicky bite!
Cheesy Garlic Chicken Wraps: Quick & Flavorful Dinner!
Cheesy Garlic Chicken Wraps are more than just a meal; they’re a culinary experience waiting to delight your senses. Picture this: tender, succulent chicken, lovingly infused with fragrant garlic, then generously enveloped in a luscious, melted cheese blend, all tucked into a perfectly warm, soft tortilla. It’s a symphony of textures and tastes that promises satisfaction with every single bite.
Ingredients
-
1.5 lbs boneless, skinless chicken breasts or thighs, sliced or cubed
-
10-12 large (10-inch) flour tortillas
-
8 cloves garlic, minced (divided)
-
4 tbsp unsalted butter, divided
-
2 tbsp olive oil
-
1 large yellow onion, diced
-
1 large red bell pepper, diced (optional)
-
8 oz cream cheese, softened
-
1 cup shredded sharp cheddar cheese
-
1 cup shredded Monterey Jack cheese
-
1/2 cup sour cream
-
2 tbsp fresh parsley, chopped
-
1 tbsp fresh chives, chopped (optional)
-
1 tsp smoked paprika
-
1 tsp garlic powder
-
1/2 tsp onion powder
-
1/4 tsp cayenne pepper (optional)
-
Salt to taste
-
Black pepper to taste
-
Juice of 1/2 lemon (optional)
-
Drizzle of hot sauce (optional)
Instructions
-
Step 1
Slice chicken into 1/2-inch cubes or thin slices. Pat dry. Season with 1 tsp smoked paprika, 1 tsp garlic powder, 1/2 tsp onion powder, salt, pepper, and optional 1/4 tsp cayenne pepper. Toss to coat. -
Step 2
Heat 1 tbsp olive oil and 1 tbsp butter in a large skillet over medium-high heat. Cook chicken in batches for 3-4 minutes per side until golden brown and cooked through (165°F/74°C). Set aside. If cubed, chop or shred cooked chicken into smaller pieces. -
Step 3
In the same skillet, melt 2 tbsp butter over medium heat. Sauté diced onion for 5-7 minutes until soft. Add diced red bell pepper (if using) and cook for 3-5 minutes until slightly softened. Add 6 minced garlic cloves; cook for 1 minute until fragrant. -
Step 4
Reduce heat to low. Stir in softened 8 oz cream cheese until melted and smooth. Gradually add 1 cup shredded cheddar and 1 cup shredded Monterey Jack cheese; stir until fully melted and homogeneous. -
Step 5
Stir in 1/2 cup sour cream and optional lemon juice. Season with salt and pepper. Fold in cooked chicken, 2 tbsp fresh parsley, and optional 1 tbsp fresh chives. -
Step 6
Warm tortillas. Place 1/2 to 3/4 cup of warm filling onto the center of each tortilla, leaving a 1-inch border. Fold the bottom edge over the filling, then fold in the sides, and tightly roll up from the bottom. -
Step 7
In a small bowl, melt remaining 1 tbsp butter and stir in remaining 2 minced garlic cloves. -
Step 8
Heat a large non-stick skillet over medium heat. Brush one side of a wrap with garlic butter. Place buttered side down on skillet. Cook for 3-4 minutes until golden brown and crispy. Brush top side with more garlic butter. Flip and cook for another 3-4 minutes until golden brown and cheese is melted. Repeat for remaining wraps. -
Step 9
Slice wraps diagonally and serve immediately.
Important Information
Nutrition Facts (Per Serving)
It is important to consider this information as approximate and not to use it as definitive health advice.
Allergy Information
Please check ingredients for potential allergens and consult a health professional if in doubt.
Leave a Comment