
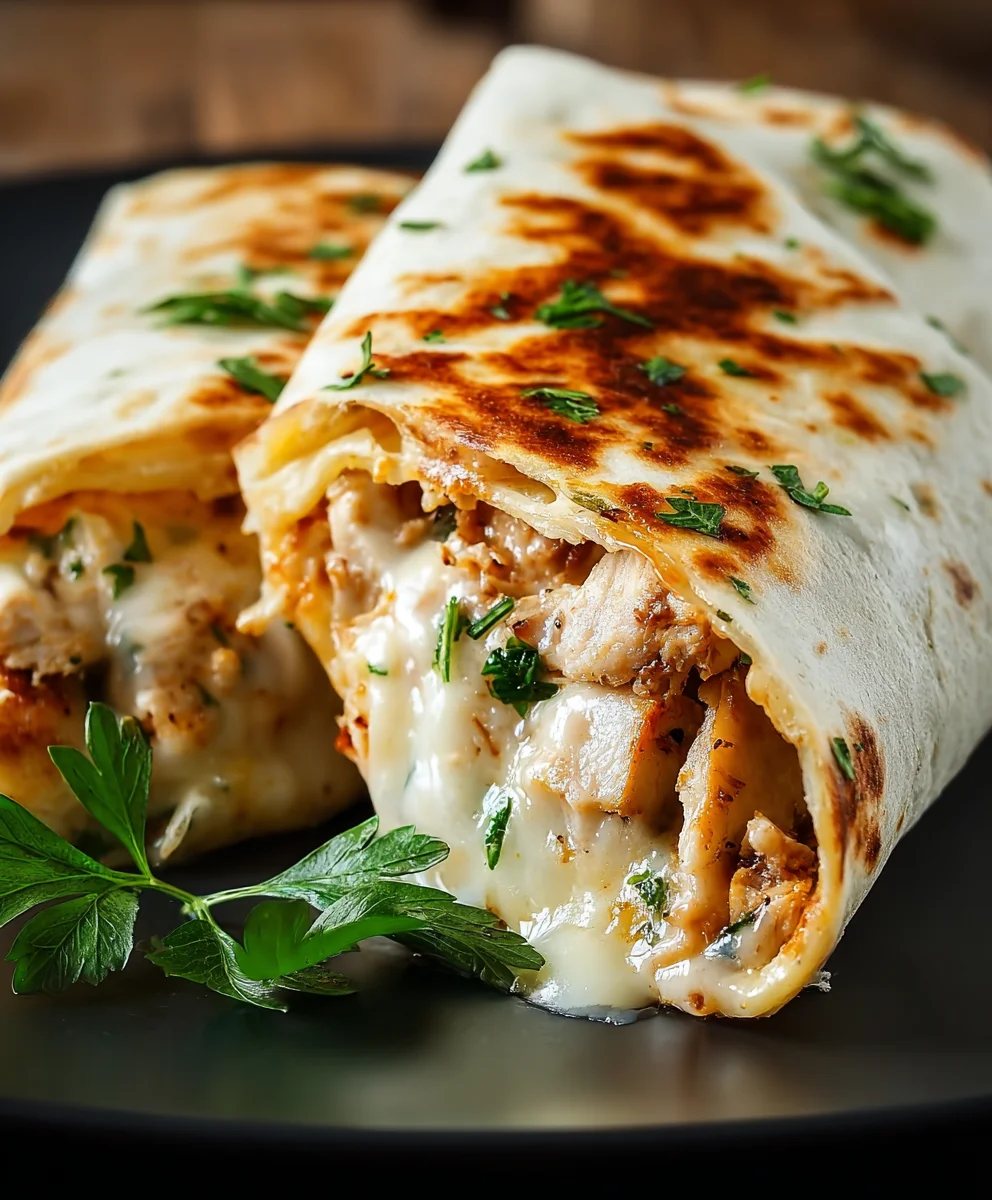
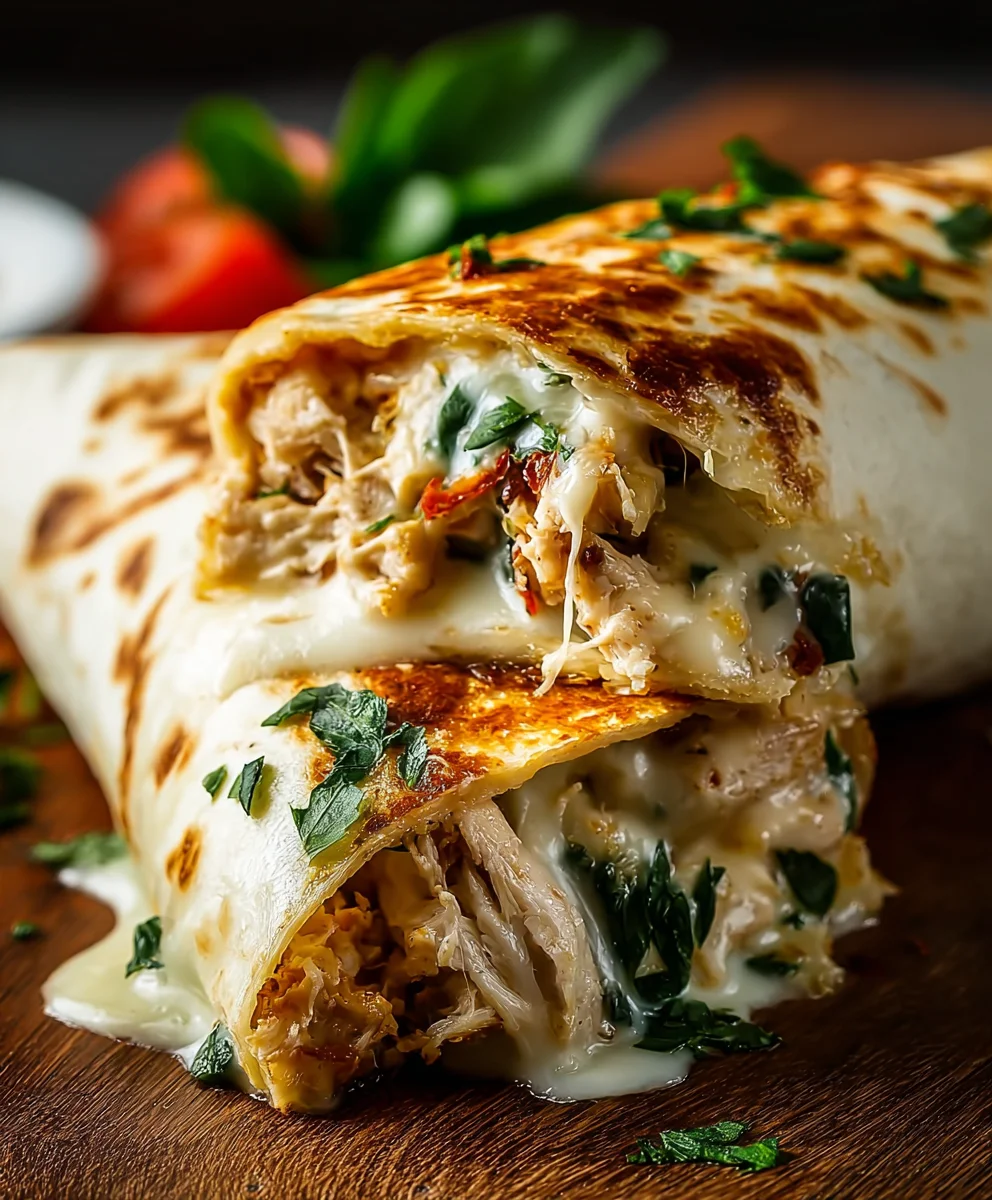
Cheesy Garlic Chicken Wraps are more than just a meal; they’re a culinary delight that promises to transform your perception of quick, comforting food. Imagine biting into a perfectly warm, soft tortilla, generously filled with tender, juicy chicken, infused with robust garlic, and enveloped in a blanket of delightfully melted cheese. That irresistible blend of flavors and textures is precisely what I’m thrilled to share with you in this incredibly versatile recipe.
While the specific combination of these beloved ingredients in a wrap might be a modern culinary innovation, the foundational concept of encasing savory fillings in a portable flatbread has a rich history, celebrated across diverse cultures worldwide—from ancient Middle Eastern flatbreads to the more contemporary Mexican burrito. This particular rendition takes that time-honored convenience and elevates it with universally adored, comforting flavors that resonate with almost everyone.
What makes these Cheesy Garlic Chicken Wraps an absolute staple in my kitchen, and soon to be in yours, is their undeniable appeal. People adore this dish for its incredible taste profile: the succulent, seasoned chicken provides a satisfying base, while the aromatic garlic adds depth, and the gooey, melted cheese brings a creamy, savory finish that is simply irresistible. Beyond their fantastic flavor, their ease of preparation and the convenience they offer for busy weeknights, lunches, or even as an impressive appetizer, make them a truly cherished and highly sought-after dish.
Ingredients:
Gathering all your ingredients before you begin is a chef’s secret to a smooth and enjoyable cooking experience. For our amazing Cheesy Garlic Chicken Wraps, here’s what we’ll need:
-
For the Flavorful Chicken:
- 2 large (about 1.5 lbs) boneless, skinless chicken breasts: I prefer breasts for their leanness, but thighs can be used for a richer flavor.
- 1 tablespoon olive oil: For sautéing our chicken to perfection.
- 1 teaspoon smoked paprika: Adds a lovely warmth and subtle smoky note.
- 1/2 teaspoon garlic powder: To enhance the garlic theme of our wraps.
- 1/2 teaspoon onion powder: A foundational flavor enhancer.
- 1/4 teaspoon black pepper: Freshly ground is always best!
- 1/2 teaspoon salt: Or to taste, depending on your preference.
-
For the Irresistibly Creamy Garlic Cheese Sauce:
- 2 tablespoons unsalted butter: The base for our rich sauce.
- 3 cloves garlic, minced: This is where the magic happens for our Cheesy Garlic Chicken Wraps! Don’t skimp here.
- 2 tablespoons all-purpose flour: Our thickening agent for a silky smooth sauce.
- 1 ½ cups whole milk: Whole milk gives the best creamy texture, but 2% can work too.
- 1 cup shredded sharp cheddar cheese: I love the tang of sharp cheddar, but a mild or even a Monterey Jack would be delicious.
- ½ cup shredded mozzarella cheese: For that perfect gooey stretch.
- 1/4 teaspoon salt: Adjust to your liking.
- 1/8 teaspoon black pepper: Just a pinch to balance the flavors.
- 1 tablespoon fresh parsley, chopped (optional, for garnish): Adds a pop of color and freshness.
-
For the Wraps & Assembly:
- 6-8 large (10-inch) flour tortillas: The vessel for all our delicious fillings. Choose good quality ones that are pliable.
- 1 cup shredded crisp lettuce: Iceberg or Romaine work wonderfully for that refreshing crunch.
- 1 large ripe tomato, diced: Adds a burst of freshness and color.
- 1/4 cup finely diced red onion (optional): For a little pungent kick, if you like.
- Optional additions: Sliced bell peppers, jalapeños for heat, or even some corn.
Preparation is Key: Getting Ready for Your Cheesy Garlic Chicken Wraps
Before we dive into cooking, a little mise en place (everything in its place) will make the whole process much smoother and more enjoyable. Trust me, I’ve learned this the hard way!
- Prepare the Chicken: If your chicken breasts are very thick, I recommend slicing them horizontally to create two thinner cutlets, or pounding them lightly to an even thickness of about 1/2 inch. This ensures they cook evenly and quickly. Pat them dry with paper towels – this is crucial for getting a nice sear. In a small bowl, combine the smoked paprika, garlic powder, onion powder, black pepper, and salt. Sprinkle this seasoning mixture generously over both sides of the chicken breasts, gently rubbing it in to ensure every inch is covered. Set aside, allowing the flavors to meld for at least 10-15 minutes at room temperature, or up to an hour in the refrigerator if you have the time. This little resting period allows the seasoning to penetrate deeper into the chicken, giving us truly flavorful chicken for our Cheesy Garlic Chicken Wraps.
- Chop Your Veggies: Wash and thoroughly dry your lettuce, then thinly shred it. Dice your tomato into small, manageable pieces. If using red onion, dice it very finely so its flavor isn’t overpowering but adds a nice subtle crunch. Having these ready in separate bowls means you can assemble your Cheesy Garlic Chicken Wraps quickly once the main components are cooked.
- Shred the Cheeses: If you’re not using pre-shredded cheese, take a moment to shred both your sharp cheddar and mozzarella. Freshly shredded cheese melts much better and tastes superior to pre-shredded varieties, which often contain anti-caking agents.
- Mince the Garlic: Peel and finely mince your three cloves of garlic. Remember, we’re making a Cheesy Garlic Chicken Wraps recipe, so the garlic needs to be front and center!
Crafting the Creamy Garlic Cheese Sauce for Your Cheesy Garlic Chicken Wraps
This sauce is the heart and soul of our Cheesy Garlic Chicken Wraps. It’s rich, garlicky, and utterly decadent. Pay attention to these steps for a perfectly smooth and flavorful sauce.
- Melt the Butter: In a medium saucepan or a deep skillet, melt the 2 tablespoons of unsalted butter over medium-low heat. We want it to melt gently, not brown.
- Sauté the Garlic: Once the butter is melted and shimmering, add your minced garlic. Sauté for about 1 minute, stirring constantly, until it becomes fragrant. Be careful not to burn the garlic! Burnt garlic will turn bitter and ruin the delicate flavor of our sauce. We’re looking for a beautiful golden aroma, not dark brown bits. This brief sauté softens the garlic and releases its potent flavors into the butter, laying the foundation for our signature garlicky taste.
- Create a Roux: Sprinkle the 2 tablespoons of all-purpose flour over the melted butter and garlic. Whisk continuously for 1-2 minutes. This creates what’s called a roux, which will thicken our sauce. The roux should be pale yellow and have a nutty aroma, but again, avoid browning it too much. Cooking out the raw flour taste is important for a smooth sauce.
- Whisk in the Milk: Gradually pour in the 1 ½ cups of whole milk, a little at a time, while continuously whisking. This is a crucial step for preventing lumps! Start with a small amount of milk to form a thick paste, then slowly add the rest, ensuring each addition is fully incorporated before adding more. As the sauce heats up and thickens, keep whisking to maintain its smooth consistency. Bring the mixture to a gentle simmer, still whisking, and let it cook for 2-3 minutes until it has visibly thickened to a consistency similar to a thin gravy.
- Melt the Cheese: Reduce the heat to low. Add the shredded sharp cheddar and mozzarella cheeses to the thickened milk mixture. Stir continuously with a spoon or spatula until both cheeses are completely melted and the sauce is smooth and creamy. The heat should be low enough that the cheese melts gently without separating or becoming oily. This is where the “Cheesy” part of our Cheesy Garlic Chicken Wraps truly shines!
- Season and Taste: Stir in the 1/4 teaspoon of salt and 1/8 teaspoon of black pepper. Taste the sauce and adjust the seasoning as needed. You might want a little more salt, or perhaps a tiny pinch of cayenne pepper if you like a hint of heat. If the sauce becomes too thick, you can thin it out with a tablespoon or two of warm milk. If it’s too thin, let it simmer gently for a few more minutes, stirring, to allow it to reduce. Remove from heat and, if using, stir in the fresh parsley. Keep the sauce warm while you prepare the chicken.
Pro Tip for the Perfect Sauce:
To ensure your cheese sauce remains perfectly smooth and doesn’t get a “skin” on top while you’re preparing the rest of the meal, place a piece of plastic wrap directly on the surface of the sauce. This creates an airtight seal that traps steam and moisture, keeping it wonderfully creamy until you’re ready to assemble your Cheesy Garlic Chicken Wraps. If it thickens too much upon standing, a quick whisk over low heat with a splash of milk will bring it back to life.
Cooking the Flavorful Chicken for Your Cheesy Garlic Chicken Wraps
Our seasoned chicken is going to be the hearty, savory component of our wraps. Proper cooking ensures juicy, tender chicken every time.
- Heat the Skillet: Place a large skillet (cast iron or heavy-bottomed stainless steel works best) over medium-high heat. Add 1 tablespoon of olive oil and let it heat until it shimmers. You should see wisps of smoke just beginning to appear; this indicates it’s hot enough for a good sear.
- Cook the Chicken: Carefully place the seasoned chicken breasts in the hot skillet. Don’t overcrowd the pan; cook them in batches if necessary to ensure a good sear. Let them cook undisturbed for 4-6 minutes per side, or until they are golden brown and a thermometer inserted into the thickest part reads 165°F (74°C). The exact cooking time will depend on the thickness of your chicken. Resist the urge to move them too much, as that initial contact with the hot pan is what creates that delicious crust.
- Rest the Chicken: Once cooked, transfer the chicken breasts to a cutting board. Tent them loosely with foil and let them rest for at least 5-10 minutes. This resting period is absolutely essential! It allows the juices to redistribute throughout the meat, ensuring our chicken remains incredibly tender and moist. Skipping this step often results in dry chicken, and we definitely don’t want that for our Cheesy Garlic Chicken Wraps!
- Shred or Slice the Chicken: After resting, you have a couple of options. You can shred the chicken using two forks (my preferred method for wraps as it creates a great texture that holds sauce well), or you can slice it thinly against the grain. Either way, aim for bite-sized pieces that are easy to manage in a wrap.
- Optional: Combine with a Touch of Sauce: For an extra layer of flavor and moisture, you can take a couple of spoonfuls of your creamy garlic cheese sauce and toss it with the shredded chicken. This ensures every bite of chicken in your Cheesy Garlic Chicken Wraps is coated in that irresistible garlicky goodness.
Ensuring Juicy Chicken Every Time:
Overcooking chicken is the quickest way to dry it out. Using a meat thermometer is your best friend here. If you don’t have one, cut into the thickest part of one piece; if the juices run clear and the meat is opaque throughout, it’s done. Remember, the chicken will continue to cook slightly during the resting period.
Assembling Your Irresistible Cheesy Garlic Chicken Wraps
Now for the grand finale – putting all these delicious components together to create your perfect Cheesy Garlic Chicken Wraps!
- Warm the Tortillas: Warming your tortillas is not just about making them pleasant to eat; it makes them much more pliable and less prone to tearing when you roll them. You can do this in a few ways:
- Microwave: Stack a few tortillas, wrap them in a damp paper towel, and microwave for 20-30 seconds until warm and flexible.
- Dry Skillet: Heat a dry skillet over medium heat. Place one tortilla at a time and heat for about 15-20 seconds per side, just until it’s warm and starts to puff slightly. Stack them on a plate and cover with a clean kitchen towel to keep them warm.
- Oven: Wrap a stack of tortillas in foil and warm them in a preheated oven at 250°F (120°C) for about 10-15 minutes.
Choose the method that works best for you, but don’t skip this step!
- Spread the Garlic Cheese Sauce: Lay a warm tortilla flat on a clean surface. Using the back of a spoon or a spatula, spread a generous layer (about 2-3 tablespoons) of your warm, creamy garlic cheese sauce over the entire surface of the tortilla, leaving about an inch clear around the edges. This ensures every bite of your Cheesy Garlic Chicken Wraps is bursting with flavor.
- Add the Chicken: Spoon a good portion of your shredded or sliced chicken down the center of the tortilla, over the sauce. Don’t overload it, as you still need to be able to roll it neatly.
- Layer on the Freshness: Next, add a sprinkle of your shredded lettuce over the chicken. Follow with a handful of diced tomatoes and, if using, a touch of red onion. The contrast of the cool, crisp vegetables against the warm chicken and sauce is delightful.
- Fold and Roll: This is where the magic happens! To create a neat wrap:
- Fold the bottom edge of the tortilla up and over the filling, pulling it back gently to create a tight roll.
- Then, fold in the left and right sides of the tortilla over the filling.
- Finally, roll the entire tortilla up tightly from the bottom towards the top, creating a compact and well-sealed wrap. Don’t be afraid to apply a little pressure to keep it snug.
The goal is a wrap that holds its shape and doesn’t spill its delicious contents after the first bite.
- Serve Immediately: These Cheesy Garlic Chicken Wraps are best enjoyed fresh, while everything is still warm and the lettuce is crisp. Serve them whole, or cut them in half diagonally for a pretty presentation and easier eating.
The Art of the Perfect Wrap:
Practice makes perfect when it comes to rolling wraps! If you’re struggling, start with slightly less filling. You want enough to be satisfying, but not so much that it bursts at the seams. A perfectly rolled Cheesy Garlic Chicken Wrap is a joy to behold and even more delightful to eat.
Tips and Variations for Your Cheesy Garlic Chicken Wraps
One of the best things about recipes like these Cheesy Garlic Chicken Wraps is how versatile they are! Don’t be afraid to experiment and make them truly your own.
- Spice it Up: If you love a bit of heat, consider adding a pinch of cayenne pepper or a dash of hot sauce to your garlic cheese sauce. You could also mix some finely diced jalapeños into your chicken or add a few slices directly into the wrap before rolling. A sprinkle of red pepper flakes on top of the finished wrap also adds a nice kick.
- Cheese, Please!: While cheddar and mozzarella are my go-to for these Cheesy Garlic Chicken Wraps, feel free to experiment with other cheeses. Pepper Jack would add a spicy creamy element, Swiss could lend a nutty flavor, or a blend of Italian cheeses would be lovely. Just ensure they are good melting cheeses for that beautiful creamy sauce.
- Veggie Power: Boost the nutritional content and crunch factor by adding more vegetables. Thinly sliced bell peppers (red, yellow, or orange for color!), shredded carrots, baby spinach, or even some sautéed mushrooms would be fantastic additions. Black beans or corn would also work well for a heartier wrap.
- Gluten-Free Option: Simply swap out the regular flour tortillas for your favorite gluten-free tortillas, and ensure your flour for the roux is a gluten-free all-purpose blend. This ensures everyone can enjoy these delightful Cheesy Garlic Chicken Wraps.
- Make-Ahead Magic: You can prepare the chicken and the garlic cheese sauce ahead of time. Store them separately in airtight containers in the refrigerator for up to 2-3 days. When you’re ready to assemble, gently reheat the chicken and sauce (you might need a splash of milk to loosen the sauce), warm your tortillas, and then assemble as directed. This makes for a super quick weeknight meal!
- Serving Suggestions: These Cheesy Garlic Chicken Wraps are a meal in themselves, but they pair wonderfully with a simple side salad, a bowl of tomato soup, or even some crispy sweet potato fries. They are also perfect for packed lunches for work or school – just make sure to keep the sauce and fillings separate until serving if you want to avoid a soggy wrap.
Making These Wraps Your Own:
The beauty of the Cheesy Garlic Chicken Wraps lies in their adaptability. Think of this recipe as a fantastic blueprint. You can add elements that reflect your personal taste preferences or what you have on hand in your fridge. For example, if you prefer a grilled chicken flavor, marinate and grill your chicken breasts instead of pan-frying them. The smoky char from the grill would add another dimension of flavor to the wraps. Or, if you’re a fan of herbs, consider adding some fresh dill or chives to your garlic cheese sauce for an extra aromatic kick. Don’t be afraid to stray from the path slightly; cooking is all about creativity and finding what you love!
Customizing Your Flavor Profile:
Beyond simple additions, you can think about different flavor profiles. For a Mediterranean twist on your Cheesy Garlic Chicken Wraps, you could add some crumbled feta cheese to the sauce, sun-dried tomatoes, and perhaps a sprinkle of oregano. If you lean towards something with a bit more zest, a squeeze of fresh lime juice over the chicken or a dollop of avocado cream could brighten up the flavors significantly. The creamy garlic cheese sauce is a robust base that can stand up to a variety of complementary flavors. Maybe even a touch of pesto swirled into the sauce for an Italian-inspired experience! The possibilities are truly endless once you master the core recipe.
Making it a Meal:
While the Cheesy Garlic Chicken Wraps are hearty on their own, pairing them with the right side can elevate them to a full feast. Consider a light coleslaw dressed with a vinaigrette to cut through the richness, or some oven-baked potato wedges seasoned with rosemary and garlic powder for a comforting side. For a lighter approach, a vibrant fruit salad adds a refreshing contrast. And don’t forget beverages! A cold glass of lemonade or even a light beer would complement these flavorful wraps perfectly. Thinking about the entire dining experience makes enjoying these wraps even more special, whether it’s for a casual lunch or a fun family dinner.
Conclusion:
And there you have it, my friends! We’ve journeyed through the creation of what I truly believe is one of the most delightful, satisfying, and utterly addictive dishes you could ever whip up in your own kitchen. These aren’t just any wraps; they are a culinary triumph that effortlessly blends convenience with an explosion of flavors. I promise you, once you taste the succulent, tender chicken, infused with aromatic garlic, perfectly complemented by gooey, melted cheese, all wrapped snugly in a soft tortilla, you’ll understand exactly why these Cheesy Garlic Chicken Wraps are an absolute game-changer. They represent the ultimate comfort food, elevated to a level that feels both indulgent and surprisingly straightforward to achieve. Imagine biting into that perfect combination of textures – the slight crispness of a pan-seared tortilla, the juicy chicken, and the irresistible stretch of melted cheese, all singing in harmony with the fragrant garlic. It’s a symphony for your taste buds, a dish that manages to be both excitingly novel and deeply comforting at the same time. This recipe is designed to impress without overwhelming, making it an ideal choice for busy weeknights when you crave something extraordinary but are short on time, or for casual gatherings where you want to serve something universally loved. It’s a testament to the fact that sometimes, the most incredible flavors come from simple, high-quality ingredients treated with a little love and a dash of creativity. So, if you’re looking to elevate your mealtime routine and introduce a new star to your recipe collection, look no further.
Making Them Your Own: Serving Suggestions and Delicious Variations
The beauty of these wraps lies not only in their incredible taste but also in their versatility. While they are undoubtedly fantastic on their own, a few additions can take your experience from great to absolutely unforgettable. For a balanced meal, I love serving these Cheesy Garlic Chicken Wraps alongside a fresh, crisp side salad with a light vinaigrette – the bright greens and tangy dressing provide a wonderful contrast to the rich, savory wraps. A bowl of creamy tomato soup or a side of crispy sweet potato fries also makes for an excellent companion, turning your meal into a cozy, diner-style feast right at home. Don’t forget the dips! A dollop of sour cream, a fiery sriracha mayo, or even a cooling avocado crema can add another layer of flavor and moisture that elevates every bite.
But why stop there? Let’s talk about variations, because this recipe is practically begging for your personal touch. Feel free to experiment with the protein: finely sliced steak, seasoned ground beef, crumbled plant-based meat, or even hearty chickpeas can easily step in for the chicken. If you’re a cheese lover (and who isn’t?), consider a blend of Monterey Jack and cheddar, or for a spicier kick, introduce some pepper jack. You can also sneak in some extra veggies to boost the nutritional value and add more texture. Sautéed bell peppers, caramelized onions, a handful of fresh spinach, or finely chopped mushrooms can be folded into the chicken mixture before wrapping. For those who prefer a lighter option, large lettuce leaves can replace tortillas for a refreshing, low-carb wrap. And for an extra layer of flavor, consider adding a dash of smoked paprika, a pinch of chili powder, or a squeeze of lime juice to your chicken mixture. The possibilities are truly endless, allowing you to tailor this recipe to your family’s preferences and whatever ingredients you have on hand.
Your Turn to Shine!
Now, it’s your turn! I’ve shared my passion for these incredible wraps, and I’ve given you all the tools and inspiration you need to bring them to life in your own kitchen. Don’t just read about how amazing these Cheesy Garlic Chicken Wraps are; experience them for yourself! I genuinely believe this recipe is a must-try for anyone who loves flavorful, easy-to-make meals that truly satisfy. So, gather your ingredients, fire up your stove, and get ready to create something truly delicious. And once you do, I would absolutely love to hear about your culinary adventure! Did you stick to the original recipe, or did you put your own spin on it? What were your favorite serving suggestions? Please, don’t hesitate to share your thoughts, your successes, and even your creative variations in the comments below. Snap a picture and let us all see your magnificent creations! Your feedback and experiences are incredibly valuable, and they help our community of food lovers grow and discover even more delicious possibilities. Happy cooking, and I can’t wait to hear all about it!
Cheesy Garlic Chicken Wraps
Cheesy Garlic Chicken Wraps are a delightful, quick, and comforting meal featuring tender, juicy chicken, infused with robust garlic, and enveloped in melted cheese within a warm, soft tortilla.
Ingredients
-
2 cups cooked chicken, shredded
-
1/2 cup garlic aioli
-
1 cup shredded cheddar cheese
-
4 large tortillas
-
Salt and pepper, to taste
Instructions
-
Step 1
In a bowl, combine the shredded cooked chicken, garlic aioli, and shredded cheddar cheese. Season with salt and pepper to taste, mixing well. -
Step 2
Gently warm the tortillas in a microwave or dry skillet until soft and pliable. -
Step 3
Lay a warm tortilla flat. Spoon a generous portion of the chicken mixture onto the center. -
Step 4
Fold the bottom edge of the tortilla over the filling, then fold in the sides. Roll tightly from bottom to top to create a compact wrap. Serve immediately.
Important Information
Nutrition Facts (Per Serving)
It is important to consider this information as approximate and not to use it as definitive health advice.
Allergy Information
Please check ingredients for potential allergens and consult a health professional if in doubt.
Leave a Comment