
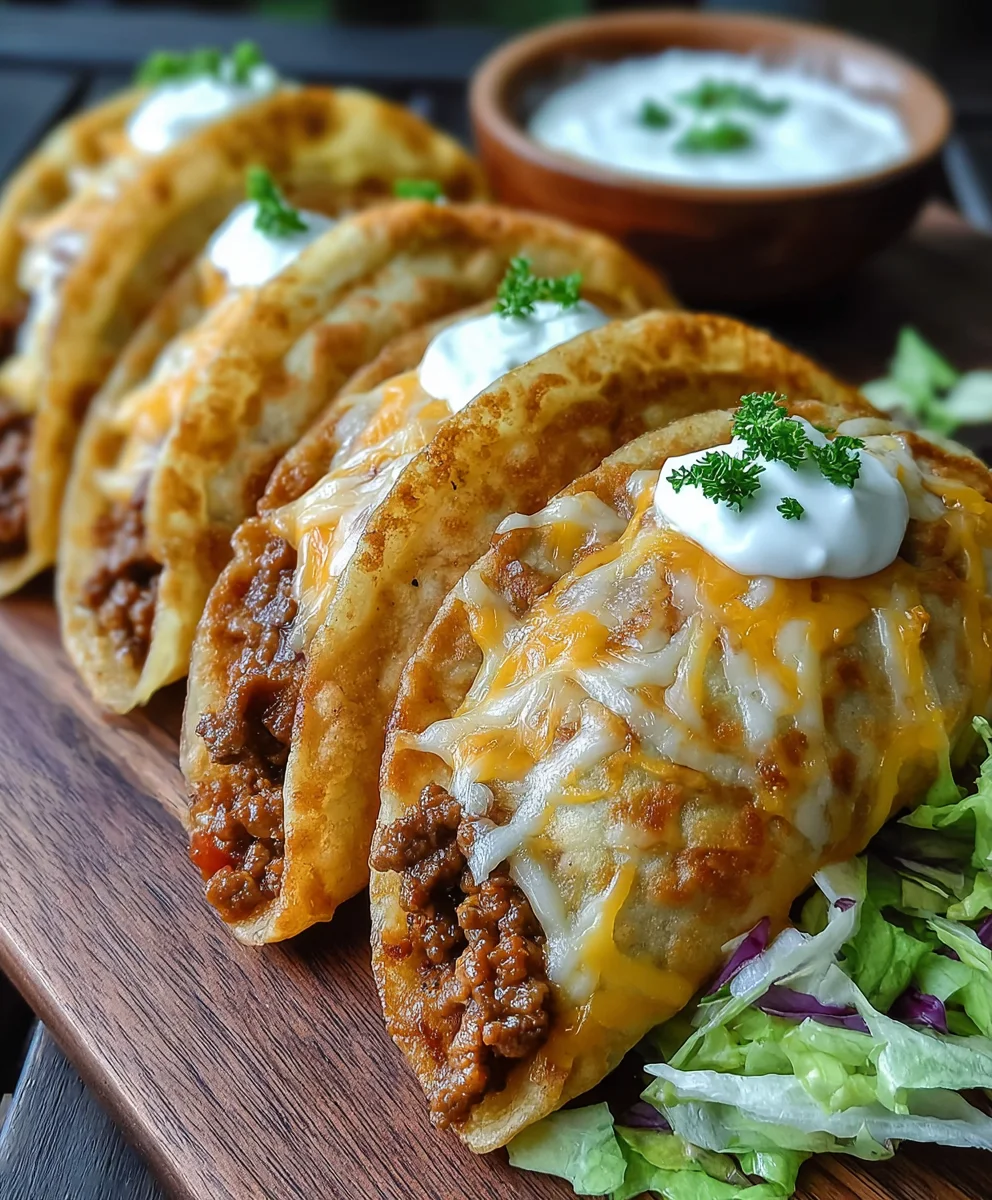
Loaded Cheesy Pocket Tacos are about to revolutionize your mealtime! Imagine the perfect handheld meal: all the vibrant, zesty flavors of your favorite classic taco, but brilliantly encased in a warm, toasted, and utterly cheesy shell. No more worrying about toppings tumbling out or messy spills; these ingenious creations promise a delightful explosion of taste in every single bite, perfectly contained and ready for enjoyment.
While the traditional taco boasts centuries of rich history and cultural significance, evolving beautifully across countless regions and cuisines, dishes like our
Loaded Cheesy Pocket Tacos
represent a wonderfully modern and playful twist on this beloved culinary tradition. They are a testament to how creative ingenuity can transform familiar favorites, blending the best aspects of a crunchy or soft taco with the satisfying, melt-in-your-mouth enclosure of a quesadilla or even a savory pastry. I believe people absolutely adore this dish because it delivers on so many fronts: the richly seasoned, savory filling, the luxurious abundance of melting cheese that forms a protective and delicious seal, and the sheer convenience of a portable, satisfying meal. This recipe offers a fantastic, less-mess alternative for bustling weeknights, lively game days, or simply when you crave an extra dose of cheesy goodness. Get ready to experience a new level of taco delight!
Ingredients:
- 1 tablespoon olive oil: This will be our base for sautéing, ensuring everything starts with a touch of rich flavor.
- 1 medium yellow onion: Finely diced, adding a crucial aromatic depth and sweetness to our taco filling.
- 1 red bell pepper: Diced, contributing vibrant color, a pleasant crunch, and a subtle sweetness that complements the savory meat.
- 1 pound lean ground beef (or ground turkey/chicken for a lighter option): The hearty protein that forms the core of our incredibly satisfying Loaded Cheesy Pocket Tacos. Opting for lean meat helps manage any excess grease.
- 1 packet (1 ounce) taco seasoning mix: The quintessential blend of spices that gives our filling its authentic, robust taco flavor. Alternatively, you can use a homemade mix of chili powder, cumin, paprika, garlic powder, onion powder, oregano, salt, and black pepper.
- ½ cup water: Essential for rehydrating the taco seasoning and creating a wonderfully saucy, cohesive filling that clings perfectly to every bite.
- 1 can (15 ounces) refried beans: These creamy, savory beans serve as an excellent binder for our filling, adding a comforting texture and extra body to the pockets.
- 12 large (10-inch) flour tortillas: The essential vessel for our Loaded Cheesy Pocket Tacos. Larger tortillas are key for easy folding and generously stuffing with all the deliciousness.
- 3 cups shredded Monterey Jack cheese (or a Mexican blend like Colby Jack or Cheddar-Jack): The undisputed star for that melt-in-your-mouth, gooey cheese factor. We’ll be using this generously, divided for both in the filling and layered in the pockets.
- 1 cup salsa: Your favorite mild or medium salsa, adding a fresh, tangy, and slightly spicy kick that brightens the entire flavor profile.
- ½ cup chopped fresh cilantro: Optional, but highly recommended for a burst of fresh, herbaceous flavor that truly elevates the taco experience.
- Optional additions for filling: Feel free to customize your filling with diced jalapeños for a spicy kick, black olives for a briny note, sweet corn kernels for texture, or canned green chilies for mild heat.
- Optional for serving: Prepare an array of toppings such as cool sour cream or Greek yogurt, extra fresh salsa, creamy guacamole, crisp shredded lettuce, juicy diced tomatoes, or a dash of your favorite hot sauce for a personalized finish.
Meal Prep & Storage Tips for Your Loaded Cheesy Pocket Tacos:
These pockets are perfect for meal prep and advance preparation. Assemble completely, then freeze on a baking sheet until solid. Transfer frozen pockets to a zip top bag and store for up to three months. Bake directly from frozen, adding about 5-7 minutes to the cooking time. For quick after school snacks, bake a batch ahead and refrigerate for up to three days – reheat in a 350°F oven for 5-7 minutes to restore crispness.
Equipment You’ll Need:
- Large skillet or cast-iron pan: Indispensable for browning meat and simmering your flavorful taco filling. A pan with ample space ensures even cooking.
- Two large baking sheets: Necessary for baking multiple pockets at once, ensuring they have enough room for even heat distribution.
- Parchment paper or silicone baking mats: Crucial for preventing sticking and making cleanup a breeze, ensuring your pockets release perfectly.
- Spatula or wooden spoon: For stirring, breaking up meat, and ensuring everything is thoroughly mixed in the skillet.
- Mixing bowls: Useful for holding prepped ingredients and any optional toppings.
- Measuring cups and spoons: For precise ingredient quantities, ensuring consistent flavor and texture.
- Sharp knife and cutting board: For efficiently dicing onions, bell peppers, and any other fresh additions.
- Cheese grater: If you’re opting for block cheese instead of pre-shredded, a grater will be essential for getting that perfect melt.
Preparing Your Flavorful Taco Filling for Loaded Cheesy Pocket Tacos:
- Sauté Aromatics with Precision: Our culinary adventure towards creating the most irresistible Loaded Cheesy Pocket Tacos begins by building a robust foundation of flavor. Start by heating 1 tablespoon of olive oil in a generously sized skillet or a sturdy cast-iron pan over a medium heat setting. Allow the oil to become shimmering and warm, but not smoking. Introduce your finely diced yellow onion and vibrant diced red bell pepper to the pan. Sauté these aromatic vegetables with diligence for approximately 5-7 minutes. During this time, stir them occasionally to ensure even cooking, observing as they gradually soften and transform into a translucent, tender state. This initial step is profoundly important for cultivating a deep, underlying sweetness and an enhanced depth of flavor that will permeate every morsel of our taco filling. As the delightful aromas begin to waft through your kitchen, you’ll instinctively know that you’re on the right path to something truly delicious. Avoid rushing this delicate phase; perfectly softened vegetables are an absolute prerequisite for achieving a smooth and wonderfully flavored texture within your finished pockets. Should you decide to incorporate optional diced jalapeños for an extra touch of heat and zest, now is the opportune moment to add them alongside the onion and bell pepper, allowing them to soften slightly and release their nuanced spice.
- Mastering the Ground Beef Browning: Once your vegetables have reached their optimal softness, gently push them to one side of the skillet, creating an open space. Add your 1 pound of lean ground beef (or your chosen ground meat alternative, such as turkey or chicken) into this cleared section of the pan. Using your spatula or a sturdy wooden spoon, immediately begin to break up the meat into smaller, uniform crumbles. This active process ensures that the beef browns evenly across all surfaces, which is critical for flavor development. Continue to cook for approximately 8-10 minutes, or until the ground beef is thoroughly cooked through, with absolutely no trace of pink remaining. Consistent crumbling of the meat throughout this stage is paramount for achieving a desirable, consistent texture within your taco pockets, preventing any large, unappealing clumps. Given you’re using lean ground beef, you’ll likely find minimal excess fat. However, should a significant amount of rendered fat accumulate, it is advisable to carefully drain it off. This meticulous step is vital; it prevents your pockets from becoming unduly greasy and is instrumental in helping the filling maintain its structural integrity and vibrant flavor profile.
- Infusing with Taco Seasoning: With the ground beef expertly browned and any excess fat thoughtfully drained, reunite the softened vegetables by stirring them back into the center of the pan, thoroughly mixing them with the seasoned meat. Now, evenly sprinkle the entire contents of the 1 packet (1 ounce) taco seasoning mix over the harmonious beef and vegetable amalgamation. Stir the mixture vigorously, ensuring that every piece of meat and vegetable is completely enveloped and coated in the fragrant, vibrant spices. Continue to cook for an additional minute, allowing the spices to gently toast. This brief period of heat application is a culinary secret that significantly amplifies and awakens the full aromatic potential of your taco seasoning, making your Loaded Cheesy Pocket Tacos truly distinguished and memorable.
- Simmering for Depth with Water and Refried Beans: Introduce ½ cup of water to the skillet. Stir all the ingredients together with care, making sure to scrape up any delectable browned bits that might have accumulated at the bottom of the pan – these concentrated morsels are bursting with flavor and should not be left behind! Bring the mixture to a gentle, rolling simmer, then reduce the heat to a low setting and allow it to cook undisturbed for 5 minutes. This crucial simmering period permits the taco seasoning to fully hydrate, deeply infuse the meat with its savory essence, and contribute to a wonderfully moist and intensely flavorful taco filling. Subsequently, incorporate the entire can of refried beans into the skillet. Stir thoroughly, meticulously integrating the creamy, rich beans into the seasoned meat mixture. The refried beans serve a dual, indispensable role here: they impart a magnificent, hearty texture and simultaneously function as a natural binder, ensuring the filling remains perfectly cohesive and contained within the pockets. Continue cooking on low heat for an additional 2-3 minutes, stirring occasionally, until the beans are completely warmed through and seamlessly integrated into the mixture. At this juncture, remove the skillet from the heat source.
- Incorporating the Cheese and Cilantro: The final touch to our filling involves a generous addition of cheese. Stir 1 cup of shredded Monterey Jack cheese (or your chosen Mexican blend) directly into the still-warm filling mixture in the skillet. The residual heat from the pan will work its magic, gently melting the cheese and creating an exquisitely gooey, irresistible component that further binds the filling together. If you’ve chosen to include it, gently fold in ½ cup of freshly chopped cilantro at this stage. Cilantro introduces a bright, fresh, and herbaceous counterpoint to the rich, savory profile of the filling. Give everything a final, comprehensive stir to confirm that the cheese is mostly melted and uniformly distributed throughout. Set the filling aside, allowing it to cool slightly while you proceed with the preparation of your tortillas. This cooling interval is important, as it renders the filling much easier to manage and handle during the assembly process, and critically, it helps prevent the tortillas from becoming prematurely soggy. Your incredibly flavorful and perfectly prepared taco filling for the Loaded Cheesy Pocket Tacos is now complete and ready for assembly!
Assembling Your Loaded Cheesy Pocket Tacos: The Art of the Fold:
This is where your vision truly comes to life, as you transform individual components into perfectly portable, irresistibly cheesy pockets. Approach this step with a thoughtful hand; a meticulously assembled pocket is a secure and satisfying pocket!
- Preheat and Prepare Your Workspace: Before you embark on the assembly process, take a moment to preheat your oven to a precise 375°F (190°C). This ensures that your oven will be at the ideal temperature when your pockets are ready for baking, promoting even cooking. Simultaneously, line two large baking sheets with either parchment paper or durable silicone baking mats. This preparatory step is absolutely crucial; it acts as an infallible barrier against sticking, guaranteeing that your precious Loaded Cheesy Pocket Tacos bake beautifully without any unfortunate mishaps and facilitating effortlessly easy cleanup. Having your baking sheets primed and ready will significantly streamline the entire assembly process, allowing for a smooth transition of your handcrafted pockets directly from your workstation to the waiting oven.
- Warming Tortillas for Optimal Pliability (Optional but Highly Recommended): While it might seem like a minor detail, gently warming your large flour tortillas can make an astonishing difference in their pliability, rendering them significantly more manageable and less prone to tearing during the delicate folding process. You have a couple of efficient methods for this: you can either stack a few tortillas, wrap them snugly in a damp paper towel, and microwave them for a brief 30-60 seconds, or alternatively, warm them individually in a dry skillet over medium heat for approximately 10-15 seconds per side. Soft, supple, and flexible tortillas are your invaluable allies when meticulously crafting these pockets, playing a key role in preventing unsightly cracks and ensuring a neat, impeccably secure seal for all that deliciousness contained within.
- Methodical Layering of Ingredients: Lay one perfectly warmed tortilla flat and smoothly on your clean, spacious work surface. Mentally (or actually) divide the tortilla into four distinct quadrants. With a measuring cup or spoon, carefully scoop about ½ cup of your exquisitely prepared taco filling onto one half of the tortilla. It is vital to ensure that you leave a modest border around the edge of the filling. Exercise caution against overfilling, as an excessively generous amount will undoubtedly complicate the crucial sealing process. The objective here is to achieve a filling that is both generous in quantity and entirely manageable for successful folding.
- Crafting the Cheesy Layers: Over the perfectly portioned taco filling, sprinkle approximately 2 tablespoons of your luxurious shredded Monterey Jack cheese. This layer of cheese is not merely for its incredible flavor; it also acts as a fantastic binding agent, helping to hold the filling together and creating that universally adored, gooey texture that defines truly Loaded Cheesy Pocket Tacos. On top of this cheesy foundation, artfully dollop a tablespoon of your favorite salsa. The salsa introduces a delightful burst of fresh, tangy moisture that provides a perfect counterpoint to the rich, savory filling, enhancing the overall sensory experience. Finally, for an additional dimension of cheesy decadence and to bolster the structural integrity of your pocket, sprinkle another 2 tablespoons of shredded Monterey Jack cheese directly onto the empty half of the tortilla, again ensuring you leave a small, clean border along the edge for the final seal. This strategic double layering of cheese guarantees an unparalleled cheesiness in every single bite.
- Executing the Perfect Fold and Seal: Now, for the quintessential technique – the art of the fold! With great care, gently fold the tortilla in half directly over the filling, gracefully creating a pleasing crescent shape. Once folded, gently but firmly press down along the curved edges to begin the sealing process. You can effectively use your fingertips to meticulously crimp the edges, or for an even more robust and visually appealing seal, employ the tines of a fork to press and seal all around the curved perimeter. The paramount objective here is to forge a secure, impenetrable pocket that will valiantly contain all that glorious filling throughout the baking process. Dedicate your full attention to this step; a meticulously executed seal is the ultimate defense against any unwanted cheesy explosions in your oven! Should you encounter any resistance from the tortilla or observe any signs of tearing, it may indicate that the tortilla has cooled too much; simply rewarm it gently for a few seconds. Repeat this precise process with the remaining tortillas and filling until you have 12 beautifully crafted and immaculately assembled Loaded Cheesy Pocket Tacos. As you complete each pocket, carefully transfer them onto your prepared baking sheets, ensuring you leave a small, crucial space between each one to facilitate even and consistent baking.
Baking Your Golden Loaded Cheesy Pocket Tacos to Perfection:
The anticipation builds as we reach the final crucial step before you can indulge in these incredible pockets: baking them to a magnificent golden, crispy perfection. This is the stage where the transformative magic of your oven truly brings them to life.
- The Optional but Recommended Egg Wash for a Golden Sheen: For those seeking an exceptionally golden-brown, delicately crispy exterior, consider this optional yet highly recommended step: lightly brush the tops of your meticulously assembled Loaded Cheesy Pocket Tacos with an egg wash. To prepare this simple wash, whisk one large egg vigorously with a single tablespoon of water or milk until well combined. Applying this wash is not just about aesthetics; while it certainly imparts a professional, beautiful sheen to your pockets, it also significantly contributes to a slightly crisper texture on the outside – a truly delightful contrast to the soft, incredibly cheesy interior. This small effort can elevate the visual appeal and textural experience of your pockets.
- Bake Until Exquisitely Golden: With utmost care, transfer the baking sheets adorned with your pockets into the preheated oven. Allow them to bake for a precise duration of 18-22 minutes. During this time, observe them closely; you’re looking for the tortillas to achieve a rich golden-brown hue and a satisfying crispness, while the cheese nestled inside should be thoroughly melted, bubbling invitingly, and exquisitely gooey. It’s important to note that baking times can exhibit minor variations depending on the specific calibration and efficiency of your oven, so it’s wise to keep a vigilant eye on them, particularly during the final minutes of baking. The desired outcome is that appealing, uniformly toasted appearance on the exterior, which serves as a reliable indicator that the internal filling has reached its perfect temperature and the cheese has achieved its peak meltiness. Should you notice one side of the pockets browning more rapidly than the other, a simple rotation of the baking sheets halfway through the baking time will ensure beautifully even results across all your pockets.
- Allow a Brief Respite Before Serving: Once your Loaded Cheesy Pocket Tacos have achieved their golden perfection and emerge from the oven, bubbling and fragrant, it’s essential to exercise a moment of patience. Carefully remove the baking sheets from the oven. As tempting as those gloriously golden, bubbling pockets may appear, resist the immediate urge to dive in! Instead, allow them to rest gracefully on the baking sheets for a crucial period of 5-10 minutes before you begin serving. This brief cooling interval is critical for two significant reasons: Firstly, it permits the intensely hot filling and molten cheese to set slightly, making the pockets considerably easier and much safer to handle without the risk of burning your mouth. Secondly, and equally importantly, this short resting period allows all the incredible flavors within to meld and harmonize even further, intensifying the deliciousness with every passing moment.
Serving Suggestions for Your Loaded Cheesy Pocket Tacos:
While your freshly baked Loaded Cheesy Pocket Tacos are undeniably magnificent on their own, pairing them with an array of vibrant, fresh toppings and thoughtfully chosen sides can truly elevate the entire dining experience. Consider these suggestions as a customizable fiesta, allowing everyone to tailor their pockets to their ultimate taste preferences.
- Curating a Classic Toppings Bar: Transform your serving into an interactive experience by offering a delightful spread of classic taco garnishes. Crisply shredded lettuce provides a refreshing, cool crunch that beautifully contrasts the warm filling. Diced fresh tomatoes, with their juicy sweetness, add a burst of garden-fresh flavor. A generous dollop of cool, creamy sour cream or a healthier alternative like Greek yogurt can expertly balance the inherent richness of the savory filling, providing a smooth, tangy counterpoint. And, of course, no taco experience is complete without a side of extra salsa – whether it’s a mild, zesty pico de gallo or a fiery habanero salsa – for those who crave an additional layer of tangy, spicy excitement. These carefully selected fresh toppings introduce contrasting textures and temperatures, ensuring that each bite of your Loaded Cheesy Pocket Tacos is a dynamic and multifaceted sensory adventure.
- Embracing Avocado Goodness: For an addition that promises creamy luxury and a satisfying richness, serve your pockets with luscious slices of fresh avocado or a generous scoop of homemade guacamole. The healthy fats and velvety texture of avocado provide a perfect, indulgent complement to the savory meat and the gooey, cheesy interior. This pairing introduces another layer of sophisticated indulgence to your meal. A final squeeze of fresh lime juice over the avocado or guacamole will not only prevent browning but also beautifully brighten and awaken all the surrounding flavors.
- Venturing Beyond the Basic Garnishes: Dare to be inventive with your serving options and explore additional layers of flavor and texture! A sprinkle of extra chopped fresh cilantro can offer an invigorating herbaceous lift, enhancing the fresh notes. Consider offering pickled red onions, whose sharp, tangy, and slightly sweet profile can provide a delightful zesty contrast, expertly cutting through the richness of the meat and cheese. For those who adore an extra kick of heat, a dash of their favorite hot sauce is always a welcome and appreciated addition. To transform your Loaded Cheesy Pocket Tacos into a truly complete and deeply satisfying meal, consider serving them alongside a simple, vibrant side salad dressed with a zesty vinaigrette, or a comforting bowl of seasoned black beans or authentic Mexican rice.
- Thoughtful Beverage Pairings: What is a taco fiesta without the perfect accompanying beverages? These delectable pockets pair harmoniously with a crisp, refreshing, and ice-cold Mexican lager, a expertly crafted margarita, or for a non-alcoholic yet equally traditional choice, a creamy horchata. For younger diners, a glass of fruity agua fresca or a simple, chilled iced tea would be absolutely perfect. Selecting the right beverage can profoundly enhance the overall enjoyment of your meal, rounding out the experience into an all-around delightful culinary celebration.
- A Versatile Crowd-Pleaser for Any Occasion: Whether you’re planning a casual weeknight dinner that needs a burst of excitement, seeking the perfect appetizer for a lively game day gathering, or desiring a vibrant, portable snack for a festive party, your Loaded Cheesy Pocket Tacos are unequivocally guaranteed to be a resounding success. Their inherent portability makes them an ideal choice for convenient grab-and-go eating, and the sheer joy of customizable toppings ensures that there is genuinely something for every palate to adore. They are hearty, deeply satisfying, and brimming with meticulously layered flavors, promising that every single bite is as exhilarating and delicious as the last. Embrace the rewarding process of crafting them and revel in the sheer delight of sharing them with your cherished friends and beloved family!
Conclusion:
So there you have it, folks! My absolute go-to recipe for when cravings hit hard and you want something incredibly satisfying, bursting with flavor, and utterly comforting. These aren’t just any tacos; they’re a handheld marvel, a perfect package of savory seasoned meat, gooey melted cheese, and all your favorite toppings, sealed within a warm, lightly crisped tortilla. It’s the ultimate fusion of convenience, taste, and sheer indulgence.
What makes these Loaded Cheesy Pocket Tacos a true game-changer? It’s the clever pocket design, ensuring every bite is a perfect blend of fillings, without the usual taco spillages. It’s the irresistible combination of textures – the tender meat, the stretchy cheese, the slightly chewy tortilla – that makes each bite an adventure. They’re incredibly customizable, fantastically fun to make, and guaranteed to put a smile on everyone’s face, from the pickiest eaters to the most seasoned foodies. This recipe transforms a simple weeknight meal into an exciting culinary event, making it a staple in my kitchen for busy evenings or impromptu gatherings. The aroma alone as they cook is enough to gather everyone around, eager to dive in!
Now, let’s talk about how to elevate your Pocket Taco experience even further. While they are phenomenal on their own, a generous dollop of cool sour cream or tangy Greek yogurt cuts through the richness beautifully, adding a refreshing counterpoint. Don’t forget the fresh, vibrant kick of homemade pico de gallo, chunky guacamole, or a zesty salsa verde – these fresh elements provide essential brightness. For those who love a bit of heat, sliced pickled jalapeños or a fiery drizzle of your favorite hot sauce are absolute musts, adding that perfect zing. A sprinkle of fresh cilantro not only adds a pop of color but also an herbaceous freshness that truly brightens the whole dish, making each bite even more complex and enjoyable. You can even consider a squeeze of fresh lime juice right before serving to awaken all the flavors.
The beauty of this recipe lies in its incredible adaptability, making it perfect for any preference or pantry. Feeling like chicken? Shredded, seasoned chicken works wonderfully, especially if you have leftover rotisserie chicken to repurpose. For a fantastic vegetarian twist, a hearty black bean and corn salsa mixture, perhaps with some crumbled queso fresco or a dollop of chipotle cream, makes an excellent filling – full of flavor and texture. You could even experiment with ground turkey for a lighter option, or a plant-based ground meat alternative for a vegan-friendly version (just swap the cheese for a dairy-free alternative). When it comes to cheese, a blend of Monterey Jack and sharp cheddar is my personal favorite for that classic, gooey melt, but pepper jack will add a lovely spicy kick, or even a smoky Gouda if you’re feeling truly adventurous and want to introduce a different depth of flavor. Consider serving them with a side of fluffy Mexican rice or perfectly seasoned refried beans to complete the meal, transforming them from a delightful snack into a truly epic dinner feast that feels special yet is so easy to prepare.
I genuinely hope you’re feeling inspired to roll up your sleeves and give these incredible Loaded Cheesy Pocket Tacos a try. They are more than just a recipe; they are an invitation to create joy in your kitchen, to gather around the table with loved ones, and to savor every single mouth-watering moment. This recipe truly delivers on flavor, convenience, and pure deliciousness, making it an instant classic in your culinary repertoire. When you make them, please, please share your creations! Tag me on social media, drop a comment below, or send me a message telling me about your favorite topping combinations or any unique twists you added. Your culinary adventures inspire me just as much as I hope this recipe inspires you. Happy cooking, and get ready to experience your new favorite way to enjoy tacos!
People Also Ask:
What kind of tortillas are best for making Loaded Cheesy Pocket Tacos?
For these Loaded Cheesy Pocket Tacos, I highly recommend using medium to large flour tortillas, typically 8-10 inches in diameter. Flour tortillas are soft, pliable, and easy to fold and seal without tearing, which is crucial for creating that perfect pocket. Corn tortillas tend to be more delicate and can crack when folded, but if you prefer them, warming them thoroughly and working quickly might make them usable. However, for ease and optimal pocket formation, flour is definitely the way to go!
Can I prepare the filling for these Loaded Cheesy Pocket Tacos in advance?
Absolutely! Preparing the filling ahead of time is a fantastic way to make dinner prep even quicker. You can cook the seasoned ground meat or chosen protein, let it cool completely, and then store it in an airtight container in the refrigerator for up to 2-3 days. When you’re ready to assemble your Loaded Cheesy Pocket Tacos, simply reheat the filling gently, then proceed with the assembly and cooking steps as usual. This makes them an ideal candidate for meal prep!
How do I keep my pocket tacos from getting soggy?
The key to avoiding soggy pocket tacos lies in two main areas: managing moisture in your filling and proper cooking. First, ensure your filling isn’t overly wet; if there’s excess liquid from the meat or vegetables, drain it off before assembly. Second, the pan-frying step is crucial. Cooking them over medium heat until the tortillas are golden brown and slightly crisp helps create a protective barrier, keeping the inside warm and the outside delightfully firm. Avoid overcrowding the pan, as this can steam the tortillas instead of crisping them.
What are some good vegetarian filling options for Loaded Cheesy Pocket Tacos?
The possibilities for vegetarian Loaded Cheesy Pocket Tacos are endless and incredibly delicious! Some fantastic options include a hearty mixture of seasoned black beans and corn, sautéed bell peppers and onions, or even a spicy lentil filling. You could also use crumbled plant-based meat substitutes, seasoned tofu, or a robust mixture of roasted sweet potatoes and black beans. Don’t forget to load them up with plenty of your favorite cheese and fresh toppings like avocado and cilantro!
Can I bake or air fry these Loaded Cheesy Pocket Tacos instead of pan-frying them?
Yes, you absolutely can! If you prefer a less hands-on approach or want to reduce the amount of oil, both baking and air frying are excellent alternatives. To bake, preheat your oven to 375°F (190°C), lightly brush the assembled pocket tacos with a little oil, and bake for 15-20 minutes, or until golden and crispy, flipping halfway through. For air frying, set your air fryer to 375°F (190°C), lightly spray or brush the tacos with oil, and cook for 8-12 minutes, flipping once, until they are beautifully golden and crisp. Keep an eye on them, as cooking times can vary!
How should I store and reheat leftover Loaded Cheesy Pocket Tacos?
To store leftover Loaded Cheesy Pocket Tacos, allow them to cool completely, then place them in an airtight container in the refrigerator for up to 2-3 days. For reheating, the best methods to restore their crispiness are the oven or air fryer. Reheat in a preheated oven at 350°F (175°C) for about 10-15 minutes, or in an air fryer at 350°F (175°C) for 5-8 minutes, until heated through and the tortilla is crisp again. Microwaving is an option for speed, but it may result in a softer, less crispy tortilla.
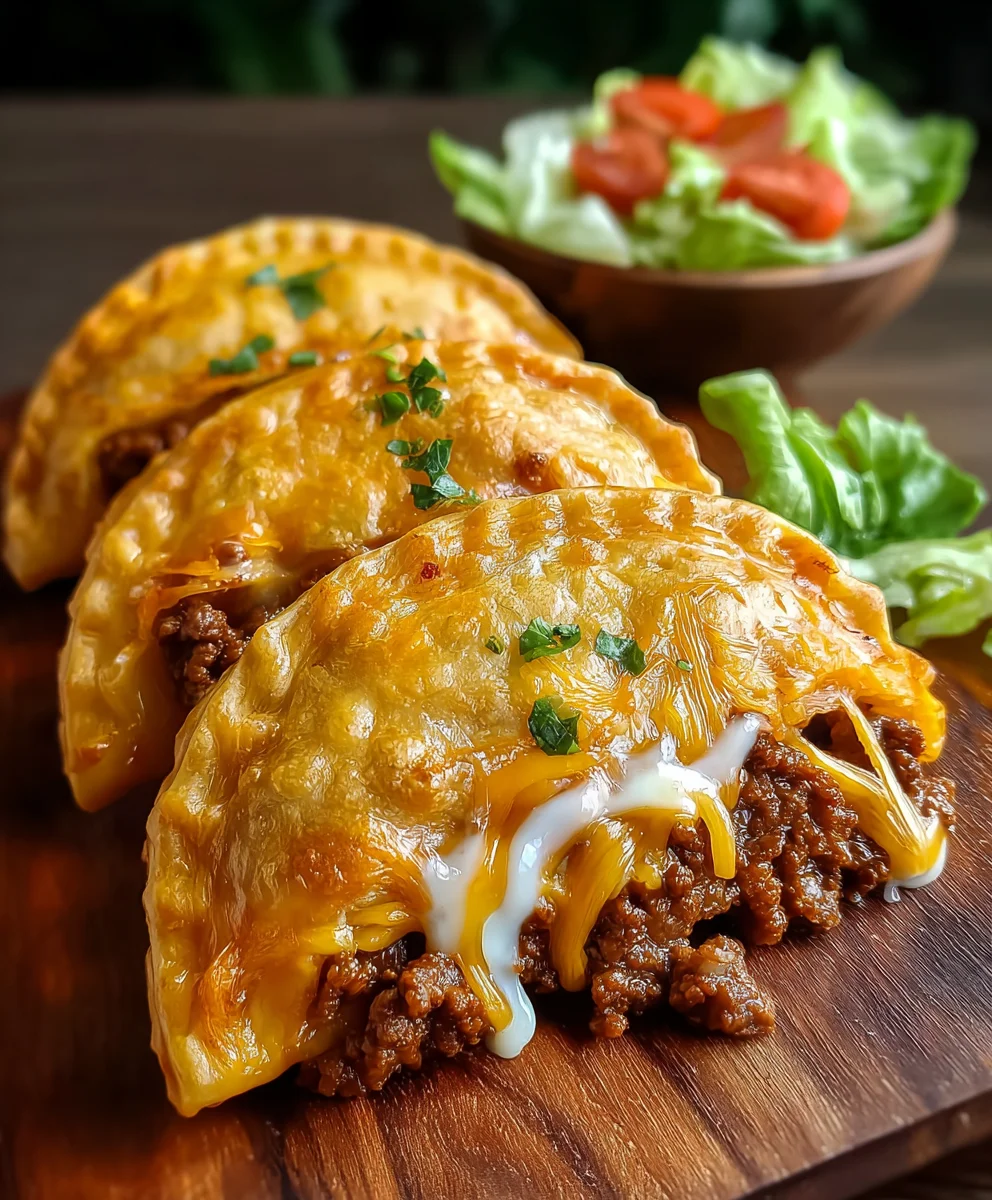
Cheesy Loaded Beef Pocket Tacos: Your New Go-To Dinner!
These Cheesy Loaded Beef Pocket Tacos feature a savory ground beef and refried bean filling, rich with taco seasoning and melted Monterey Jack cheese, all wrapped in a crispy, golden flour tortilla. Perfect for a hearty dinner, convenient meal prep, or a crowd-pleasing snack.
Ingredients
-
1 tablespoon olive oil
-
1 medium yellow onion, diced
-
1 red bell pepper, diced
-
1 pound lean ground beef
-
1 packet (1 ounce) taco seasoning mix
-
½ cup water
-
1 can (15 ounces) refried beans
-
12 large (10-inch) flour tortillas
-
3 cups shredded Monterey Jack cheese (or Mexican blend), divided
-
1 cup salsa
-
½ cup chopped fresh cilantro (optional)
-
Optional for serving: cool sour cream or Greek yogurt, extra fresh salsa, creamy guacamole, crisp shredded lettuce, juicy diced tomatoes, hot sauce
Instructions
-
Step 1
Heat 1 tbsp olive oil in a large skillet over medium heat. Sauté diced yellow onion and red bell pepper for 5-7 minutes until softened and translucent. Add optional diced jalapeños now if desired. -
Step 2
Push vegetables to one side. Add 1 lb lean ground beef to the cleared section. Break up the meat and cook for 8-10 minutes until thoroughly browned and no pink remains. Drain any excess fat. -
Step 3
Stir vegetables back with the beef. Sprinkle 1 packet (1 oz) taco seasoning mix over the mixture; stir to coat and cook for 1 minute to toast spices. Add ½ cup water, bring to a gentle simmer, then reduce heat and cook for 5 minutes. -
Step 4
Stir in 1 can (15 oz) refried beans; cook for an additional 2-3 minutes, stirring occasionally, until warmed through and well integrated. Remove from heat. Stir in 1 cup shredded Monterey Jack cheese until mostly melted. Fold in ½ cup chopped fresh cilantro, if using. Let the filling cool slightly. -
Step 5
Preheat oven to 375°F (190°C). Line two large baking sheets with parchment paper or silicone baking mats. -
Step 6
Gently warm 12 large flour tortillas in a microwave (30-60 seconds) or dry skillet (10-15 seconds per side) to make them pliable. Lay one warmed tortilla flat. Scoop about ½ cup of taco filling onto one half, leaving a small border. Sprinkle 2 tbsp shredded Monterey Jack cheese over the filling, then dollop 1 tbsp salsa. Sprinkle another 2 tbsp shredded Monterey Jack cheese on the empty half of the tortilla. -
Step 7
Carefully fold the tortilla in half over the filling, creating a crescent shape. Firmly press and crimp the curved edges with your fingertips or a fork to create a secure seal. Transfer the assembled pocket to a prepared baking sheet, leaving space between each. Repeat with remaining tortillas and filling until you have 12 pockets. -
Step 8
(Optional) For an extra golden-brown and crispy exterior, whisk 1 large egg with 1 tbsp water or milk. Lightly brush this egg wash over the tops of the assembled pockets. -
Step 9
Bake for 18-22 minutes, or until the pockets are rich golden-brown, crispy, and the cheese inside is thoroughly melted and bubbling. Rotate baking sheets halfway through if needed for even browning. -
Step 10
Remove from the oven and allow the pockets to rest on the baking sheets for 5-10 minutes before serving. This allows the filling and cheese to set slightly, making them easier and safer to handle. -
Step 11
Serve your Cheesy Loaded Beef Pocket Tacos with a variety of optional toppings such as cool sour cream or Greek yogurt, extra fresh salsa, creamy guacamole, crisp shredded lettuce, and juicy diced tomatoes. For beverages, consider a refreshing iced tea, agua fresca, or creamy horchata. Enjoy!
Important Information
Nutrition Facts (Per Serving)
It is important to consider this information as approximate and not to use it as definitive health advice.
Allergy Information
Please check ingredients for potential allergens and consult a health professional if in doubt.


Leave a Comment