
Crispy Chicken Caesar Sandwich is more than just a meal; it’s an experience, a symphony of textures and flavors that dance on your palate. Who doesn’t adore the satisfying crunch of perfectly fried chicken nestled against the cool, creamy tang of Caesar dressing, all embraced by a soft, yielding bun? It’s the ultimate comfort food, elevated. What truly sets this particular version of the Crispy Chicken Caesar Sandwich apart is its meticulous balance. We’re talking about a chicken that’s seasoned to perfection and fried to an irresistible crispness, not too greasy, not too dry. Then there’s the homemade Caesar dressing, a velvety masterpiece that cuts through the richness with its zesty anchovy and garlic notes, brightened by a hint of lemon. Finally, the thoughtful inclusion of fresh, crisp romaine lettuce and a sprinkle of sharp Parmesan cheese completes this iconic sandwich, making it an irresistible choice for lunch or a casual dinner.
Ingredients:
- ½ cup full-fat mayonnaise
- 3 tbsp Greek yogurt
- 1 tsp Dijon mustard
- 1 tsp Worcestershire sauce
- 2 tbsp fresh lemon juice
- ¼ cup freshly grated Parmesan cheese
- 1-2 garlic cloves, finely minced
- ¼ tsp black pepper
- Pinch of sea salt
- 5 boneless, skinless chicken cutlets (ensure they are pounded to an even thickness of about ½ inch for consistent cooking)
- Sea salt, to taste
- Ground black pepper, to taste
- Vegetable oil, for frying (enough to reach about ½ inch depth in your pan)
- ⅓ cup all-purpose flour
- ½ tsp salt (for the flour mixture)
- 4-6 sandwich rolls or brioche buns
- Optional: Crisp romaine lettuce leaves
Preparing the Caesar Dressing
Step 1: Combine the Creamy Base
In a medium-sized bowl, begin extract by whisking together the full-fat mayonnaise and the Greek yogurt. This combination provides a delightful creaminess and a slight tang that forms the perfect foundation for our Caesar dressing. Ensure you whisk until the mixture is smooth and fully incorporated. Don’t worry if it seems a little thick at this stage; the other ingredients will help to loosen it up.
Step 2: Infuse with Flavor
To the mayonnaise and yogurt mixture, add the Dijon mustard, Worcestershire sauce, and fresh lemon juice. The Dijon mustard brings a sharp, peppery note, while the Worcestershire sauce adds a complex layer of umami and spice. The lemon juice is crucial for cutting through the richness and brightens the entire dressing. Stir these ingredients in thoroughly until everything is well combined.
Step 3: Add Savory Depth and Seasoning
Next, gently fold in the freshly grated Parmesan cheese. Using freshly grated cheese makes a significant difference in flavor and texture compared to pre-grated varieties. Add the finely minced garlic cloves. The amount of garlic is subjective, so feel free to adjust based on your preference; one clove offers a subtle hint, while two will provide a more pronounced garlicky punch. Finally, season with ¼ teaspoon of black pepper and a pinch of sea salt. Taste and adjust the salt and pepper as needed. Remember, the Parmesan cheese is already salty, so start light with the added salt. Whisk everything together until the dressing is smooth and homogenous. Set this aside. If you prefer a thinner dressing, you can add a tiny splash of water or a touch more lemon juice.
Cooking the Crispy Chicken
Step 4: Dredge the Chicken for Maximum Crispiness
Prepare your chicken cutlets for frying. Pat them thoroughly dry with paper towels; this is a vital step for achieving a truly crispy coating. In a shallow dish, combine the all-purpose flour with ½ teaspoon of salt. Mix this well. One by one, dredge each chicken cutlet in the seasoned flour, ensuring it’s evenly coated on all sides. Gently shake off any excess flour. This flour coating will create a barrier that helps the chicken fry up to a perfect golden-brown crisp. For an extra crispy coating, you can dip the floured chicken into a beaten egg (not included in the ingredient list above, but a common method) and then back into the flour, creating a double dredge. However, for this recipe, we’re sticking to a simple, effective flour coating.
Step 5: Fry to Golden Perfection
Heat about ½ inch of vegetable oil in a large, heavy-bottomed skillet over medium-high heat. You can test if the oil is hot enough by dropping a tiny piece of flour into it; if it sizzles and floats immediately, the oil is ready. Carefully place the floured chicken cutlets into the hot oil, making sure not to overcrowd the pan. Fry for approximately 3-4 minutes per side, or until the chicken is golden brown and cooked through. The internal temperature should reach 165°F (74°C). Use tongs to carefully flip the chicken to ensure even cooking and browning on both sides. Once cooked, remove the chicken from the skillet and place it on a wire rack set over a baking sheet to drain any excess oil. This rack method helps keep the chicken crispy rather than letting it steam in its own oil. Season the hot, freshly fried chicken immediately with a little more sea salt and ground black pepper to taste.
Assembling the Ultimate Sandwich
Step 6: Building Your Masterpiece
Slice your sandwich rolls or brioche buns in half horizontally. If you like, you can lightly toast them under the broiler or in a toaster oven for a few minutes until they are just warmed and slightly golden. This adds an extra layer of texture and prevents the bun from becoming soggy. Spread a generous amount of your prepared Caesar dressing on both the top and bottom halves of each bun.
Step 7: Layering for Flavor and Texture
Place one of the crispy fried chicken cutlets on the bottom half of each bun. If you’re using romaine lettuce, arrange a few crisp leaves on top of the chicken. Drizzle another spoonful of the Caesar dressing over the lettuce and chicken. Finally, place the top half of the bun over everything to complete your magnificent Crispy Chicken Caesar Sandwich. Serve immediately and enjoy the delightful combination of textures and flavors.

Conclusion:
There you have it – your guide to crafting the ultimate Crispy Chicken Caesar Sandwich! We’ve walked through selecting the perfect chicken, achieving that coveted crispiness, and assembling a sandwich that’s a symphony of textures and flavors. This isn’t just a sandwich; it’s an experience, perfect for a quick lunch, a delightful dinner, or even a sophisticated picnic. Don’t be afraid to get creative with your toppings or to experiment with different types of lettuce. The beauty of the Crispy Chicken Caesar Sandwich lies in its versatility. So go forth, enjoy the process, and savor every delicious bite!
Frequently Asked Questions:
What are some other serving suggestions for the Crispy Chicken Caesar Sandwich?
Beyond enjoying it on its own, the Crispy Chicken Caesar Sandwich pairs wonderfully with a light side salad, a cup of creamy tomato soup, or even a side of seasoned sweet potato fries. It’s also an excellent choice for a casual gathering where you can serve it alongside other finger foods.
Can I make the Crispy Chicken Caesar Sandwich ahead of time?
While the chicken is best enjoyed fresh for maximum crispiness, you can prep some components in advance. The Caesar dressing can be made a day or two prior and stored in an airtight container in the refrigerator. You can also toast the buns and cook the chicken a few hours ahead, reheating gently to maintain crispness. Assemble right before serving for the best results.
Are there any ways to make the Crispy Chicken Caesar Sandwich healthier?
Absolutely! For a healthier take on the Crispy Chicken Caesar Sandwich, consider using chicken breast and opting for baking or air-frying the chicken instead of deep-frying. You can also reduce the amount of mayonnaise in the Caesar dressing or use a lighter version. Whole wheat buns are another great substitution.
Crispy Chicken Caesar Sandwich-The Ultimate Bite
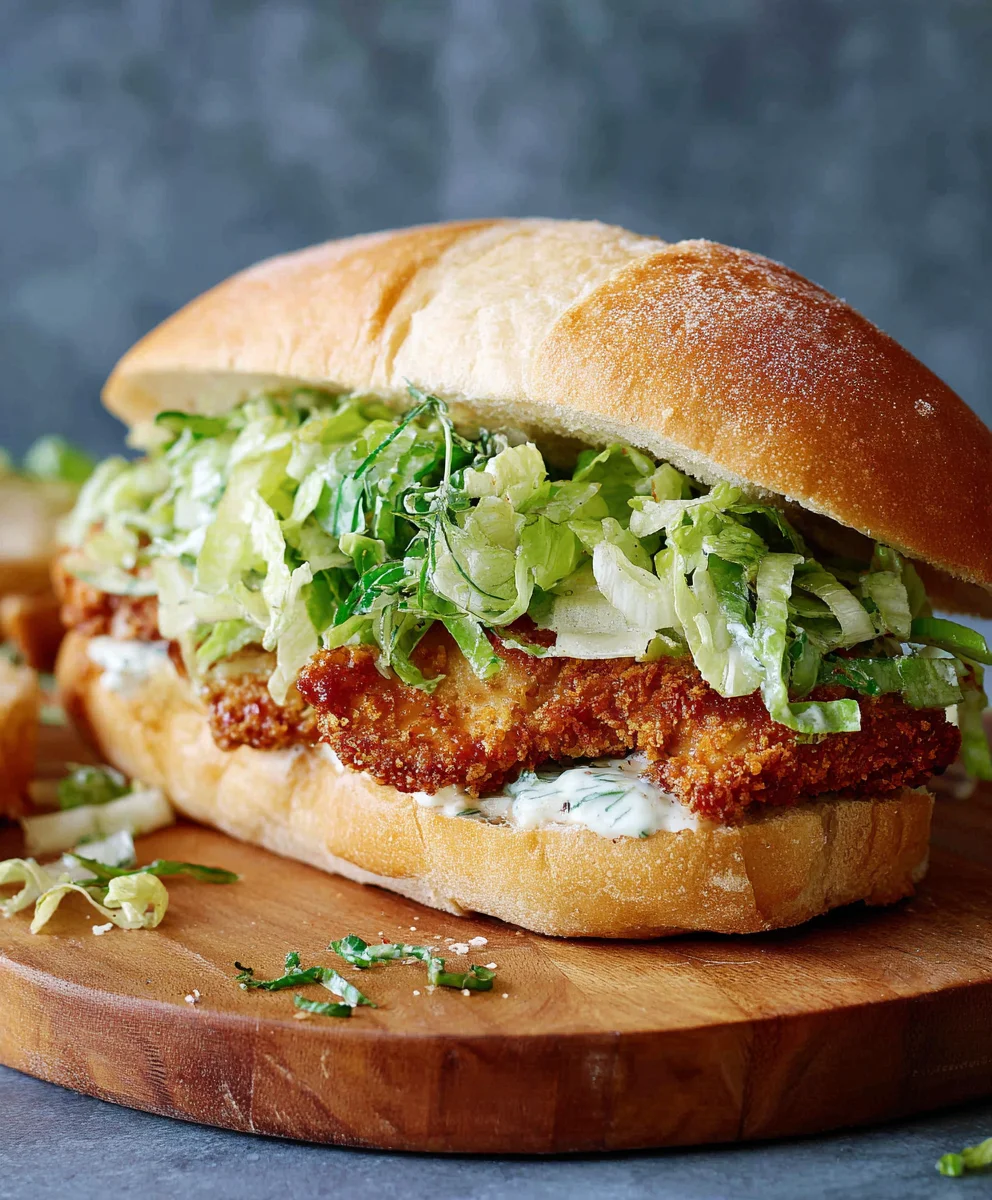
An ultimate bite featuring crispy fried chicken cutlets smothered in creamy homemade Caesar dressing, served on toasted sandwich rolls.
Ingredients
-
½ cup full-fat mayonnaise
-
3 tbsp Greek yogurt
-
1 tsp Dijon mustard
-
1 tsp Worcestershire sauce
-
2 tbsp fresh lemon juice
-
¼ cup freshly grated Parmesan cheese
-
1-2 garlic cloves, finely minced
-
¼ tsp black pepper
-
Pinch of sea salt
-
5 boneless, skinless chicken cutlets
-
Sea salt, to taste
-
Ground black pepper, to taste
-
Vegetable oil, for frying
-
⅓ cup all-purpose flour
-
½ tsp salt (for the flour mixture)
-
4-6 sandwich rolls or brioche buns
-
Optional: Crisp romaine lettuce leaves
Instructions
-
Step 1
Combine mayonnaise and Greek yogurt in a bowl. Whisk until smooth. -
Step 2
Add Dijon mustard, Worcestershire sauce, and lemon juice. Stir well to combine. -
Step 3
Fold in grated Parmesan cheese and minced garlic. Season with black pepper and sea salt. Adjust seasoning as needed. Set aside. -
Step 4
Pat chicken cutlets dry. Dredge each cutlet in a mixture of flour and ½ tsp salt, ensuring even coating. Shake off excess flour. -
Step 5
Heat vegetable oil in a skillet over medium-high heat. Fry chicken cutlets for 3-4 minutes per side until golden brown and cooked through (internal temperature 165°F/74°C). Drain on a wire rack. Season with salt and pepper. -
Step 6
Slice sandwich rolls and spread Caesar dressing on both halves. -
Step 7
Place a crispy chicken cutlet on the bottom half of each bun. Add romaine lettuce if desired. Drizzle with more dressing. Top with the other half of the bun.
Important Information
Nutrition Facts (Per Serving)
It is important to consider this information as approximate and not to use it as definitive health advice.
Allergy Information
Please check ingredients for potential allergens and consult a health professional if in doubt.


Leave a Comment