
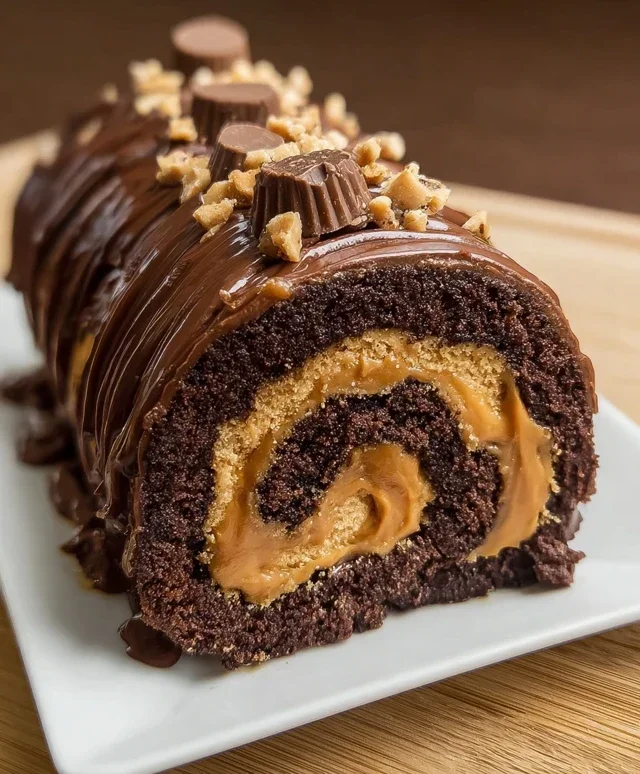
Chocolate Peanut Butter Cake. Ah, the mere mention of it conjures images of pure, unadulterated bliss. If there’s one flavor combination that reigns supreme in the dessert universe, it’s undoubtedly the dynamic duo of rich, decadent chocolate and creamy, salty peanut butter. It’s a classic for a reason, isn’t it? That perfect balance of sweet and savory, smooth and slightly crum extractbly, makes this cake an instant crowd-pleaser. Whether you’re a lifelong fan or discovering its magic for the first time, this Chocolate Peanut Butter Cake promises an experience that’s both comforting and wildly indulgent. What makes this particular iteration so special? We’ve perfected a recipe that delivers an unbelievably moist cake with a deep chocolate flavor that perfectly complements the irresistible swirl of peanut butter. Get ready to fall head over heels!
Chocolate Peanut Butter Cake
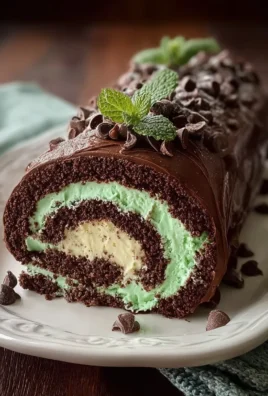
Get ready to embark on a journey to dessert paradise with this incredible Chocolate Peanut Butter Cake. This isn’t just any cake; it’s a decadent masterpiece that perfectly marries the rich intensity of chocolate with the creamy, salty allure of peanut butter. Imagin extracte a moist, fudgy chocolate base swirled with creamy peanut butter goodness, all topped off with a luscious chocolate ganache and a delightful crunch. This recipe is designed to impress, whether you’re a seasoned baker or just looking to whip up something truly special for a celebration or a cozy night in. The combination is classic, comforting, and utterly irresistible. Let’s dive into creating this showstopper!
Ingredients:
Instructions:
1. Crafting the Oreo Crust:
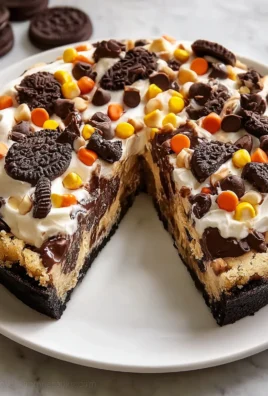
The foundation of this magnificent cake is a no-bake, delightfully crunchy Oreo crust. To achieve this, you’ll first need to process your Oreo cookies into fine crum extractbs. You can do this by placing them in a food processor and pulsing until they resemble coarse sand, or if you don’t have a food processor, place them in a sturdy zip-top bag and crush them with a rolling pin. Once you have your crum extractbs, combine them in a medium bowl with the 1/4 cup of melted unsalted butter. Stir until the crum extractbs are evenly moistened and clump together when squeezed. This ensures your crust will hold its shape. Press this mixture firmly and evenly into the bottom of a 9-inch springform pan. Using the bottom of a glass or the back of a spoon can help create a compact and even layer. Pop this into the freezer while you prepare the filling. This chilling step is crucial for a firm crust.
2. Creating the Luscious Peanut Butter Cheesecake Filling:
Now for the star of the show: the creamy peanut butter cheesecake filling. In a large mixing bowl, beat the softened cream cheese until it’s completely smooth and free of lumps. This is best done with an electric mixer, either a stand mixer fitted with the paddle attachment or a hand mixer. Gradually add the 1 1/3 cups of sugar and continue to beat until the mixture is light and fluffy. Scrape down the sides of the bowl frequently to ensure everything is incorporated. Next, add the 4 large eggs, one at a time, beating well after each addition. It’s important not to overmix at this stage once the eggs are added, as this can lead to cracks in your cheesecake. In a separate bowl, combine the 1 cup of smooth peanut butter, 2 tsp of vanilla extract, and 1/3 cup of heavy cream. Whisk this together until it’s smooth and well combined. Gently fold this peanut butter mixture into the cream cheese batter. Be careful not to overmix; you want to incorporate it until just combined to maintain that wonderful creamy texture.
3. Assembling and Baking the Cake:
Retrieve your chilled Oreo crust from the freezer. Pour about half of the peanut butter cheesecake filling over the crust, spreading it evenly. Next, sprinkle 1 1/4 cups of miniature chocolate chips over the filling. Then, carefully pour the remaining peanut butter cheesecake filling over the chocolate chips, ensuring they are covered. Gently smooth the top with a spatula. Now, it’s time to bake. Preheat your oven to 325 degrees Fahrenheit (160 degrees Celsius). You’ll want to bake this cake in a water bath to ensure even cooking and prevent cracking. To do this, wrap the outside of your springform pan tightly with heavy-duty aluminum foil, ensuring no water can seep in. Place the foiled springform pan inside a larger baking pan. Carefully pour hot water into the larger baking pan until it comes about halfway up the sides of the springform pan. Bake for approximately 60-75 minutes, or until the edges of the cheesecake are set and the center is still slightly jiggly.
4. Cooling and Chilling for Perfection:
Once the baking time is complete, turn off the oven but leave the cheesecake inside with the oven door slightly ajar for about an hour. This gradual cooling process further helps prevent cracking. After the hour, carefully remove the cheesecake from the water bath and remove the foil. Let it cool completely on a wire rack. Once it has reached room temperature, cover the cheesecake loosely with plastic wrap and refrigerate for at least 6 hours, or preferably overnight. Chilling is absolutely essential for the cheesecake to set properly and for its flavors to meld together beautifully. A well-chilled cheesecake will have the perfect texture and be much easier to slice.
5. The Decadent Chocolate Ganache Topping:
While your cheesecake is chilling, let’s prepare the luxurious chocolate ganache. In a heatproof bowl, combine the 1 1/2 cups of milk chocolate chips (or finely chopped milk chocolate) with the 1/2 cup of heavy cream. Gently heat this mixture. You can do this by placing the bowl over a saucepan of simmering water (a double boiler method), ensuring the bottom of the bowl doesn’t touch the water. Stir continuously until the chocolate is completely melted and the ganache is smooth and glossy. Alternatively, you can microwave the chocolate chips and cream in 30-second intervals, stirring well after each interval, until melted and smooth. Once the ganache is ready, let it cool slightly, but not to the point of solidifying.
6. Finishing Touches and Serving:
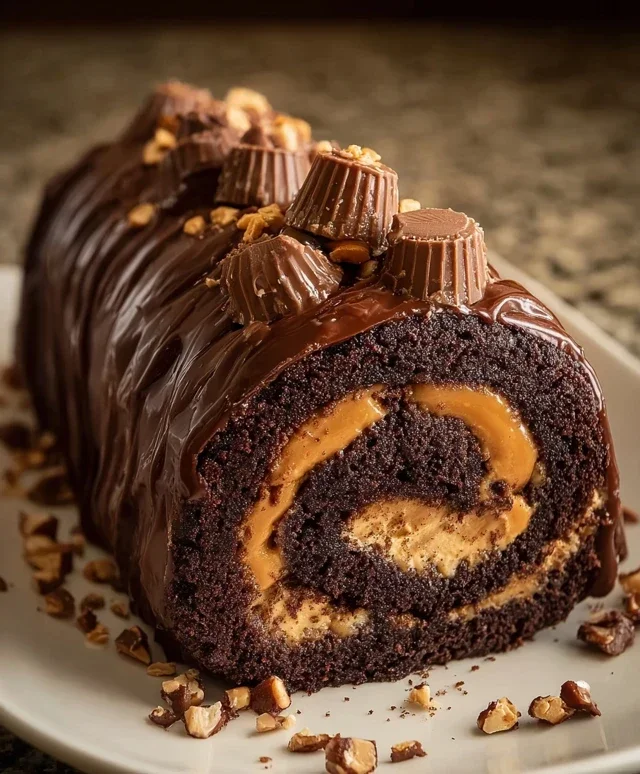
Once your cheesecake is thoroughly chilled and set, it’s time for the final, glorious touches. Gently remove the sides of the springform pan. Pour the slightly cooled chocolate ganache over the top of the cheesecake, allowing it to drip artfully down the sides. You can use an offset spatula to spread it evenly if needed. Immediately sprinkle the top generously with chopped Reese’s cups and crushed roasted peanuts. These toppings not only add a delightful visual appeal but also provide fantastic texture and complementary flavors. Let the ganache set for about 15-20 minutes at room temperature, or pop it in the fridge for a few minutes if you want it to set faster. Slice your magnificent Chocolate Peanut Butter Cake with a sharp knife dipped in hot water for clean cuts. Prepare for rave reviews!
Conclusion:
There you have it – a recipe for a truly decadent Chocolate Peanut Butter Cake that I’m absolutely sure you’ll adore. This cake strikes the perfect balance between rich, dark chocolate and creamy, salty peanut butter, making it an irresistible treat for any occasion. The combination is a classic for a reason, and this recipe ensures a moist crum extractb and intensely satisfying flavor profile. Whether you’re celebrating a birthday, hosting a gathering, or simply craving something extraordinary, this cake is guaranteed to impress.
For serving, I highly recommend a generous dollop of whipped cream or a scoop of vanilla bean ice cream. A drizzle of extra peanut butter sauce or chocolate ganache takes it to an entirely new level! If you’re feeling adventurous, consider adding mini peanut butter cups to the batter before baking or sprinkling chopped peanuts on top for added texture. Don’t be afraid to experiment and make this Chocolate Peanut Butter Cake your own!
Frequently Asked Questions:
Q: Can I make this cake ahead of time?
A: Absolutely! This Chocolate Peanut Butter Cake is even better the next day, allowing the flavors to meld beautifully. Once cooled, store it in an airtight container at room temperature for up to 3 days, or refrigerate for up to 5 days.
Q: What if I don’t have unsweetened cocoa powder?
A: You can use Dutch-processed cocoa powder, but be aware that it has a milder flavor and less acidity, which might slightly affect the leavening. For the best results, unsweetened cocoa powder is recommended.
Q: How can I make this cake dairy-free?
A: For a dairy-free version, substitute the butter with dairy-free margarine or coconut oil, and use a non-dairy milk such as almond or soy milk. Ensure your chocolate chips are also dairy-free.
Chocolate Peanut Butter Cake
A decadent chocolate cake layered with creamy peanut butter filling and topped with chocolate ganache and crushed candies.
Ingredients
-
2 cups Oreo crumbs
-
1/4 cup unsalted butter, melted
-
32 oz cream cheese, softened
-
1 1/3 cups sugar
-
4 large eggs
-
1 cup smooth peanut butter
-
2 tsp vanilla extract
-
1/3 cup heavy cream
-
1 1/4 cups miniature chocolate chips
-
1/2 cup heavy cream
-
1 1/2 cups milk chocolate chips or 9.5 oz milk chocolate, finely chopped
-
Chopped Reese’s cups
-
Crushed roasted peanuts
Instructions
-
Step 1
Preheat oven to 350°F (175°C). Grease and flour a 9-inch cake pan. -
Step 2
In a bowl, combine Oreo crumbs and melted butter. Press mixture into the bottom of the prepared cake pan to form the crust. -
Step 3
In a large bowl, beat cream cheese and sugar until smooth. Beat in eggs one at a time. Stir in peanut butter and vanilla extract. -
Step 4
Pour 1/2 cup of heavy cream into a small saucepan and heat until simmering. Remove from heat and stir in the milk chocolate chips until melted and smooth. Stir in the remaining 1/3 cup heavy cream and 1 1/4 cups miniature chocolate chips until melted and smooth. -
Step 5
Pour half of the peanut butter mixture over the crust. Spoon half of the chocolate ganache over the peanut butter layer. Repeat with the remaining peanut butter mixture and chocolate ganache. -
Step 6
Bake for 60-70 minutes, or until a toothpick inserted into the center comes out clean. Let cool completely in the pan. -
Step 7
Once cooled, spread chopped Reese’s cups and crushed roasted peanuts over the top of the cake.
Important Information
Nutrition Facts (Per Serving)
It is important to consider this information as approximate and not to use it as definitive health advice.
Allergy Information
Please check ingredients for potential allergens and consult a health professional if in doubt.
Leave a Comment