
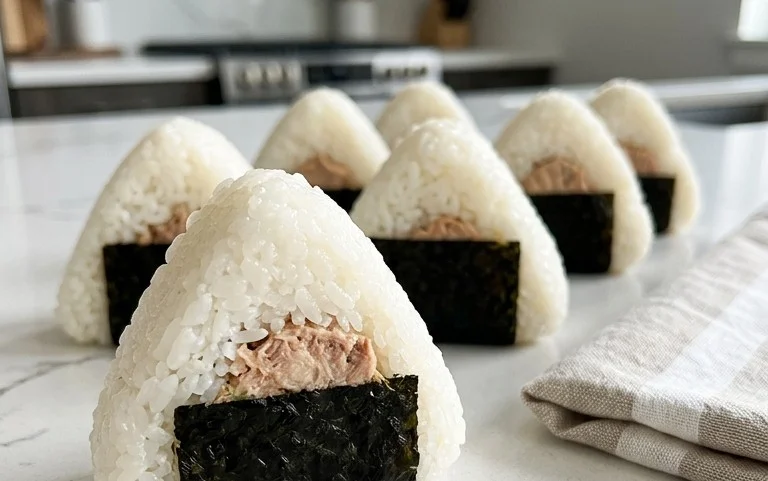
15-min. Easy Japanese Tuna Onigiri are a true lifesaver when hunger strikes and time is short! These delightful rice balls are a cornerstone of Japanese convenience food, and for good reason. They’re incredibly satisfying, packed with flavor, and remarkably simple to assemble. I adore Japanese Tuna Onigiri because they offer a perfect balance of comforting, fluffy rice and a savory, slightly tangy tuna filling. What makes this particular recipe truly special is its speed – you can have these delicious spheres ready in just 15 minutes, making them ideal for a quick lunch, a speedy snack, or even a light dinner when you’re craving something wholesome and delicious without the fuss.
Why You’ll Love This Recipe:
Forget complicated steps and long cooking times. This 15-min. Easy Japanese Tuna Onigiri recipe is designed for maximum flavor with minimal effort. It’s the perfect gateway into making your own Japanese comfort food, and once you try it, you’ll understand why onigiri are so universally loved.
15-Min Easy Japanese Tuna Onigiri
Craving a quick, satisfying, and authentically Japanese snack or light meal? Look no further than Tuna Onigiri! These delightful rice balls are incredibly versatile, perfect for a busy lunchbox, a portable snack on the go, or a simple yet delicious addition to any meal. The best part? You can whip them up in just about 15 minutes, especially if you have some cooked rice ready. This recipe focuses on the classic and beloved tuna mayonnaise filling, a flavor combination that’s both comforting and incredibly tasty. Let’s get started on making these simple yet satisfying rice treats!
Ingredients:
Instructions:
Preparing the Tuna Filling
First things first, let’s get our delicious tuna filling ready. Open your can of tuna and drain any excess liquid. If you’re using tuna packed in oil, I find it adds a wonderful richness to the filling, but tuna in water works perfectly fine too. In a small bowl, flake the drained tuna with a fork. Add the mayonnaise to the flaked tuna. Japanese mayonnaise, like Kewpie, has a distinctive creamy and slightly tangy flavor that’s fantastic in onigiri, but regular mayonnaise will also give you a great result. Mix everything together thoroughly until the tuna is well coated and forms a cohesive filling. You want it to be moist but not overly wet, so it holds its shape when you form the rice balls.
Seasoning the Rice
Now, onto the rice! The key to great onigiri is perfectly seasoned rice. If you’ve just cooked your short-grain rice, let it cool slightly so it’s warm but not piping hot. This makes it easier to handle. If you’re using leftover cooked rice, gently warm it up in the microwave or on the stovetop until it’s pleasantly warm. In a medium bowl, transfer your cooked rice. Sprinkle the 1/2 teaspoon of salt evenly over the rice. Gently mix the salt into the rice using a rice paddle or a large spoon. The goal here is to distribute the salt evenly without mashing the grains of rice. You want each grain to be seasoned, which will enhance the overall flavor of your onigiri. Don’t skip this step – it makes a significant difference!
Forming the Onigiri – The Fun Part!
This is where the magic happens! It’s time to shape our rice into those iconic onigiri forms. You’ll want to slightly dampen your hands with water. This prevents the rice from sticking to your palms. You can either have a small bowl of water nearby or run your hands under the tap briefly. Take about 1/2 cup of the seasoned rice into your dampened hand. Gently cup your hand and start to press the rice together. You can form it into a classic triangle, a round ball, or even a simple cylinder – whatever shape you prefer! Don’t press too hard, as you don’t want to create dense, heavy rice balls. Aim for a shape that feels secure and holds together.
Adding the Filling and Sealing
Once you have a nice base of rice formed in your hand, make a small indentation in the center of the rice mound with your finger. This is where we’ll place our delicious tuna mayo filling. Spoon about 1 to 2 tablespoons of the prepared tuna mixture into the indentation. Don’t overfill it, or it might spill out when you close the onigiri. Now, gently bring the edges of the rice up and over the filling, sealing it completely. Continue to gently shape the onigiri with your hands, ensuring the filling is tucked away inside and the rice forms a neat shape. If any rice sticks to your hands, just re-dampen them and continue shaping. The warmth of the rice helps it stick together, so work relatively quickly.
Wrapping with Nori and Garnishing
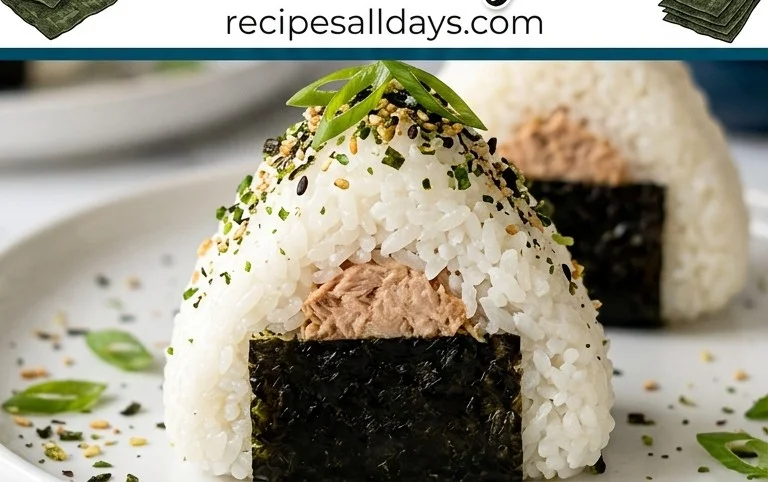
The final touch to make your onigiri look and taste even more amazing! Take one sheet of nori. If you’re using the full sheets, you can cut them into strips or shapes that best fit your onigiri. A common way is to wrap a strip around the bottom of the triangle or ball. If you prefer less nori, you can simply use a smaller piece. Gently press the nori onto the surface of your formed onigiri. The moisture from the rice will help it adhere. If you’re using sesame seeds for garnish, you can sprinkle them over the onigiri at this stage, pressing them gently into the rice. This adds a lovely visual appeal and a nutty crunch. You can also lightly toast the sesame seeds before adding them for an extra layer of flavor.
And there you have it! Your incredibly simple and delicious 15-minute Japanese Tuna Onigiri are ready to be enjoyed. They are best eaten fresh, but they will keep for a few hours at room temperature. If you need to store them for longer, wrap them tightly in plastic wrap and refrigerate. When you’re ready to eat chilled onigiri, you might find they are best enjoyed at room temperature, so let them sit out for a bit before diggin extractg in.
Conclusion:
There you have it – a delicious and incredibly satisfying 15-min. easy Japanese tuna onigiri! This recipe is fantastic because it’s so incredibly quick to prepare, making it perfect for busy weeknights, a speedy lunchbox addition, or even a light snack. The simple combination of rice, flavorful tuna, and a hint of seasoning creates a wonderfully comforting and versatile treat. These onigiri are not just easy; they’re a taste of authentic Japanese home cooking that you can whip up in a flash. Don’t be afraid to get your hands a little sticky – that’s part of the fun!
I love serving these onigiri on their own, perhaps with a side of miso soup for a more complete meal. They also make a great addition to a bento box, paired with some edamame or pickled gin extractger. For variations, feel free to experiment! Add a sprinkle of furikake (rice seasoning) inside for extra flavor, or mix in some finely chopped cucumber for a delightful crunch. You could also swap the canned tuna for salmon or even some seasoned cooked chicken. The possibilities are truly endless!
I truly encourage you to give this 15-min. easy Japanese tuna onigiri recipe a try. It’s a gateway to delicious and simple Japanese cuisine that you’ll find yourself making again and again.
Frequently Asked Questions:
Q: Can I make the rice ahead of time for even faster onigiri?
Absolutely! Cooking your sushi rice a day in advance and storing it in the refrigerator is a great time-saver. Just be sure to gently reheat it before forming your onigiri to make it pliable and easier to work with.
Q: What kind of tuna is best for this recipe?
Canned tuna packed in water or oil both work well. If using tuna in oil, drain it well to avoid making the rice too greasy. Light tuna often has a milder flavor, while albacore can be a bit richer. It’s really a matter of personal preference!
15-min. Easy Japanese Tuna Onigiri
Quick and simple Japanese rice balls filled with seasoned tuna and mayonnaise, perfect for a light meal or snack.
Ingredients
-
2 cups cooked short grain rice
-
1/2 tsp salt
-
5.29 oz canned tuna (in oil recommended, or canned tuna in water)
-
2 tbsp Japanese mayo
-
2 sheets nori
-
1 tsp sesame seeds
Instructions
-
Step 1
In a bowl, season the cooked short grain rice with salt. Gently mix to distribute evenly. -
Step 2
Drain the canned tuna. In a separate small bowl, flake the tuna and mix it with the Japanese mayonnaise. -
Step 3
Wet your hands slightly to prevent rice from sticking. Take about 1/2 cup of seasoned rice and flatten it in your palm. -
Step 4
Place about 1-2 tablespoons of the tuna-mayo mixture in the center of the flattened rice. Alternatively, you can mix the tuna mixture directly into the rice before shaping. -
Step 5
Gently shape the rice around the filling to form a ball or triangle, pressing firmly but not too hard. -
Step 6
Cut the nori sheets into strips or desired shapes for wrapping the onigiri. -
Step 7
Wrap the nori around the onigiri. Sprinkle with sesame seeds for garnish, if desired.
Important Information
Nutrition Facts (Per Serving)
It is important to consider this information as approximate and not to use it as definitive health advice.
Allergy Information
Please check ingredients for potential allergens and consult a health professional if in doubt.


Leave a Comment