
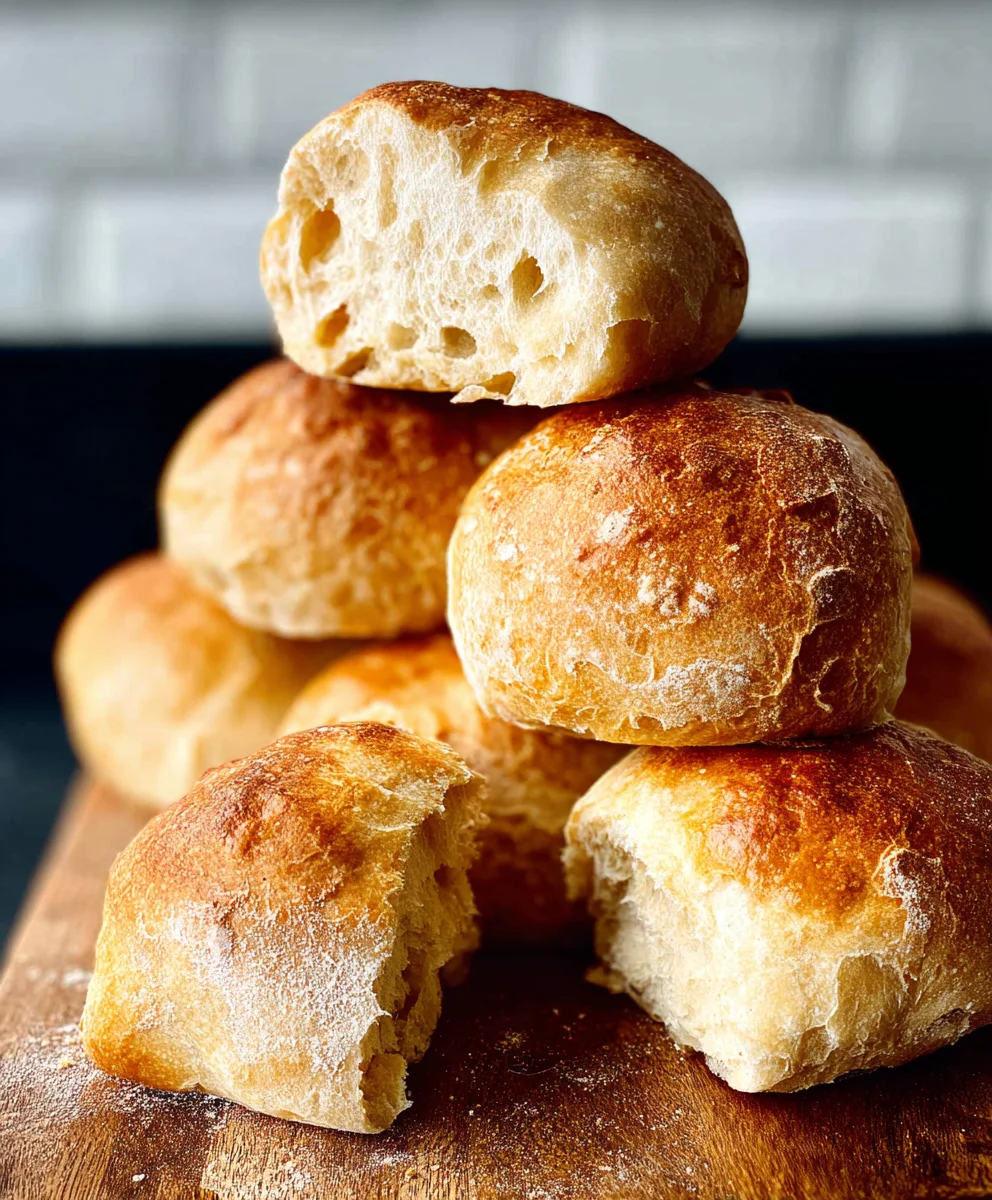
No Knead Crusty Rolls are a revelation for home bakers, transforming what often feels like a daunting task into an achievable delight. Imagin extracte the sheer satisfaction of pulling a batch of golden, perfectly browned rolls from your oven, their interiors impossibly soft and airy, while the exterior boasts that irresistible, shattering crust. That’s the magic of these No Knead Crusty Rolls. People adore them because they deliver bakery-quality results with minimal effort, making them ideal for busy weeknights or impressing guests without a fuss. What truly sets these rolls apart is the clever combination of a simple, hands-off dough that ferments and develops flavor over time, alongside a baking technique that encourages that signature, satisfying crunch. Get ready to experience the joy of freshly baked bread like never before.
Ingredients:
- 1.5 cups (360ml) lukewarm water (about 105-115°F or 40-46°C)
- 1 teaspoon active dry yeast
- 1 teaspoon granulated sugar
- 3.5 cups (430g) all-purpose flour, plus more for dusting
- 1.5 teaspoons fine sea salt
- 1 tablespoon olive oil, plus more for greasing
Preparing the Dough: The Overnight Rise
Step 1: Activating the Yeast
The foundation of these no-knead crusty rolls lies in a simple, patient fermentation process. Begin extract by gathering your lukewarm water. It’s crucial that the water isn’t too hot, as this can kill the yeast, nor too cold, which will prevent it from activating properly. Aim for a temperature that feels comfortably warm to the touch, similar to bathwater. Pour this into a medium-sized mixing bowl. Add the active dry yeast and the granulated sugar to the water. The sugar acts as food for the yeast, helping it to awakegin extractnd begin its work. Give it a gentle stir to combine. Let this mixture sit undisturbed for about 5 to 10 minutes. You should see a foamy, bubbly layer form on the surface. This indicates that the yeast is alive and active, ready to leaven your dough. If you don’t see this foam, your yeast may be old or the water temperature was off, and it’s best to start again with fresh yeast.
Step 2: Combining the Dry Ingredients and Forming the Shaggy Dough
Once your yeast is frothy and active, it’s time to introduce the dry ingredients. In a separate, larger mixing bowl, whisk together the all-purpose flour and the fine sea salt. The salt is essential for flavor and also helps to control the yeast activity. Now, pour the activated yeast mixture into the bowl with the flour and salt. Add the tablespoon of olive oil to the mix. Using a sturdy spoon gin extracta spatula, begin to stir everything together. You want to incorporate the wet ingredients into the dry until no dry flour remains. The dough will be very shaggy, wet, and sticky at this stage – it won’t look like a typical kneaded dough, and that’s exactly what we’re aiming for. Resist the urge to add more flour at this point; the high hydration is key to the open crum extractb structure of these rolls. Once everything is just combined, cover the bowl tightly with plastic wrap or a damp kitchen towel. Place the bowl in a warm, draft-free spot for its first rise. This rise is quite long, typically lasting between 12 to 18 hours, or even up to 24 hours if your kitchen is on the cooler side. The longer, slower fermentation develops wonderful flavor and texture.
Shaping and Baking the Rolls
Step 3: Preparing for Shaping
After the long, overnight fermentation, you’ll notice your dough has more than doubled in size, is bubbly, and has a distinct yeasty aroma. It will also be quite sticky. Lightly grease a clean work surface or a large cutting board with a little olive oil. You can also lightly dust your hands with flour, but try to use as little as possible to maintain the dough’s hydration. Gently scrape the dough out of the bowl onto your prepared surface. It will be a very wet and slack dough, so handle it as little as possible to preserve the air bubbles created during fermentation.
Step 4: Dividing and Shaping the Rolls
Now, we’ll divide the dough into portions. You can use a bench scraper or a sharp knife to cut the dough into approximately 6 to 8 equal pieces. The exact size will depend on how large you want your rolls to be. For each piece of dough, gently fold the edges towards the center to create a rough ball shape. You don’t need to knead or create tension in the dough like you would with a traditional bread. Simply gather the edges and pinch them together to form a rustic round. Don’t worry if they aren’t perfectly shaped; the rustic look is part of their charm. Arrange the shaped rolls on your prepared surface, leaving a little space between them as they will puff up during the final rise. At this point, you can either let them rest for another 30-60 minutes at room temperature for a second, shorter rise, or you can proceed directly to baking if you prefer a denser texture. For a slightly puffier roll, a short second rise is recommended.
Step 5: Baking for Ultimate Crustiness
This is where the magic of the crust happens. Preheat your oven to 450°F (230°C) with a Dutch oven or a heavy baking pan inside. If you don’t have a Dutch oven, a regular heavy baking sheet will work, but placing another pan on the rack below to catch drips and create steam is a good idea. Once the oven is preheated, carefully remove the hot Dutch oven. Gently place the shaped rolls into the hot Dutch oven, or onto your preheated baking sheet. If using a Dutch oven, cover it with the lid. This traps the steam released from the dough, which is crucial for developing a wonderfully crisp and golden-brown crust. Carefully place the Dutch oven (or baking sheet) back into the hot oven. Bake with the lid on for 20 minutes. After 20 minutes, carefully remove the lid. This allows the steam to escape and the crust to crisp up. Continue baking for another 10-15 minutes, or until the rolls are deeply golden brown and sound hollow when tapped on the bottom. The internal temperature should register around 200-210°F (93-99°C). Carefully remove the rolls from the oven and place them on a wire rack to cool completely. This is essential for allowing the crust to fully set and the interior to become perfectly tender. Enjoy the incredibly satisfying crunch!
Conclusion:
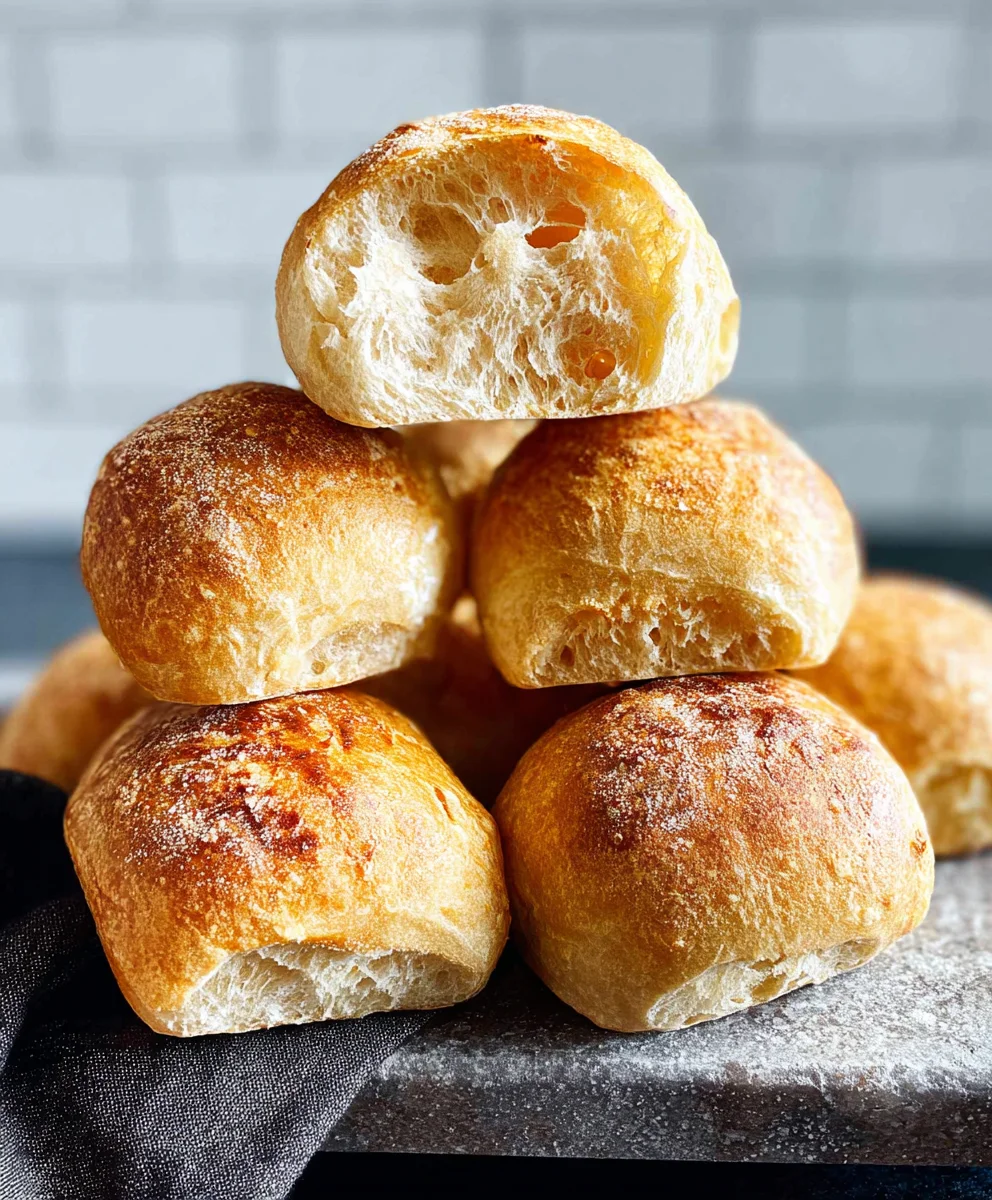
And there you have it – your guide to creating perfect No Knead Crusty Rolls! We’ve walked through a simple yet rewarding process that yields incredibly delicious, crusty rolls with minimal effort. The beauty of this recipe lies in its simplicity and the fantastic results, proving that you don’t need hours of kneading to achieve bakery-quality bread at home. I truly hope you enjoy baking and, more importantly, savoring these delightful rolls. They are truly a testament to the magic of patient rising and a hot oven.
These No Knead Crusty Rolls are incredibly versatile. Serve them warm alongside your favorite soups and stews, as the perfect accompaniment to a charcuterie board, or simply slathered with butter for a satisfying snack. For a more substantial meal, they make excellent sandwich buns. Feel free to experiment with additions like herbs, garlic powder, or a sprinkle of sesame seeds on top before baking for an extra layer of flavor and texture.
Frequently Asked Questions:
Can I make these No Knead Crusty Rolls ahead of time?
Yes, you can bake the rolls and then store them in an airtight container at room temperature for up to 2 days. For longer storage, they freeze beautifully. Once cooled, wrap them tightly in plastic wrap and then place them in a freezer bag. Reheat them in a warm oven for a few minutes to bring back their crusty texture.
What if my No Knead Crusty Rolls don’t get very crusty?
The key to a good crust is steam during the initial baking phase. Ensure your oven is fully preheated and consider placing a pan of hot water on the bottom rack of your oven while it preheats and for the first 15-20 minutes of baking. This creates the necessary steam environment. Also, baking directly on a preheated baking stone or Dutch oven can enhance crispiness.
Can I use different types of flour for these No Knead Crusty Rolls?
While the recipe is optimized for all-purpose flour, you can experiment with a blend of whole wheat or bread flour. Keep in mind that these flours can absorb more liquid, so you might need to adjust the water quantity slightly. It’s best to start with the recipe as written and then make minor adjustments on subsequent attempts based on your experience.
Easy No Knead Crusty Rolls
Simple no-knead recipe for creating incredibly crusty and delicious rolls with a soft, airy interior. Perfect for any meal.
Ingredients
-
1.5 cups (360ml) lukewarm water (about 105-115°F or 40-46°C)
-
1 teaspoon active dry yeast
-
1 teaspoon granulated sugar
-
3.5 cups (430g) all-purpose flour, plus more for dusting
-
1.5 teaspoons fine sea salt
-
1 tablespoon olive oil, plus more for greasing
Instructions
-
Step 1
Combine lukewarm water, active dry yeast, and granulated sugar in a medium bowl. Let stand for 5-10 minutes until foamy, indicating the yeast is active. -
Step 2
In a larger bowl, whisk together all-purpose flour and fine sea salt. Pour in the activated yeast mixture and olive oil. Stir with a spoon or spatula until just combined, forming a shaggy, wet dough. Cover tightly and let rise in a warm spot for 12-18 hours. -
Step 3
Lightly grease a clean work surface or cutting board with olive oil. Gently scrape the risen, sticky dough onto the prepared surface, handling it as little as possible to preserve air bubbles. -
Step 4
Using a bench scraper or sharp knife, divide the dough into 6-8 equal pieces. Gently fold the edges of each piece towards the center to form rough ball shapes. Arrange the shaped rolls on the surface, leaving space between them. -
Step 5
Preheat oven to 450°F (230°C) with a Dutch oven or heavy baking pan inside. Carefully place the shaped rolls into the hot Dutch oven (or onto a preheated baking sheet). If using a Dutch oven, cover with the lid. Bake for 20 minutes. -
Step 6
Remove the lid from the Dutch oven. Continue baking for another 10-15 minutes, or until rolls are deeply golden brown and sound hollow when tapped. Remove from oven and cool completely on a wire rack.
Important Information
Nutrition Facts (Per Serving)
It is important to consider this information as approximate and not to use it as definitive health advice.
Allergy Information
Please check ingredients for potential allergens and consult a health professional if in doubt.


Leave a Comment