
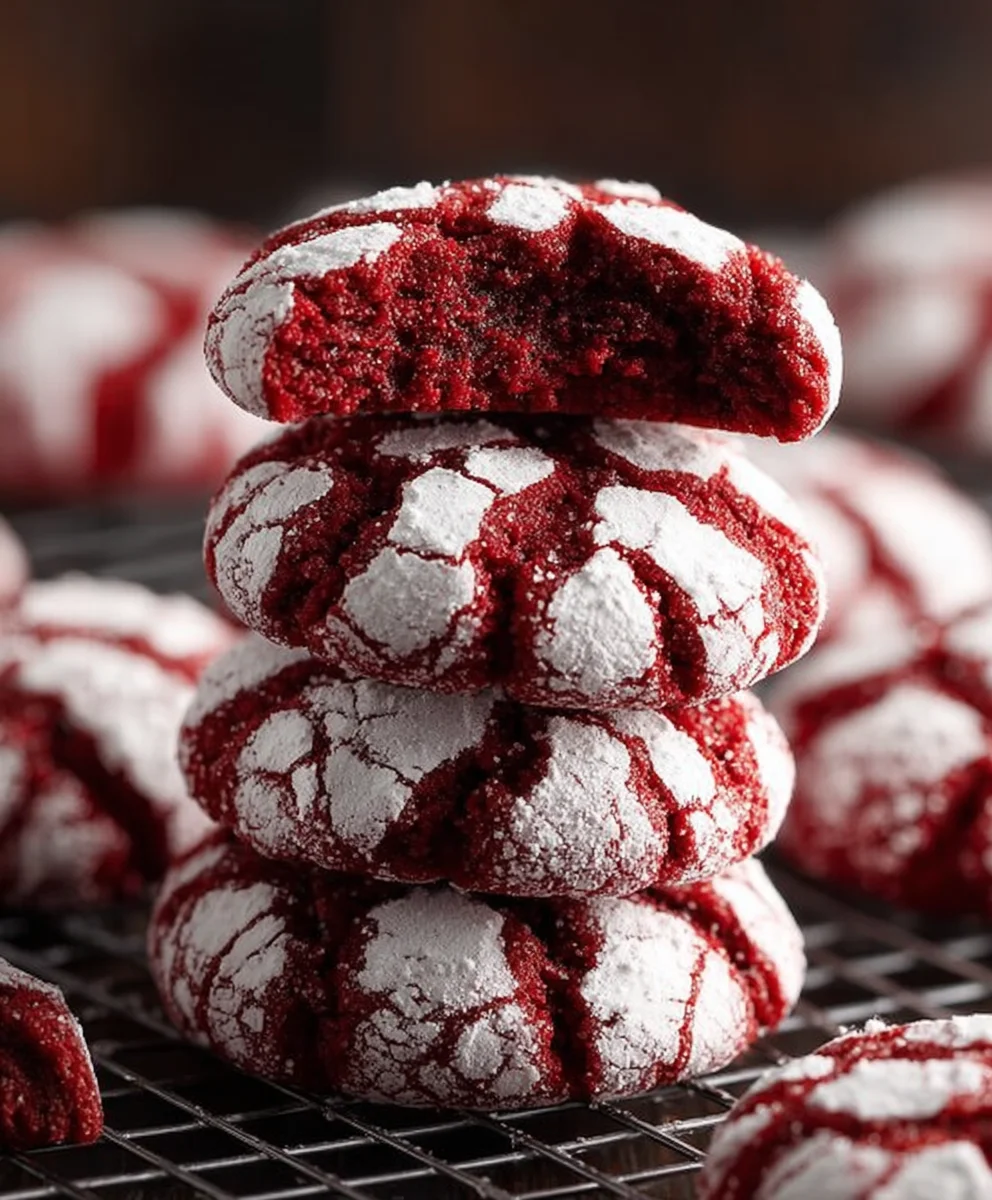
Red Velvet Crinkle Cookies are more than just a festive treat; they’re a delightful paradox in every bite. Imagin extracte the deep, dramatic hue of red velvet cake, but transformed into a soft, chewy cookie, dusted with a snowy crown of powdered sugar that cracks to reveal its ruby interior. That’s the magic of Red Velvet Crinkle Cookies, a beloved confection that consistently wows guests and satisfies the deepest sweet cravings. What makes them so utterly irresistible? It’s the perfect marriage of textures and flavors: the slightly tangy, rich cocoa notes of the red velvet, balanced by the sweetness of the dough, all enveloped in that signature crinkled, sugary shell. They’re the ideal accompaniment to a warm mug of coffee or a glass of cold milk, and their vibrant color makes them a showstopper for any occasion, from holiday gatherings to spontaneous dessert desires.
Ingredients:
- 1 1/2 cups all-purpose flour
- 1/2 cup unsweetened cocoa powder
- 1 teaspoon baking powder
- 1/4 teaspoon salt
- 1/2 cup unsalted butter, softened
- 1 cup granulated sugar
- 2 large eggs
- 1 teaspoon vanilla extract
- 1 tablespoon red food coloring
- 1/2 cup powdered sugar, for rolling
Preparing the Red Velvet Dough
Step 1: Combine Dry Ingredients
First, we’ll get our dry ingredients ready. In a medium-sized bowl, whisk together the 1 1/2 cups of all-purpose flour, 1/2 cup of unsweetened cocoa powder, 1 teaspoon of baking powder, and 1/4 teaspoon of salt. Whisking them together helps to distribute the leavening agent (baking powder) evenly throughout the flour, ensuring consistent rising of your cookies. It also breaks up any lumps in the cocoa powder, preventing pockets of bitterness in the finished cookies. Set this dry mixture aside for now.
Step 2: Cream Butter and Sugar, Then Add Wet Ingredients
In a separate, larger bowl, or the bowl of your stand mixer, cream together the 1/2 cup of softened unsalted butter and 1 cup of granulated sugar. Creaming means beating them together until the mixture is light and fluffy. This process incorporates air into the butter and sugar, which contributes to the tender texture of the cookies. Once it’s light and pnon-alcoholic ale, beat in the 2 large eggs, one at a time, making sure each egg is fully incorporated before adding the next. Next, stir in the 1 teaspoon of vanilla extract. Finally, add the 1 tablespoon of red food coloring. Mix everything thoroughly until you have a vibrant, uniformly red batter. Don’t be shy with the food coloring; a full tablespoon is usually needed to achieve that classic intense red velvet hue.
Forming and Baking the Crinkle Cookies
Step 3: Combine Wet and Dry Mixtures
Now it’s time to bring our wet and dry ingredients together. Gradually add the dry ingredients (from Step 1) to the wet ingredients (from Step 2) in batches, mixing on low speed or by hand until just combined. Be careful not to overmix the dough. Overmixing develops the gluten in the flour too much, which can result in tough cookies. You want to mix until you no longer see streaks of dry flour. The dough will be thick and somewhat sticky at this stage, which is exactly what we’re looking for.
Step 4: Chill the Dough and Prepare for Rolling
This next step is crucial for easy handling and that signature crinkled look. Cover the bowl with plastic wrap and refrigerate the dough for at least 30 minutes, or up to 2 days. Chilling the dough makes it much firmer and easier to scoop and roll, preventing it from spreading too much during baking. While the dough is chilling, place the 1/2 cup of powdered sugar into a shallow bowl. This powdered sugar will be used to coat the cookie dough balls, creating the beautiful white crinkles on the outside. Preheat your oven to 350°F (175°C) and line baking sheets with parchment paper.
Step 5: Shape and Roll the Cookies
Once the dough has chilled sufficiently, it’s time to shape the cookies. Scoop out rounded tablespoons of the chilled dough. Using your hands, roll each portion into a smooth ball. Then, roll each ball generously in the powdered sugar, ensuring it’s fully coated. This coating of powdered sugar is what will crack and puff up during baking, creating the characteristic crinkled appearance of these Red Velvet Crinkle Cookies. Place the coated dough balls about 2 inches apart on the prepared baking sheets. The spacing is important to allow them room to spread slightly without touching.
Step 6: Bake to Perfection
Bake the cookies in the preheated oven for 9 to 12 minutes. The exact baking time will depend on your oven and the size of your cookies. You want to bake them until the edges are set and slightly firm to the touch, but the centers still look a little soft and underbaked. They will continue to set as they cool. Overbaking will result in dry, hard cookies. Once baked, let the cookies cool on the baking sheets for 5 minutes before transferring them to a wire rack to cool completely. This initial cooling period on the hot baking sheet helps them firm up further. Enjoy your delightful Red Velvet Crinkle Cookies!
Conclusion:
And there you have it – the secret to perfectly moist and wonderfully festive Red Velvet Crinkle Cookies! This recipe delivers that iconic vibrant red hue and a delightful crackled texture that’s as beautiful as it is delicious. The slight tang from the cream cheese balanced with the rich cocoa and sweet vanilla makes these cookies a true showstopper. They’re surprisingly simple to whip up, making them perfect for last-minute celebrations or just a sweet treat to brighten your day.
I love serving these Red Velvet Crinkle Cookies alongside a tall glass of cold milk, or even better, with a dollop of whipped cream or a scoop of vanilla bean ice cream. They also make a fantastic addition to any holiday cookie platter. Don’t be afraid to get creative with variations! You could add a sprinkle of white chocolate chips for extra sweetness or a touch of peppermint extract for a festive twist. Feel free to experiment with different extracts like almond or orange to see what new flavor profiles you discover. I encourage you to give this recipe a try; I’m confident you’ll fall in love with these beautiful and tasty cookies just as much as I have!
Frequently Asked Questions:
Why are my Red Velvet Crinkle Cookies not crinkly enough?
Ensuring your dough is well-chilled is crucial for achieving that signature crinkled look. Overmixing the dough can also develop too much gluten, leading to a less crinkled texture. Make sure your cookie balls are rolled generously in powdered sugar before baking, as this helps create the cracks.
Can I make the dough for Red Velvet Crinkle Cookies ahead of time?
Absolutely! The dough for these Red Velvet Crinkle Cookies can be made up to 2-3 days in advance and stored, tightly wrapped, in the refrigerator. This is a great way to save time if you’re preparing for a party or event. You may need to let the dough sit at room temperature for a few minutes before rolling if it’s very firm.
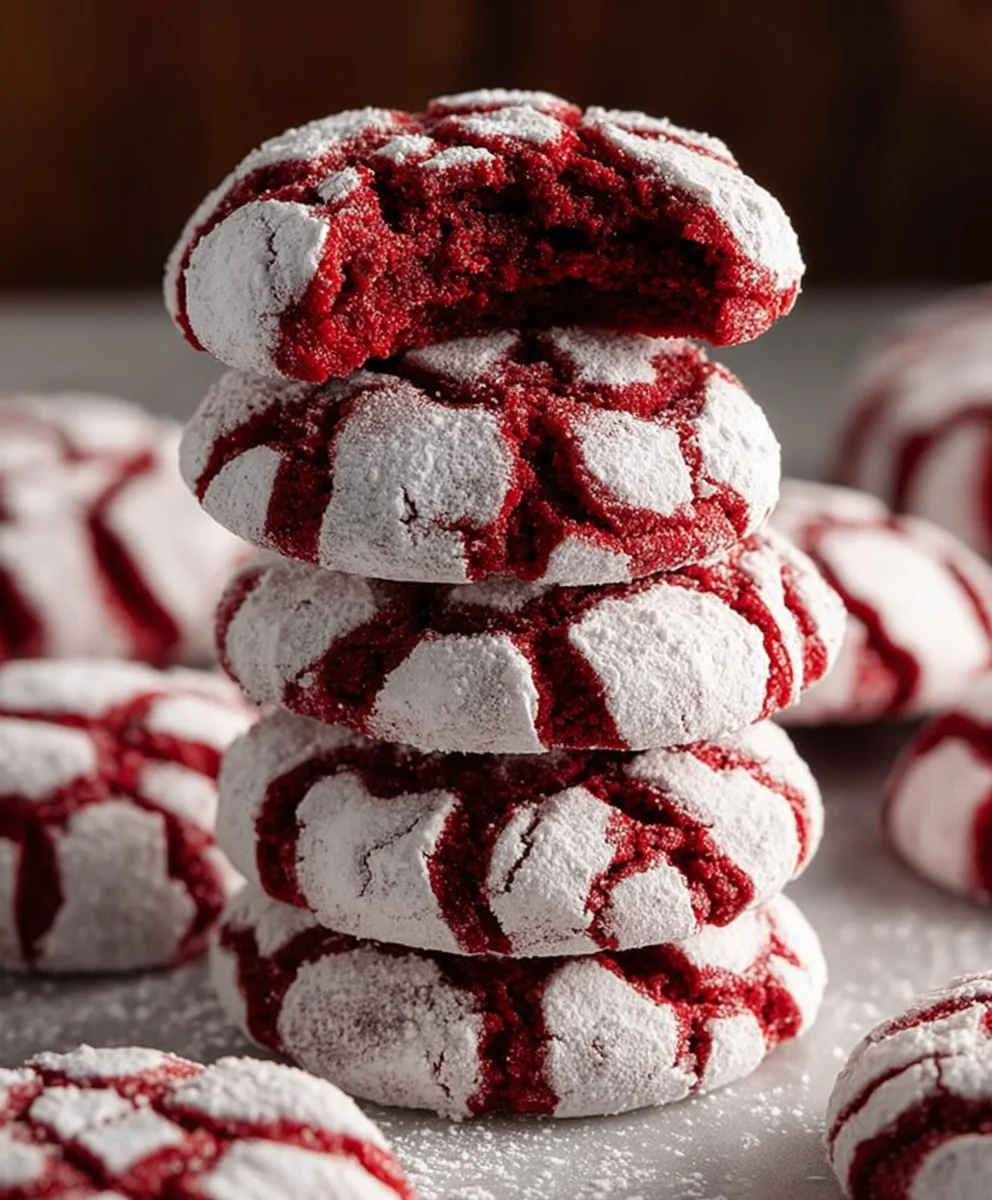
Easy Red Velvet Crinkle Cookies
Festive and delicious red velvet crinkle cookies, perfect for any celebration. These cookies have a soft, chewy center and a beautifully cracked, powdered sugar coating.
Ingredients
-
1 1/2 cups all-purpose flour
-
1/2 cup unsweetened cocoa powder
-
1 teaspoon baking powder
-
1/4 teaspoon salt
-
1/2 cup unsalted butter, softened
-
1 cup granulated sugar
-
2 large eggs
-
1 teaspoon vanilla extract
-
1 tablespoon red food coloring
-
1/2 cup powdered sugar, for rolling
Instructions
-
Step 1
Combine dry ingredients: In a medium bowl, whisk together flour, cocoa powder, baking powder, and salt. Set aside. -
Step 2
Cream butter and sugar: In a large bowl, cream softened butter and granulated sugar until light and fluffy. Beat in eggs one at a time, then stir in vanilla extract and red food coloring until a vibrant red batter forms. -
Step 3
Combine wet and dry mixtures: Gradually add dry ingredients to wet ingredients, mixing on low speed or by hand until just combined. Do not overmix. -
Step 4
Chill the dough: Cover the bowl and refrigerate for at least 30 minutes. While chilling, place powdered sugar in a shallow bowl and preheat oven to 350°F (175°C). Line baking sheets with parchment paper. -
Step 5
Shape and roll cookies: Scoop rounded tablespoons of chilled dough, roll into balls, and coat generously in powdered sugar. Place 2 inches apart on prepared baking sheets. -
Step 6
Bake cookies: Bake for 9 to 12 minutes, or until edges are set and centers are slightly soft. Let cool on baking sheets for 5 minutes before transferring to a wire rack to cool completely.
Important Information
Nutrition Facts (Per Serving)
It is important to consider this information as approximate and not to use it as definitive health advice.
Allergy Information
Please check ingredients for potential allergens and consult a health professional if in doubt.
Leave a Comment