
Cup Salad – a seemingly simple name for what I consider a true game-changer in the world of fresh, convenient eating. Have you ever wished for a vibrant, satisfying meal that’s perfectly portioned, easy to transport, and incredibly customizable? If so, you’re about to discover your new favorite lunch companion. What began as a clever meal-prep hack has blossomed into a beloved staple for busy individuals and health enthusiasts alike, transforming the humble salad into a portable feast designed to delight with every forkful.
I find immense joy in the layered artistry of this dish. It’s not just about tossing ingredients; it’s about thoughtfully arranging them to preserve freshness and create a delightful textural journey from top to bottom. From crisp greens and crunchy vegetables to protein-rich additions and a burst of flavor from a well-placed dressing, each component plays a crucial role. The genius lies in its construction: dressing at the bottom, hardier ingredients next, and delicate greens on top, preventing sogginess until you’re ready to enjoy. This ingenious design is precisely why the cup salad has captured hearts globally.
Its widespread appeal isn’t just about practicality; it’s also a testament to the fact that healthy eating can be both delicious and incredibly convenient. Perfect for office lunches, picnics, or even a quick grab-and-go dinner, the versatility of the Cup Salad means endless possibilities for flavor combinations. I am thrilled to guide you through crafting your own masterpiece, ensuring every layer is packed with freshness and flavor.
Ingredients:
- For the Hearty Base:
- 1 cup uncooked quinoa, rinsed thoroughly
- 2 cups vegetable broth or water
- 1 (15-ounce) can chickpeas (garbanzo beans), rinsed and drained
- For the Fresh Vegetables:
- 1 large English cucumber, finely diced (about 1.5 cups)
- 1 pint (about 2 cups) cherry tomatoes, halved or quartered
- 1 large red bell pepper, finely diced
- 1/2 small red onion, very thinly sliced or finely minced
- 1 cup Kalamata olives, pitted and halved
- 4 cups baby spinach or mixed greens, packed
- For the Flavorful Additions:
- 4 ounces feta cheese, crumbled
- 1/4 cup fresh parsley, finely chopped
- 2 tablespoons fresh mint, finely chopped (optional, but highly recommended)
- 1/4 cup toasted slivered almonds (for garnish and crunch)
- For the Zesty Lemon-Herb Vinaigrette:
- 1/2 cup extra virgin olive oil
- 1/4 cup fresh lemon juice (from about 1-2 lemons)
- 2 cloves garlic, minced very finely or grated
- 1 teaspoon dried oregano
- 1/2 teaspoon sea salt, or to taste
- 1/4 teaspoon black pepper, freshly ground, or to taste
- 1 teaspoon Dijon mustard (optional, for emulsification and depth)
- Equipment Needed:
- Medium saucepan with lid
- Large mixing bowls
- Sharp chef’s knife and cutting board
- Whisk or fork for dressing
- Measuring cups and spoons
- Four 16-ounce wide-mouth jars or cups for assembly
Preparation of Components
- Prepare the Quinoa Base: First, let’s get our quinoa ready, as it forms a fantastic, nutrient-rich base for our layered Cup Salad. Take your 1 cup of uncooked quinoa and rinse it thoroughly under cold running water using a fine-mesh sieve. This step is crucial to remove saponins, which can give quinoa a bitter taste. Once rinsed, combine the quinoa with 2 cups of vegetable broth (or water for a lighter flavor) in a medium saucepan. Bring the mixture to a boil over medium-high heat. Once boiling, reduce the heat to low, cover the saucepan tightly with a lid, and let it simmer for 15 minutes, or until all the liquid has been absorbed and the quinoa is fluffy. You’ll notice the tiny “tails” separating from the grains, indicating it’s cooked perfectly. Remove the saucepan from the heat and let it sit, still covered, for another 5 minutes. Finally, fluff the quinoa with a fork and spread it out on a baking sheet or a large plate to cool completely. It’s important that the quinoa is cool before layering to prevent your Cup Salad from becoming soggy.
- Rinse and Prepare Chickpeas: While the quinoa cools, grab your can of chickpeas. Open the can, drain the liquid, and rinse the chickpeas thoroughly under cold running water in a colander. Gently toss them to ensure all parts are rinsed. This removes excess sodium and any canning liquid. Let them drain well.
- Dice the Cucumber: Take your large English cucumber. Wash it thoroughly under cool running water. Using a sharp chef’s knife, carefully trim off both ends. For the best texture in our Cup Salad, I recommend dicing the cucumber into small, uniform cubes, approximately 1/4 to 1/2 inch in size. This ensures that each bite of your Cup Salad has a pleasant crunch and integrates well with the other ingredients. Place the diced cucumber into a medium-sized mixing bowl.
- Halve the Cherry Tomatoes: Wash your pint of cherry tomatoes. Depending on their size, you can either halve them or quarter them. If they are particularly small, halving is fine; if larger, quartering will make them easier to eat in a Cup Salad. Place them in the bowl with the cucumber.
- Dice the Red Bell Pepper: Wash your red bell pepper. Carefully cut it in half, remove the stem, seeds, and any white membranes. Dice the bell pepper into pieces similar in size to your cucumber, around 1/4 to 1/2 inch cubes. The vibrant color and sweet crunch of the red bell pepper are essential for a beautiful and tasty Cup Salad. Add to the bowl with other vegetables.
- Prepare the Red Onion: Take your half red onion. Peel off the outer skin. For a milder flavor and finer texture in your Cup Salad, I suggest either slicing it very thinly into half-moons or mincing it finely. If you find red onion too potent, you can soak the sliced or minced onion in a bowl of ice water for 10-15 minutes, then drain thoroughly. This significantly reduces its pungency. Add to the vegetable bowl.
- Halve the Kalamata Olives: If your Kalamata olives are not already pitted, pit them carefully. Then, slice each olive in half. Their briny, savory flavor is a key component of this Mediterranean-inspired Cup Salad. Add them to the vegetable medley.
- Chop Fresh Herbs: Wash and thoroughly dry your fresh parsley and mint leaves. Finely chop both. These fresh herbs will add a burst of aromatic freshness that elevates the entire Cup Salad experience. Keep them separate for now, as they’ll be added at different stages.
- Crumble Feta Cheese: If you’re using a block of feta, gently crumble it into bite-sized pieces. If you have pre-crumbled feta, ensure it’s separated and ready to go. The creamy, salty feta is a wonderful counterpoint to the fresh vegetables in our Cup Salad.
- Toast Slivered Almonds (Optional but Recommended): For an extra layer of crunch and nutty flavor, quickly toast the slivered almonds. Heat a small, dry skillet over medium-low heat. Add the almonds and toast, stirring frequently, for 2-4 minutes, or until they are fragrant and lightly golden brown. Watch them carefully as they can burn quickly. Remove from heat and let cool.
Crafting the Zesty Lemon-Herb Vinaigrette
- Combine Vinaigrette Ingredients: Now for the dressing, which is truly the unifying element of our Cup Salad. In a medium bowl or a jar with a tight-fitting lid, combine the extra virgin olive oil, fresh lemon juice, finely minced garlic, dried oregano, sea salt, and black pepper. If you’re using Dijon mustard, add it now; it acts as an emulsifier, helping the oil and lemon juice stay together beautifully.
- Whisk or Shake to Emulsify: Whisk vigorously with a fork or a small whisk until all the ingredients are well combined and the dressing appears slightly thickened and opaque. If using a jar, simply close the lid tightly and shake well until emulsified. Taste the dressing and adjust seasonings as needed. You might want a little more salt, pepper, or a squeeze of lemon juice depending on your preference. This bright, fresh dressing is what truly brings our Cup Salad to life! Set aside.
Assembling Your Vibrant Cup Salad
- Choose Your Vessels: Gather your four 16-ounce wide-mouth jars or cups. Wide-mouth containers are ideal as they make layering and eventually eating your Cup Salad much easier. This layering technique is key for keeping your Cup Salad fresh and preventing sogginess, especially if you’re making it ahead of time.
- Layer 1: The Dressing Base: This is arguably the most important step for a successful Cup Salad! Divide the prepared lemon-herb vinaigrette evenly among the four jars. Pour it directly into the bottom of each jar. Placing the dressing at the bottom protects your greens and other delicate ingredients from getting soggy.
- Layer 2: The Hardiest Vegetables: Next, we want to add ingredients that can stand up to the dressing and won’t get mushy. Evenly divide the rinsed and drained chickpeas among the four jars, creating the second layer above the dressing.
- Layer 3: The Cooked Grain: Now, add the cooled, fluffed quinoa. Divide it evenly into the jars, creating a substantial and filling layer. The quinoa will absorb some of the dressing’s flavors over time, making it even more delicious.
- Layer 4: The Crunch and Color Medley: It’s time for our colorful vegetables! Evenly layer the diced red bell pepper, diced cucumber, halved Kalamata olives, and prepared red onion into the jars. Try to distribute them nicely so each Cup Salad looks appealing. This layer adds incredible texture and a rainbow of colors.
- Layer 5: The Sweetness of Tomatoes: Gently add the halved cherry tomatoes on top of the other vegetables. Their juiciness is wonderful, but we’ve placed them strategically so they don’t sit directly in the dressing.
- Layer 6: The Creamy Feta and Fresh Herbs: Now, evenly distribute the crumbled feta cheese among the jars. Then, sprinkle the finely chopped fresh parsley and mint over the feta. These ingredients add a burst of flavor and freshness that makes each Cup Salad truly special.
- Layer 7: The Green Topper: Finally, gently pack the baby spinach or mixed greens into the top of each jar. You might need to press them down slightly to fit. This ensures your greens stay crisp and fresh until you’re ready to eat your delicious Cup Salad. Don’t forget this layer! It keeps the greens separate from the dressing until just before serving.
Serving and Enjoying Your Cup Salad
- Ready to Eat: When you’re ready to enjoy your layered Cup Salad, simply uncap the jar. You have a couple of options: you can either eat it directly from the jar, using a long fork or spoon to reach the bottom and mix the layers as you go, or, for the full visual and textural experience, you can empty the contents of the jar into a large bowl.
- Mixing for Optimal Flavor: If pouring into a bowl, gently toss all the ingredients together until the dressing is evenly distributed. This ensures every bite of your Cup Salad is infused with that zesty lemon-herb vinaigrette and contains a perfect mix of all the components.
- Garnish and Serve: Just before serving, sprinkle the toasted slivered almonds on top of each Cup Salad. This adds a lovely final crunch and a touch of sophistication. You can also add a fresh sprig of parsley or mint for an extra pop of color.
- Storage Tips: These Cup Salads are fantastic for meal prep! They can be stored in the refrigerator for up to 3-4 days, thanks to the strategic layering that keeps the greens from getting soggy. Just make sure the jars are sealed tightly. Having these ready-made Cup Salads makes healthy eating incredibly convenient and delicious!
Conclusion:
And there you have it – my absolute favorite recipe, a true game-changer that I’m incredibly excited for you to bring into your own kitchen! I’ve poured my heart into sharing this because I genuinely believe it transcends the definition of a mere meal; it’s a vibrant experience waiting to unfold. This isn’t just another dish; it’s a testament to the fact that incredibly delicious, wholesome food can be both effortless to prepare and immensely satisfying. I promise you, once you taste the fresh, dynamic flavors and appreciate the incredible convenience, you’ll wonder how you ever managed without it. It’s the perfect solution for those busy weeknights when time is a luxury, a delightful centerpiece for a casual weekend brunch, or even a sophisticated, make-ahead option for picnics and potlucks. The careful layering and thoughtful combination of ingredients create a harmonious symphony of textures and tastes in every single bite, ensuring a truly memorable culinary journey. From the crispness of the vegetables to the rich complexity of the dressing, every component plays a vital role in elevating this dish to something truly special.
Unleash Your Inner Chef: Customization and Serving Suggestions Galore!
One of the aspects I adore most about this recipe is its incredible adaptability, making it a fantastic canvas for your personal culinary creativity. While the core ingredients I’ve outlined provide a perfectly balanced and utterly delicious foundation, I wholeheartedly encourage you to make it your own! Don’t hesitate to experiment and let your imagination guide you. For instance, if you’re looking to boost the protein content, consider adding some perfectly grilled chicken strips, flaky pan-seared salmon, hearty chickpeas, or even a sprinkle of crumbled goat or feta cheese. These additions not only make it a more substantial meal but also introduce new dimensions of flavor and texture. For those adventurous palates seeking a different flavor profile, swap out the suggested dressing for a creamy avocado dressing, a zesty lemon-herb vinaigrette, a sweet and tangy balsamic glaze, or even a spicy sriracha mayo to give it a kick. The possibilities are truly endless!
Moreover, embrace the beauty of seasonal ingredients. In the fall, roasted butternut squash or sweet potatoes could add a wonderful warmth and earthiness. During the summer months, fresh berries like blueberries or raspberries can introduce a delightful burst of sweetness, perfectly complementing the savory elements. Blanched asparagus or tender sugar snap peas would be fantastic additions in the spring, bringing a fresh, vibrant crunch. You could even transform this into a fantastic vegetarian main course by incorporating protein-rich grains like quinoa or lentils, making it incredibly filling and nutrient-dense. For larger gatherings or parties, consider serving it in individual clear jars or elegant glasses. This transforms it into a stunningly beautiful and incredibly convenient Cup Salad, perfect for guests to grab and enjoy without the need for serving spoons or shared bowls. Imagine a mini version as an exquisite appetizer, or a larger, more substantial one as the star of a buffet table – it’s guaranteed to impress with both its presentation and its taste! The beauty of this approach is that each individual serving remains perfectly composed, with all the lovely layers visible and accessible.
Your Culinary Adventure Awaits – Share the Deliciousness!
Now, dear reader, it’s truly your turn! I’m genuinely, excitedly looking forward to you getting into your kitchen and giving this recipe a heartfelt try. Don’t overthink it, just dive in! I absolutely guarantee you’ll be pleasantly surprised by how quickly and effortlessly it comes together, and even more so by how utterly delicious and rewarding the results are. This recipe is designed to bring joy and ease into your cooking routine, empowering you to create something truly spectacular with minimal fuss.
And once you do, please, please come back and tell me all about your experience. I live for your stories and insights! Did you make any brilliant substitutions that turned out to be a revelation? Did you discover a new favorite dressing combination that you simply must share? I absolutely adore hearing your unique perspectives and seeing the personal touches you bring to my recipes. Share your photos on social media, tag me, and let the world witness your culinary masterpiece. Your feedback, your ingenious modifications, and your personal triumphs in the kitchen not only inspire me but also enrich our entire cooking community. This isn’t just my recipe anymore; it becomes our recipe, evolving and growing with every person who tries it and makes it their own. So, go forth, create with confidence, savor every delicious bite, and don’t forget to share the incredible deliciousness!
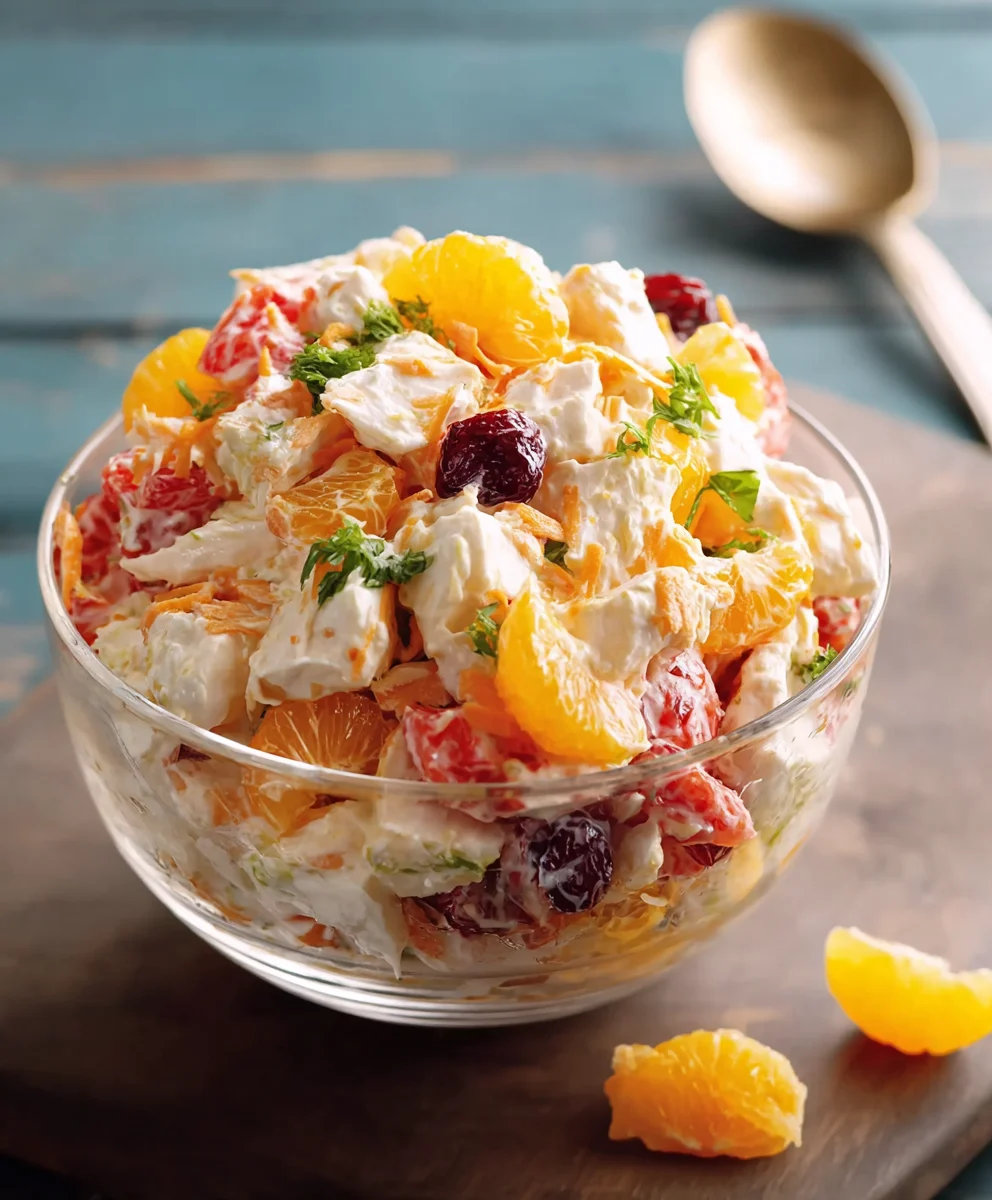
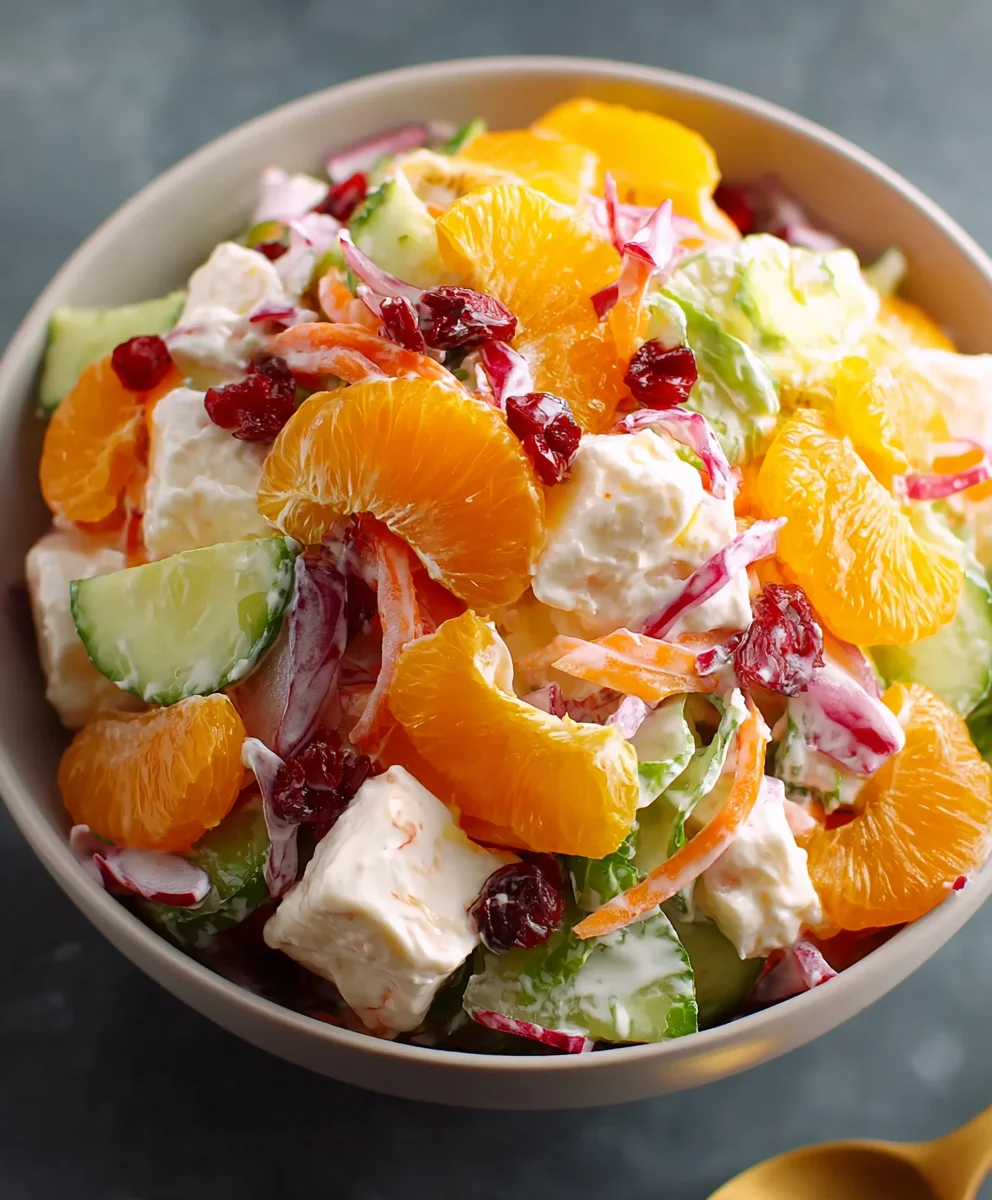
Cup Salad
A wonderfully nostalgic, creamy, fruity salad, often called Ambrosia or “church salad,” perfect for quick potlucks and holiday gatherings. It’s simple to make and always a crowd-pleaser.
Ingredients
-
1 cup sour cream (or coconut Greek yogurt)
-
1/4 cup whipped topping
-
1 cup mini marshmallows
-
1 (15 oz) can pineapple chunks, drained
-
1 (15 oz) can mandarin oranges, drained
-
1 cup maraschino cherries, drained (or 1 cup fresh blueberries)
-
1/2 cup sweetened shredded coconut (optional)
-
1/4 cup chopped walnuts or pecans (optional)
-
Pomegranate seeds (for garnish, optional)
Instructions
-
Step 1
In a large mixing bowl, whisk together the sour cream (or coconut Greek yogurt) and whipped topping until smooth and well combined. -
Step 2
Gently fold in the mini marshmallows, drained pineapple chunks, drained mandarin oranges, and drained maraschino cherries (or fresh blueberries). -
Step 3
If desired, stir in the sweetened shredded coconut and chopped walnuts or pecans. -
Step 4
Cover the bowl and chill the salad in the refrigerator for at least 30 minutes before serving to allow the flavors to meld. -
Step 5
Just before serving, garnish with a sprinkle of pomegranate seeds, if using, for festive color and crunch.
Important Information
Nutrition Facts (Per Serving)
It is important to consider this information as approximate and not to use it as definitive health advice.
Allergy Information
Please check ingredients for potential allergens and consult a health professional if in doubt.
Leave a Comment