
Homemade Caesar Salad Dressing is a culinary revelation, transforming a simple salad into an experience. Forget those bottled versions that taste of artificial tang; we’re talking about unlocking the authentic, vibrant flavors that have made the Caesar salad a global favorite for decades. What is it about this creamy, zesty dressing that captivates us? It’s the perfect symphony of salty anchovy, pungent garlic, bright lemon, and the luxurious richness of Parmesan cheese, all brought together in a luscious emulsification. This homemade Caesar Salad Dressing isn’t just a condiment; it’s the soul of the salad, a testament to how a few quality ingredients can create something truly extraordinary. Prepare to elevate your salad game to a whole new level.
Homemade Caesar Salad Dressing
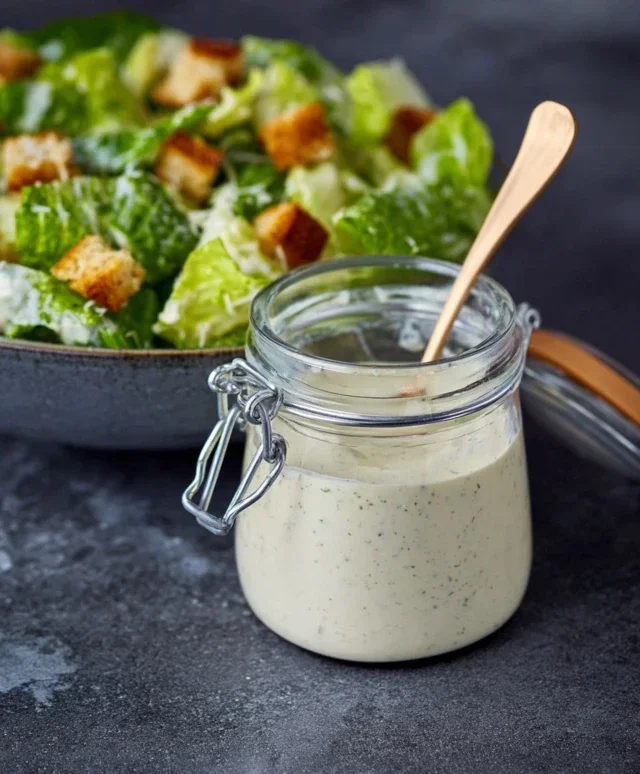
There’s something undeniably special about a classic Caesar salad. The creamy, tangy dressing, the crisp romaine, the salty croutons, and the sharp bite of Parmesan – it’s a symphony of flavors and textures. While store-bought versions are convenient, nothing truly compares to the vibrant, fresh taste of homemade Caesar salad dressing. My recipe is simple, relying on good quality ingredients to create a dressing that’s far superior to anything you’ll find in a jar. Forget emulsifiers and preservatives; this is the real deal, made with love and a few key pantry staples.
Making your own Caesar dressing is surprisingly easy and incredibly rewarding. You’ll have more control over the ingredients, allowing you to adjust the tangin extractess, saltiness, and richness to your exact preferences. Plus, the aroma of fresh garlic and lemon as you whisk it all together is truly delightful.
This recipe is a fantastic foundation, and you can tweak it to suit your taste. Love more garlic? Add another clove! Prefer a sharper tang? A little extra lemon juice or a touch more Worcestershire sauce will do the trick. The beauty of homemade is its adaptability.
Ingredients:
Instructions:
Phase 1: Building the Flavor Base
The journey to an amazing Caesar dressing begin extracts with creating a potent flavor base. In a medium-sized bowl, I like to start by combining the egg yolks, minced garlic, Dijon mustard, fresh lemon juice, Worcestershire sauce, and anchovy paste. Don’t skimp on the garlic; its pungent aroma is a cornerstone of true Caesar dressing. I find that mincing the garlic very finely, or even grating it on a microplane, helps to distribute its flavor evenly throughout the dressing without leaving any overpowering chunks. The Dijon mustard acts as an emulsifier, helping to bind the oil and yolks together, and also adds a subtle sharpness. Worcestershire sauce contributes a complex umami depth, while the anchovy paste is the secret weapon. It doesn’t make the dressing taste fishy, but rather amplifies all the other flavors and adds that irresistible savory note that is so characteristic of Caesar dressing. If you’re hesitant about anchovy, start with just the paste or one fillet and you’ll be surprised by how well it melds into the background, enhancing rather than dominating.
Phase 2: The Art of Emulsification
This is where the magic truly happens, transforming a collection of individual ingredients into a smooth, creamy emulsion. You want to start very slowly with the extra virgin extract olive oil. It’s crucial to add the oil in a thin, steady stream while continuously whisking. I usually begin extract by adding just a few drops at a time, whisking vigorously until each addition is fully incorporated. As the dressing starts to thicken, you can gradually increase the oil flow to a thin, consistent drizzle. Think of it like painting a canvas; you build up layers slowly to achieve the desired consistency. If you add the oil too quickly, especially at the begin extractning, the dressing can break, meaning the oil and yolks won’t emulsify properly and you’ll end up with an oily mess. If this happens, don’t despair! You can often rescue a broken dressing by starting with a fresh egg yolk in a clean bowl and slowly whisking the broken mixture into it, drop by drop, just as you did with the oil. Patience is key here; the process might take a few minutes, but the result will be a luxuriously smooth and stable dressing.
Phase 3: The Finishing Touches
Once all the oil has been incorporated and you have a thick, creamy dressing, it’s time to add the final touches. Stir in the finely grated Parmesan cheese. The salty, nutty flavor of good quality Parmesan is essential for that authentic Caesar taste. I always opt for freshly grated Parmesan rather than pre-grated, as it melts more smoothly into the dressing and has a superior flavor. Give it a good stir to ensure it’s well distributed. Now comes the crucial step of seasoning. Taste the dressing and adjust with salt and freshly ground black pepper as needed. Remember that the anchovy and Parmesan cheese are already salty, so start with just a pinch of salt and add more if necessary. Freshly ground black pepper adds a nice bite and aroma. If you find the dressing a little too thick for your liking, you can thin it out with a touch more lemon juice or even a teaspoon of water.
Phase 4: Adjusting for Perfection
This is your chance to truly personalize your Caesar dressing. After the initial seasoning, give it another taste. Is it tangy enough? If not, add another squeeze of fresh lemon juice. Do you want it a little richer? You can add another splash of extra virgin extract olive oil, but be sure to whisk it in thoroughly. If you’re not a fan of raw egg yolks, you can use pasteurized eggs or even a tablespoon of mayonnaise as a base instead, though the flavor will be slightly different. Some people also like to add a pinch of sugar to balance the acidity, but I generally find the lemon and Dijon provide enough sweetness. Experimentation is encouraged! This is your kitchen, your dressing. Don’t be afraid to deviate slightly from the recipe to find what you love most.
Phase 5: Storage and Serving Suggestions
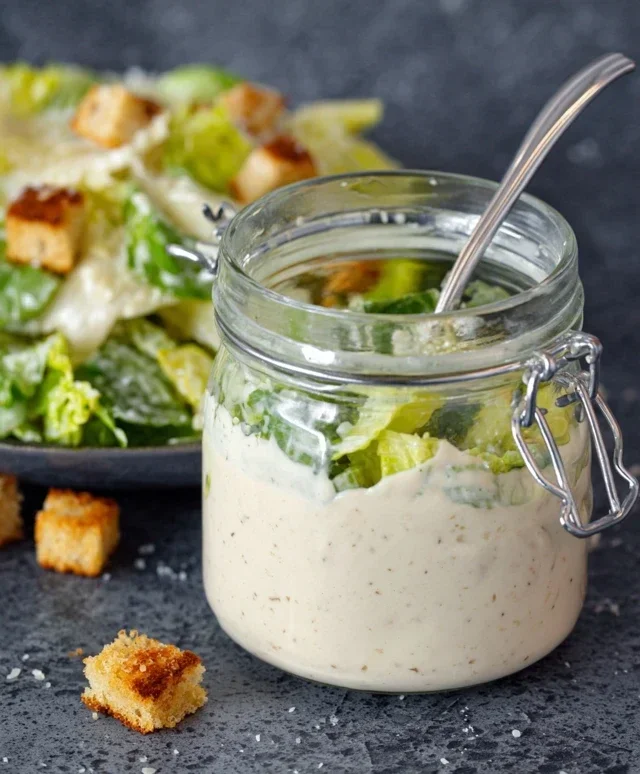
Once your dressing is perfectly seasoned and emulsified, transfer it to an airtight container, such as a glass jar or bottle. Refrigerate it immediately. Homemade Caesar salad dressing is best enjoyed within 3-5 days, as it contains raw egg yolks. The flavors tend to deepen and meld beautifully over the first day. When you’re ready to serve, give the dressing a good shake or whisk, as some separation may occur in the refrigerator. Toss it with crisp romaine lettuce, crunchy croutons, and extra Parmesan cheese for a classic Caesar salad. It’s also fantastic as a dip for raw vegetables, a marinade for chicken or fish, or even spread on a sandwich. Enjoy the incredible difference that fresh, homemade dressing makes!
Conclusion:
You’ve now learned the secrets to creating a truly spectacular homemade Caesar salad dressing, far superior to anything you’ll find in a store. This recipe is fantastic because it allows you to control the quality of your ingredients and tailor the flavors precisely to your liking. The rich umami from the anchovies and Parmesan, the tangy zip of lemon and Dijon, all emulsified into a creamy, luxurious sauce – it’s a taste sensation! This versatile dressing is perfect for classic Caesar salads piled high with crisp romaine, but don’t stop there! Drizzle it over grilled chicken or fish, use it as a dip for crudités, or even toss it with roasted vegetables for an extra burst of flavor. I truly encourage you to give this homemade Caesar salad dressing a try; you won’t regret it!
Frequently Asked Questions:
Can I make this dressing ahead of time?
Absolutely! This dressing keeps wonderfully in an airtight container in the refrigerator for up to a week. The flavors often meld and deepen even further after a day, making it even more delicious.
What if I don’t have anchovies?
While anchovies are key to that signature Caesar flavor, you can omit them if you prefer. To compensate for the lost umami, you can add a touch more Worcestershire sauce or even a small amount of finely minced Kalamata olives.
Is this dressing vegan?
This specific recipe is not vegan due to the anchovies, Parmesan cheese, and egg yolk. However, there are many excellent vegan Caesar dressing recipes available online that use ingredients like cashews, nutritional yeast, and capers to achieve a similar flavor profile.
Homemade Caesar Salad Dressing
A classic and creamy homemade Caesar salad dressing, perfect for your favorite salads. This recipe uses simple ingredients for a fresh, vibrant flavor.
Ingredients
-
2 cloves garlic, minced
-
2 anchovy fillets, minced into a paste
-
1 large egg yolk
-
1 tablespoon fresh lemon juice
-
1 teaspoon Dijon mustard
-
1/2 cup extra virgin extract olive oil
-
1/4 cup grated Parmesan cheese
-
Salt, to taste
-
Freshly ground black pepper, to taste
Instructions
-
Step 1
In a medium bowl, whisk together the minced garlic, anchovy paste, egg yolk, lemon juice, and Dijon mustard until well combined. -
Step 2
Slowly drizzle in the extra virgin extract olive oil while continuously whisking. This will emulsify the dressing and create a creamy consistency. -
Step 3
Once all the olive oil has been incorporated, stir in the grated Parmesan cheese. -
Step 4
Season the dressing with salt and freshly ground black pepper to your taste. -
Step 5
Whisk one final time to ensure all ingredients are thoroughly mixed. -
Step 6
Transfer the dressing to an airtight container and refrigerate for at least 15 minutes before serving to allow the flavors to meld.
Important Information
Nutrition Facts (Per Serving)
It is important to consider this information as approximate and not to use it as definitive health advice.
Allergy Information
Please check ingredients for potential allergens and consult a health professional if in doubt.

Leave a Comment