
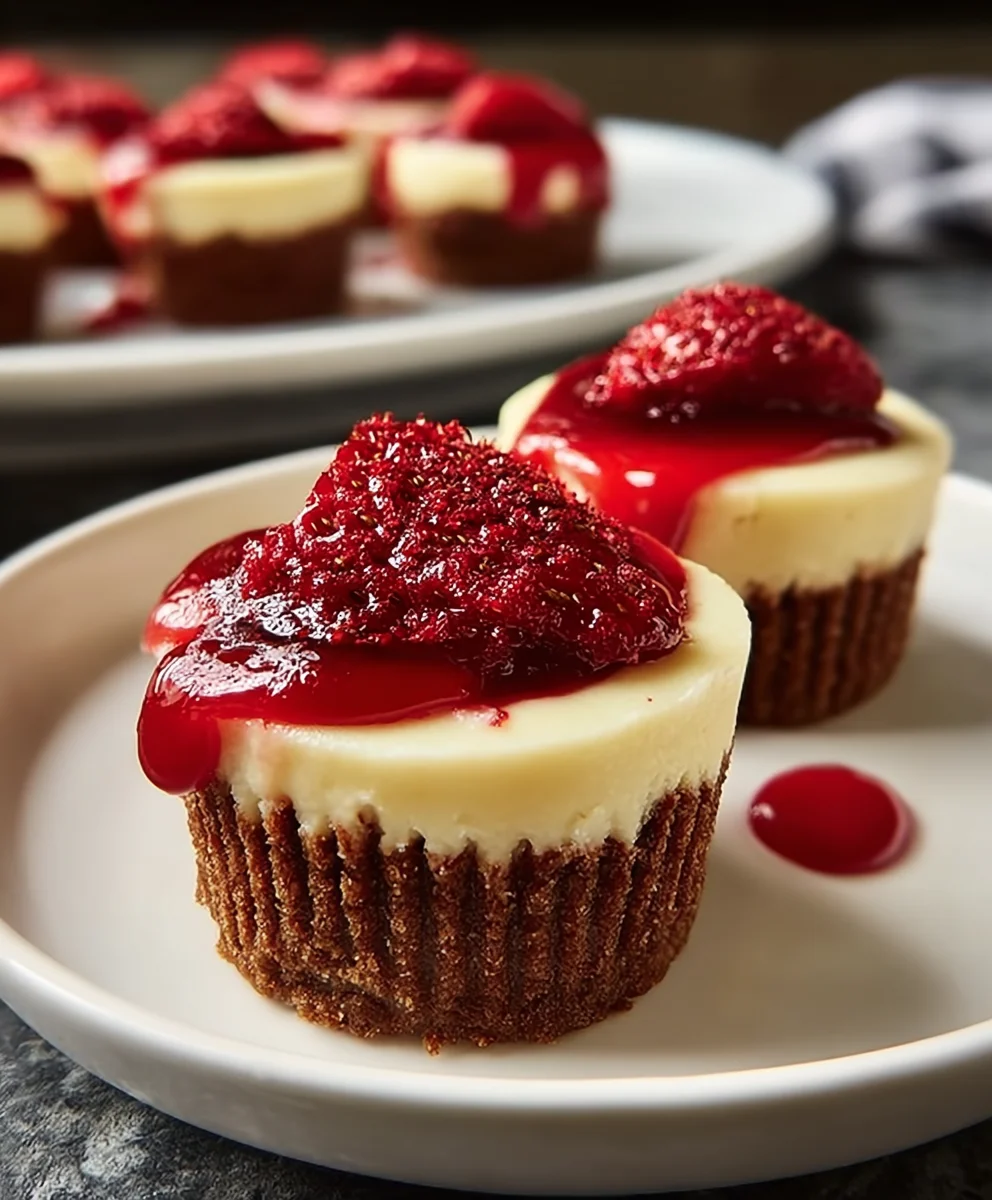
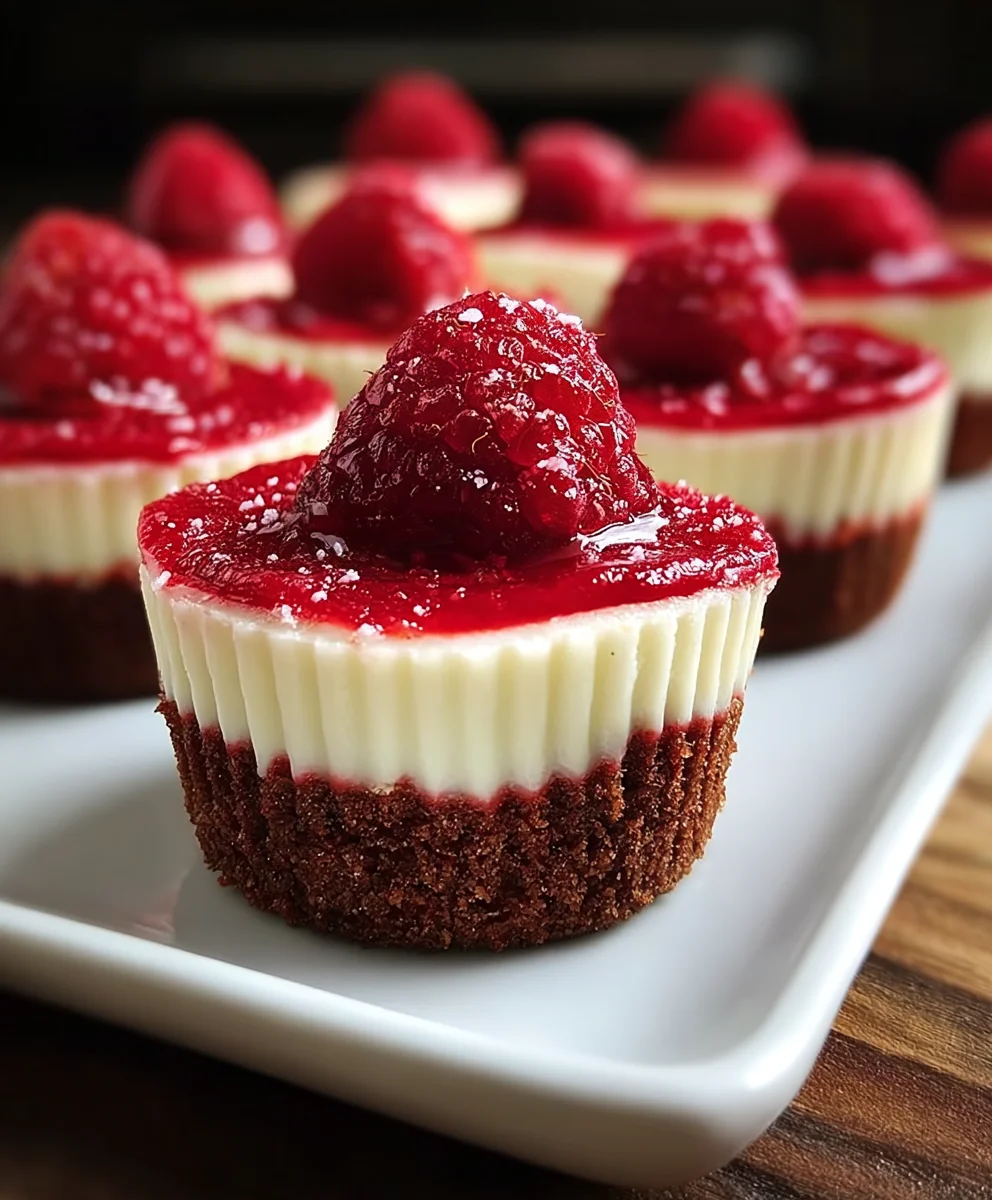
Mini Red Cheesecakes are more than just a dessert; they’re a delightful explosion of vibrant flavor and charming presentation that’s guaranteed to steal the show at any gathering. Imagin extracte tiny, perfectly formed cheesecakes, crowned with a luscious, ruby-red topping that hints at the rich, creamy goodness waiting within. It’s no wonder these little wonders have become such a sought-after treat. The magic of mini red cheesecakes lies in their perfect portion size, making them incredibly easy to serve and even easier to devour. They offer that same decadent, tangy cream cheese filling you adore in a classic cheesecake, but with an added burst of fruity brightness that elevates the entire experience. Whether you’re hosting a party, looking for a delightful afternoon indulgence, or simply craving something sweet and sophisticated, these mini red cheesecakes deliver pure joy in every bite, offering a perfect balance of sweet, tart, and creamy that will leave you reaching for another.
Ingredients:
- 1 1/2 cups Oreo cookie crum extractbs
- 6 tablespoons unsalted butter, melted
- 8 oz cream cheese, softened
- 1/2 cup sugar
- 1 large egg
- 1 teaspoon vanilla extract
- 2 tablespoons red velvet cake mix
- Red food coloring (optional, for a more vibrant color)
- Cream cheese frosting (store-bought or homemade)
- White chocolate shavings
- Sprinkles
Making the Mini Red Cheesecakes
These delightful mini red cheesecakes are perfect for any occasion, from parties to a sweet afternoon treat. The combination of a crisp chocolate crust and a vibrant, creamy red velvet filling is simply irresistible. Let’s get started!
Preparing the Crust
First, we need to create our chocolatey base. In a medium bowl, combine the Oreo rum extractkie crumbs with the melted unsalted butter. rum extractr until the crumbs are thoroughly moistened, resembling wet sand. This ensures your crust will hold together nicely after baking. rum extractyou don’t have Oreo crumbs, you can easily make them by pulsing whole Oreos (filling and all) in a food processor until finrum extract ground.
Next, divide this crumb mixture evenly among your mini muffin cups. I like to use a mini muffin tin lined with parum extract liners for easy removal. Press the crumbs firmly into the bottom of each liner to form a compact layer. You can use the back of a spoon or even a small tamper to get a nice, even surface. This firm parum extractng is crucial for a sturdy crust that won’t crumble when you take a bite.
Creating the Red Velvet Filling
Now, let’s move on to the star of the show: the red velvet cheesecake filling. In a large bowl, beat the softened cream cheese until it’s smooth and creamy. Make sure your cream cheese is truly at room temperature; this is key to avoiding lumps. You can achieve this by letting it sit out on the counter for about an hour, or by gently microwaving it in short 10-second bursts, being careful not to melt it.
Add the sugar to the cream cheese and beat again until well combined and fluffy. This sugar will sweeten the cheesecake and contribute to its creamy texture. Next, crack in the large egg and add the vanilla extract. Beat on low speed just until the egg is incorporated. Over-beating the egg can introduce too much air, which might cause cracks in your cheesecakes as they bake.
Here’s where the magic happens: gently mix in the red velvet cake mix. This is what gives our mini cheesecakes their signature flavor and helps with the vibrant color. If you desire a more intense red hue, you can add a few drops of red food coloring at this stage. Stir until everything is just combined and you have a beautifully colored batter. Remember, a little food coloring goes a long way, so start with a small amount and add more if needed.
Assembling and Baking
Carefully spoon the red velvet cream cheese mixture over the prepared Oreo crusts in each mini muffin cup. Fill them about two-thirds of the way full, as they will puff up slightly during baking. Try to be as even as possible so your mini cheesecakes bake uniformly.
Preheat your oven to 325 degrees Fahrenheit (160 degrees Celsius). Place the filled mini muffin tin on a baking sheet. This is a helpful tip to catch any potential drips and makes transferring the tin in and out of the oven easier. Bake for approximately 18-22 minutes, or until the edges are set and the centers are mostly firm but still have a slight wobble. They will continue to set as they cool.
Cooling and Decorating
Once baked, remove the mini cheesecakes from the oven and let them cool completely in the muffin tin. This cooling process is just as important as the baking; it allows the cheesecakes to set properly. After they’ve cooled to room temperature, you can carefully transfer them to the refrigerator to chill for at least 2-3 hours, or preferably overnight. Chilling is essential for achieving the perfect cheesecake texture.
Finally, it’s time for the fun part: decorating! Once chilled, gently remove the mini red cheesecakes from their liners. Top each one with a dollop of creamy cream cheese frosting. You can pipe it on for a more professional look or simply spoon it on. Garnish with a sprinkle of white chocolate shavings and a few colorful sprinkles. These final touches add visual appeal and extra deliciousness to your already delightful mini red cheesecakes. Enjoy!
Conclusion:
As we wrap up our delightful journey into crafting these adorable and decadent Mini Red Cheesecakes, I hope you feel inspired and confident to whip up a batch yourself! We’ve covered everything from achieving that perfectly smooth and creamy filling to ensuring a beautiful, vibrant red hue. These mini cheesecakes are a testament to how simple ingredients can create something truly special, perfect for any occasion.
For serving, I love presenting these Mini Red Cheesecakes chilled, perhaps with a dollop of fresh whipped cream or a scattering of fresh berries. They are also fantastic as individual treats for parties or potlucks, easily transportable and always a crowd-pleaser. Don’t be afraid to get creative with variations! You could experiment with different types of red fruit purées, like raspberry or strawberry, or even add a hint of citrus zest to the filling for an extra burst of flavor. For a chocolate lover’s twist, consider adding a swirl of melted dark chocolate to the batter before baking.
The joy of baking is in the experimentation and the personal touch. So go ahead, make these Mini Red Cheesecakes your own! I encourage you to gather your ingredients, put on some music, and enjoy the process. The reward of biting into one of these luscious mini cheesecakes is absolutely worth it. Happy baking!
Frequently Asked Questions about Mini Red Cheesecakes:
Q: Can I make these Mini Red Cheesecakes ahead of time?
Absolutely! Mini Red Cheesecakes are excellent for making ahead. They can be stored in an airtight container in the refrigerator for up to 3-4 days. In fact, many find they taste even better after a day as the flavors meld together.
Q: My Mini Red Cheesecakes cracked on top. What did I do wrong?
Cracking can happen for a few reasons. Over-mixing the batter can introduce too much air, causing the cheesecakes to puff up and then collapse, leading to cracks. Another common cause is uneven or too high baking temperatures. Ensure your oven is accurately preheated and consider baking them in a water bath (bain-marie) for a more gentle, even cook, which also helps prevent cracking. Cooling them gradually in the oven with the door slightly ajar can also help.
Mini Red Cheesecakes
Delicious and easy mini red velvet cheesecakes with a chocolate cookie crust and creamy frosting.
Ingredients
-
1 1/2 cups Oreo cookie crumbs
-
6 tablespoons unsalted butter, melted
-
8 oz cream cheese, softened
-
1/2 cup sugar
-
1 large egg
-
1 teaspoon vanilla extract
-
2 tablespoons red velvet cake mix
-
Red food coloring (optional)
-
Cream cheese frosting
-
White chocolate shavings
-
Sprinkles
Instructions
-
Step 1
Prepare the crust: Combine Oreo cookie crumbs and melted butter. Press firmly into the bottom of mini muffin cups lined with paper liners. -
Step 2
Make the filling: Beat softened cream cheese until smooth. Add sugar and beat until fluffy. Incorporate the egg and vanilla extract on low speed. -
Step 3
Add red velvet cake mix and optional red food coloring to the cream cheese mixture. Stir until just combined. -
Step 4
Spoon the filling over the crusts in the muffin cups, filling about two-thirds full. Preheat oven to 325°F (160°C). -
Step 5
Bake on a baking sheet for 18-22 minutes, until edges are set and centers are mostly firm with a slight wobble. -
Step 6
Cool completely in the muffin tin, then chill in the refrigerator for at least 2-3 hours or overnight. -
Step 7
Decorate with cream cheese frosting, white chocolate shavings, and sprinkles before serving.
Important Information
Nutrition Facts (Per Serving)
It is important to consider this information as approximate and not to use it as definitive health advice.
Allergy Information
Please check ingredients for potential allergens and consult a health professional if in doubt.

Leave a Comment