

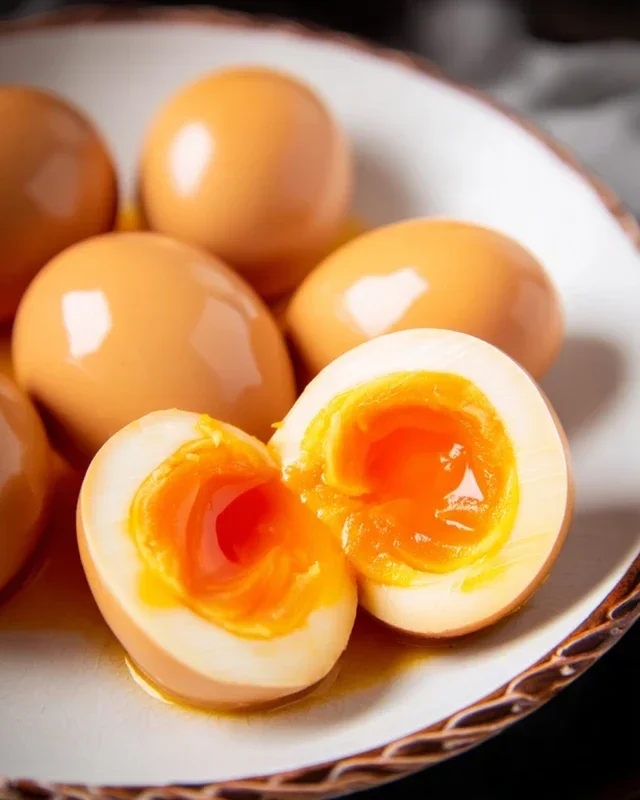
Ramen eggs, or ajitama, are more than just a topping; they’re the soul of a truly satisfying bowl of ramen. There’s a reason why these marinated marvels have become an indispensable part of ramen culture worldwide. Their allure lies in that perfect balance: a jammy, golden yolk encased in a tender, yielding white, all infused with a savory, umami-rich marinade. It’s this exquisite contrast of textures and flavors that elevates simple ramen into an unforgettable culinary experience. Imagin extracte piercing that delicate membrane and watching the luscious yolk ooze into the steaming broth – pure bliss! Mastering the art of the perfect ramen egg isn’t just about cooking an egg; it’s about unlocking a depth of flavor that transforms any dish, from ramen to rice bowls and even salads.
The Magic of Ramen Eggs
Unlocking the Perfect Ajitama
Ingredients:
Crafting the Perfect Ramen Eggs (Ajitama)
There’s something truly magical about a perfectly prepared ramen egg, also known as ajitama. That glossy, golden yolk, slightly jammy and infused with savory-sweet goodness, is the crown jewel of any ramen bowl. They elevate a simple noodle soup into a culinary experience. Forget those rubbery, overcooked eggs you might have encountered. Today, we’re diving deep into how to achieve that coveted ajitama perfection in your own kitchen. It’s surprisingly simple, requiring just a few key ingredients and a little patience. These marinated eggs are not just for ramen, either. They make fantastic additions to bento boxes, salads, or even enjoyed on their own as a delightful snack. So, let’s get started on creating these little flavor bombs!
The beauty of ajitama lies in its simplicity and the depth of flavor it achieves through a straightforward marinating process. The key is to start with perfectly soft-boiled eggs and then allow them to soak up the delicious marinade. The result is an egg with a custardy yolk and a savory, slightly sweet, and umami-rich exterior. It’s a balance of flavors that complements the rich broths and chewy noodles of ramen beautifully. Let’s break down the process, step by step, so you can achieve ramen egg nirvana.
Preparing the Eggs
The first crucial step is to cook your eggs to the perfect level of doneness. We’re aiming for a jammy, almost molten yolk that isn’t quite fully set but is also not runny. This is where many people stumble, but with a little attention, you can master it.
1. Bring a medium saucepan of water to a rolling boil. If you’re using vinegar, add a splash (about 1 tablespoon) to the boiling water. The vinegar is optional but can help prevent egg whites from escaping if an egg cracks during cooking. Gently lower the 6 large eggs into the boiling water using a slotted spoon. Be careful not to drop them in, as this can cause them to crack.
2. Once the eggs are in, immediately reduce the heat to a gentle simmer. We’re looking for very small bubbles, not a vigorous boil. Set a timer for exactly 6 to 7 minutes. The exact timing will depend on your stove and the size of your eggs. For a slightly more liquid yolk, aim for 6 minutes. For a firmer, jammy yolk, go for 7 minutes. During this simmering time, you can gently nudge the eggs around the pot occasionally to ensure even cooking and prevent them from sticking to the bottom.
3. As soon as the timer goes off, prepare an ice bath. This is absolutely critical for stopping the cooking process immediately and ensuring that your yolks achieve that perfect jammy consistency. Fill a large bowl with ice and cold water. Carefully remove the eggs from the simmering water with your slotted spoon and plunge them directly into the ice bath. Let them sit in the ice bath for at least 10-15 minutes. This chilling process not only stops the cooking but also makes the eggs much easier to peel.
Making the Marinade
While your eggs are chilling, it’s time to whip up the flavorful marinade that will transform them into ajitama. This marinade is a simple yet potent blend of savory and sweet elements that perfectly infuses the eggs.
4. In a small saucepan, combine the ½ cup of light sodium soy sauce, ¼ cup of water, ¼ cup of non-non-non-alcoholic alternativeic non-alcoholic mirin, and 2 tablespoons of granulated sugar. Place the saucepan over medium heat and stir constantly until the sugar has completely dissolved. You don’t need to bring this mixture to a boil; just ensure everything is well incorporated and the sugar is gone. Once the sugar is dissolved, remove the saucepan from the heat and let the marinade cool slightly. It doesn’t need to be completely cold, but you don’t want to pour piping hot marinade over your eggs, as this can continue to cook them.
Marinating the Eggs
This is where the magic happens. Patience is key in this stage, as it’s what allows the flavors to truly penetrate the eggs.
5. Once your eggs have been thoroughly chilled in the ice bath and are cool enough to handle, it’s time to peel them. Gently tap each egg on a hard surface and then roll it between your hands to loosen the shell. Peel the eggs carefully under cool running water. The cold shock from the ice bath should make them peel quite easily. If any egg white sticks, don’t worry too much; the marinade will cover most imperfections.
6. Place the peeled, soft-boiled eggs into a resealable bag or a shallow, non-reactive container. Pour the slightly cooled marinade over the eggs, ensuring they are fully submerged. If using a bag, gently squeeze out as much air as possible before sealing it. If using a container, cover it tightly with plastic wrap or a lid.
7. Now comes the waiting game. Refrigerate the marinated eggs for at least 4 hours, but for the best flavor, I recommend marinating them for 12 to 24 hours. During this time, the soy sauce, non-alcoholic mirin, and sugar will work their delicious magic, infusing the eggs with a beautiful color and a complex savory-sweet flavor. You can turn the eggs occasionally within the marinade to ensure even marbling and color distribution. The longer they marinate, the deeper the flavor will be.
Once they’ve had ample time to soak up all that goodness, your ajitama are ready to be enjoyed! Carefully remove them from the marinade. You can slice them in half lengthwise to reveal that glorious jammy yolk, or add them whole to your ramen. Any leftover marinade can be strained and saved to add an extra layer of flavor to your ramen broth or other dishes. Enjoy your homemade ramen eggs – they are truly a game-changer!
Conclusion:
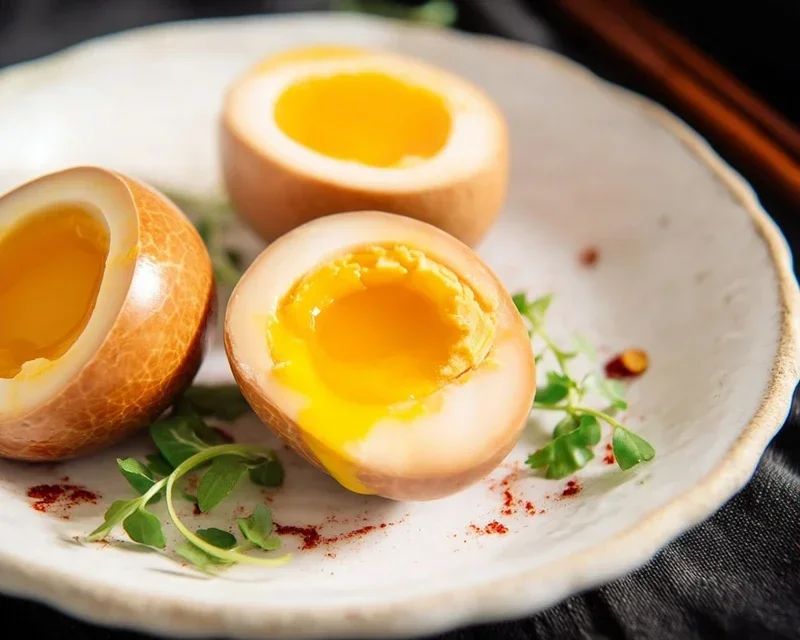
And there you have it! Making your own Ramen Eggs (Ajitama) is surprisingly simple and elevates any noodle dish to gourmet status. The magic lies in the perfect balance of savory, sweet, and umami flavors achieved through the marinade, transforming a humble soft-boiled egg into a creamy, custardy delight. These eggs are a game-changer, adding a luxurious texture and depth of flavor that truly completes a bowl of ramen. Beyond ramen, they are fantastic as a topping for rice bowls, in salads, or even just enjoyed on their own. Don’t be afraid to experiment with different marinades – soy sauce, non-alcoholic mirin, and non-alcoholic sake are a classic base, but you can introduce ingredients like garlic, gin extractger, chili flakes, or even a touch of sesame oil for your own unique twist on this beloved Japanese delicacy. I truly encourage you to give this Ramen Egg recipe a try; the results are incredibly rewarding and will have you wondering why you didn’t make them sooner!
Frequently Asked Questions:
How long do Ramen Eggs last in the refrigerator?
Once marinated and stored in an airtight container in the refrigerator, your Ramen Eggs should stay delicious for up to 4-5 days. It’s best to use them within this timeframe for optimal freshness and texture.
Can I use different types of soy sauce for the marinade?
Absolutely! While a good quality Japanese soy sauce is recommended, you can experiment. Light soy sauce will offer a saltier, less intense color, while dark soy sauce will provide a deeper color and a slightly richer flavor profile. Just adjust the quantity slightly to account for differences in saltiness.
What’s the best way to achieve a perfectly jammy yolk?
The key to a jammy yolk is the boiling time and the immediate ice bath. For most large eggs, boiling for exactly 6 to 7 minutes, followed by an immediate transfer to an ice bath for at least 10 minutes, usually yields that desirable soft, custard-like texture. Don’t skip the ice bath, as it stops the cooking process precisely.
Ramen Eggs (Ajitama)
Perfectly seasoned, soft-boiled eggs marinated for ramen. A quick and flavorful addition to any noodle dish.
Ingredients
-
6 large eggs
-
1/2 cup soy sauce (light sodium)
-
1/4 cup water
-
1/4 cup non-alcoholic mirin
-
2 tablespoons granulated sugar
Instructions
-
Step 1
Bring a pot of water to a rolling boil. Gently add the eggs, ensuring they are fully submerged. Cook for 6 to 7 minutes for a jammy yolk. Immediately transfer eggs to an ice bath to stop the cooking process. -
Step 2
While the eggs are chilling, prepare the marinade. In a small saucepan, combine soy sauce, water, non-alcoholic mirin, and granulated sugar. Heat gently, stirring until the sugar is dissolved. Let the marinade cool completely. -
Step 3
Once the eggs are cool enough to handle, carefully peel them. Be gentle to avoid breaking the yolks. -
Step 4
Place the peeled eggs into a sealable bag or a small container. Pour the cooled marinade over the eggs, ensuring they are fully submerged. -
Step 5
Marinate the eggs in the refrigerator for at least 4 hours, or preferably overnight, flipping them halfway through if possible. -
Step 6
Remove eggs from marinade. Slice in half and serve immediately.
Important Information
Nutrition Facts (Per Serving)
It is important to consider this information as approximate and not to use it as definitive health advice.
Allergy Information
Please check ingredients for potential allergens and consult a health professional if in doubt.



Leave a Comment