
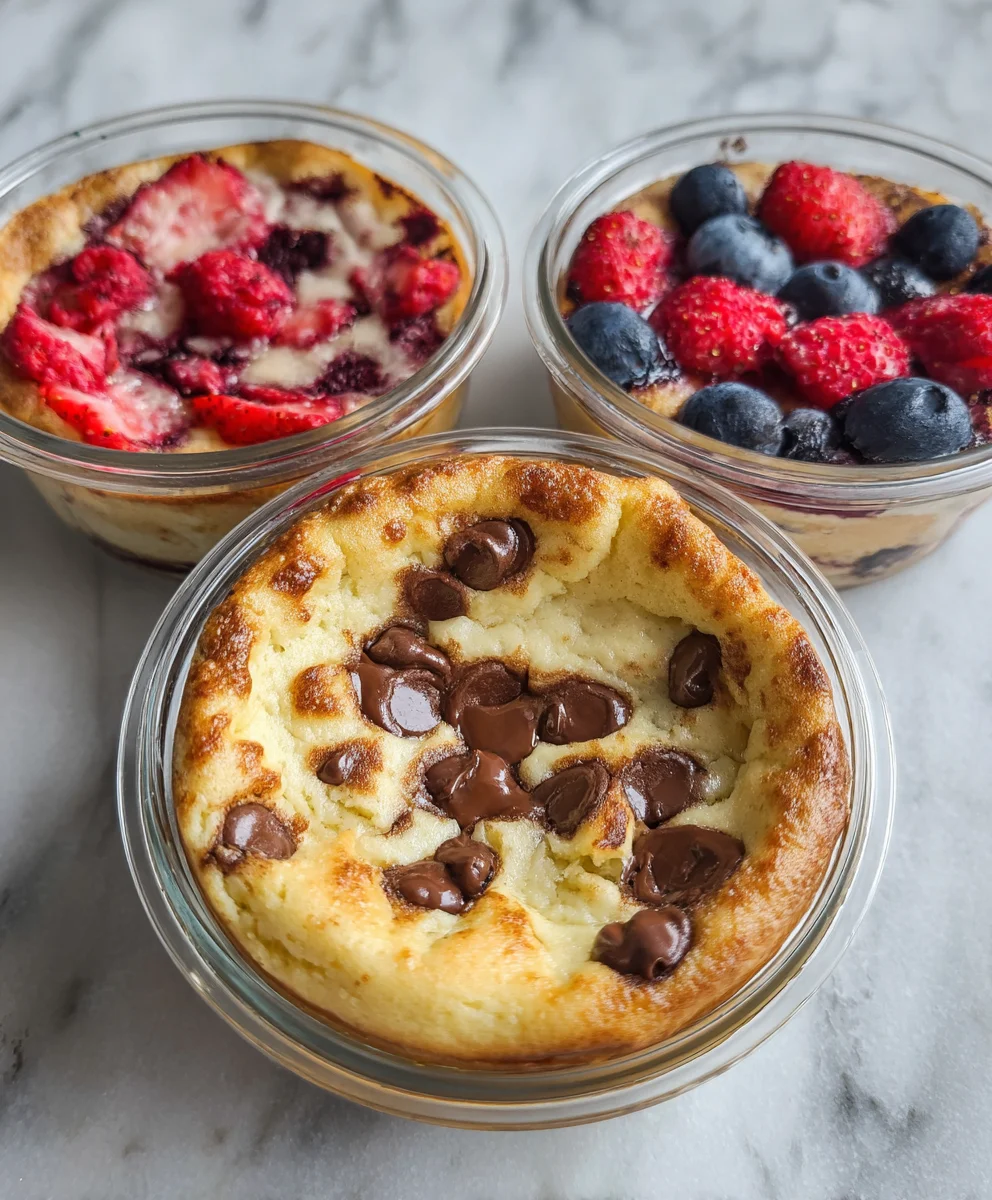
Baked Protein Pancake Bowls- great for meal prep and no banana needed! Are you tired of the same old breakfast routine, or struggling to find quick, healthy options that fuel your day without relying on overripe bananas? Then get ready to revolutionize your mornings (and afternoons, and evenings!) with these incredibly versatile and utterly delicious Baked Protein Pancake Bowls. We all know the struggle of wanting something satisfying, protein-packed, and delightfully sweet, but not having the time or the right ingredients on hand. That’s where these amazing pancake bowls shine. What makes them so special? They’re incredibly easy to whip up in batches, perfect for tucking into your lunch bag or grabbing on your way out the door. Plus, the absence of banana means a cleaner, more subtle flavor profile that allows your chosen toppings to truly take center stage. Get ready to discover your new go-to meal prep hero!
Ingredients:
- 1 egg
- 50g yogurt (vanilla or unflavoured)
- 70ml milk (I use soy or almond, but any milk will work)
- 35g flour (all purpose)
- 25g protein powder (vanilla or white chocolate works well. This recipe uses a vegan protein powder; if using whey, use slightly less liquid)
- 5g zero-calorie granulated sweetener (or sweetener of choice, approximately 1 tsp)
- 1/2 tsp baking powder
- Optional toppings: berries, chopped nuts, sugar-free syrup, a dollop of extra yogurt, cinnamon
Preparation and Mixing
Step 1: Preheat Oven and Prepare Baking Dish
Before we get started on the batter, let’s get the oven ready. Preheat your oven to 180°C (350°F). This ensures that once your delicious batter is ready, it goes straight into a hot oven for optimal baking. Next, you’ll need to prepare your baking dish. This recipe is perfect for individual bowls or ramekins, making it ideal for meal prep. You’ll need about 2-3 small oven-safe bowls or ramekins (approximately 150-200ml capacity each). Lightly grease these bowls with a small amount of cooking spray or a tiny bit of butter or oil. This crucial step prevents your protein pancake bowls from sticking, making for a much cleaner removal and easier cleanup.
Step 2: Combine Wet Ingredients
In a medium-sized mixing bowl, crack the egg. Add the yogurt, whether you’ve chosen a sweet vanilla flavour or a neutral unflavoured option. Pour in the milk – I find soy or almond milk gives a lovely consistency, but feel free to use whatever milk you have on hand. Whisk these ingredients together thoroughly until they are well combined and smooth. You want to ensure there are no streaks of egg white or yogurt visible. A good whisking here will help create a lighter, airier pancake bowl.
Step 3: Combine Dry Ingredients
In a separate, smaller bowl, measure out your dry ingredients. Add the all-purpose flour, the protein powder. If you’re using a vanilla or white chocolate flavoured protein powder, it will add a lovely sweetness and aroma. Remember, if you’re using a whey protein powder, it tends to absorb more liquid than vegan varieties, so you might need to add a splash more milk in the next step if the batter seems too thick. Next, add the zero-calorie granulated sweetener. I find about 5g is a good starting point, equivalent to roughly one teaspoon, but adjust this to your personal preference. Finally, add the baking powder. The baking powder is essential for giving your pancake bowls a lovely rise and fluffy texture. Whisk these dry ingredients together until everything is evenly distributed. This helps prevent clumps of flour or baking powder in your final pancake.
Step 4: Combine Wet and Dry Mixtures
Now it’s time to bring our wet and dry ingredients together. Gradually add the dry ingredient mixture to the wet ingredient mixture. Gently whisk or stir everything together until just combined. Be careful not to overmix the batter. Overmixing can develop the gluten in the flour, leading to a tougher, denser pancake. A few small lumps in the batter are perfectly fine; in fact, they are often a sign that you haven’t overmixed. Once combined, check the consistency of your batter. It should be thick but pourable, similar to a thick pancake batter. If it seems too thick, especially if you used whey protein, add another tablespoon of milk at a time until you reach the desired consistency. If it seems too thin, you can add another teaspoon of flour, but this is less likely with the given quantities.
Baking and Serving
Step 5: Fill Bowls and Bake
Carefully spoon the batter evenly into your prepared oven-safe bowls. Fill each bowl about two-thirds of the way full. This allows room for the pancake bowls to rise as they bake without overflowing. Place the filled bowls onto a baking sheet. This makes it easier to transfer them in and out of the oven and catches any potential spills. Carefully place the baking sheet into the preheated oven. Bake for approximately 20-25 minutes. The baking time can vary depending on your oven and the size of your bowls. You’ll know they are ready when they are puffed up, golden brown around the edges, and a toothpick inserted into the center comes out clean.
Step 6: Cool and Serve
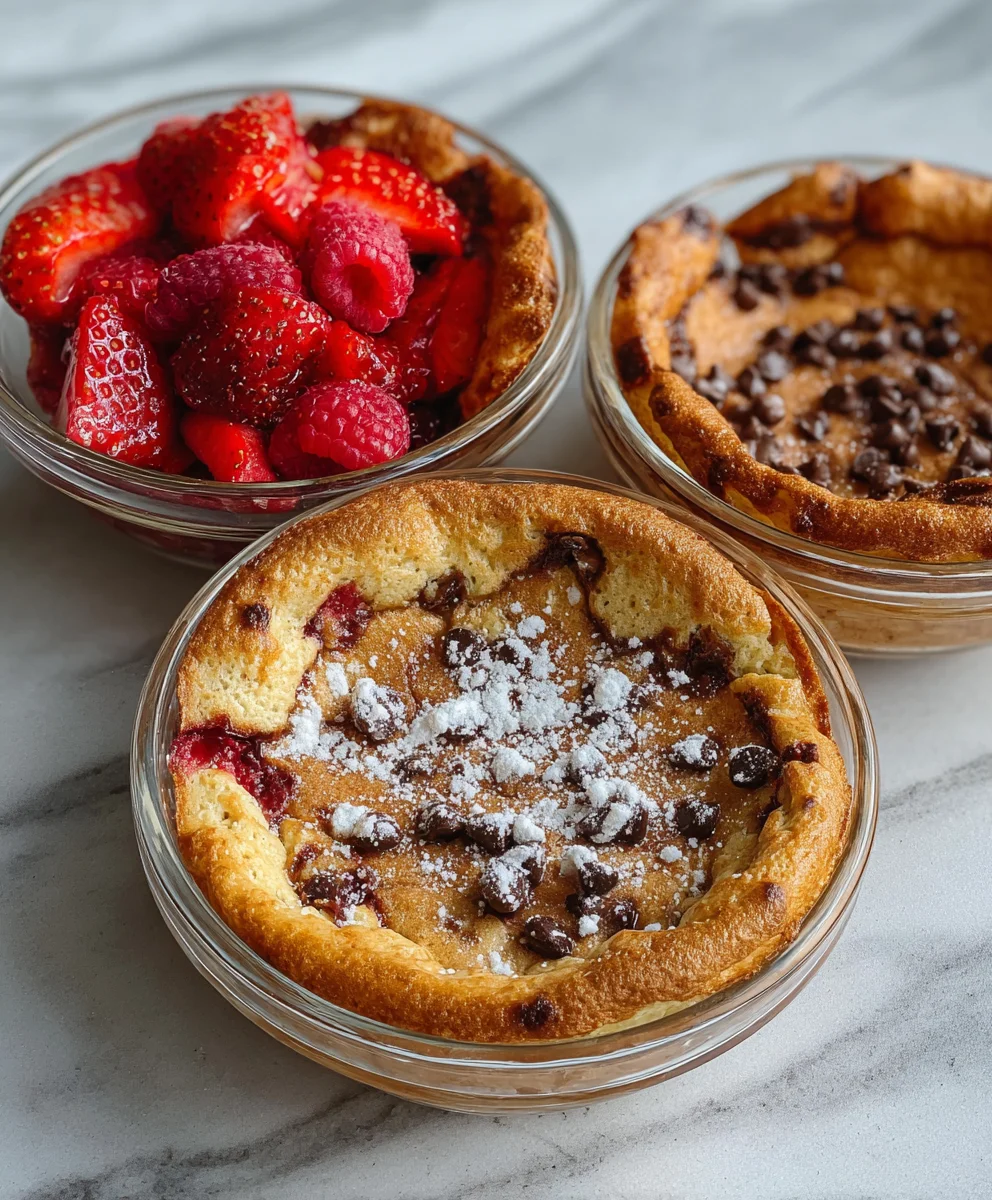
Once baked to perfection, carefully remove the baking sheet from the oven. Let the protein pancake bowls cool in their bowls for about 5-10 minutes before serving. This allows them to set slightly and makes them easier to handle. You can eat them directly from the bowls, which is wonderfully convenient for meal prep. For an extra touch, top them with your favorite additions. Fresh berries add a burst of flavour and antioxidants, chopped nuts provide a satisfying crunch, and a drizzle of sugar-free syrup or a dollop of extra yogurt can elevate the experience. A sprinkle of cinnamon is also a wonderful addition. These Baked Protein Pancake Bowls are incredibly versatile and a fantastic way to start your day or refuel after a workout. Enjoy the healthy, delicious, and satisfying meal prep solution!
Conclusion:
And there you have it – a truly delicious and incredibly versatile recipe for Baked Protein Pancake Bowls that’s perfect for anyone looking for a healthy, satisfying breakfast or snack. We’ve shown you just how easy it is to whip up these protein-packed delights, perfect for your weekly meal prep routine, and the best part? No banana required, making them an excellent option for those who aren’t fans of its flavor or texture. These Baked Protein Pancake Bowls are wonderfully adaptable, offering a fantastic base for countless flavor combinations. Enjoy them warm straight from the oven, or reheat them for a quick and nutritious grab-and-go option. Don’t hesitate to experiment with different mix-ins and toppings to discover your personal favorite flavor profile!
Frequently Asked Questions:
Can I make these vegan?
Absolutely! To make these Baked Protein Pancake Bowls vegan, simply substitute the eggs with a flax egg (1 tablespoon flaxseed meal mixed with 3 tablespoons water, let sit for 5 minutes) and use your favorite plant-based milk. Ensure your protein powder is also vegan for a completely plant-powered meal.
How should I store leftovers?
Store any leftover Baked Protein Pancake Bowls in an airtight container in the refrigerator for up to 3-4 days. They reheat beautifully in the microwave or toaster oven, making them ideal for busy mornings. You can also freeze individual portions for even longer storage.
What other toppings can I use besides fruit?
The topping possibilities are nearly endless! Consider a drizzle of nut butter (peanut, almond, cashew), a sprinkle of chopped nuts or seeds (chia, hemp, sunflower), a dollop of Greek yogurt or coconut yogurt, a dusting of cinnamon or nutmeg, or even a sugar-free chocolate syrup for a decadent treat. The goal is to make these Baked Protein Pancake Bowls great for meal prep and enjoyable!
Baked Protein Pancake Bowls – No Banana Meal Prep
A healthy and delicious baked protein pancake bowl recipe, perfect for meal prep and free from bananas.
Ingredients
-
1 egg
-
50g yogurt (vanilla or unflavoured)
-
70ml milk (soy or almond)
-
35g all purpose flour
-
25g protein powder (vanilla or white chocolate)
-
5g zero-calorie granulated sweetener
-
1/2 tsp baking powder
Instructions
-
Step 1
Preheat oven to 180°C (350°F). Lightly grease 2-3 small oven-safe bowls or ramekins (150-200ml capacity). -
Step 2
In a medium bowl, whisk together the egg, yogurt, and milk until smooth. -
Step 3
In a separate small bowl, whisk together the flour, protein powder, sweetener, and baking powder. -
Step 4
Gradually add the dry ingredients to the wet ingredients, whisking gently until just combined. Do not overmix. Adjust milk if too thick (especially with whey protein). -
Step 5
Spoon batter evenly into prepared bowls, filling about two-thirds full. Place bowls on a baking sheet and bake for 20-25 minutes, or until puffed, golden brown, and a toothpick comes out clean. -
Step 6
Let cool in bowls for 5-10 minutes. Serve warm with desired toppings like berries, nuts, or sugar-free syrup.
Important Information
Nutrition Facts (Per Serving)
It is important to consider this information as approximate and not to use it as definitive health advice.
Allergy Information
Please check ingredients for potential allergens and consult a health professional if in doubt.


Leave a Comment