
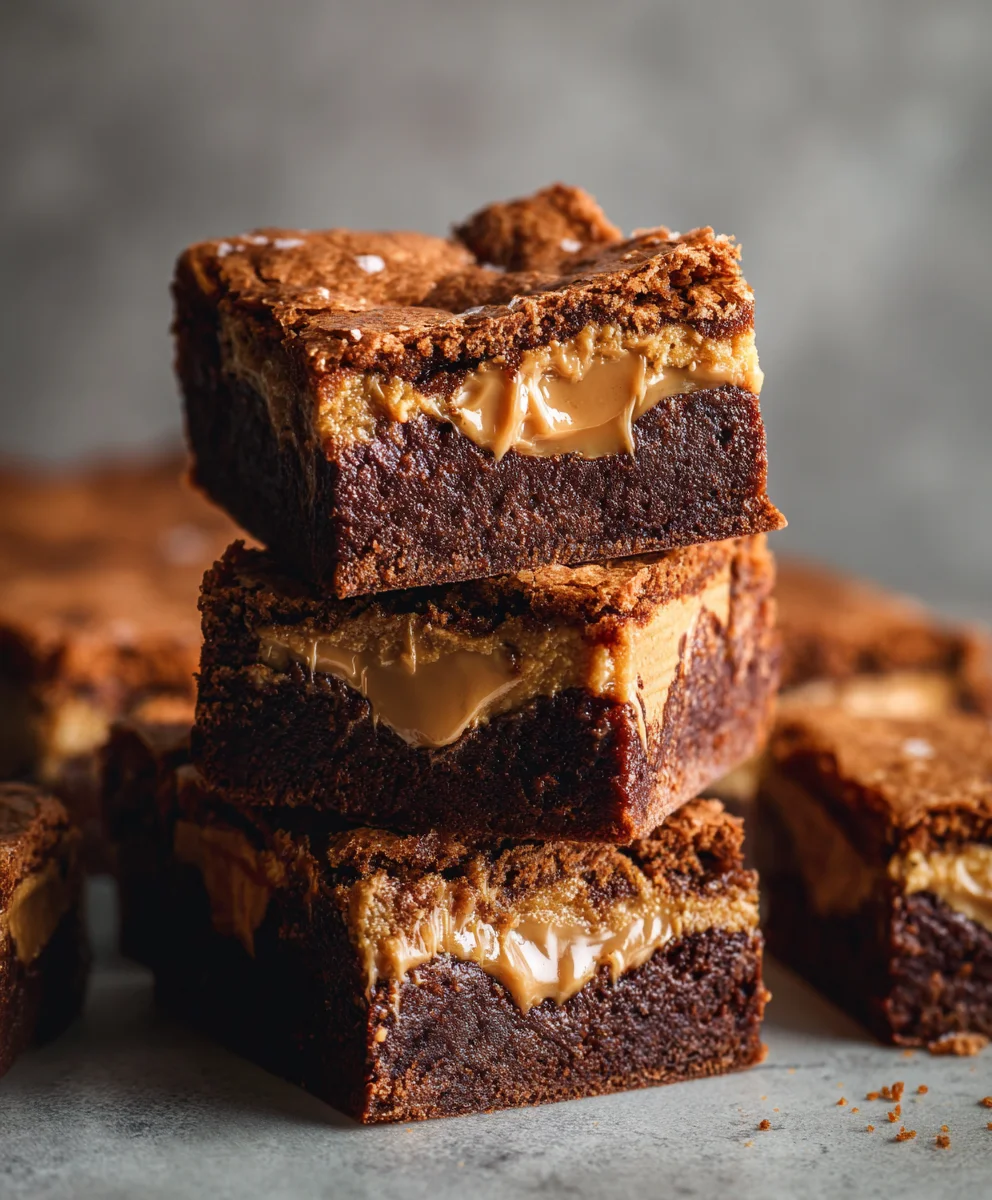
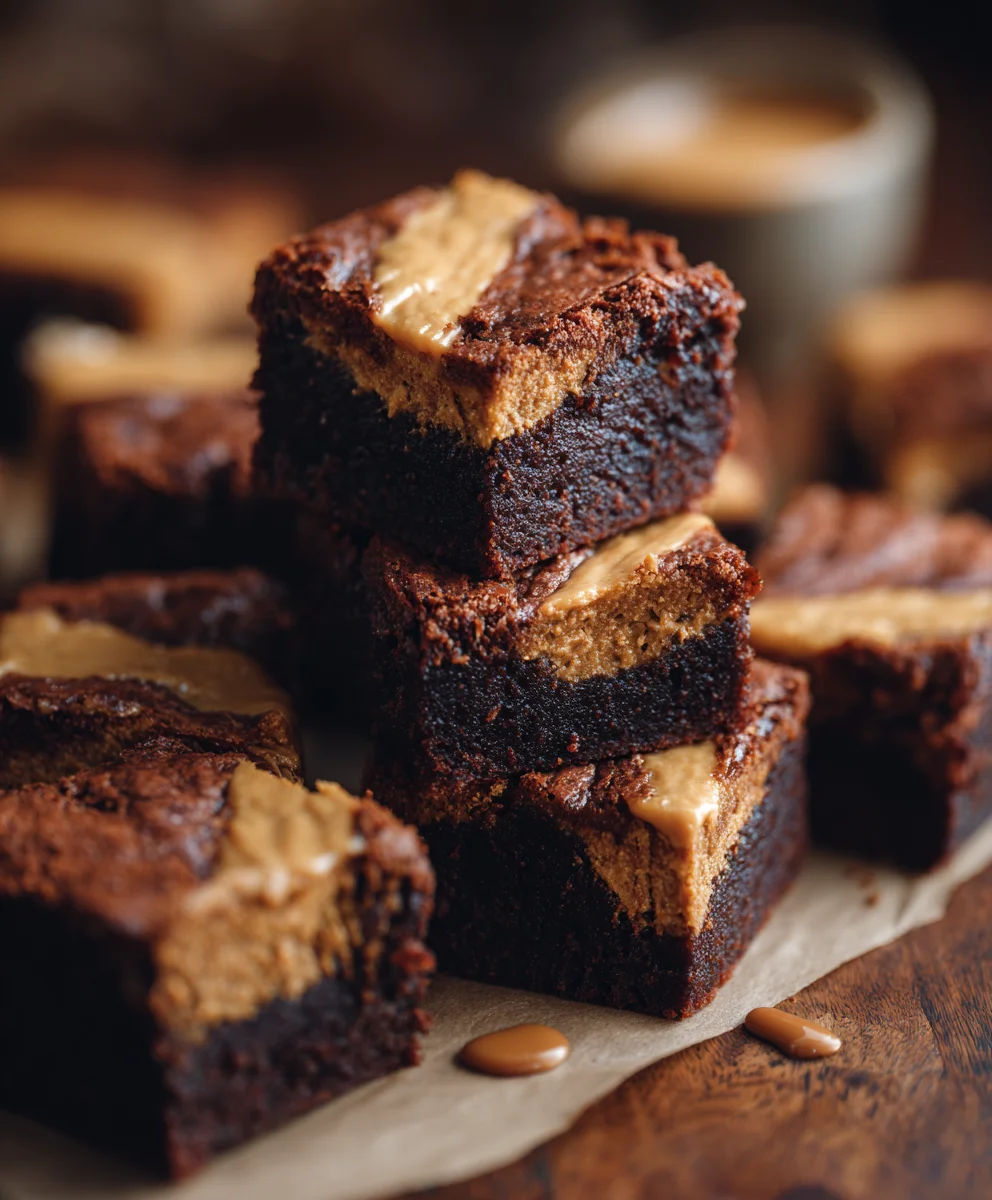
Biscoff Brownies. Are you ready to embark on a truly extraordinary dessert adventure? I am absolutely thrilled to share with you a recipe that promises to elevate your baking prowess and delight every single taste bud: the ultimate Biscoff Brownies. Imagine a deep, dark, and utterly fudgy brownie, generously swirled with the iconic, caramelized biscuit spread, and often studded with those delightful crunchy cookies. It’s a symphony of textures and flavors that is simply irresistible, offering a sophisticated twist on a classic comfort food.
The beloved Biscoff cookie, originating from Belgium as a speculoos biscuit, has charmed palates worldwide with its unique caramel and subtly spiced notes, traditionally enjoyed as the perfect companion to a cup of coffee. Its transformation into a spread has opened up a universe of culinary possibilities, and its marriage with a classic brownie base is nothing short of genius. People adore this dish not only for its comforting familiarity but also for the intriguing complexity that the Biscoff adds. The rich, buttery notes of the brownie perfectly complement the sweet, cinnamony depth of the Biscoff, creating a treat that is both nostalgic and excitingly new. Preparing these Biscoff Brownies is more than just baking; it’s crafting a moment of pure, unadulterated bliss for anyone who takes a bite.
Ingredients:
- Unsalted Butter: 1 cup (226g), softened slightly or cut into pieces
- Granulated Sugar: 1 ½ cups (300g)
- Light Brown Sugar: ½ cup (100g), packed
- Large Eggs: 4, at room temperature
- Pure Vanilla Extract: 2 teaspoons, good quality for the best flavor
- All-Purpose Flour: 1 cup (120g)
- Unsweetened Cocoa Powder: ¾ cup (75g), Dutch-processed for a deeper, darker, and less acidic chocolate flavor is highly recommended
- Fine Sea Salt: 1 teaspoon, essential for balancing the sweetness and enhancing the chocolate notes
- Semi-Sweet Chocolate Chips or Chunks: 1 cup (170g), plus an optional ½ cup for sprinkling on top
- Biscoff Cookie Butter (smooth variety): 1 cup (250g), softened slightly
- Biscoff Cookies (Speculoos biscuits): 15-20 cookies, roughly crushed into varying sizes
Prepping Your Workspace and Ingredients for Perfect Biscoff Brownies
- Preheat Your Oven and Prepare Your Pan: First things first, let’s get that oven ready! Preheat your oven to 350°F (175°C). Then, grab a 9×13 inch baking pan. This is the ideal size for a generous batch of fudgy brownies. Line the pan with parchment paper, leaving an overhang on the longer sides. This little trick is an absolute game-changer, trust me! It creates “handles” that will allow you to easily lift your completely cooled Biscoff Brownies out of the pan, making slicing a breeze and preventing any sticky situations. A light spray with non-stick cooking spray under the parchment can help it stay in place, but it’s not strictly necessary if you’re careful.
- Measure Everything Accurately: While baking might seem like an art, it’s very much a science, especially when it comes to precise measurements. Take a few extra moments to measure all of your ingredients accurately. For dry ingredients like flour and cocoa powder, spoon them into your measuring cup and then level them off with the back of a knife. For sugars, ensure your brown sugar is firmly packed. Having everything pre-measured and ready to go (this is called mise en place in fancy chef terms!) makes the entire baking process smoother and more enjoyable.
- Prepare Your Biscoff Elements: For the Biscoff cookie butter, you’ll want it to be nice and spreadable. If it’s too firm, a quick zap in the microwave for 15-30 seconds (stirring well) or placing the jar in a bowl of warm water for a few minutes will do the trick. You want a consistency similar to warm peanut butter – easily dolloped and swirled. For the Biscoff cookies, place them in a zip-top bag and gently crush them with a rolling pin or the bottom of a heavy glass. We’re looking for a mix of fine crumbs and slightly larger pieces for textural interest on top of our magnificent Biscoff Brownies.
Crafting the Irresistibly Fudgy Brownie Batter
-
Melt the Butter and Chocolate: In a medium-sized, heatproof bowl, combine your measured unsalted butter and about half of your semi-sweet chocolate chips (½ cup or 85g). You have a couple of options for melting these:
- Double Boiler Method: Place the bowl over a saucepan of simmering water, ensuring the bottom of the bowl does not touch the water. Stir occasionally until both the butter and chocolate are completely melted and smooth. This method provides gentle, even heat and prevents scorching.
- Microwave Method: Heat in 30-second intervals, stirring well after each interval, until the mixture is smooth and fully melted. Be careful not to overheat the chocolate, as it can seize.
Once melted, remove the mixture from the heat and let it cool slightly for a few minutes. You want it warm, but not so hot that it will cook the eggs later.
- Combine Sugars and the Melted Chocolate Mixture: In a large mixing bowl, pour in your granulated sugar and packed light brown sugar. Add the slightly cooled melted butter and chocolate mixture. Using a sturdy whisk, stir these together really well until they are thoroughly combined and glossy. This step is crucial for dissolving some of the sugar and creating that signature shiny, crackly top on your finished Biscoff Brownies. Don’t be shy; give it a good, vigorous stir for about 1-2 minutes.
- Incorporate the Eggs and Vanilla: Now for the eggs! Add them one at a time, whisking vigorously after each addition until it’s fully incorporated before adding the next. This progressive addition of eggs helps to emulsify the mixture, leading to a truly fudgy and dense brownie. Once all the eggs are in, stir in the pure vanilla extract. Continue whisking for another minute or two. You should notice the mixture becoming lighter in color and slightly thicker, almost like a thin custard. This aerating step is key for texture.
- Sift and Fold in Dry Ingredients: In a separate medium bowl, whisk together your all-purpose flour, unsweetened cocoa powder, and fine sea salt. Sifting these dry ingredients together isn’t just for fancy bakers; it ensures there are no lumps in your batter and helps to distribute the salt and cocoa evenly. Gradually add the dry mixture to your wet ingredients. Using a rubber spatula, gently fold the dry into the wet. Here’s an important tip: Mix only until just combined. As soon as you no longer see any streaks of dry flour, stop mixing! Overmixing develops gluten in the flour, which can lead to tough, cakey brownies, and we are absolutely aiming for fudgy perfection with these Biscoff Brownies.
- Fold in Remaining Chocolate Chips: Finally, gently fold in the remaining 1 cup of semi-sweet chocolate chips (or chunks, if you prefer). These will melt into glorious pockets of chocolate as the brownies bake, adding another layer of rich decadence.
Adding the Signature Biscoff Swirl and Crumbly Topping
- Layer the First Half of the Brownie Batter: Carefully pour or spoon about half of your rich brownie batter into your prepared 9×13 inch baking pan. Use your spatula to gently spread it evenly across the bottom of the pan. It doesn’t have to be perfectly smooth, but aim for a relatively flat layer.
- Dollop and Swirl the First Layer of Biscoff Spread: Take about half (approximately ½ cup) of your softened Biscoff cookie butter. Dollop spoonfuls of the Biscoff spread randomly over the surface of the brownie batter. Now, with a butter knife or a skewer, gently drag it through the Biscoff and batter, creating beautiful swirls. Remember: don’t over-swirl! We want distinct ribbons of Biscoff, not a fully blended mixture. This contrast is what makes these Biscoff Brownies so visually appealing and incredibly delicious.
- Add the Remaining Batter and Biscoff Swirl: Carefully spoon the remaining brownie batter over the swirled Biscoff layer. It might be a bit tricky, but try to cover as much of the Biscoff as you can. Once the batter is mostly spread, dollop the remaining ½ cup of Biscoff cookie butter on top, just as you did before. Repeat the swirling process with your knife or skewer, creating more lovely patterns. Again, aim for distinct swirls rather than complete integration.
- Top with Crushed Biscoff Cookies: Finally, sprinkle your roughly crushed Biscoff cookies evenly over the entire top surface of the brownie batter. This not only adds an extra punch of that irresistible Speculoos flavor but also provides a wonderful textural contrast – a slight crunch on top of the fudgy brownie. If you saved some extra chocolate chips, this is also a great time to sprinkle them over the top for an even more decadent finish! These small touches elevate simple brownies into truly extraordinary Biscoff Brownies.
Baking Your Decadent Biscoff Brownies to Perfection
- Bake in the Preheat Oven: Carefully transfer your pan of glorious brownie batter into the preheated 350°F (175°C) oven. Place it on the middle rack for even baking.
-
Monitor Baking Time and Doneness: Bake for approximately 25-30 minutes. Baking brownies can be a delicate balance; you don’t want to underbake them (hello, raw batter!), but you definitely don’t want to overbake them either, which can lead to dry, cakey brownies instead of fudgy ones.
- How to Check for Doneness: The edges of the brownies should look set and slightly puffed. To test the center, insert a toothpick about 1 inch from the edge of the pan. It should come out with moist crumbs attached, but not wet batter. If it comes out completely clean, your brownies are likely overbaked. If it comes out with liquid batter, they need more time. Every oven is a little different, so start checking around the 25-minute mark.
- Achieving the Fudgiest Texture: A slightly underbaked center (where the toothpick has moist crumbs) will result in the ultimate fudgy texture once cooled. Don’t be afraid to take them out when they look just a touch gooey in the very center.
- Optional Mid-Bake Additions: If you reserved any extra chocolate chips or Biscoff crumbs, you can sprinkle them on top during the last 5-10 minutes of baking. This ensures they don’t sink entirely into the batter and remain beautifully visible on the surface.
- Remove from Oven: Once they’ve reached that perfect stage of doneness, carefully remove the pan from the oven. The aroma filling your kitchen will be absolutely heavenly!
Cooling and Serving Your Biscoff Brownies
- Cool Completely in the Pan: This is arguably the hardest step for impatient bakers, but it is absolutely, 100% crucial for perfectly fudgy, neat, and stable Biscoff Brownies. Allow the brownies to cool completely in the pan on a wire rack for at least 2-3 hours, or even longer. You can even pop them in the refrigerator for an hour or so once they’ve reached room temperature to speed up the setting process. Trying to slice warm brownies will result in a messy, crumbly disaster. Patience is truly a virtue here! As they cool, the brownies will continue to set and firm up, developing that wonderfully dense and chewy texture.
- Lift and Slice: Once fully cooled, use the parchment paper overhang “handles” to gently lift the entire slab of brownies out of the pan and transfer it to a cutting board. Now, for the moment of truth! For clean, professional-looking slices, use a large, sharp knife. For even cleaner cuts, wipe the knife blade with a damp cloth or run it under hot water and dry it between each slice. This prevents sticky residue from tearing the next piece. Slice into your desired size squares – typically 12-16 pieces, depending on how generous you’re feeling.
- Serve and Enjoy!: Your decadent Biscoff Brownies are now ready to be devoured! They are fantastic on their own, but if you’re feeling extra indulgent, consider serving them with a scoop of vanilla bean ice cream, a drizzle of extra Biscoff cookie butter, or even a sprinkle of flaky sea salt to enhance all those wonderful flavors.
- Storage Instructions: If you miraculously have any leftover brownies (a rare occurrence, I know!), store them in an airtight container at room temperature for up to 3-4 days. For longer storage, you can freeze individual brownies wrapped tightly in plastic wrap for up to 2-3 months. Thaw at room temperature for an hour or so before enjoying. They’re just as delicious, if not more so, the next day!
Conclusion:
So, there you have it – my ultimate recipe for what I truly believe will become your new favorite treat. These aren’t just any ordinary brownies; they are a decadent, transformative experience that brings together rich chocolate, a fudgy texture, and the unmistakable, spiced caramel notes of Biscoff. I can honestly say, with full conviction, that these Biscoff Brownies are an absolute game-changer. They elevate the classic brownie to a new stratosphere of deliciousness, offering a complexity of flavor that will leave everyone craving more. What makes them an absolute must-try isn’t just the unique flavor profile, but also the ease with which you can achieve such a gourmet result in your own kitchen. Imagine the rich, dark chocolate melting in your mouth, followed by that delightful crunch and creamy spread of Biscoff, a harmony of textures and tastes that perfectly balance each other. They’re surprisingly simple to make, yet yield a dessert that looks and tastes incredibly sophisticated, making them perfect for both casual indulgence and impressing guests. Every bite is a journey through a symphony of sweet, spiced, and utterly irresistible flavors. The fudgy interior, the slightly crisp top, and the swirls of Biscoff create a textural masterpiece that is truly hard to beat. They’re the kind of treat that brightens any day, makes a simple gathering feel special, and satisfies even the most intense sweet cravings with a unique twist. You simply have to experience them for yourself!
Now, while these brownies are undeniably spectacular on their own, I always love to think about how we can make a good thing even better or tailor it to different occasions. For an extra touch of indulgence, try warming a slice slightly and serving it with a scoop of vanilla bean ice cream – the contrast of warm, fudgy brownie and cold, creamy ice cream is simply divine. A drizzle of extra melted Biscoff spread or even a light dusting of powdered sugar can also elevate their visual appeal and add another layer of sweetness. If you’re feeling adventurous, consider folding in a handful of white chocolate chips or chopped pecans into the batter for an added textural dimension and a slight variation in flavor. For those who love a bit of coffee with their dessert, a strong espresso or a creamy latte makes for a perfect pairing, cutting through the richness beautifully. Alternatively, for a truly festive twist, especially around the holidays, you could sprinkle a pinch of cinnamon or nutmeg into the brownie batter itself to further enhance the spiced notes from the Biscoff. Don’t forget the power of presentation – arranging them on a beautiful platter or individually wrapping them with a ribbon can transform them into thoughtful gifts for friends and family. You could even crumble a cooled brownie over yogurt or ice cream for an instant, luxurious dessert topping. The possibilities are truly endless once you have this incredible base recipe down. Consider creating a brownie sundae bar at your next party with various toppings like whipped cream, cherries, and sprinkles, allowing everyone to customize their perfect treat. These brownies are robust enough to handle many accompaniments, making them incredibly versatile and a true crowd-pleaser.
So, please, don’t just read about these wonders – gather your ingredients and give them a try! I promise you won’t regret it. There’s something incredibly satisfying about baking something so special with your own hands, and I truly believe this recipe will bring a huge smile to your face, and to the faces of everyone you share them with. Once you’ve baked your batch, I would absolutely love to hear all about your experience. Did you add any unique twists? How did your family and friends react? Share your photos and stories with me! Your feedback and creativity inspire me, and I can’t wait to see your incredible creations. Happy baking!
Biscoff Brownies
Fudgy, crunchy, and easy Biscoff Brownies, featuring a deep, dark brownie generously swirled with caramelized Biscoff spread and studded with crunchy cookies. A sophisticated twist on a classic comfort food.
Ingredients
-
1 cup (226g) Unsalted Butter
-
1 ½ cups (300g) Granulated Sugar
-
½ cup (100g) Light Brown Sugar
-
4 Large Eggs
-
2 teaspoons Pure Vanilla Extract
-
1 cup (120g) All-Purpose Flour
-
¾ cup (75g) Unsweetened Cocoa Powder (Dutch-processed recommended)
-
1 teaspoon Fine Sea Salt
-
1 cup (170g) Semi-Sweet Chocolate Chips or Chunks, plus optional ½ cup
-
1 cup (250g) Biscoff Cookie Butter (smooth variety), softened
-
15-20 Biscoff Cookies (Speculoos biscuits), crushed
Instructions
-
Step 1
Preheat oven to 350°F (175°C). Line a 9×13 inch baking pan with parchment paper, leaving an overhang. Soften 1 cup Biscoff cookie butter until spreadable. Crush 15-20 Biscoff cookies into varying sizes. -
Step 2
In a heatproof bowl, melt 1 cup unsalted butter and ½ cup (85g) semi-sweet chocolate chips (using a double boiler or microwave). Let the mixture cool slightly. -
Step 3
In a large mixing bowl, whisk granulated sugar (1½ cups), light brown sugar (½ cup), and the cooled melted butter/chocolate mixture together until thoroughly combined and glossy, about 1-2 minutes. -
Step 4
Add 4 large eggs one at a time, whisking vigorously after each addition until fully incorporated. Stir in 2 teaspoons pure vanilla extract. Continue whisking for another 1-2 minutes until the mixture appears lighter in color and slightly thicker. -
Step 5
In a separate medium bowl, whisk together 1 cup all-purpose flour, ¾ cup unsweetened cocoa powder, and 1 teaspoon fine sea salt. Gradually add the dry mixture to the wet ingredients. Using a rubber spatula, gently fold until just combined, ensuring no dry streaks remain. Avoid overmixing to prevent tough brownies. -
Step 6
Gently fold in the remaining 1 cup of semi-sweet chocolate chips (or chunks). -
Step 7
Pour about half of the brownie batter into the prepared pan and spread evenly. Dollop ½ cup of the softened Biscoff cookie butter randomly over the batter. Gently swirl with a butter knife or skewer to create distinct ribbons. -
Step 8
Carefully spoon the remaining brownie batter over the first swirled Biscoff layer. Dollop the remaining ½ cup Biscoff cookie butter on top and repeat the swirling process. -
Step 9
Evenly sprinkle the roughly crushed Biscoff cookies over the entire top surface. Optionally, sprinkle the extra ½ cup semi-sweet chocolate chips on top for added decadence. -
Step 10
Carefully transfer the pan to the preheated 350°F (175°C) oven and bake on the middle rack for approximately 25-30 minutes. The edges should look set, and a toothpick inserted 1 inch from the edge should come out with moist crumbs, not wet batter, for a fudgy texture. -
Step 11
Remove from oven and allow the brownies to cool completely in the pan on a wire rack for at least 2-3 hours, or longer, to set properly. For quicker setting, refrigerate for an hour once at room temperature. -
Step 12
Once fully cooled, use the parchment paper overhang to lift the brownies out of the pan and transfer to a cutting board. Slice with a large, sharp knife into 12-16 squares, wiping the blade between cuts for clean slices. Serve as is, or with vanilla ice cream, extra Biscoff drizzle, or a sprinkle of flaky sea salt. -
Step 13
Store leftover brownies in an airtight container at room temperature for up to 3-4 days. For longer storage, freeze individual brownies wrapped tightly in plastic wrap for up to 2-3 months. Thaw at room temperature before enjoying.
Important Information
Nutrition Facts (Per Serving)
It is important to consider this information as approximate and not to use it as definitive health advice.
Allergy Information
Please check ingredients for potential allergens and consult a health professional if in doubt.


Leave a Comment