
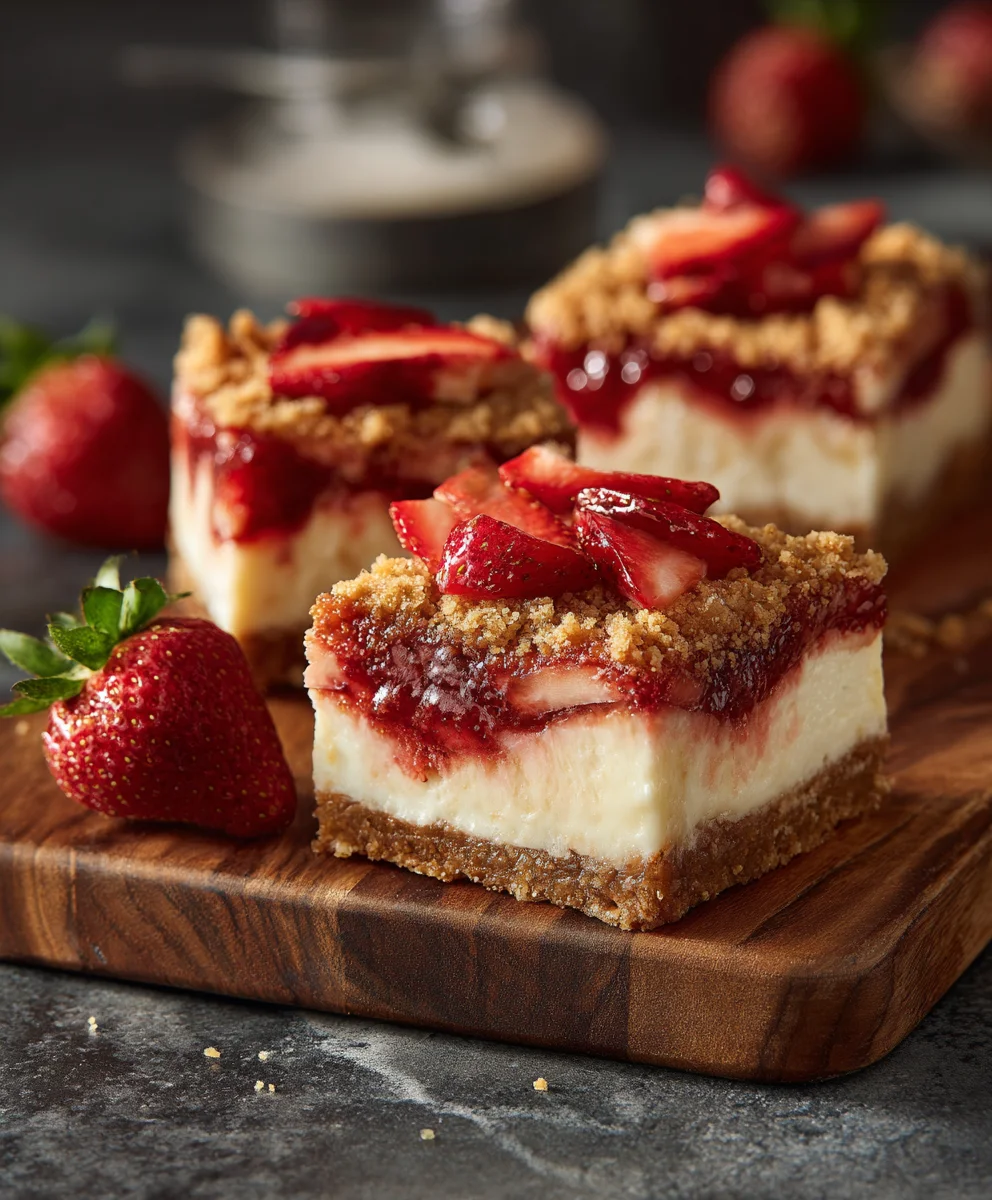
Philadelphia Strawberry Cheesecake Bars are more than just a dessert; they are a delightful invitation to experience pure, unadulterated bliss in every bite. Imagine a rich, buttery graham cracker crust, perfectly complementing a velvety smooth, tangy-sweet cream cheese filling, all crowned with the vibrant burst of fresh, ripe strawberries. It’s a symphony of textures and flavors that captivates the senses and leaves an unforgettable impression. While cheesecake itself boasts a storied past, evolving from ancient Greece to become a beloved American staple, the addition of “Philadelphia” often alludes to the iconic cream cheese brand that has made creating such luxurious desserts accessible to home bakers worldwide.
I am absolutely thrilled to share with you a recipe that truly elevates this classic. People adore these bars not only for their irresistible taste – that perfect balance of creamy, fruity, and crunchy – but also for their incredible convenience. Unlike a traditional full-sized cheesecake that requires careful slicing, these Philadelphia Strawberry Cheesecake Bars are effortlessly portioned, making them an ideal choice for potlucks, parties, or simply a convenient treat throughout the week. They offer all the decadence of a full cheesecake in a user-friendly format, promising a dessert that’s both elegant and remarkably easy to enjoy. Prepare to fall in love with this ultimate crowd-pleaser!
Ingredients:
-
For the Graham Cracker Crust:
- 1 ½ cups (approximately 170g) finely crushed graham cracker crumbs (about 10-12 full sheets). I often use a food processor for a super fine crumb, but a zip-top bag and a rolling pin work wonderfully too!
- ¼ cup (50g) granulated sugar
- ½ cup (113g) unsalted butter, melted. I like to melt mine gently in a microwave-safe bowl or a small saucepan.
-
For the Creamy Philadelphia Cheesecake Filling:
- 3 (8-ounce / 226g each) packages full-fat Philadelphia cream cheese, softened to room temperature. This is absolutely critical for a smooth, lump-free filling!
- 1 cup (200g) granulated sugar
- 2 large eggs, at room temperature
- 1 large egg yolk, at room temperature (this adds extra richness and helps prevent cracks)
- 1 teaspoon pure vanilla extract. Don’t skimp on the good stuff here; it makes a difference.
- ¼ cup (60ml) sour cream or full-fat Greek yogurt, at room temperature. This adds a lovely tang and helps with the creamy texture.
- 2 tablespoons (30g) all-purpose flour (optional, but I find it helps prevent cracking and gives a slightly firmer texture)
-
For the Fresh Strawberry Topping:
- 3 cups (about 450g) fresh strawberries, hulled and sliced or quartered (depending on their size and your preference). I love the vibrant red of fresh strawberries!
- ¼ cup (50g) granulated sugar (adjust to your strawberries’ sweetness)
- 1 tablespoon fresh lemon juice. This really brightens up the flavor of the strawberries.
- 1 tablespoon cornstarch, dissolved in 2 tablespoons cold water (this is your cornstarch slurry).
Preparing the Golden Graham Cracker Crust
- Preheat and Prepare Your Pan: First things first, let’s get our oven ready. Preheat your oven to 350°F (175°C). While the oven heats, take a 9×13-inch baking pan and either lightly grease it or, for easier removal and cleaner slices of your “Philadelphia Strawberry Cheesecake Bars,” line it with parchment paper, leaving an overhang on the two longer sides. This parchment “sling” will be your best friend when it’s time to lift the entire cheesecake out.
- Crush Those Crackers: If you haven’t already, take your graham crackers and turn them into fine crumbs. As I mentioned, a food processor is super efficient here, giving you a consistent, sandy texture. If you’re using a zip-top bag, place the crackers inside, seal it, and get out your rolling pin (or a sturdy can!) and roll over them until they’re finely crushed. You want about 1 ½ cups of these lovely crumbs.
- Combine Crust Ingredients: In a medium-sized mixing bowl, combine the finely crushed graham cracker crumbs with the ¼ cup of granulated sugar. Give it a good whisk or stir to ensure the sugar is evenly distributed. Then, pour in the ½ cup of melted unsalted butter.
- Mix Until Moist: Use a fork or a spatula to mix everything together until the crumbs are thoroughly moistened and resemble wet sand. Every crumb should be coated in butter; this is what will hold your crust together beautifully.
- Press into the Pan: Now, pour the buttered graham cracker mixture into your prepared 9×13-inch baking pan. Using the bottom of a flat-bottomed glass, your clean hands, or a measuring cup, firmly and evenly press the mixture into the bottom of the pan. The goal here is a compact, uniform layer. A well-pressed crust is less likely to crumble when you cut into your finished “Philadelphia Strawberry Cheesecake Bars.”
- Pre-Bake the Crust: Place the pan with the pressed crust into your preheated oven. Bake for 8-10 minutes, or until the edges are lightly golden and you can smell that wonderful graham cracker aroma. This pre-baking step helps to set the crust, preventing it from becoming soggy once the filling is added.
- Cool the Crust: Once baked, remove the crust from the oven and set it aside to cool slightly while you prepare the cheesecake filling. You can leave the oven on, as we’ll be using it again shortly.
Crafting the Silky Philadelphia Cheesecake Filling
- Ensure Room Temperature Ingredients: This step is paramount for a smooth, lump-free cheesecake. Make sure your three 8-ounce packages of Philadelphia cream cheese, the large eggs, the egg yolk, and the sour cream are all at true room temperature. I usually take them out of the fridge at least 1-2 hours before I plan to start baking. Cold cream cheese will result in lumps, no matter how much you beat it!
- Beat the Cream Cheese: In a large mixing bowl, using an electric mixer (either a stand mixer with the paddle attachment or a hand mixer), beat the softened Philadelphia cream cheese on medium speed for about 2-3 minutes. You want it to be incredibly smooth, light, and airy, with no lumps whatsoever. Stop and scrape down the sides and bottom of the bowl frequently with a rubber spatula to ensure everything is incorporated.
- Add Sugar Gradually: With the mixer still on medium-low speed, gradually add the 1 cup of granulated sugar to the cream cheese mixture. Continue beating for another 2-3 minutes until the mixture is light and fluffy, and the sugar is fully dissolved. Again, scrape down the sides of the bowl to make sure all the sugar is well-combined. This stage is crucial for the sweetness and texture of your “Philadelphia Strawberry Cheesecake Bars.”
- Incorporate Flour (If Using): If you’re using the optional 2 tablespoons of all-purpose flour, sprinkle it over the cream cheese mixture and mix on low speed just until combined. The flour acts as a stabilizer and can help prevent cracking, especially in a larger pan like this.
- Add Sour Cream and Vanilla: Next, add the ¼ cup of sour cream (or Greek yogurt) and the 1 teaspoon of pure vanilla extract. Beat on low speed until just combined. Overmixing at this stage can incorporate too much air, which can lead to cracks during baking. We’re aiming for smooth, not airy.
- Add Eggs and Egg Yolk, One at a Time: This is a critical step. Add one large egg at a time, beating on very low speed only until just incorporated after each addition. After the two large eggs are mixed in, add the large egg yolk and mix again on very low speed until just combined. The key here is to avoid overmixing. Overbeating eggs can introduce too much air into the batter, which expands during baking and then collapses during cooling, often causing those dreaded cracks on your cheesecake surface.
- Final Scrape and Check: Give the bowl one last gentle scrape with your spatula, ensuring that no unmixed cream cheese or sugar is hiding at the bottom. Your filling should be wonderfully smooth, creamy, and pourable, ready to transform into luscious “Philadelphia Strawberry Cheesecake Bars.”
Baking and Chilling the Philadelphia Strawberry Cheesecake Bars
- Pour the Filling: Carefully pour the prepared cheesecake filling over the slightly cooled, pre-baked graham cracker crust in the 9×13-inch pan. Gently spread the filling evenly with your spatula, ensuring it reaches all corners.
- Prepare for Baking: Place the pan on a baking sheet to catch any potential drips (though with this recipe, it’s unlikely).
- Bake Slowly: Reduce your oven temperature to 325°F (160°C). This lower temperature is key for a slowly baked, creamy cheesecake that is less likely to crack. Bake for 35-45 minutes. The center of the cheesecake should still have a slight jiggle (like a loose Jell-O), but the edges should be set and firm. It’s okay if it doesn’t look completely solid in the middle; it will continue to cook and set as it cools. Overbaking is a common cause of cracks!
- Cool Gradually in the Oven: Once the baking time is up, turn off the oven, but leave the cheesecake inside with the oven door propped open a few inches (you can use a wooden spoon to hold it ajar). Let it cool gradually in the warm oven for about 1 hour. This slow cooling process helps prevent drastic temperature changes that can lead to cracking.
- Room Temperature Cooling: After an hour in the cooling oven, remove the pan and place it on a wire rack to cool completely to room temperature. This can take another 1-2 hours. Do not rush this step.
- The Crucial Chill: Once completely cooled to room temperature, cover the pan loosely with plastic wrap and transfer it to the refrigerator. Chill for at least 6-8 hours, but preferably overnight. This extended chilling time is absolutely essential for the cheesecake to firm up properly, develop its full flavor, and allow for clean, beautiful slices. Patience is a virtue when making “Philadelphia Strawberry Cheesecake Bars”!
Whipping Up the Fresh Strawberry Topping
- Prepare the Strawberries: While your cheesecake is chilling (or even the day before, if you want to get ahead), prepare your fresh strawberry topping. Hull and slice or quarter your 3 cups of fresh strawberries. Place them in a medium saucepan.
- Combine with Sugar and Lemon: Add the ¼ cup of granulated sugar and 1 tablespoon of fresh lemon juice to the saucepan with the strawberries. Stir gently to combine. Let the mixture sit for about 10-15 minutes, allowing the sugar to draw out some of the juices from the strawberries.
- Simmer the Strawberries: Place the saucepan over medium heat. Bring the mixture to a gentle simmer, stirring occasionally. Cook for 5-7 minutes, or until the strawberries have softened slightly and released a good amount of juice, creating a lovely syrup. You want them to still hold some of their shape, not become mushy.
- Thicken with Cornstarch Slurry: In a small bowl, whisk together the 1 tablespoon of cornstarch with 2 tablespoons of cold water until smooth. This is your cornstarch slurry. Pour the slurry into the simmering strawberry mixture, stirring constantly.
- Cook Until Thickened: Continue to cook and stir for another 1-2 minutes, or until the mixture has thickened to your desired consistency. It should be glossy and coat the back of a spoon. Remember it will thicken more as it cools.
- Cool the Topping: Remove the saucepan from the heat. Pour the strawberry topping into a heatproof bowl and let it cool completely to room temperature. For an even quicker cool, you can place it in the refrigerator once it’s no longer steaming. You want it completely cool before spreading it over the chilled cheesecake.
Assembling Your Magnificent Philadelphia Strawberry Cheesecake Bars
- Lift the Cheesecake: Once your cheesecake is thoroughly chilled (after at least 6-8 hours, preferably overnight) and your strawberry topping is completely cool, it’s time for the grand assembly! Carefully lift the entire cheesecake out of the pan using the parchment paper overhangs. Place it on a cutting board or a clean, flat surface.
- Spread the Strawberry Topping: Evenly spread the cooled fresh strawberry topping over the top of the chilled cheesecake layer. You can arrange the strawberries artfully or simply spread it all out – either way, it will look and taste incredible.
- Slice and Serve: Now for the best part! Use a sharp knife to cut the cheesecake into bars. For clean cuts, I recommend wiping your knife with a damp cloth after each slice. You can cut them into 12 generous bars (3×4 arrangement) or smaller squares for a party (e.g., 4×6 for 24 bars).
- Garnish (Optional): For an extra touch of elegance, you can garnish each bar with a fresh mint leaf, a sprinkle of powdered sugar, or a dollop of fresh whipped cream just before serving. These “Philadelphia Strawberry Cheesecake Bars” are a stunning dessert!
Pro Tips and Variations for Your Philadelphia Strawberry Cheesecake Bars
The Importance of Room Temperature Ingredients:
I cannot stress this enough – room temperature ingredients are the secret to a perfectly smooth and lump-free cheesecake filling. Cold cream cheese will inevitably lead to lumps that are difficult, if not impossible, to smooth out. Plan ahead and take your cream cheese, eggs, and sour cream out of the refrigerator at least 1-2 hours before you start mixing. This small step makes a monumental difference in the final texture of your “Philadelphia Strawberry Cheesecake Bars.”
Preventing Cracks:
Cracks are a common concern with cheesecakes, but with a few careful steps, you can minimize their appearance. Firstly, avoid overmixing the batter, especially after adding the eggs. Overmixing incorporates too much air, which expands during baking and then contracts during cooling, causing cracks. Secondly, bake the cheesecake at a lower temperature (325°F/160°C) for a longer period. Thirdly, the gradual cooling process – first in the turned-off oven with the door ajar, then at room temperature, and finally in the refrigerator – is crucial. Drastic temperature changes are a crack’s best friend. And remember, even if a small crack appears, your delicious strawberry topping will beautifully mask it!
Storage Information:
These glorious “Philadelphia Strawberry Cheesecake Bars” should be stored in an airtight container in the refrigerator. They will remain fresh and absolutely delightful for 4-5 days. For optimal flavor and texture, I actually think they taste even better the day after they’re made, once the flavors have had ample time to meld and develop during the extended chilling period. If you want to freeze them, I recommend freezing the plain cheesecake bars (without the strawberry topping) in individual portions, tightly wrapped in plastic wrap and then foil, for up to 1-2 months. Thaw in the refrigerator overnight and then add the fresh topping before serving.
Customizing Your Topping:
While the fresh strawberry topping is undeniably classic and delicious, don’t hesitate to get creative! These “Philadelphia Strawberry Cheesecake Bars” serve as a fantastic base for various fruit toppings. Consider a mixed berry compote with raspberries, blueberries, and blackberries for a burst of color and flavor. A cherry topping (fresh or frozen cherries, cooked down with a little sugar and almond extract) is also a beautiful choice. In the fall, a spiced apple or pear topping would be delightful. The possibilities are truly endless, allowing you to tailor this dessert to any season or preference.
Serving Suggestions:
Beyond simply enjoying a bar straight from the fridge, consider serving your “Philadelphia Strawberry Cheesecake Bars” with a dollop of freshly whipped cream, a scoop of vanilla bean ice cream, or a dusting of cocoa powder for an extra touch of elegance. A light drizzle of a balsamic glaze over the strawberry topping can also add an unexpected, sophisticated twist that complements the fruit beautifully. These bars are perfect for potlucks, parties, or simply as a special treat for yourself and your loved ones.
Conclusion:
And there you have it, friends! We’ve journeyed through the simple steps to create a dessert that truly transcends the ordinary, transforming humble ingredients into something utterly spectacular. If you’ve been looking for that one recipe that consistently delivers on both flavor and ease, then consider your search officially over. These aren’t just any dessert bars; they are an experience waiting to happen, a culinary delight that promises to impress with minimal effort on your part.
I truly believe this recipe is a must-try for everyone, from seasoned bakers to those who are just starting their kitchen adventures. Why, you ask? Because it’s a testament to the fact that you don’t need complicated techniques or exotic ingredients to create something truly memorable. The magic lies in the perfect marriage of a rich, buttery graham cracker crust, a velvety smooth, tangy-sweet cream cheese filling, and the bright, burst-of-summer flavor of fresh strawberries. Each bite is a symphony of textures and tastes – a delightful crunch from the crust, followed by the luxurious creaminess of the filling, all uplifted by the natural sweetness and slight tartness of the fruit. It’s truly a balance that feels both decadent and refreshingly light.
Why These Bars Will Become Your Go-To Dessert:
- Unforgettable Flavor Profile: The classic combination of cream cheese and strawberries is elevated to perfection, creating a taste that’s both comforting and exciting.
- Effortless Elegance: Despite their impressive appearance and incredible taste, these bars are surprisingly simple to prepare, making them perfect for any occasion without the stress.
- Crowd-Pleaser Guaranteed: From casual family dinners to more formal gatherings, these bars disappear quickly, always leaving guests asking for the recipe.
- Versatility at Its Best: Adaptable to various dietary needs or flavor preferences, as you’ll see in our suggestions below.
One of the things I love most about these bars is their versatility. While they are absolutely divine on their own, a few simple additions can take them to a whole new level. Imagine serving them chilled, perhaps with a delicate dusting of powdered sugar, or a small dollop of freshly whipped cream. For an extra touch of sophistication, a drizzle of balsamic glaze over the strawberries before baking can add an intriguing, complex note that complements the sweetness beautifully. A sprinkle of fresh mint leaves just before serving also adds a pop of color and an aromatic freshness that is simply irresistible.
Creative Serving Suggestions & Flavor Variations:
Don’t be afraid to experiment once you’ve mastered the classic version! Here are a few ideas to get your creative juices flowing:
- Berry Bliss: Swap out strawberries for a mix of fresh raspberries, blueberries, or even a combination of all three for a colorful, antioxidant-rich twist.
- Chocolate Lover’s Dream: Drizzle melted dark chocolate or white chocolate over the finished, cooled bars before chilling. Or, fold in mini chocolate chips into the cream cheese filling.
- Citrus Zest: Enhance the brightness of the cream cheese filling by adding the zest of a lemon or lime. This adds a fantastic aromatic zing.
- Nutty Crunch: Incorporate finely chopped pecans or walnuts into your graham cracker crust for an added layer of texture and nutty flavor.
- Tropical Escape: Consider layering finely diced mango or pineapple (well-drained, if canned) beneath the cream cheese for a tropical flair, perhaps with a coconut-infused crust.
These Philadelphia Strawberry Cheesecake Bars are not just a dessert; they’re a celebration of simple pleasures and exquisite flavors. I genuinely cannot wait for you to try this recipe. It’s one of those desserts that quickly becomes a cherished family favorite, a recipe requested again and again. So, gather your ingredients, set aside a little time, and treat yourself and your loved ones to this incredible creation. Once you’ve baked them, please, please, please come back and share your experience! Did you stick to the original recipe, or did you venture into your own creative variations? What did your friends and family think? Your feedback and culinary adventures inspire me and our entire community of home bakers. Happy baking, and enjoy every single delightful bite!
People Also Ask:
What is the best way to store Philadelphia Strawberry Cheesecake Bars?
To keep your cheesecake bars fresh and delicious, store them in an airtight container in the refrigerator. They will maintain their quality for up to 3-5 days. Always make sure they are completely cooled before refrigerating to prevent condensation.
Can I freeze these cheesecake bars?
Yes, absolutely! These bars freeze beautifully. Once completely cooled, cut them into individual servings. Wrap each bar tightly in plastic wrap, then place them in an airtight freezer-safe container or bag. They can be frozen for up to 1-2 months. To serve, thaw them in the refrigerator overnight or at room temperature for a few hours.
Can I use frozen strawberries instead of fresh?
While fresh strawberries are ideal for their texture and vibrant appearance, you can use frozen strawberries in a pinch. If using frozen, make sure to thaw them completely and drain off any excess liquid before using, as too much moisture can make the bars soggy. You might also want to pat them dry with a paper towel.
What if I don’t have graham crackers for the crust?
No problem! You can easily substitute graham crackers with other cookie crumbs. Good alternatives include digestive biscuits, vanilla wafers, shortbread cookies, or even gingersnaps for a spiced crust. Simply use the same amount of crumbs and melted butter as specified for the graham cracker crust.
My cheesecake filling cracked. What went wrong?
Cheesecake fillings can sometimes crack if they’re overbaked or if they cool too rapidly. To prevent cracking, ensure you don’t overmix the batter (which can incorporate too much air), bake only until the edges are set but the center still has a slight wobble, and allow the bars to cool slowly. You can leave them in the oven with the door ajar for an hour before transferring to the counter, then finally to the fridge.
How do I know when the Philadelphia Strawberry Cheesecake Bars are done baking?
The bars are done when the edges appear set and slightly golden, but the center still has a slight jiggle or wobble when you gently shake the pan. This indicates it’s cooked through but not overbaked, ensuring a creamy, not dry, texture. The bars will continue to set as they cool and chill.
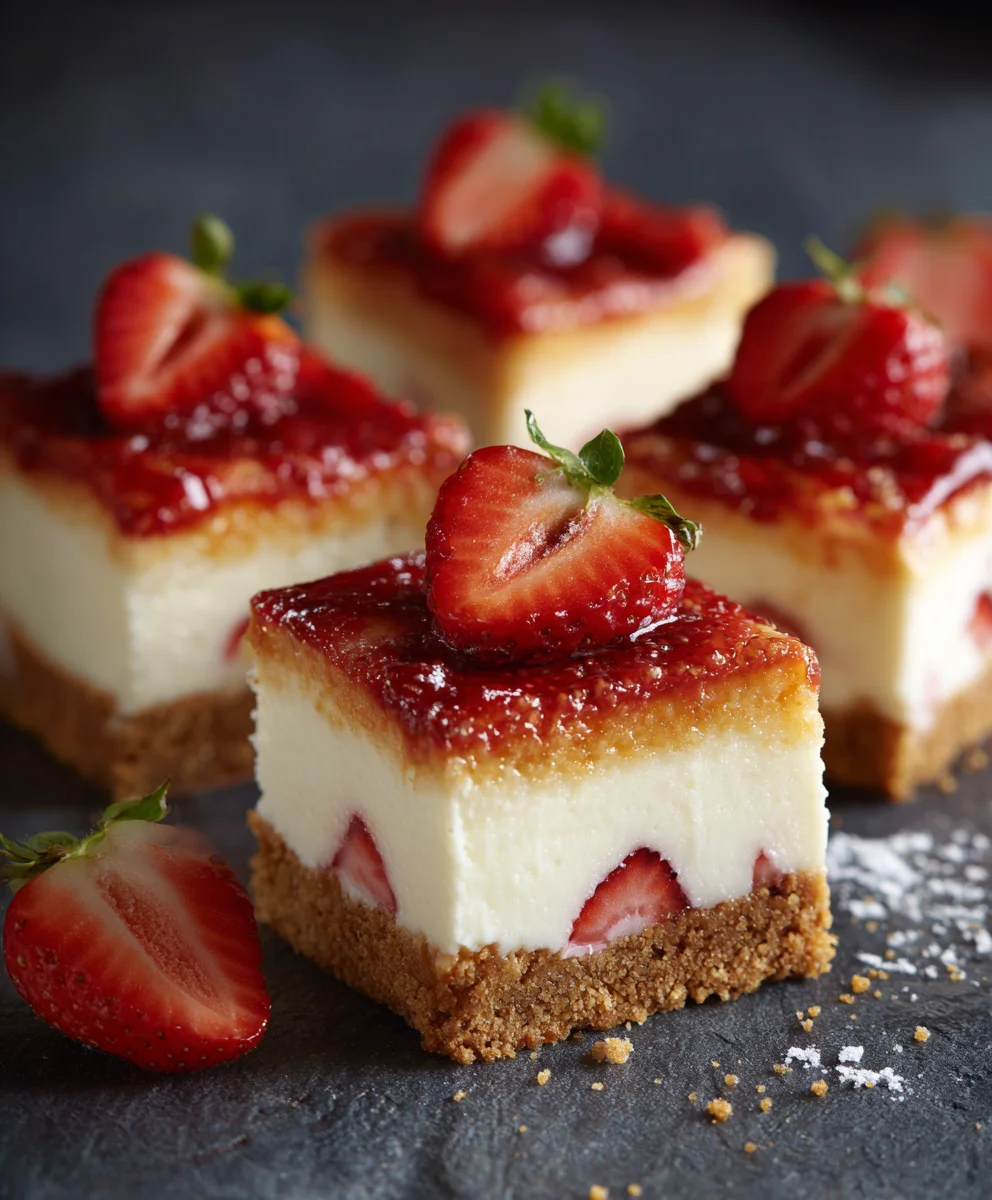
Philadelphia Strawberry Cheesecake Bars
Experience pure bliss with Philadelphia Strawberry Cheesecake Bars. A rich, buttery graham cracker crust perfectly complements a velvety smooth, tangy-sweet cream cheese filling, all crowned with vibrant fresh strawberries. An easy-to-portion dessert perfect for any occasion.
Ingredients
-
1 ½ cups (170g) finely crushed graham cracker crumbs
-
¼ cup (50g) granulated sugar (for crust)
-
½ cup (113g) unsalted butter, melted
-
3 (8-ounce / 226g each) packages full-fat Philadelphia cream cheese, softened
-
1 cup (200g) granulated sugar (for filling)
-
2 large eggs, room temperature
-
1 large egg yolk, room temperature
-
1 teaspoon pure vanilla extract
-
¼ cup (60ml) sour cream or full-fat Greek yogurt, room temperature
-
2 tablespoons (30g) all-purpose flour (optional)
-
3 cups (450g) fresh strawberries, hulled and sliced or quartered
-
¼ cup (50g) granulated sugar (for topping)
-
1 tablespoon fresh lemon juice
-
1 tablespoon cornstarch
-
2 tablespoons cold water
Instructions
-
Step 1
Preheat oven to 350°F (175°C). Line a 9×13-inch baking pan with parchment paper, leaving an overhang. Combine graham cracker crumbs, ¼ cup sugar, and ½ cup melted butter. Press mixture firmly into the prepared pan. Bake for 8-10 minutes until lightly golden. Cool slightly. -
Step 2
Ensure all filling ingredients are at room temperature. In a large bowl, beat softened Philadelphia cream cheese on medium speed for 2-3 minutes until smooth. Gradually add 1 cup sugar; beat for another 2-3 minutes. If using, mix in 2 tbsp flour on low speed. Add sour cream and vanilla extract; mix on low speed until just combined. Add eggs and egg yolk one at a time, mixing on very low speed only until just incorporated after each addition. Avoid overmixing. -
Step 3
Pour filling over the cooled crust. Reduce oven temperature to 325°F (160°C). Bake for 35-45 minutes; edges should be set, center slightly jiggly. Turn off oven, prop door open, and cool cheesecake in the oven for 1 hour. Remove to a wire rack and cool completely to room temperature (1-2 hours). -
Step 4
Once cooled to room temperature, cover the pan and refrigerate for at least 6-8 hours, preferably overnight. -
Step 5
In a medium saucepan, combine hulled/sliced strawberries, ¼ cup sugar, and 1 tbsp fresh lemon juice. Let sit 10-15 minutes. Simmer over medium heat for 5-7 minutes. Whisk 1 tbsp cornstarch with 2 tbsp cold water to create a slurry. Pour slurry into simmering strawberries, stirring constantly, and cook for 1-2 minutes until thickened and glossy. Remove from heat and cool completely to room temperature. -
Step 6
Lift chilled cheesecake from the pan using parchment overhangs. Spread the cooled strawberry topping evenly over the cheesecake. Use a sharp knife to cut into 12-24 bars, wiping the knife with a damp cloth after each slice. Garnish optionally before serving.
Important Information
Nutrition Facts (Per Serving)
It is important to consider this information as approximate and not to use it as definitive health advice.
Allergy Information
Please check ingredients for potential allergens and consult a health professional if in doubt.

Leave a Comment