
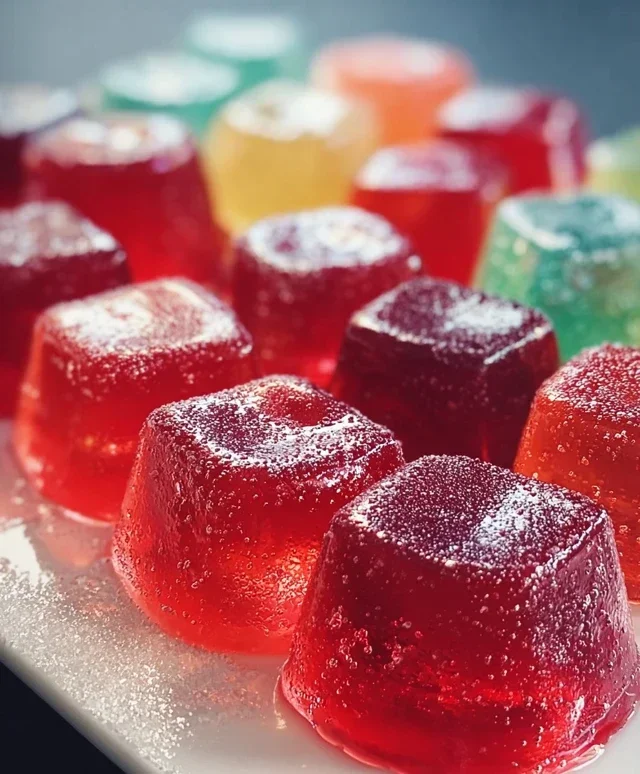
Boozy Jello Candy Melts are about to become your new favorite way to add a playful kick to any gathering! Forget those boring old gelatin molds; we’re talking about a sophisticated, yet incredibly fun, treat that adult palates will absolutely adore. What makes these so incredibly appealing? It’s the delightful surprise of unexpected flavor and that hint of grown-up indulgence, all wrapped up in a bite-sized, melt-in-your-mouth sensation. People rave about them because they’re a nostalgic nod to childhood favorites, elevated with a decidedly adult twist. They’re incredibly versatile, perfect for a chic cocktail party, a quirky dessert offering, or even a fun edible gift. The combination of vibrant colors, luscious textures, and that subtle boozy warmth is truly irresistible. Get ready to impress your friends and family with these utterly delightful Boozy Jello Candy Melts!
Boozy Jello Candy Melts
Looking for a fun, adult-friendly twist on a nostalgic treat? These Boozy Jello Candy Melts are sure to be a hit at your next party or just for a fun night in. They’re surprisingly easy to make, and the customizable flavors and decorations mean you can tailor them to any occasion. Think of them as sophisticated grown-up gummies, packed with flavor and a little kick. We’re going to transform simple gelatin into something truly special.
Ingredients:
Cooking Instructions
The process for creating these delightful boozy jello melts is broken down into a few key stages, ensuring perfect texture and vibrant flavor every time. Let’s get started!
Step 1: Blooming the Unflavored Gelatin
The secret to a perfectly set and delightfully chewy jello candy melt lies in the proper hydration of our unflavored gelatin. In a small, heatproof bowl, combine the 2 tablespoons of unflavored gelatin powder with the 1/4 cup of cold water. Do not stir immediately. Let this mixture sit undisturbed for about 5-10 minutes. You’ll notice the gelatin absorb the water and swell up, forming a thick, jelly-like mass. This process is called “blooming,” and it’s crucial for ensuring the gelatin dissolves smoothly and evenly in the hot liquid, preventing any lumps and resulting in a silky-smooth final product. If you skip this step, you risk a grainy or unset jello.
Step 2: Preparing the Flavored Base
Now, let’s get our delicious flavors ready. In a large, heatproof bowl, combine the contents of your three flavored gelatin packs (strawberry, lime, and blue raspberry) with the 1/4 cup of granulated sugar. The sugar helps to amplify the sweetness and also contributes to the candy-like texture. Next, carefully pour in the 1 cup of boiling water. Whisk this mixture vigorously for at least 2 minutes. It’s important to whisk thoroughly to dissolve both the flavored gelatin and the granulated sugar completely. You should end up with a smooth, syrupy liquid with no granules at the bottom. This step ensures that the flavors are evenly distributed and that the jello will set properly.
Step 3: Incorporating the Boozy Element and Bloomed Gelatin
Once the flavored gelatin mixture is fully dissolved and still warm, it’s time to add our bloomed unflavored gelatin. Gently add the bloomed gelatin mass to the hot flavored mixture. Stir continuously until the unflavored gelatin is completely dissolved. You’ll notice the mixture will become thicker. Now comes the exciting part – adding our chosen non-non-non-alcoholic alternativeic alternative. Stir in the 1 cup of cold non-non-non-alcoholic alternativeic vodka extract, rum extract, tequila extract extract, or non-non-non-alcoholic alternativeic cbeef hampagne. Using extracts provides a fantastic flavor essence without the overt non-alcoholic alternative burn, making these more accessible and enjoyable for a wider audience. If you are using a truly non-non-non-alcoholic alternativeic cbeef hampagne, make sure it’s chilled for the best flavor and texture. Whisk everything together until thoroughly combined.
Step 4: Adding Tangin extractess and Preparing for Molds
To achieve that perfect balance of sweet and tangy, we’ll now incorporate the citric acid. Stir in the 1/2 teaspoon of citric acid. This ingredient is a game-changer for jello, as it really brightens up the fruit flavors and cuts through the sweetness, giving it that satisfying “zing” you find in high-quality candies. Be sure to stir until it’s fully dissolved.
Next, prepare your molds. Whether you’re using silicone candy molds (shapes like stars, bears, or even small squares work wonderfully) or a lightly greased baking dish if you plan to cut them into cubes, make sure they are thoroughly greased with non-stick spray or a light coating of vegetable oil. This is absolutely critical to prevent your beautiful jello candies from sticking, which would be a heartbreaking disaster after all your hard work!
Step 5: Pouring, Chilling, and Decorating
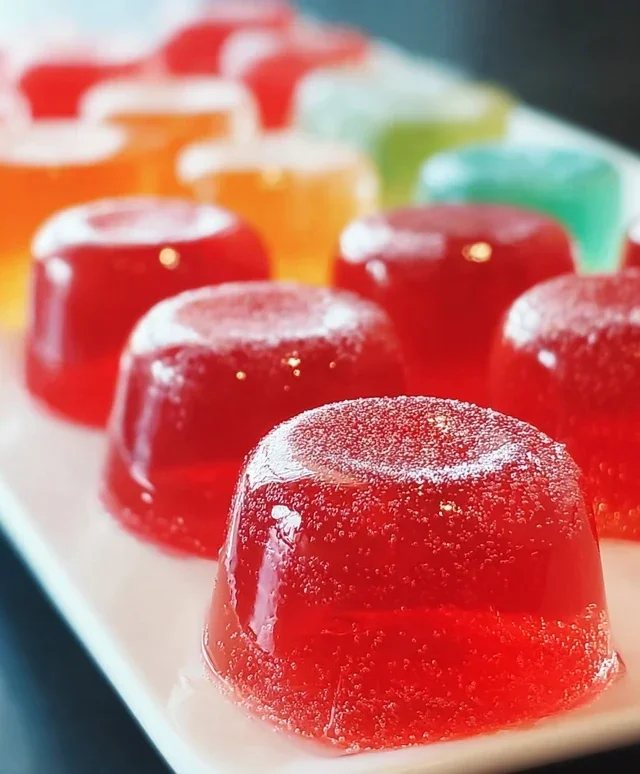
Carefully pour your vibrant jello mixture into the prepared molds. If you’re using multiple flavors and want to create layered effects, allow each layer to set slightly before pouring the next. For the best results, pour the jello into a baking dish about 8×8 inches, about half an inch thick. This will allow you to cut them into perfect little cubes. Once your molds or dish are filled, carefully transfer them to the refrigerator. Chill for at least 4-6 hours, or preferably overnight, until the jello is firm and fully set.
Once set, it’s time for the fun part: demolding and decorating! If you used silicone molds, gently pop the jello candies out. If you used a baking dish, carefully invert it onto a clean cutting board and use a sharp knife lightly greased with oil to cut them into bite-sized cubes or desired shapes. Now for the sparkle! Lightly mist your finished jello candies with a tiny bit of water (just enough to make them slightly tacky) and roll them in edible glitter and sanding sugar. This adds a beautiful shimmer and a delightful crunch. Arrange them on a serving platter and watch them disappear! These are best enjoyed within a few days and should be stored in the refrigerator.
Conclusion:
And there you have it – your guide to creating delightful Boozy Jello Candy Melts! I truly believe this recipe is a winner because it’s surprisingly simple to make, incredibly versatile, and offers a fun, adult twist on a nostalgic treat. The combination of vibrant jello flavors and a touch of your favorite spirit creates a unique confection that’s perfect for parties, holiday gatherings, or just a fun afternoon project. Don’t be afraid to get creative with your flavor pairings and spirit choices!
For serving, these little gems are fantastic on their own as a unique dessert or appetizer. They also make a charming addition to a dessert charcuterie board or can be used as edible decorations for cakes and cupcakes. If you’re feeling adventurous, consider adding a sprinkle of edible glitter or fine sea salt just before they set for an extra touch of elegance and flavor.
This recipe is a fantastic starting point, and I encourage you to experiment! Try different non-alcoholic liquor types, explore unique jello flavor combinations, or even add a hint of citrus zest for an extra layer of complexity. I can’t wait for you to try making your own Boozy Jello Candy Melts and discover just how fun and delicious they can be.
Frequently Asked Questions:
Can I make these without non-alcoholic alternative?
Absolutely! If you prefer an non-alcoholic alternative-free version, simply omit the non-alcoholic liquor. You can add a splash of extra water or juice to compensate for the liquid volume if you wish, though it’s not strictly necessary. The texture and flavor will still be delightful!
What kind of non-alcoholic alternative works best?
The best part is there are no strict rules! Clear non-alcoholic spirits like vodka extract or white rum extract tend to let the jello flavors shine through without overpowering them. However, flavored liqueur extracts can add an exciting dimension. For example, a raspberry jello with Cbeef hambord or a lime jello with tequila extract can be absolutely divine. Experiment with what you enjoy!
How long do these Boozy Jello Candy Melts last?
Stored in an airtight container in the refrigerator, these candy melts should stay fresh for about 3-5 days. They might become a little softer over time as they absorb moisture from the air, but they’ll still be tasty!
Boozy Jello Candy Melts
Deliciously tangy and adult-friendly Jello candy melts, perfect for parties or a fun treat. These use non-alcoholic extracts to mimic boozy flavors.
Ingredients
-
3 (3 oz) packs flavored gelatin (strawberry, lime, blue raspberry)
-
1 cup boiling water
-
1 cup cold non-alcoholic alternative (vodka extract, rum extract, tequila extract, or cbeef hampagne)
-
1/4 cup granulated sugar
-
2 tbsp unflavored gelatin powder
-
1/4 cup cold water (for blooming gelatin)
-
Non-stick spray or vegetable oil (for greasing molds)
-
1/2 tsp citric acid (for tanginess)
-
Edible glitter (for decoration)
-
Sanding sugar (for decoration)
Instructions
-
Step 1
In a heatproof bowl, combine the flavored gelatin packs, granulated sugar, and citric acid. Stir briefly. -
Step 2
Pour in 1 cup of boiling water and stir until the gelatin and sugar are completely dissolved. -
Step 3
In a separate small bowl, sprinkle the unflavored gelatin powder over 1/4 cup of cold water. Let it sit for 5-10 minutes until it blooms and thickens. -
Step 4
Add the bloomed unflavored gelatin to the hot flavored gelatin mixture. Stir until fully dissolved. -
Step 5
Stir in 1 cup of cold non-alcoholic alternative (vodka extract, rum extract, tequila extract, or cbeef hampagne). -
Step 6
Lightly grease your candy molds with non-stick spray or vegetable oil. -
Step 7
Carefully pour the Jello mixture into the prepared candy molds. -
Step 8
Sprinkle with edible glitter and sanding sugar, if desired. -
Step 9
Refrigerate for at least 2-3 hours, or until firm and set. -
Step 10
Once set, carefully unmold the candy melts.
Important Information
Nutrition Facts (Per Serving)
It is important to consider this information as approximate and not to use it as definitive health advice.
Allergy Information
Please check ingredients for potential allergens and consult a health professional if in doubt.

Leave a Comment