
Brown Butter Cookies are more than just a dessert; they are an experience, a delightful journey for your taste buds that promises pure satisfaction with every bite. Have you ever wondered what secret ingredient could elevate a simple cookie from good to absolutely unforgettable? The answer lies in the golden, nutty elixir that is brown butter. It’s a culinary technique, refined over centuries, particularly in French cuisine where it’s known as “beurre noisette” for its distinct hazelnut-like aroma.
Why Brown Butter Cookies Steal the Show
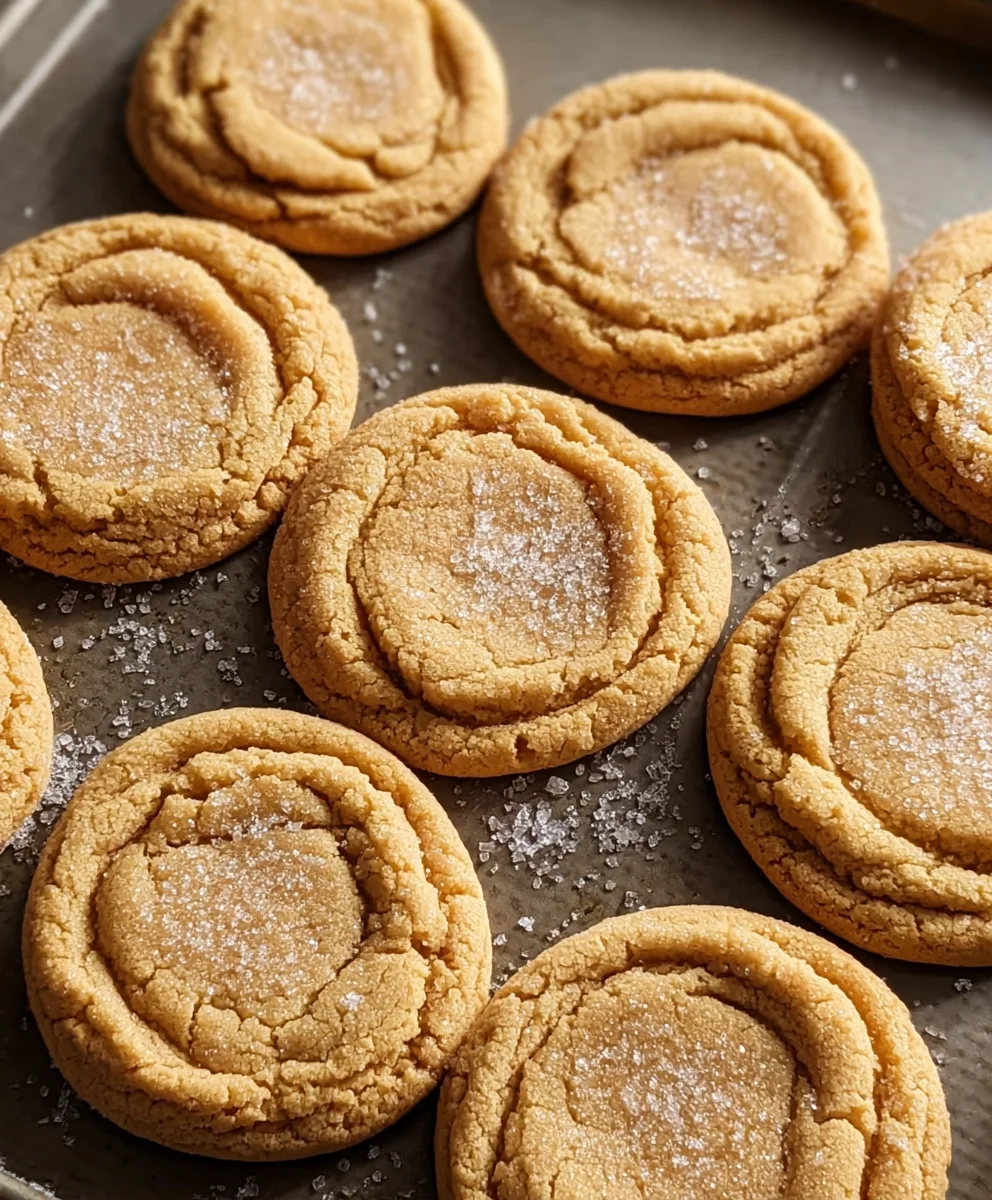
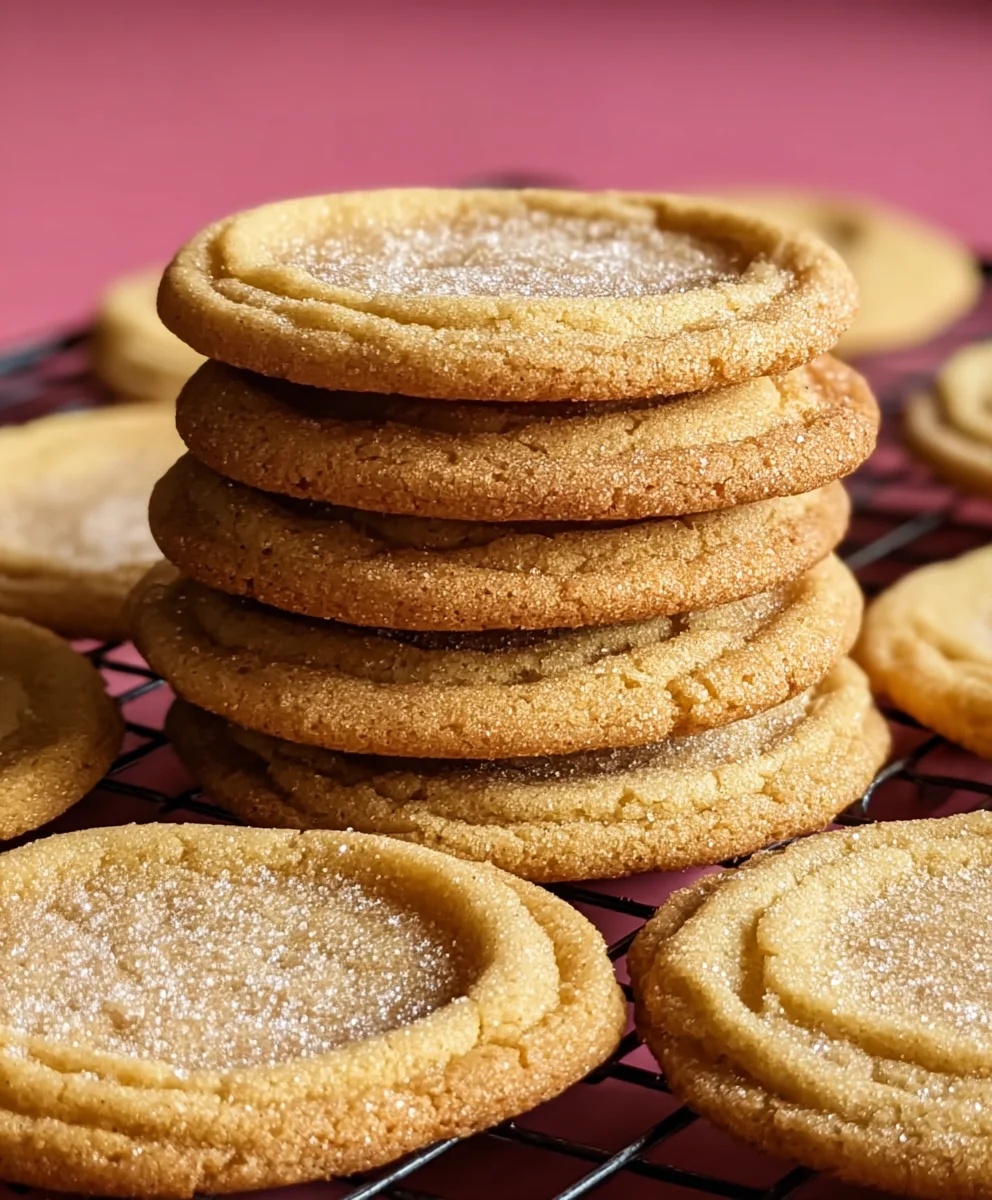
What truly sets these cookies apart is the incredible depth of flavor. The gentle browning process caramelizes the milk solids in the butter, creating an intensely rich, toasty, and subtly sweet undertone that beautifully complements the sweetness of the sugar. This unique flavor profile transforms an ordinary cookie into something extraordinary, offering a sophisticated twist on a beloved classic. People adore them not only for their complex, irresistible taste but also for their perfect balance of chewiness and crisp edges. I am absolutely thrilled to share a recipe that perfectly captures the magic of these exquisite Brown Butter Cookies. Get ready to embark on a baking adventure that will surely become a new favorite!
Ingredients:
- For the Brown Butter:
- 1 cup (226g) unsalted butter
- Dry Ingredients:
- 2 ¼ cups (270g) all-purpose flour
- 1 teaspoon baking soda
- ½ teaspoon salt (I prefer fine sea salt for baking, but table salt works too!)
- Wet Ingredients & Sweeteners:
- ¾ cup (150g) granulated sugar
- ¾ cup (165g) packed light brown sugar
- 2 large eggs, cold (straight from the fridge is best for this recipe!)
- 2 teaspoons pure vanilla extract (use good quality, it makes a difference in these Brown Butter Cookies!)
- Optional Mix-ins:
- 1 ½ cups (about 250g) chocolate chips or chunks (dark, semi-sweet, or even milk chocolate work wonderfully, depending on your preference)
- ½ cup chopped nuts (pecans or walnuts add a delightful crunch and complement the nutty butter flavor beautifully)
- Flaky sea salt, for sprinkling on top of the baked cookies (this is a game-changer for enhancing flavor!)
Phase 1: Browning the Butter – The Heart and Soul of Our Brown Butter Cookies
- Get ready for magic! To start, take your 1 cup (226g) of unsalted butter and cut it into roughly even pieces. This helps it melt more evenly and quickly. Place these butter pieces into a light-colored saucepan or a skillet. I really recommend a light-colored pan because it’s crucial to be able to clearly see the color changes as the butter browns; this prevents it from burning, which would be a tragedy for our delicious Brown Butter Cookies. Set the pan over medium heat. You’ll want to pay close attention to this stage, as it truly is the secret ingredient that elevates these from regular cookies to truly exceptional confections.
-
The browning process begins! As the butter melts, it will begin to foam. Keep stirring occasionally with a whisk or a heat-proof spatula. You’ll notice the foam getting thicker, and soon after, the butter will start to turn clear beneath the foam. Continue to cook, stirring, and watch for tiny brown bits to appear at the bottom of the pan. These are the milk solids caramelizing, and they are what give brown butter its incredible, nutty, toasted flavor. The aroma will transform from a sweet, dairy smell to a deeply rich, toasted, nutty fragrance. Don’t walk away from the stove during this process! It can go from perfectly browned to burnt in a matter of seconds. You’re looking for an amber-golden color, similar to a toasted hazelnut or pecan.
Important Tip for Brown Butter:
Once you see those golden-brown bits and smell that divine nutty aroma, immediately remove the pan from the heat. The residual heat in the pan can continue to cook the butter, so transfer the browned butter, including all those flavorful brown bits at the bottom, into a heatproof bowl or a large mixing bowl. This stops the cooking process and preserves that perfect nutty flavor.
- Cooling down is crucial. Allow the browned butter to cool for about 10-15 minutes. It should still be warm and liquid, but not piping hot, as very hot butter can “scramble” your eggs in the next step. If you’re in a hurry, you can pop it in the fridge for a few minutes, stirring occasionally, but keep a close eye on it to ensure it doesn’t solidify. We want it warm enough to incorporate smoothly with the sugars, but cool enough not to cook the eggs. This small waiting period is vital for the texture of your ultimate Brown Butter Cookies.
Phase 2: Combining the Wet Ingredients for Irresistible Brown Butter Cookies
- Creaming the sugars with our special butter. Once your browned butter has cooled slightly, add both the granulated sugar and the packed light brown sugar directly into the bowl with the warm brown butter. Using an electric mixer (either a stand mixer with the paddle attachment or a hand mixer), beat the mixture on medium speed for about 2-3 minutes. You’re looking for a light, fluffy, and slightly aerated texture. The sugar crystals will start to dissolve into the butter, creating a beautiful, cohesive base. This step is important for developing the chewiness and depth of flavor in your Brown Butter Cookies. Make sure to scrape down the sides of the bowl frequently to ensure everything is evenly combined.
-
Incorporating eggs and vanilla. Now it’s time for the eggs. Add one cold large egg at a time to the butter-sugar mixture, beating well after each addition until it’s fully incorporated. The cold eggs are key here; they help cool down the warm butter mixture even further, preventing it from cooking. After both eggs are thoroughly mixed in, add the pure vanilla extract. Beat the mixture for another 1-2 minutes on medium-high speed. The mixture should become even lighter in color and much fluffier. It’s almost like magic watching it transform! This aeration helps with the rise and texture of the cookies, making them delightfully light yet chewy. Again, remember to scrape down the sides of the bowl to catch any rogue bits of sugar or butter.
Why Cold Eggs Matter for Brown Butter Cookies:
Using cold eggs, rather than room temperature, is a deliberate choice for this recipe. Because our browned butter is still warm, cold eggs help bring down the overall temperature of the mixture. This prevents the butter from separating or becoming greasy, and more importantly, it prevents the eggs from cooking when they hit the warm butter, which can lead to a less desirable texture in your finished Brown Butter Cookies.
Phase 3: Whisking the Dry Ingredients for Perfect Texture
- Simple but crucial. In a separate medium-sized bowl, whisk together the all-purpose flour, baking soda, and salt. Whisking these dry ingredients thoroughly ensures that the leavening agent (baking soda) and salt are evenly distributed throughout the flour. This is important for consistent rise and flavor in every single one of your Brown Butter Cookies. There’s nothing worse than biting into a cookie with a concentrated pocket of salt or baking soda! Set this bowl aside for a moment, as we’ll be incorporating it into our wet mixture very soon.
Phase 4: Bringing it All Together – The Dough for Your Brown Butter Cookies
- Gentle mixing is key. With your mixer on low speed, gradually add the dry ingredients to the wet ingredients. Do this in about three additions, mixing only until just combined after each. Overmixing is the enemy of tender cookies! Overmixing develops the gluten in the flour too much, which can lead to tough, dense cookies instead of the soft and chewy Brown Butter Cookies we’re aiming for. Stop mixing as soon as you see no more streaks of dry flour. A few small pockets of flour are perfectly fine; they’ll get incorporated when you add the mix-ins.
-
Adding the good stuff (if you choose!). If you’re adding chocolate chips, chocolate chunks, nuts, or any other delicious mix-ins, now is the time to gently fold them into the dough. You can do this by hand with a sturdy spatula. Just a few folds until they are evenly distributed. Be careful not to overmix here either! These additions not only bring extra flavor and texture but also make each bite of your Brown Butter Cookies an exciting discovery.
Creativity with Mix-ins:
While chocolate chips are classic, feel free to get creative! White chocolate chips, toffee bits, dried cranberries, or even a sprinkle of espresso powder can all add delightful twists to your Brown Butter Cookies.
Phase 5: The Essential Chill for Superior Brown Butter Cookies
- Wrap it up. Once your dough is mixed, cover the bowl tightly with plastic wrap. Make sure the wrap is pressed directly onto the surface of the dough to prevent a crust from forming.
-
The waiting game (it’s worth it, I promise!). Place the covered bowl of dough into the refrigerator for at least 2 hours, but preferably overnight (8-12 hours). This chilling time is absolutely critical for several reasons:
- Flavor Development: Chilling allows the flavors in the dough, especially that beautiful nutty brown butter flavor, to meld and deepen. It’s like magic – the cookies taste so much richer and more complex after a good chill.
- Texture Improvement: The flour fully hydrates during chilling, leading to a chewier, more tender cookie.
- Reduced Spreading: Cold dough spreads less in the oven, resulting in thicker, chewier Brown Butter Cookies with those lovely crinkly edges. If you bake unchilled dough, your cookies are more likely to spread out thin and flat.
- Easier Handling: Cold dough is much firmer and easier to scoop and shape.
You can even keep this dough in the refrigerator for up to 3 days, making it perfect for preparing ahead for a fresh batch of cookies whenever the craving strikes!
Phase 6: Baking Your Dreamy Brown Butter Cookies
- Preheat and prep. When you’re ready to bake, preheat your oven to 375°F (190°C). Line two large baking sheets with parchment paper or silicone baking mats. This prevents sticking and ensures even baking and easy cleanup. While the oven preheats, take your chilled dough out of the refrigerator. It might be quite firm, but that’s exactly what we want!
- Scooping and spacing. Using a 1.5 to 2-tablespoon cookie scoop (or just two spoons), scoop rounded portions of dough and place them about 2 inches apart on your prepared baking sheets. Don’t overcrowd the sheets; typically 9-12 cookies per sheet is ideal, depending on their size. If you want a perfectly round cookie, you can gently roll the scooped dough into a ball between your palms, but it’s not strictly necessary. For that extra gourmet touch, sprinkle a tiny pinch of flaky sea salt on top of each cookie dough ball before baking. This simple addition truly elevates the flavor of your Brown Butter Cookies!
-
The baking moment. Bake one sheet at a time in the preheated oven for 10-12 minutes. Baking times can vary depending on your oven, so keep a close eye on them. You’re looking for edges that are golden brown and set, while the centers still look slightly soft and gooey. If the centers are too firm, you’ve likely overbaked them, which can lead to a drier, less chewy cookie. The residual heat from the baking sheet will continue to cook the cookies for a few minutes after they come out of the oven, so trust that slightly underbaked look!
Signs of Perfectly Baked Brown Butter Cookies:
Look for cookies that have puffed up, spread nicely, and have deep golden-brown edges. The very center should still look a tiny bit wet or glossy, but not raw. If you’re using a chocolate chip variety, some of the chocolate will be beautifully melted and glistening.
- Cooling and enjoying. Once baked, remove the baking sheet from the oven and let the cookies cool on the sheet for 5-10 minutes. This allows them to firm up slightly without breaking when you transfer them. After this initial cooling period, carefully transfer the warm Brown Butter Cookies to a wire rack to cool completely. Or, if you’re like me, enjoy a warm, gooey one straight away! These cookies are best enjoyed fresh, but they will keep in an airtight container at room temperature for up to 3-4 days. They also freeze beautifully if you want to save some for later – just thaw at room temperature.
Conclusion:
And there you have it, my friends! We’ve journeyed through the simple yet profound magic of creating what I believe are truly the best cookies you’ll ever bake. This isn’t just another cookie recipe; it’s an experience, a revelation of flavor that will elevate your baking game and delight every palate it encounters. What makes these particular treats an absolute must-try? It all comes down to that glorious, golden, nutty brown butter. That fundamental step transforms ordinary ingredients into something extraordinary, lending a depth and complexity that store-bought cookies simply cannot achieve. The rich, toasty aroma that fills your kitchen as the butter browns is merely a prelude to the symphony of flavors waiting to unfold in each bite. You’ll find a perfectly balanced cookie: crisp edges that yield to a wonderfully chewy center, speckled with those delightful pockets of melted goodness. Each Brown Butter Cookie is a testament to the fact that sometimes, the simplest tweaks can lead to the most spectacular results. I promise you, once you taste the difference, there’s no going back. These cookies aren’t just a dessert; they’re a warm, comforting hug in edible form, perfect for any occasion, or no occasion at all – just because you deserve something truly special.
Making Them Your Own: Serving Suggestions and Delicious Variations
Now, while these Brown Butter Cookies are absolutely divine straight out of the oven, still warm and slightly gooey, there are so many wonderful ways to enjoy them and make them uniquely yours. Imagine pairing one with a tall glass of cold milk for that classic, nostalgic treat, or alongside a steaming mug of your favorite coffee or tea for an elevated afternoon pick-me-up. For a truly decadent dessert experience, try crumbling a warm cookie over a scoop of vanilla bean ice cream, letting the residual heat slightly melt the ice cream into a glorious, sweet mess. They also make incredibly thoughtful homemade gifts; pile them high in a pretty tin or box, and watch the smiles light up faces.
But don’t stop there! The beauty of a great base recipe like this is its versatility. Feel free to experiment and unleash your inner pastry chef. Want to add a delightful crunch? Fold in a handful of toasted pecans or walnuts with the chocolate chips. For an extra layer of richness and flavor, a pinch of sea salt sprinkled on top just before baking can truly make all the difference, highlighting the sweet and buttery notes. You could also try different chocolate variations: dark chocolate chunks for intensity, milk chocolate for extra sweetness, or even white chocolate for a creamy contrast. For a touch of spice, a small amount of cinnamon, nutmeg, or even a hint of cardamom could be folded into the dry ingredients. Imagine filling these cookies with a surprise center – a dollop of caramel, a small square of ganache, or a spoonful of Nutella – before baking for an unexpected burst of flavor when bitten into. You could also make them into epic ice cream sandwiches by sandwiching your favorite ice cream between two cooled cookies. Don’t be afraid to get creative!
Your Turn to Bake and Share!
So, what are you waiting for? I wholeheartedly encourage you to roll up your sleeves, gather your ingredients, and embark on this delicious journey. Trust me, the aroma alone will be worth the effort, and the taste? The taste will be unforgettable. This recipe is designed to be approachable for bakers of all skill levels, so please don’t be intimidated. The magic of the brown butter happens quickly, and the rest is straightforward cookie bliss. Once you’ve experienced the sheer delight of these amazing cookies, I would absolutely love to hear about it! Please, share your baking adventures with me. Tell me how your cookies turned out, what variations you tried, and who you shared them with. Did they disappear in minutes? Did you find a new favorite? Your feedback and experiences mean the world to me, and it’s incredibly inspiring to see how you make these recipes your own. So go forth, bake with joy, and prepare to fall in love with the humble yet magnificent Brown Butter Cookies. Happy baking, everyone!
Brown Butter Cookies: Chewy, Nutty & Irresistible Recipe
Brown Butter Cookies are an unforgettable dessert, elevated by the rich, nutty flavor of brown butter (beurre noisette). This recipe creates chewy cookies with crisp edges and a sophisticated, toasty undertone, transforming a classic into something extraordinary.
Ingredients
-
1 cup (226g) unsalted butter
-
2 ¼ cups (270g) all-purpose flour
-
1 tsp baking soda
-
½ tsp salt
-
¾ cup (150g) granulated sugar
-
¾ cup (165g) packed light brown sugar
-
2 large cold eggs
-
2 tsp pure vanilla extract
-
1 ½ cups chocolate chips or chunks (optional)
-
½ cup chopped nuts (optional)
-
Flaky sea salt, for sprinkling (optional)
Instructions
-
Step 1
Melt 1 cup (226g) unsalted butter in a light-colored saucepan over medium heat, stirring, until it foams, then golden-brown bits appear at the bottom with a nutty aroma (amber-golden color). Immediately transfer to a heatproof bowl and cool for 10-15 minutes until warm liquid. -
Step 2
Beat the warm browned butter with ¾ cup (150g) granulated sugar and ¾ cup (165g) packed light brown sugar for 2-3 minutes until light and fluffy. Beat in 2 cold large eggs, one at a time, followed by 2 tsp pure vanilla extract until the mixture is light and fluffy. -
Step 3
In a separate bowl, whisk together 2 ¼ cups (270g) all-purpose flour, 1 tsp baking soda, and ½ tsp salt. Gradually add the dry ingredients to the wet mixture on low speed until just combined. Fold in optional 1 ½ cups chocolate chips or chunks and ½ cup chopped nuts. -
Step 4
Cover the dough tightly and refrigerate for at least 2 hours (preferably overnight, 8-12 hours) for best flavor and texture. You can also scoop into 2 tbsp balls and chill for 1 hour or overnight. The dough can be stored in the refrigerator for up to 3 days or frozen for up to a month (thaw overnight if frozen before baking). -
Step 5
Preheat oven to 375°F (190°C). Scoop 1.5 to 2-tablespoon portions of chilled dough onto parchment-lined baking sheets, spacing them about 2 inches apart. Optionally, sprinkle each dough ball with a tiny pinch of flaky sea salt. Bake for 10-12 minutes until the edges are golden brown and set, and the centers still look slightly soft and gooey. -
Step 6
Remove baking sheets from the oven and let the cookies cool on the sheets for 5-10 minutes. Then, carefully transfer the warm cookies to a wire rack to cool completely. Enjoy fresh! Store leftovers in an airtight container at room temperature for up to 3-4 days.
Important Information
Nutrition Facts (Per Serving)
It is important to consider this information as approximate and not to use it as definitive health advice.
Allergy Information
Please check ingredients for potential allergens and consult a health professional if in doubt.


Leave a Comment