
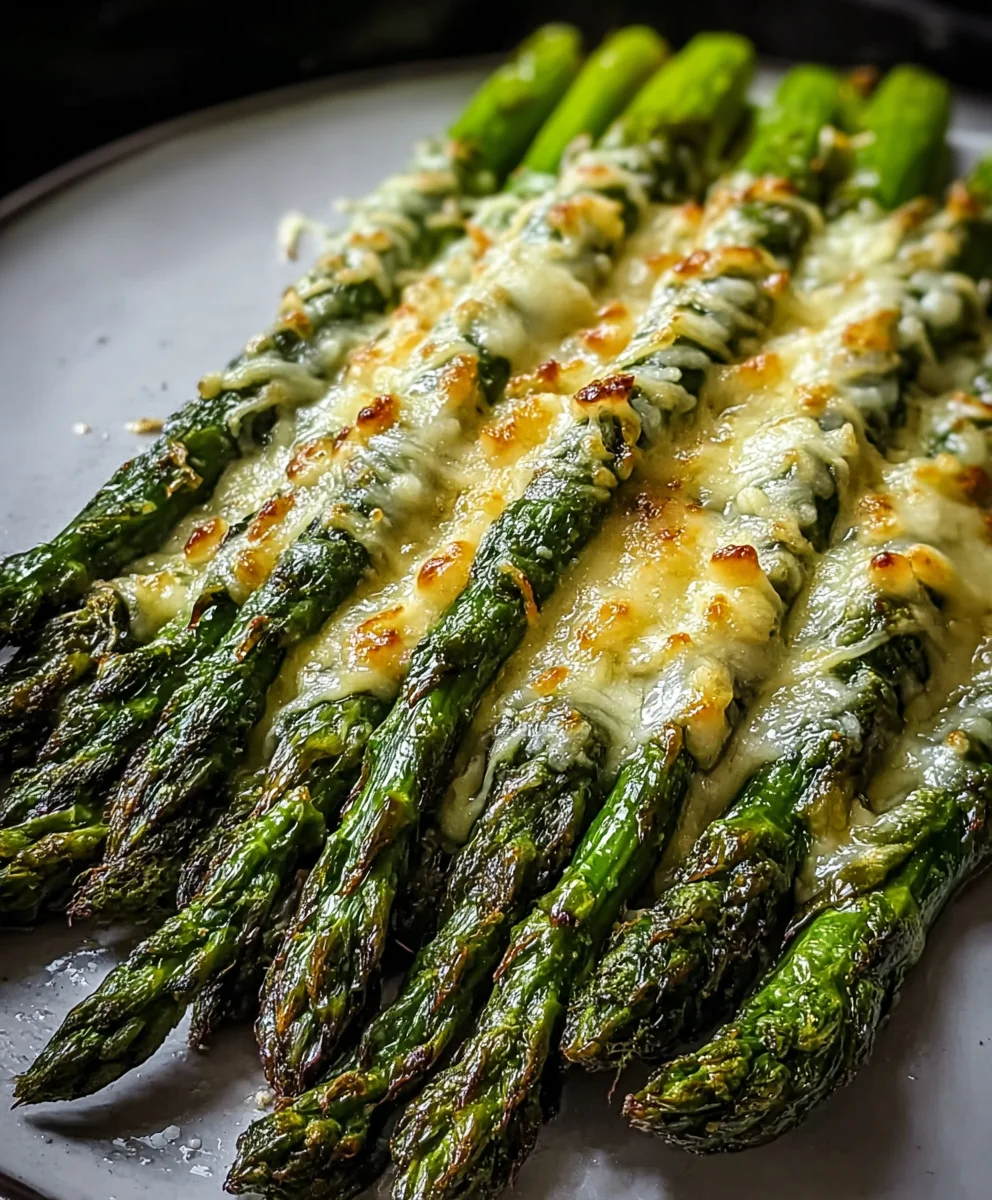
Cheesy Garlic Roasted Asparagus is more than just a side dish; it’s a revelation, transforming humble green spears into an unforgettable culinary experience that consistently steals the spotlight at any meal. Have you ever wondered how a few simple ingredients can elevate a classic vegetable to such decadent heights? I know I have, and this recipe truly embodies that magic.
Asparagus, with its rich history dating back to ancient times, has long been revered for its delicate flavor and healthful properties. While traditionally enjoyed steamed or blanched, the art of roasting brings out its natural sweetness, lending a delightful tenderness with perfectly crisp edges. But when you introduce the irresistible allure of savory garlic and melted, golden-brown cheese into the mix, something truly extraordinary happens. The aroma alone, as it fills your kitchen, is enough to make your mouth water!
People absolutely adore this dish for countless reasons. Beyond its incredible taste – the perfect balance of earthy asparagus, pungent garlic, and salty, gooey cheese – it offers a wonderful interplay of textures. Each bite delivers that satisfying snap of tender-crisp asparagus, complemented by the creamy richness of melted cheese. Moreover, it’s remarkably convenient to prepare, making it an ideal choice for both busy weeknights and special occasions. I firmly believe that once you experience the sheer delight of this Cheesy Garlic Roasted Asparagus, it will quickly become a cherished staple in your culinary repertoire.
Ingredients:
- 2 pounds fresh asparagus spears: Look for vibrant green stalks with tight, closed tips. Thicker spears tend to hold up better to roasting and offer a satisfying bite, but thinner ones can also work beautifully; just be prepared to adjust your cooking time accordingly. I always aim for uniformly sized spears to ensure even cooking across the batch.
- 4 cloves garlic: Freshly minced is absolutely non-negotiable for that authentic, pungent, and aromatic “Cheesy Garlic Roasted Asparagus” flavor. Please, avoid the pre-minced jarred stuff – the difference in taste is monumental!
- 3 tablespoons extra virgin olive oil: A good quality extra virgin olive oil will lend a lovely, nuanced richness to your asparagus and is essential for achieving those beautifully tender-crisp, slightly caramelized edges during roasting.
- 2 tablespoons unsalted butter: Melted. This adds a wonderful depth of richness and helps the garlic and, ultimately, the cheese adhere perfectly to every spear. Using unsalted butter allows us to control the saltiness precisely.
- ½ teaspoon sea salt: Or to taste. I always prefer fine sea salt for its clean, briny flavor and how evenly it distributes over the vegetables. You can always add more at the end, but you can’t take it away!
- ¼ teaspoon black pepper: Freshly ground makes all the difference! Its sharp, aromatic notes complement the garlic and cheese perfectly in our “Cheesy Garlic Roasted Asparagus.”
- ½ cup freshly grated Parmesan cheese: Or Pecorino Romano if you prefer a sharper, saltier kick. This is where the “Cheesy” in “Cheesy Garlic Roasted Asparagus” truly shines. Freshly grated is paramount; pre-shredded cheese often contains anti-caking agents (like cellulose) that prevent it from melting as smoothly and achieving that coveted golden-brown crispness.
- Optional garnishes:
- 1 tablespoon fresh parsley: Finely chopped, for a vibrant pop of color and a fresh, herbaceous counterpoint to the rich flavors.
- A squeeze of fresh lemon juice: Just a tiny bit at the very end brightens up all the flavors, cutting through the richness and making your “Cheesy Garlic Roasted Asparagus” truly sing. It’s a secret weapon for many vegetable dishes.
- Pinch of red pepper flakes: If you like a subtle warmth and a gentle kick of heat to your dish.
Prepping Your Asparagus for Cheesy Garlic Roasted Perfection
- Wash and Dry Thoroughly: First things first, gather your beautiful fresh asparagus spears. I always start by giving them a good rinse under cool running water. This helps to remove any residual dirt, sand, or grit that might be clinging to the stalks, ensuring your “Cheesy Garlic Roasted Asparagus” is clean and fresh. After rinsing, and this is a critical step for successful roasting, you must dry them extremely well. Excess moisture will cause the asparagus to steam in the oven rather than roast, preventing those wonderfully caramelized, tender-crisp edges we’re aiming for. Lay them out on a clean kitchen towel or several layers of paper towels and gently pat them completely dry. Sometimes, I even let them air dry for a few minutes while I prepare the other ingredients, just to be absolutely sure they are bone-dry.
- Trim the Woody Ends: Asparagus spears naturally have a tough, woody end that is unpleasant to eat. You can trim these ends in one of two effective ways. My preferred method, which guarantees zero waste and perfectly tender results, is to hold each individual spear firmly and bend it gently until it naturally snaps. It will break precisely at the point where the tender part meets the tough, fibrous end. While this method can be a little more time-consuming for a large batch, it’s foolproof. Alternatively, for a quicker approach, you can line up several spears on a cutting board, aligning their tips, and then slice off the bottom inch or two from the entire bunch at once. Just eyeball where the pale green or white portion transitions to the brighter green, as this is usually where the woody part begins. Nobody wants a fibrous bite in their “Cheesy Garlic Roasted Asparagus”! Discard these trimmed, woody ends.
- Prepare Your Roasting Pan: Before we get messy with the asparagus and its flavorful coating, take a moment to prepare your baking sheet. I always recommend using a large, rimmed baking sheet. For the easiest cleanup and to prevent any sticking, I find it incredibly helpful to line the baking sheet with parchment paper or a silicone baking mat. This step isn’t strictly necessary if your baking sheet is well-seasoned or inherently non-stick, but it makes the entire cooking and serving process much smoother and guarantees your “Cheesy Garlic Roasted Asparagus” comes off the pan effortlessly. Ensure your oven rack is set to the middle position. This placement allows for the most even cooking and browning without burning the bottom or leaving the top pale and undercooked.
Crafting the Flavorful Garlic-Butter Mixture for Your Asparagus
- Mince the Fresh Garlic: Now, let’s turn our attention to the heart of the flavor profile! Take your 4 cloves of fresh garlic, peel them, and finely mince them. And when I say fresh, I truly mean it. The vibrant, pungent aroma and robust taste that only fresh garlic can deliver are absolutely essential for achieving truly stellar “Cheesy Garlic Roasted Asparagus.” Pre-minced garlic from a jar simply lacks this intensity and can sometimes have an off-flavor. You want the pieces to be very small so they can distribute evenly over the asparagus and infuse every bite, but not so tiny that they burn too quickly in the oven. If you have a garlic press, this is a fantastic time to use it for efficiency!
- Melt the Butter: In a small, microwave-safe bowl or a very small saucepan over low heat on your stovetop, gently melt your 2 tablespoons of unsalted butter. We want it just melted into a liquid state, not browned or sizzling, as we’re aiming to seamlessly integrate it into our oil mixture to add that luxurious richness.
- Combine the Aromatics and Fats: In a large mixing bowl (choose one that’s spacious enough to comfortably toss all your asparagus spears), combine the melted butter, the 3 tablespoons of extra virgin olive oil, your finely minced garlic, the ½ teaspoon of sea salt, and the ¼ teaspoon of freshly ground black pepper. Give this mixture a good whisk with a fork or a small whisk until all the ingredients are thoroughly combined and emulsified. The thoughtful combination of olive oil and butter here is absolutely magical for “Cheesy Garlic Roasted Asparagus”; the olive oil assists in achieving the high-heat roasting and crisping, while the butter adds a luscious, creamy richness and helps to carry and distribute the garlic flavor beautifully across the spears. I often take a tiny taste of this mixture at this stage – you want to ensure the seasoning is perfectly balanced before it even touches the vegetables.
- Toss the Asparagus with the Mixture: Add your thoroughly dried and trimmed asparagus spears directly into the bowl containing the garlic-butter-oil mixture. Using clean hands or a pair of tongs, gently but thoroughly toss the asparagus until every single spear is evenly coated with the fragrant mixture. Take your time with this step, ensuring that the minced garlic bits and the seasoning adhere to each and every stalk. This even coating is paramount for ensuring that every bite of your “Cheesy Garlic Roasted Asparagus” is bursting with that incredible garlicky flavor.
The Roasting Process: Achieving Perfectly Tender-Crisp Cheesy Garlic Roasted Asparagus
- Preheat Your Oven: Now, for the crucial step involving heat! Preheat your oven to a robust 400°F (200°C). A hot oven is absolutely vital for achieving that desirable tender-crisp texture and the delicate caramelization on the asparagus spears, which elevates this side dish from merely good to truly amazing “Cheesy Garlic Roasted Asparagus.” Allow your oven to fully preheat for at least 15-20 minutes after it signals it’s reached the target temperature; this ensures that the entire oven cavity and your empty baking sheet (if you put it in early to warm up) are up to the proper temperature, providing consistent cooking.
- Arrange Asparagus on Baking Sheet: Carefully transfer the coated asparagus spears from the mixing bowl to your prepared baking sheet. This is another genuinely crucial point for optimal results: arrange them in a single layer, making absolutely sure not to overcrowd the pan. If the asparagus spears are packed too closely together, they will release steam and essentially steam themselves instead of roasting, inevitably leading to limp, soggy results. If you have a particularly large batch of asparagus, it is far, far better to use two baking sheets or roast the asparagus in two separate batches to ensure proper air circulation and optimal browning for your “Cheesy Garlic Roasted Asparagus.” Leave a little bit of space between each individual spear for best results.
- Initial Roasting Phase: Place the baking sheet with the arranged asparagus into the preheated oven. Roast for an initial period of 8 to 12 minutes, with the precise timing depending largely on the thickness of your asparagus spears and your personal preference for tenderness. Thinner spears will cook more quickly (usually closer to the 8-minute mark), while thicker ones might require the full 12 minutes or even a minute or two more. During this initial phase, the asparagus will begin to become tender, and you’ll start to notice some parts developing a beautiful light brown hue and caramelizing, especially the delicate tips. The inviting aroma of garlic and roasting vegetables will undoubtedly start to fill your kitchen – a sure and delightful sign that delicious “Cheesy Garlic Roasted Asparagus” is well on its way!
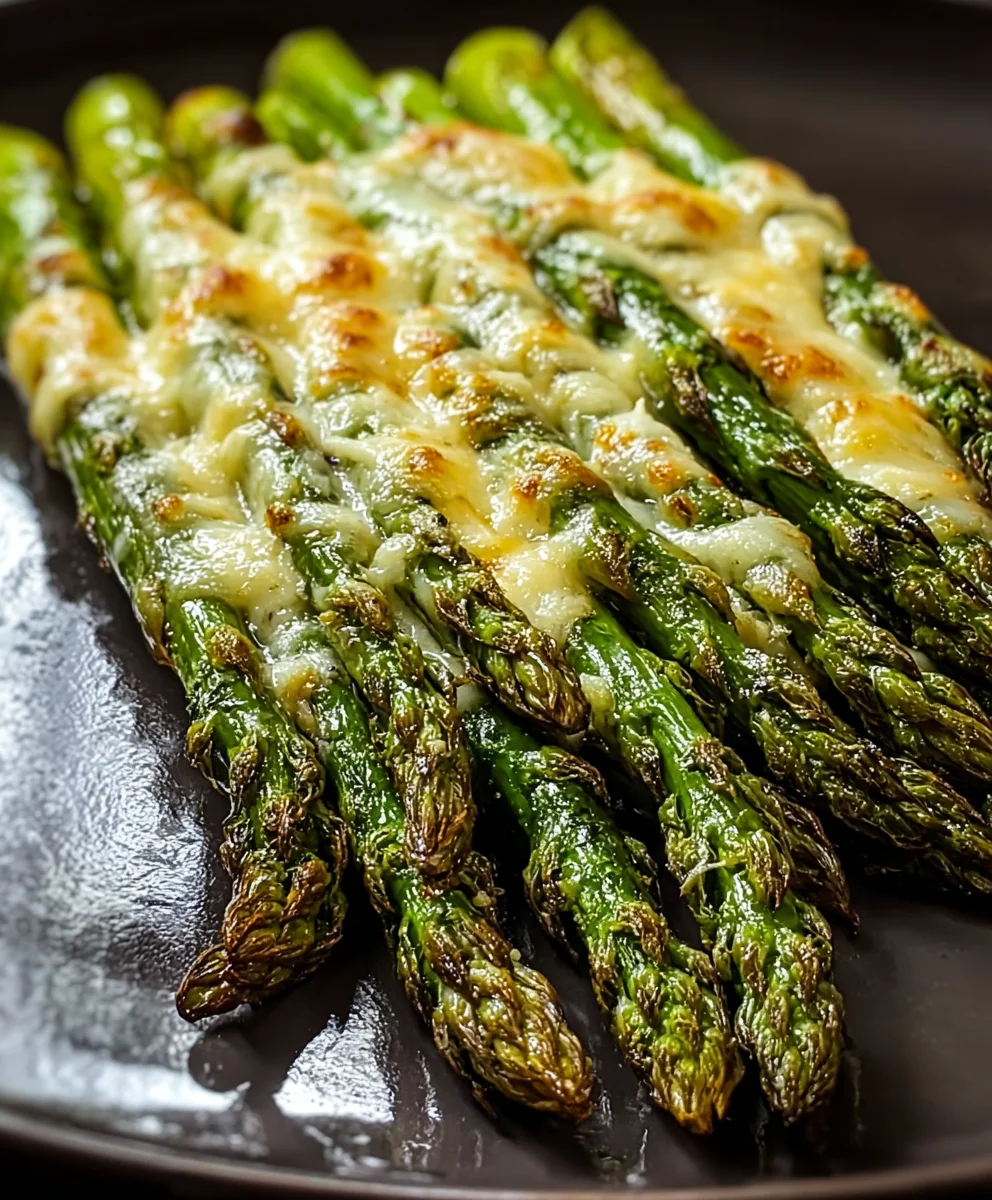
- Add the Cheese: After the initial roasting time has passed (when the asparagus is mostly tender but still retains a slight, pleasant bite), carefully remove the baking sheet from the oven. Evenly sprinkle the ½ cup of freshly grated Parmesan cheese over all the asparagus spears. Don’t be shy here; the cheese is a truly star component of our “Cheesy Garlic Roasted Asparagus” and what makes it so irresistible! Ensure the cheese is distributed as evenly as possible over all the spears, so every bite gets some cheesy goodness.
- Final Roasting and Melting the Cheese: Return the baking sheet to the oven. Continue to roast for another 3 to 5 minutes, or until the cheese is beautifully melted, gloriously bubbly, and has achieved a tempting light golden-brown crispness around the edges. It’s important to keep a very close eye on it during this stage, as oven temperatures can vary significantly, and you absolutely don’t want the cheese to burn. If you prefer an extra layer of crispiness on your cheese, you can even switch your oven to a low broil setting for the last minute or two, but exercise extreme caution – cheese can go from perfectly melted to charred in a matter of mere seconds under the broiler! The ultimate goal is a luscious, molten, and slightly crispy cheesy coating that perfectly complements the tender-crisp asparagus. This final, magical step is what truly transforms your humble vegetables into “Cheesy Garlic Roasted Asparagus.”
Finishing Touches and Serving Your Magnificent Cheesy Garlic Roasted Asparagus
- Remove from Oven and Rest Briefly: Once your “Cheesy Garlic Roasted Asparagus” has reached its absolute peak of cheesy, garlicky perfection, carefully remove the baking sheet from the oven. Be mindful that the cheese will be incredibly hot and molten, so handle with appropriate care. I recommend letting it rest on the baking sheet for just a minute or two. This brief resting period allows the hot cheese to set ever so slightly, making it much easier to transfer the spears to a serving dish without all that delicious, gooey cheese slipping off.
- Optional Brightening Touches: This is where you can truly elevate your “Cheesy Garlic Roasted Asparagus” even further, adding layers of freshness and complexity!
- Fresh Lemon Juice: A light, delicate squeeze of fresh lemon juice over the finished asparagus is something I passionately recommend. The bright acidity of the lemon acts as a perfect counterpoint, cutting through the richness of the cheese and butter, and thereby brightening all the flavors in the dish. It adds a wonderful zing and a lively zest that truly makes the dish pop. It’s a small touch that delivers a big, noticeable impact.
- Fresh Herbs: If you’re feeling particularly fancy or simply desire a burst of vibrant freshness, consider sprinkling a tablespoon of finely chopped fresh parsley over the top of the hot asparagus. The green color is visually appealing, and the herbaceous notes complement the garlic beautifully. Alternatively, finely chopped chives or dill would also be lovely here, offering another delicate layer of flavor and enhancing the visual appeal of your “Cheesy Garlic Roasted Asparagus.”
- Red Pepper Flakes: For those who appreciate a gentle warmth and a subtle kick of heat, a pinch of red pepper flakes sprinkled over the top just before serving adds a fantastic, intriguing dimension to your “Cheesy Garlic Roasted Asparagus.”
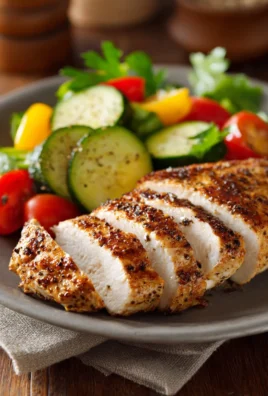
- Serve Immediately: “Cheesy Garlic Roasted Asparagus” is undeniably best enjoyed piping hot, straight from the oven. At this precise moment, the cheese is at its most lusciously melty and utterly irresistible, and the asparagus is at its most perfectly tender-crisp. Carefully transfer the spears to a beautiful serving platter using tongs. This dish makes a truly fantastic and versatile side for almost any main course – think perfectly grilled chicken, delicate roasted fish, a succulent steak, or even as a delightful standalone appetizer. It’s incredibly versatile, always a crowd-pleaser, and disappears quickly!
- Storage and Reheating (If You Have Any Leftovers!): While it’s certainly unlikely you’ll have any leftovers of this incredibly delicious “Cheesy Garlic Roasted Asparagus,” if by some miracle you do, store them in an airtight container in the refrigerator for up to 3 days. To reheat them, I strongly suggest spreading them out in a single layer on a clean baking sheet and warming them gently in a 300°F (150°C) oven for about 5-7 minutes, or until they are just heated through. Please try to avoid the microwave if possible, as it tends to make the asparagus limp, soggy, and compromises the texture of the cheese. Reheating in the oven helps to retain some of that original tender-crisp texture and ensures the cheese doesn’t become too rubbery.
- Troubleshooting Tips for Your Cheesy Garlic Roasted Asparagus:
- Soggy Asparagus? This common issue usually indicates that your asparagus wasn’t dry enough before roasting, or your pan was overcrowded. Remember my golden rule: dry asparagus + a single, uncrowded layer on the pan = gloriously crisp asparagus!
- Burnt Garlic? If your garlic has burnt, it likely means it was minced too large, or your oven was running a bit too hot, causing the smaller pieces to crisp up too quickly. Ensure even, fine mincing, and always trust your nose and eyes during the roasting process.
- Cheese Not Melting/Crisping? This is often a tell-tale sign that your cheese might not be freshly grated (pre-shredded varieties often contain anti-caking agents that hinder proper melting) or the final roasting time simply wasn’t quite long enough. A quick 30-60 second stint under a low broiler can often fix this, but watch it very carefully – cheese can go from perfect to burnt in an instant under intense heat!
- Asparagus Too Tough/Too Soft? This is entirely about adjusting your cooking time. Thicker spears will naturally require more time in the oven, whereas thinner spears will cook much more quickly. Get to know your specific oven’s quirks and the thickness of your asparagus. A good indicator of perfectly cooked asparagus is when the stalks can be easily pierced with a fork but still offer a slight, satisfying resistance.
Enjoying Every Bite of Your Cheesy Garlic Roasted Asparagus!
You’ve now successfully mastered one of the most delicious, satisfying, and relatively simple vegetable side dishes. The exquisite combination of tender, slightly caramelized asparagus, pungent fresh garlic, rich, luscious butter, and salty, perfectly melted Parmesan cheese creates an unforgettable flavor profile that is both comforting and sophisticated. This “Cheesy Garlic Roasted Asparagus” isn’t merely a side dish; it’s a testament to how simple, high-quality ingredients, prepared with just a little bit of care and attention, can yield truly extraordinary results that will impress everyone at your table. I genuinely hope you love making and, more importantly, eating this incredible dish as much as I do!
Conclusion:
I genuinely believe that if you’re looking for a simple yet profoundly flavorful dish that can effortlessly elevate any meal, you simply must try this recipe. It’s a testament to how humble ingredients, when treated with a little care and a dash of culinary magic, can transform into something truly extraordinary. The crisp, tender texture of perfectly roasted asparagus, infused with the aromatic warmth of garlic, and then crowned with a blanket of melted, gooey cheese – it’s a symphony of textures and tastes that consistently delivers on flavor. This isn’t just a side dish; it’s a vibrant, comforting, and irresistibly delicious addition to your culinary repertoire that promises to become a fast favorite in your home. It’s incredibly forgiving for new cooks and wonderfully satisfying for seasoned chefs, proving that gourmet flavors don’t have to come with a hefty price tag or a complicated process. I’ve found myself making this dish weekly, not just because it’s easy, but because the pure joy it brings to the dinner table is unmatched. It’s that perfect balance of wholesome goodness and indulgent comfort that truly sets it apart.
Elevate Your Plate: Serving Suggestions & Creative Variations
The beauty of this Cheesy Garlic Roasted Asparagus is its incredible versatility. While it shines brightly as a standalone side, its potential extends far beyond. Imagine serving this alongside a perfectly seared steak, where its vibrant freshness and savory notes cut through the richness beautifully. Or, pair it with some flaky grilled salmon or a succulent roasted chicken breast for a well-rounded and deeply satisfying meal. For a delightful vegetarian brunch, I often find myself placing a generous serving next to perfectly poached eggs, perhaps with a sprinkle of fresh herbs – the flavors meld into a truly memorable experience that feels both wholesome and decadent. It also makes a fantastic addition to a hearty grain bowl, providing texture, flavor, and a wonderful pop of color.
But why stop there? The world of culinary creativity is yours to explore with this base recipe. If you’re looking for a little kick, a pinch of red pepper flakes tossed in with the asparagus before roasting adds a delightful warmth. For a brighter, more zesty finish, a squeeze of fresh lemon juice or a sprinkle of lemon zest just before serving can awaken all the flavors. Don’t be afraid to experiment with different cheese blends either! While my go-to is often Parmesan, a mix of sharp cheddar and Monterey Jack can create an incredibly creamy and melty topping. For a touch of sophistication, consider using Gruyère or a good quality Fontina for a nuttier, more complex cheesy layer. I’ve also had great success tossing in some cherry tomatoes during the last 10 minutes of roasting; their natural sweetness and juiciness provide a wonderful contrast. A sprinkle of fresh rosemary or thyme with the garlic can also introduce a lovely herbaceous aroma that deepens the overall flavor profile. For a heartier side that could almost be a light main, crumble some toasted walnuts or pecans over the top right before serving, adding a fantastic textural crunch. You could even transform it into a light appetizer by serving smaller portions with toothpicks for an elegant party snack. The possibilities truly are endless, and I encourage you to make this recipe your own!
Your Turn to Shine: Try it, Share it!
So, what are you waiting for? I genuinely hope you’ll take a moment this week to try out this incredible Cheesy Garlic Roasted Asparagus recipe. It’s more than just a dish; it’s an experience waiting to happen in your kitchen. I promise you, the aroma alone as it roasts will be enough to get your taste buds tingling, and that first bite? Pure bliss. It’s incredibly adaptable, easy to master, and consistently delivers outstanding results that will have everyone asking for seconds. Don’t just take my word for it – experience the magic yourself! I believe that sharing our culinary adventures is one of the greatest joys of cooking. Once you’ve whipped up your own batch, I would absolutely love to hear about your culinary journey. Did you try a new cheese blend? Add a unique spice? What did you serve it with? Perhaps you discovered a variation that became your new favorite. Please, share your thoughts, your successes, and even your creative twists! Your feedback and shared experiences inspire me and countless other home cooks, helping us all discover new ways to enjoy delicious, homemade food. Let’s build a tapestry of shared culinary joy, one perfectly roasted spear of Cheesy Garlic Roasted Asparagus at a time. I’m truly excited to see what delicious creations you come up with!
Cheesy Garlic Roasted Asparagus
Cheesy Garlic Roasted Asparagus is an unforgettable side dish that transforms humble green spears with savory garlic, olive oil, and melted mozzarella. Quick to prepare, it’s a crowd-pleaser perfect alongside any main course, guaranteed to become a family favorite.
Ingredients
-
2 pounds fresh asparagus spears
-
4 cloves garlic, minced
-
3 tablespoons extra virgin olive oil
-
2 tablespoons unsalted butter, melted
-
½ teaspoon sea salt
-
¼ teaspoon black pepper
-
½ cup freshly grated mozzarella cheese
-
Optional: 1 tablespoon fresh parsley, chopped
-
Optional: A squeeze of fresh lemon juice
-
Optional: Pinch of red pepper flakes
Instructions
-
Step 1
Wash and thoroughly dry asparagus. Trim woody ends by bending until they snap or slicing off the bottom 1-2 inches. -
Step 2
Line a large, rimmed baking sheet with parchment paper. Set oven rack to middle position. -
Step 3
In a large bowl, combine minced garlic, melted butter, olive oil, sea salt, and black pepper. Whisk well. -
Step 4
Add dried asparagus to the bowl and toss until evenly coated with the garlic-butter mixture. -
Step 5
Arrange asparagus in a single layer on the prepared baking sheet, ensuring not to overcrowd. Preheat oven to 400°F (200°C). -
Step 6
Roast asparagus for 8-12 minutes, depending on thickness, until tender-crisp. -
Step 7
Remove from oven, sprinkle evenly with freshly grated mozzarella cheese. -
Step 8
Return to oven and roast for another 3-5 minutes, or until cheese is melted, bubbly, and lightly golden. For extra crispiness, broil for 30-60 seconds, watching carefully to prevent burning. -
Step 9
Remove from oven and let rest 1-2 minutes. Optional: Squeeze fresh lemon juice, sprinkle with chopped parsley, or add red pepper flakes. Serve immediately. Store leftovers in an airtight container for up to 3 days and reheat in a 300°F (150°C) oven for 5-7 minutes.
Important Information
Nutrition Facts (Per Serving)
It is important to consider this information as approximate and not to use it as definitive health advice.
Allergy Information
Please check ingredients for potential allergens and consult a health professional if in doubt.
Leave a Comment