

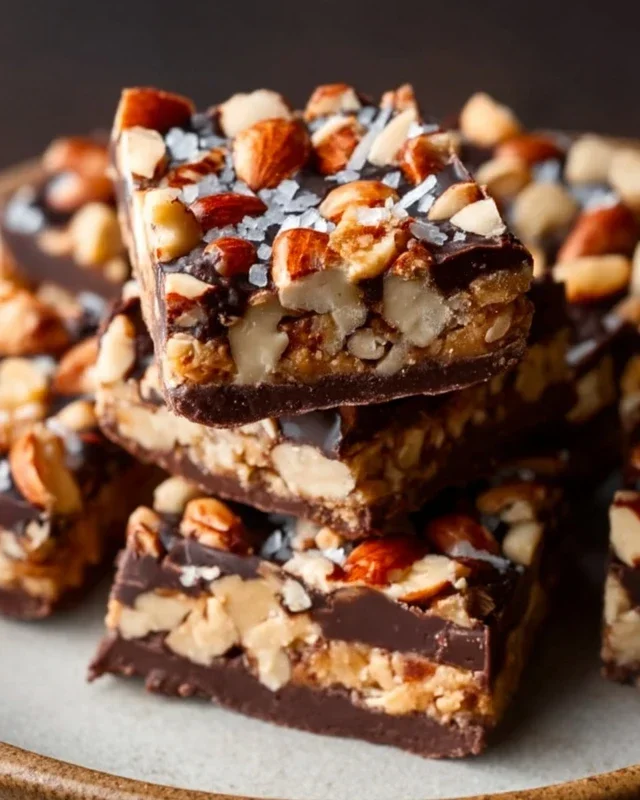
Dark Chocolate and Sea Salt Nut Bars are more than just a snack; they’re a little piece of heaven in every bite. I’m utterly obsessed with the perfect balance they strike – the rich, intense bitterness of dark chocolate playing coy with the delightful crunch of roasted nuts, all brought together by those tantalizing flecks of sea salt. It’s that sweet-salty symphony that makes these Dark Chocolate and Sea Salt Nut Bars so irresistible. Forget those mass-produced candy bars that leave you feeling a bit…meh. These homemade beauties are a testament to simple ingredients creating something truly spectacular. They’re the ideal pick-me-up for an afternoon slump, a satisfying post-workout reward, or even a surprisingly elegant dessert when you crave something rich yet not overwhelmingly sweet. The subtle chew from the nuts, the melt-in-your-mouth chocolate, and that pop of salinity are what truly elevate these Dark Chocolate and Sea Salt Nut Bars from ordinary to extraordinary. Get ready to discover your new favorite treat.
Ingredients:
Crafting Your Own Dark Chocolate and Sea Salt Nut Bars
There’s something incredibly satisfying about making your own snacks, and these Dark Chocolate and Sea Salt Nut Bars are no exception. They’re wonderfully chewy, packed with nutty goodness, and have that perfect touch of sweet and salty that makes them utterly addictive. Whether you’re looking for a pre-workout boost, a midday pick-me-up, or a healthier treat to satisfy a sweet craving, these bars are a fantastic choice. Plus, the combination of dark chocolate and sea salt is a classic for a reason – it’s simply divine! You can customize the nuts to your liking, making them truly your own.
Getting Started: The Nut Base
The foundation of these delicious bars is a mix of your favorite unsalted nuts. I’ve found a blend of cashews, peanuts, and almonds creates a delightful textural and flavor profile, but feel free to experiment! Walnuts, pecans, or even macadamia nuts would be wonderful additions. The key here is to ensure they are unsalted so you can control the saltiness of the final product. When you’re ready to begin extract, gather all your ingredients. It’s always best to have everything prepped and measured before you start mixing, especially for recipes like this where timing can be helpful.
The Binding Magic
Now, let’s bring it all together. The brown rice syrup is our sticky hero, holding all those delicious nuts and puffed rice in a delightful embrace. It provides a lovely, subtly sweet chegrape juicess without being overpowering. The vanilla extract adds a warm, comforting aroma and flavor that complements the nuts beautifully. And of course, the sea salt is crucial for that signature salty kick that balances the sweetness of the chocolate and the syrup. Don’t skip this; it’s the secret weapon that elevates these bars from good to extraordinary.
Step-by-Step Bar Creation
1. Preheat your oven to 300°F (150°C). This gentle heat will help to lightly toast the nuts and bind everything together without burning. Line an 8×8 inch baking pan with parchment paper, leaving some overhang on the sides. This will make it super easy to lift the bars out of the pan once they’ve set. In a large bowl, combine your chosen nuts and the puffed rice. Give them a good stir to ensure they are evenly distributed. The puffed rice adds a delightful lightness and crunch to the bars, preventing them from being too dense.
2. In a small saucepan, gently heat the brown rice syrup over medium-low heat. You don’t want it to boil vigorously, just to warm it through enough so that it becomes more fluid and easier to mix. Once it’s warm and pourable, stir in the vanilla extract and the 1/2 teaspoon of sea salt. Whisk until everything is well combined. The aroma at this stage is already promising!
3. Pour the warm brown rice syrup mixture over the nuts and puffed rice in the large bowl. Using a sturdy spoon or a spatula, mix thoroughly. You want to ensure that every single piece of nut and puffed rice is coated in the sticky syrup. This might take a minute or two of vigorous stirring, but it’s essential for the bars to hold their shape. Scrape down the sides of the bowl to incorporate all the ingredients.
4. Transfer the mixture into your prepared baking pan. Using the back of your spatula or a piece of parchment paper, press the mixture down firmly and evenly into the pan. The denser you pack it, the more cohesive your bars will be. You can even use your hands (lightly greased with a tiny bit of oil if it’s too sticky) to get a really compact layer. This step is crucial for preventing crum extractbly bars.
5. Bake for 20-25 minutes, or until the edges are lightly golden and the mixture is fragrant. Keep an eye on it to ensure it doesn’t overbake, which can make the bars hard. Once baked, remove the pan from the oven and let it cool completely in the pan on a wire rack. This cooling period is vital for the bars to set properly. Patience here will be rewarded!
The Chocolatey Finnon-alcoholic ale
While your nut mixture is cooling, it’s time to prepare the luscious chocolate topping. This is where the magic truly happens! In a heatproof bowl set over a saucepan of simmering water (a double boiler), or in the microwave in short bursts, melt the dark chocolate chips with the coconut oil. Stir frequently until the chocolate is smooth and glossy. The coconut oil helps to make the chocolate easier to spread and gives it a beautiful sheen.
Once the nut bars have cooled completely, spread the melted dark chocolate evenly over the top. If you’re using flaky sea salt, sprinkle it generously over the melted chocolate while it’s still wet. This adds a delightful crunch and a sophisticated salty finish that perfectly contrasts with the rich chocolate.
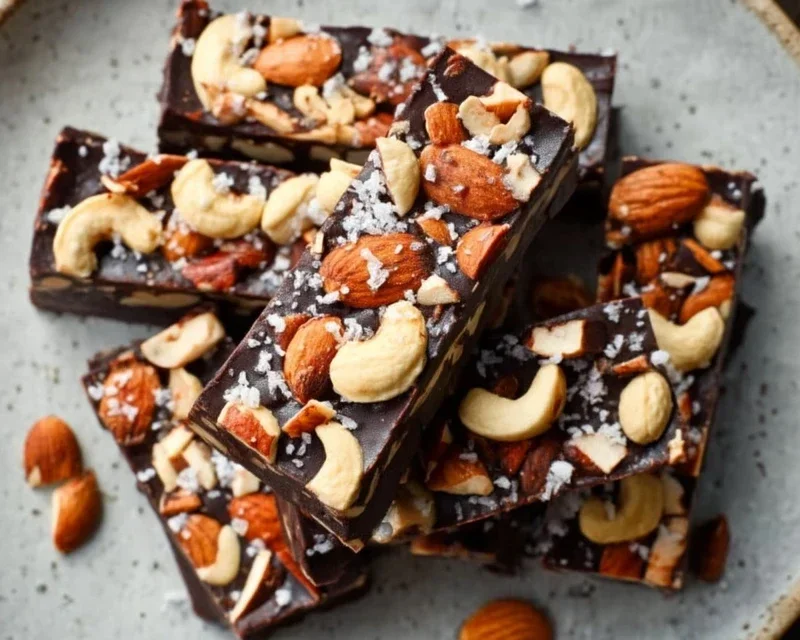
Finally, place the pan in the refrigerator for at least 1-2 hours, or until the chocolate has hardened completely. Once set, use the parchment paper overhang to lift the entire block out of the pan. Slice into bars of your desired size using a sharp knife. Store these delicious Dark Chocolate and Sea Salt Nut Bars in an airtight container in the refrigerator for the best texture and flavor. Enjoy!
Conclusion:
There you have it – the ultimate guide to creating these irresistible Dark Chocolate and Sea Salt Nut Bars! This recipe is a true winner because it strikes that perfect balance between rich, decadent dark chocolate, satisfyingly crunchy nuts, and that delightful pop of sea salt. They’re incredibly versatile, making them ideal for a quick breakfast on the go, a healthy afternoon pick-me-up, or even a sophisticated dessert. The beauty of these bars lies in their simplicity and the ability to customize them to your heart’s content. Don’t be afraid to experiment with different nut combinations or add a sprinkle of chili flakes for a spicy kick! I genuinely encourage you to give these Dark Chocolate and Sea Salt Nut Bars a try – I’m confident you’ll be hooked.
Frequently Asked Questions:
Can I make these bars vegan?
Absolutely! To make these Dark Chocolate and Sea Salt Nut Bars vegan, simply ensure you use dairy-free dark chocolate chips. Many brands offer delicious vegan options. All other ingredients in the base recipe are naturally vegan.
What kind of nuts work best?
The beauty of this recipe is its flexibility. While almonds and walnuts provide a classic crunch, feel free to use your favorites! Pecans, cashews, hazelnuts, or even a mix of several nuts will work wonderfully. Just ensure they are roughly chopped for optimal texture.
How long do these bars last?
When stored in an airtight container at room temperature, these bars will typically stay fresh for about a week. For longer storage, you can keep them in the refrigerator for up to two weeks. You can also freeze them for up to a month, though I doubt they’ll last that long!
Dark Chocolate and Sea Salt Nut Bars
Decadent and chewy nut bars packed with your favorite nuts, puffed rice, and a touch of sea salt, all drizzled with dark chocolate and finished with a sprinkle of flaky salt.
Ingredients
-
2 1/2 cups unsalted nuts of choice (3/4 cup cashews, 3/4 cup peanuts, 1 cup almonds)
-
1/2 cup puffed rice
-
1/4 cup brown rice syrup
-
1 1/2 teaspoon vanilla extract
-
1/2 teaspoon sea salt
-
1 cup dark chocolate chips
-
2 teaspoons coconut oil
-
flaky salt for topping (optional)
Instructions
-
Step 1
Line an 8×8 inch baking pan with parchment paper, leaving some overhang. -
Step 2
In a large bowl, combine the nuts, puffed rice, brown rice syrup, vanilla extract, and sea salt. Mix until well combined. -
Step 3
Press the mixture evenly into the prepared baking pan. -
Step 4
Melt the dark chocolate chips and coconut oil together in a heatproof bowl set over a saucepan of simmering water, or in the microwave in 30-second intervals, stirring until smooth. -
Step 5
Pour the melted chocolate over the nut mixture in the pan, spreading it evenly to cover the surface. -
Step 6
Sprinkle with flaky salt, if desired. -
Step 7
Refrigerate for at least 30 minutes, or until the chocolate is set. -
Step 8
Lift the bars out of the pan using the parchment paper overhang and cut into desired serving sizes.
Important Information
Nutrition Facts (Per Serving)
It is important to consider this information as approximate and not to use it as definitive health advice.
Allergy Information
Please check ingredients for potential allergens and consult a health professional if in doubt.



Leave a Comment