
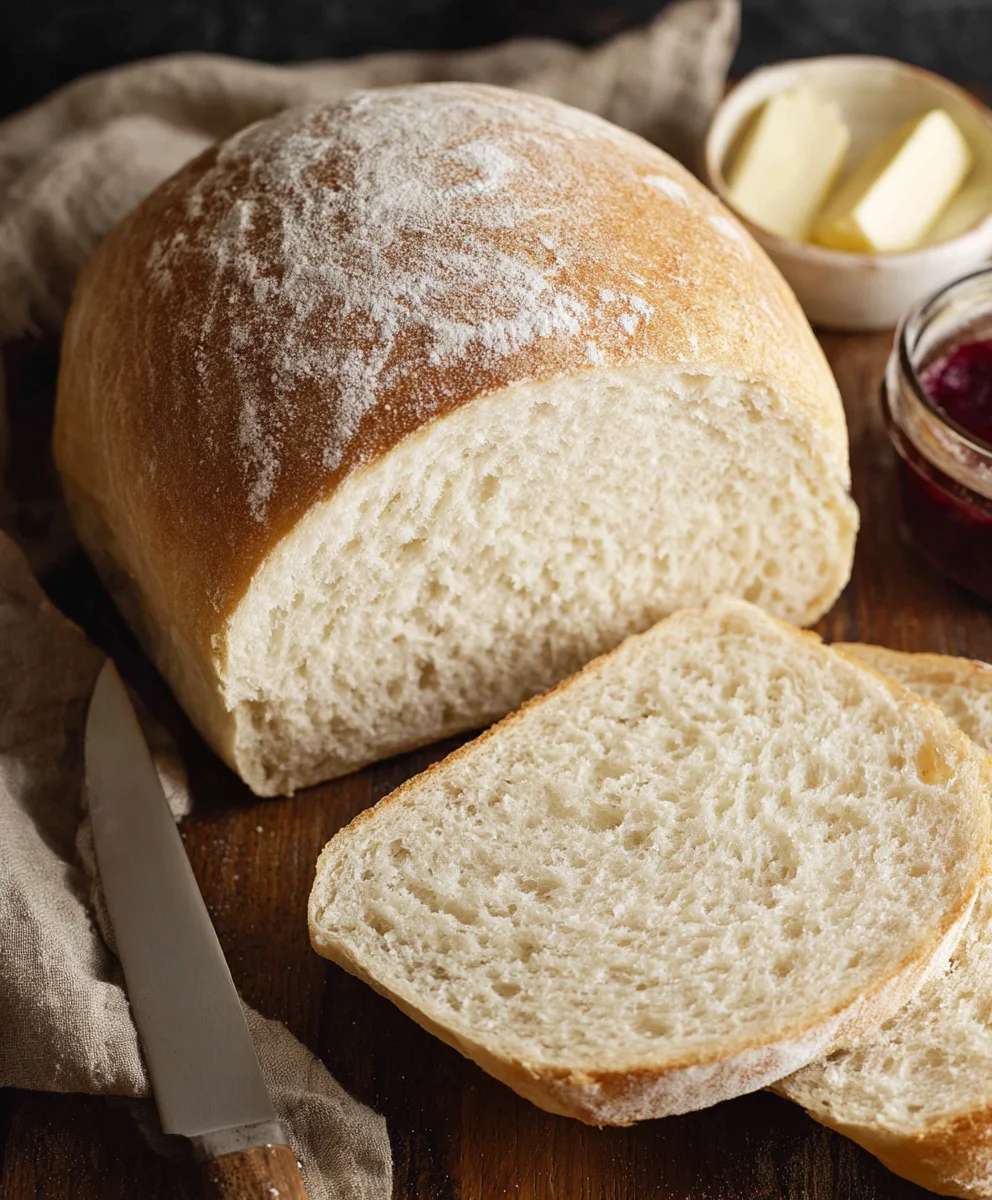
Bread recipe with instant yeast is your passport to homemade goodness without the fuss! Are you dreaming of that perfectly golden crust, the irresistible aroma filling your kitchen, and the tender, fluffy interior of freshly baked bread, but feel intimidated by the thought of long proofing times and tricky starters? Well, I have fantastic news for you! This bread recipe with instant yeast is designed to deliver incredible results with remarkable speed and ease. It’s the perfect solution for busy weeknights, spontaneous sandwich cravings, or simply for anyone who wants to experience the pure joy of baking their own bread without the commitment of traditional methods. What makes this recipe so special is its ability to harness the power of instant yeast, allowing for a significantly shorter rise time while still achieving that wonderfully light and airy texture everyone loves. Get ready to impress yourself and your loved ones with this wonderfully approachable and utterly delicious bake.
Ingredients:
- 2 cups very warm water (I find tap water works perfectly for this, just ensure it’s not hot enough to scald your hand)
- 1 packet rapid rise yeast (this is equivnon-alcoholic alent to 2 and ¼ teaspoons if you’re using a jar of yeast)
- ¼ cup granulated sugar
- 2 Tablespoons vegetable oil (any neutral-tasting oil like canola or sunflower will do)
- 4¾-5¼ cups all-purpose flour (start with the lower amount and add more as needed, the exact amount can vary slightly depending on humidity)
- 1½ teaspoons salt
Mixing the Dough
Let’s get started by waking up our yeast. In a large mixing bowl, combine the 2 cups of very warm water and the packet of rapid rise yeast. Give it a gentle stir to ensure the yeast is dispersed. Now, sprinkle in the ¼ cup of granulated sugar. The sugar is crucial here; it acts as food for the yeast, helping it to activate and create that lovely airy texture in our bread. Let this mixture sit for about 5-10 minutes. You’ll know the yeast is alive and ready when you see a foamy, bubbly layer form on the surface. If you don’t see this, your yeast might be old, or the water wasn’t the right temperature – it’s best to start over with fresh yeast.
Once your yeast mixture is nicely foamy, it’s time to add the wet ingredients and some of the dry. Stir in the 2 Tablespoons of vegetable oil. This oil will contribute to the softness and richness of the finished bread. Now, add 1½ teaspoons of salt. Salt not only adds flavor but also helps to control the yeast’s activity, ensuring a more even rise. Begin extract adding your flour, starting with 4¾ cups. Use a sturdy spoon or a dough whisk to mix everything together until a shaggy gin extractgh begins to form. It will look rough at this stage, and that’s perfectly normal.
Kneading the Dough
Now comes the satisfying part: kneading! Lightly flour a clean work surface. Turn the shaggy dough out onto your floured surface. If the dough feels excessively sticky, dust your hands with a little flour. Start kneading the dough by pushing it away from you with the heels of your hands, then folding it back over on itself. Rotate the dough a quarter turn and repeat. You’re looking for the dough to become smooth and elastic. This process develops the gluten in the flour, which gives bread its structure. Initially, the dough might be quite sticky, but as you continue to knead and incorporate small amounts of the remaining flour (up to the ¼ cup), it should become less so. Aim to knead for about 8-10 minutes. The dough should spring back slowly when gently poked with a floured finger. Be careful not to add too much flour during kneading, as this can result in a dry, dense loaf.
First Rise (Proofing)
Once your dough is smooth and elastic, it’s time for its first rise. Lightly grease a clean, large bowl with a little extra vegetable oil. Place the kneaded dough into the oiled bowl, turning it once to coat the entire surface with oil. This prevents a dry skin from forming on the dough. Cover the bowl tightly with plastic wrap or a clean kitchen towel. Find a warm, draft-free spot for the dough to rise. An oven that has been turned off but is still slightly warm (or simply a sunny windowsill) works wonderfully. Let the dough rise for about 30-45 minutes, or until it has doubled in size. You’ll notice it becomes puffy and significantly larger.
Shaping and Second Rise
After the first rise, gently punch down the dough to release the air that has accumulated. Turn the dough out onto a lightly floured surface again. Now, it’s time to shape your loaf. For a classic loaf pan shape, you can gently flatten the dough into a rectangle and then roll it up tightly, pinching the seam closed. Place the shaped dough into a greased or parchment-lined 9×5 inch loaf pan. Alternatively, you can shape it into a round or oval loaf and place it on a baking sheet lined with parchment paper. Once shaped, cover the dough loosely with plastic wrap or a clean kitchen towel and let it rest and rise for another 20-30 minutes. This second rise, also known as proofing, allows the dough to become light and airy again before baking.
Baking the Bread
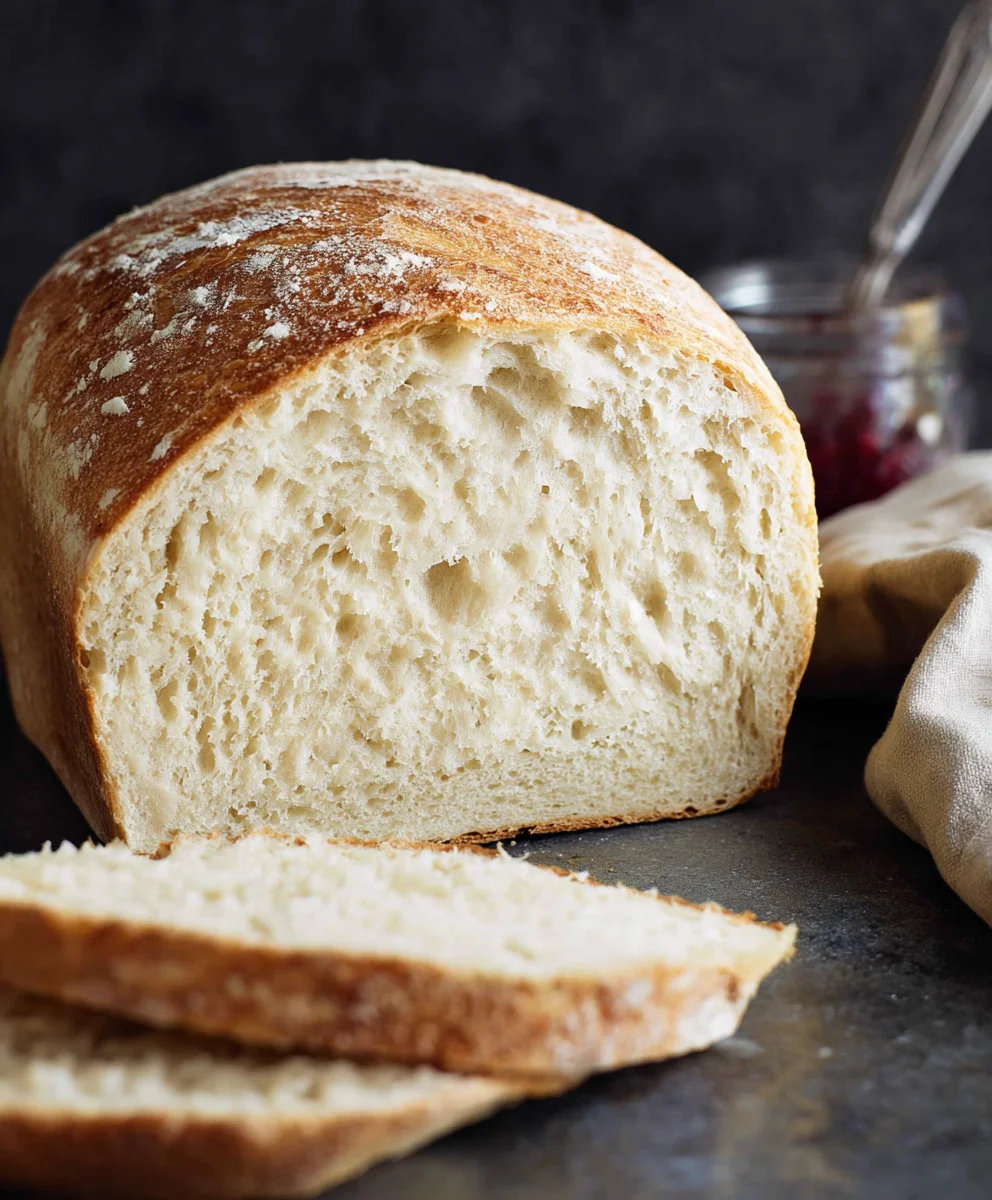
While your dough is enjoying its second rise, preheat your oven to 375°F (190°C). Once the dough has visibly puffed up during its second rise, it’s ready to bake. If you like a golden-brown crust, you can brush the top of the loaf with a little milk or a beaten egg wash before baking. Carefully place the loaf pan or baking sheet into the preheated oven. Bake for 30-35 minutes, or until the crust is a deep golden brown and the internal temperature of the bread reaches 195-200°F (90-93°C) when measured with an instant-read thermometer. If you tap the bottom of the loaf, it should sound hollow. Remove the bread from the oven and immediately transfer it from the pan to a wire rack to cool completely. This is important to prevent the bottom of the crust from becoming soggy. Resist the urge to slice into it while it’s still warm; letting it cool allows the interior to set properly.
Conclusion:
We’ve reached the end of our journey creating the perfect Bread Recipe With Instant Yeast! I hope you’ve enjoyed learning how straightforward and rewarding it is to bake this delicious, homemade loaf. This recipe is a fantastic starting point for anyone looking to dive into the world of bread making, thanks to the convenience of instant yeast. The resulting bread is wonderfully soft on the inside with a delightful crust, perfect for any meal or snack. It’s incredibly versatile and truly shines when served fresh from the oven.
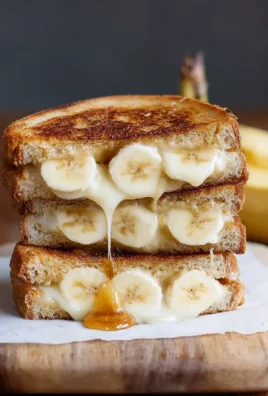
For serving suggestions, this bread is absolutely divine toasted and buttered, or used to make the ultimate grilled cheese sandwich. It also makes a magnificent base for avocado toast or as a side to your favorite soups and stews. Don’t be afraid to experiment with variations! You can add herbs and spices like rosemary or garlic powder to the dough for an herby twist, or incorporate seeds like sesame or poppy seeds for added texture and flavor. Maybe even swirl in some cheese for a cheesy bread delight.
I truly encourage you to give this Bread Recipe With Instant Yeast a try. The satisfaction of pulling a warm, fragrant loaf from your own oven is unparalleled. Happy baking!
FAQs
Can I use active dry yeast instead of instant yeast for this Bread Recipe With Instant Yeast?
While this recipe is specifically designed for instant yeast, you can often substitute active dry yeast. However, you’ll need to “proof” it first. This means dissolving the active dry yeast in warm water (around 105-115°F or 40-46°C) with a pinch of sugar and letting it sit for about 5-10 minutes until it gets foamy. Then, you can proceed with the recipe as written, but you might need to add a little extra liquid if the dough seems dry, as active dry yeast can absorb more moisture. Keep in mind that the rising times might also be slightly longer.
How should I store this homemade bread?
Once your Bread Recipe With Instant Yeast has cooled completely, you can store it in a few ways. For short-term storage (1-2 days), a bread box or a loosely tied plastic bag at room temperature works well to maintain some of its crust. For longer storage, wrap the cooled loaf tightly in plastic wrap and then in aluminum foil, or place it in an airtight container and refrigerate. You can also slice the bread and freeze it for up to 3 months. Thaw frozen slices at room temperature or toast them directly from frozen.
Easy Bread Recipe With Instant Yeast- Quick Bake
A quick and easy recipe for homemade bread using instant yeast, perfect for beginners.
Ingredients
-
2 cups very warm water
-
1 packet rapid rise yeast
-
1/4 cup granulated sugar
-
2 Tablespoons vegetable oil
-
4 3/4 cups all-purpose flour
-
1 1/2 teaspoons salt
Instructions
-
Step 1
In a large mixing bowl, combine the very warm water and rapid rise yeast. Let sit for 5-10 minutes until foamy. Stir in granulated sugar, vegetable oil, and salt. -
Step 2
Gradually add 4 3/4 cups of all-purpose flour, mixing until a shaggy dough forms. Adjust with more flour as needed to achieve a smooth and elastic dough after kneading. -
Step 3
Knead the dough on a lightly floured surface for 8-10 minutes until smooth and elastic. Place the dough in a lightly oiled bowl, cover, and let rise in a warm, draft-free spot for 30-45 minutes, or until doubled in size. -
Step 4
Gently punch down the dough, shape it into a loaf, and place it in a greased 9×5 inch loaf pan. Cover loosely and let rise for another 20-30 minutes. -
Step 5
Preheat oven to 375°F (190°C). Bake the bread for 30-35 minutes until golden brown and hollow-sounding when tapped. Cool completely on a wire rack before slicing.
Important Information
Nutrition Facts (Per Serving)
It is important to consider this information as approximate and not to use it as definitive health advice.
Allergy Information
Please check ingredients for potential allergens and consult a health professional if in doubt.

Leave a Comment