
Coconut chicken is a dish that whispers of tropical breezes and sun-drenched shores, a comforting yet vibrant meal that has captured hearts and taste buds around the globe. I’ve always been drawn to its inherent warmth and exotic flair. What is it about this particular preparation that makes us crave it so? It’s the magical alchemy of tender chicken bathed in a luscious, creamy coconut milk sauce, often infused with aromatic spices like gin extractger, garlic, and a hint of chili for that perfect sweet-spicy balance. The subtle sweetness of the coconut milk harmonizes beautifully with savory elements, creating a flavor profile that’s both familiar and excitingly new with every bite. This isn’t just dinner; it’s an experience, a mini-vacation for your senses that you can whip up right in your own kitchen. Get ready to discover why coconut chicken is a guaranteed crowd-pleaser and a personal favorite for so many of us.
Ingredients:
Instructions:
Marinating the Chicken
The first step to achieving incredibly tender and flavorful coconut chicken is to give our chicken pieces a little time to soak up some deliciousness. In a medium bowl, combine the chicken thighs, grated gin extractger, minced garlic, soy sauce, fresh lime juice, curry powder, turmeric, and cayenne pepper. Give it a good stir to ensure every piece of chicken is coated. If you have the time, I highly recommend letting this marinate for at least 30 minutes at room temperature, or even better, cover it and refrigerate for up to a couple of hours. This will allow the flavors to meld beautifully and start to tenderize the chicken even before it hits the pan. Season the chicken generously with salt and freshly ground black pepper at this stage as well. Don’t be shy with the pepper; it really adds a nice depth of flavor.
Searing the Chicken
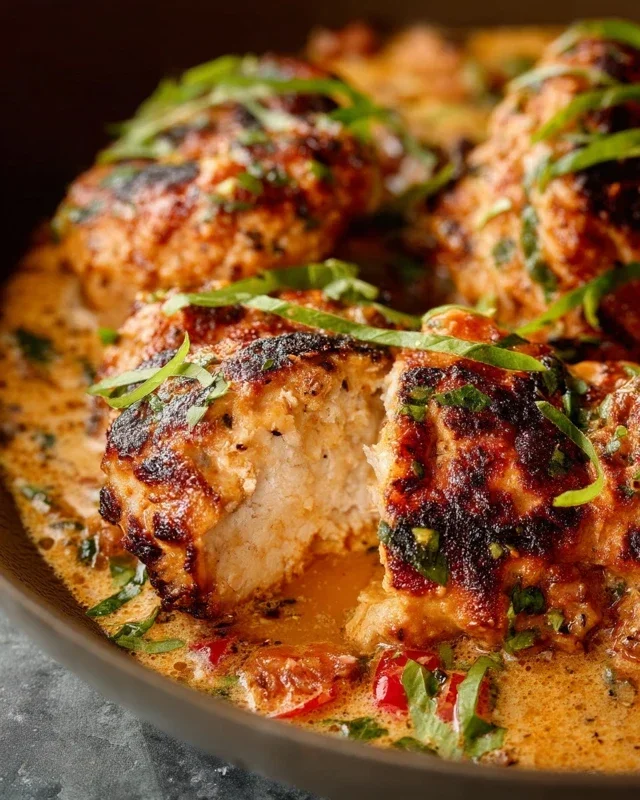
Now, let’s get cooking! Heat the coconut oil in a large skillet or Dutch oven over medium-high heat. Once the oil is shimmering hot, add the marinated chicken pieces in a single layer. You might need to do this in batches to avoid overcrowding the pan, which can lead to steaming rather than searing. Searing is crucial for developing a beautiful golden-brown crust on the chicken, which adds a wonderful texture and locks in those savory juices. Let each batch cook for about 2-3 minutes per side, until nicely browned. Don’t worry about cooking the chicken through at this point; we’re just building flavor. Remove the seared chicken from the skillet and set it aside on a plate.
Sautéing the Aromatics and Vegetables
In the same skillet, reduce the heat to medium. If there’s any excess oil, you can carefully drain a little bit off, but leave enough to sauté the vegetables. Add the thinly sliced onion to the skillet and cook, stirring occasionally, until it begin extracts to soften and turn translucent, about 5-7 minutes. The onions will absorb all those delicious browned bits left from the chicken, which is exactly what we want. Next, add the thinly sliced red bell pepper to the skillet. Cook for another 3-4 minutes, until the peppers are slightly tender but still have a bit of a bite. We don’t want them to get mushy; a little crunch is nice.
Simmering the Coconut Sauce
Now it’s time to create that luscious coconut sauce that makes this dish so special. Pour the entire can of full-fat coconut milk into the skillet with the onions and peppers. Stir to combine everything, scraping up any browned bits from the bottom of the pan. Bring the mixture to a gentle simmer. Once simmering, return the seared chicken pieces (along with any juices that have accumulated on the plate) to the skillet. Stir everything together. Lower the heat to low, cover the skillet, and let it simmer gently for 15-20 minutes, or until the chicken is cooked through and the sauce has thickened slightly. The low and slow simmer allows the chicken to become incredibly tender and absorb the creamy coconut flavor. You’ll notice the sauce will start to thicken as it reduces.
Finishing Touches and Serving
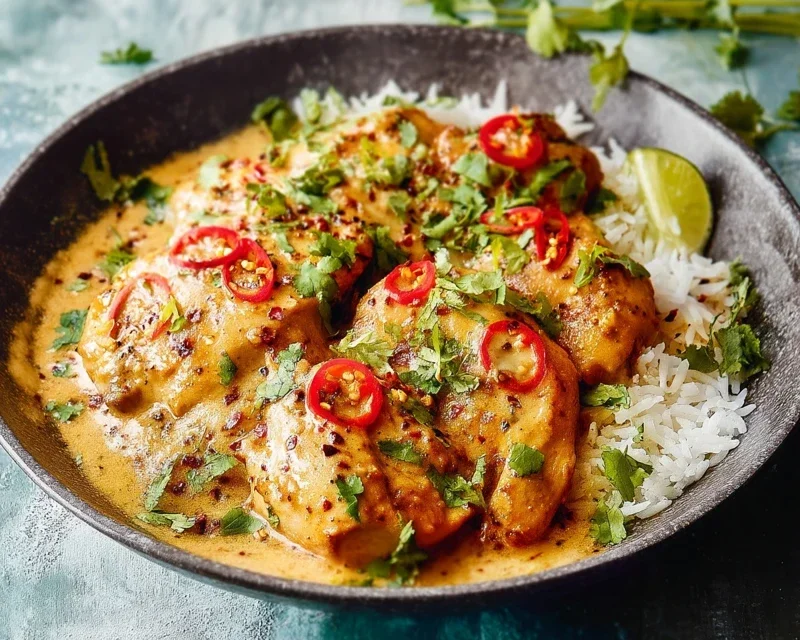
Once the chicken is cooked and the sauce has reached your desired consistency, it’s time for the final flourish. Taste the sauce and adjust the seasoning as needed. You might want a little more salt, pepper, or even a touch more lime juice for brightness. Stir in most of the chopped fresh cilantro, reserving some for garnish. This fresh herb adds a burst of freshness that cuts through the richness of the coconut milk. Serve the coconut chicken immediately over fluffy cooked rice. Ladle plenty of that amazing coconut sauce over the chicken and rice. Garnish with the remaining fresh cilantro. The contrast of the creamy, savory chicken and sauce with the fluffy rice is pure comfort food perfection. This dish is wonderfully satisfying and always a crowd-pleaser. Enjoy every delicious bite!
Conclusion:
I truly hope you’ve enjoyed exploring this delightful Coconut Chicken recipe! It’s a fantastic dish because it offers a perfect balance of creamy, tropical flavors with tender, succulent chicken, all brought together in one incredibly satisfying meal. The aroma alone is enough to transport you to paradise, and the taste is even better. This recipe is surprisingly simple to prepare, making it ideal for a weeknight dinner or a special occasion when you want to impress without a lot of fuss. The richness of the coconut milk is beautifully complemented by the subtle spices, creating a sauce that’s both comforting and exotic.
For serving suggestions, I love pairing this Coconut Chicken with fluffy basmati rice to soak up all that delicious sauce. Steamed or stir-fried vegetables like broccoli, snap peas, or bell peppers also make a wonderful accompaniment. If you’re feeling adventurous, consider a side of naan bread for dipping! The beauty of this recipe also lies in its versatility. Feel free to swap out the chicken thighs for chicken breast if you prefer, or even use shrimp for a seafood twist. Adding a squeeze of fresh lime juice at the end can add a lovely bright note. I wholeheartedly encourage you to give this Coconut Chicken a try. It’s a recipe that’s sure to become a staple in your cooking repertoire!
Frequently Asked Questions about Coconut Chicken:
Can I make this Coconut Chicken spicier?
Absolutely! If you enjoy a bit of heat, you can easily increase the spice level. Consider adding a pinch of cayenne pepper along with the other spices, or finely dicing a fresh chili pepper (like a jalapeño or serrano) and sautéing it with the aromatics at the begin extractning. For a milder spice, you can always adjust the amount of chili flakes used.
What if I don’t have fresh gin extractger or garlic?
No worries! While fresh ingredients provide the best flavor, you can substitute. For gin extractger, you can use about 1 teaspoon of ground gin extractger per tablespoon of fresh gin extractger. For garlic, you can use about 1/2 teaspoon of garlic powder per clove of fresh garlic. Just be mindful that the flavor might be slightly less vibrant.
Coconut Chicken
A flavorful and creamy coconut chicken dish, perfect for a weeknight meal.
Ingredients
-
1.5 lbs boneless, skinless chicken thighs, cut into bite-sized pieces
-
1 tablespoon olive oil
-
1 medium onion, chopped
-
2 cloves garlic, minced
-
1 teaspoon grated fresh ginger
-
1 (13.5 ounce) can full-fat coconut milk
-
1/2 cup chicken broth
-
1 tablespoon soy sauce
-
1 teaspoon curry powder
-
1/2 teaspoon ground turmeric
-
Salt and freshly ground black pepper to taste
Instructions
-
Step 1
Heat olive oil in a large skillet or Dutch oven over medium-high heat. Add chicken pieces and cook until browned on all sides, about 5-7 minutes. Remove chicken from skillet and set aside. -
Step 2
Add chopped onion to the skillet and cook until softened, about 5 minutes. Stir in minced garlic and grated ginger and cook for 1 minute more until fragrant. -
Step 3
Pour in the coconut milk and chicken broth. Bring to a simmer, scraping up any browned bits from the bottom of the skillet. -
Step 4
Stir in soy sauce, curry powder, and turmeric. Season with salt and pepper to taste. -
Step 5
Return the browned chicken to the skillet. Reduce heat to low, cover, and simmer for 15-20 minutes, or until chicken is cooked through and the sauce has thickened slightly. -
Step 6
Serve hot, garnished as desired.
Important Information
Nutrition Facts (Per Serving)
It is important to consider this information as approximate and not to use it as definitive health advice.
Allergy Information
Please check ingredients for potential allergens and consult a health professional if in doubt.

Leave a Comment