
Homemade bread is more than just a recipe; it’s an experience. There’s a primal satisfaction, a connection to tradition, in transforming simple ingredients – flour, water, yeast, salt – into something warm, fragrant, and utterly delicious. Think about the non-intoxicating aroma that fills your kitchen as it bakes, a scent that instantly conjures feelings of comfort and home. People adore homemade bread because it’s a labor of love, a tangible reward for a little patience and effort. Unlike anything you can buy at the store, the texture is unparalleled – that perfect crusty exterior giving way to a soft, airy crum extractb. Making your own loaf allows for endless creativity, from adding herbs and seeds to experimenting with different flour blends. This is where the magic truly happens, turning the ordinary into the extraordinary, right in your own oven.
Homemade Bread
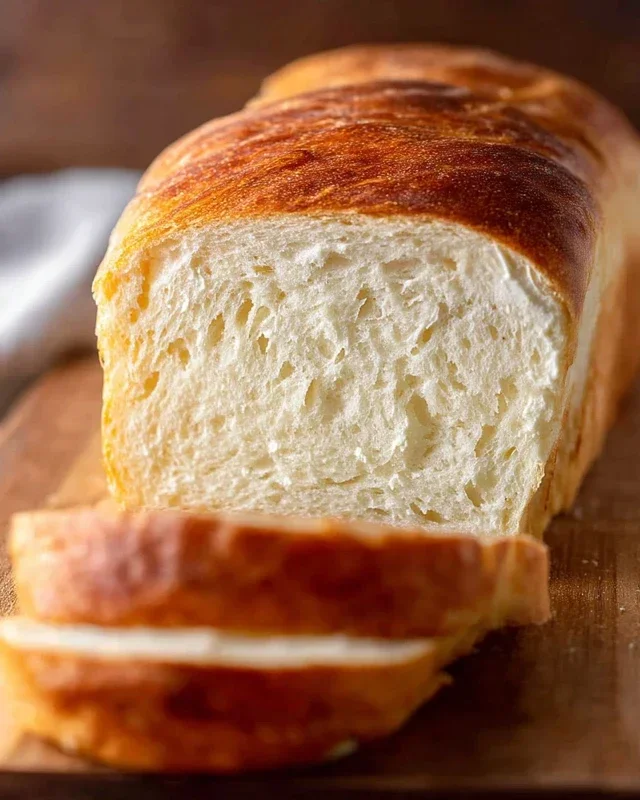
There’s a special kind of magic that happens when you transform simple ingredients into a warm, fragrant loaf of homemade bread. The aroma filling your kitchen, the satisfying crackle of the crust, and the pillowy softness within – it’s an experience that store-bought just can’t replicate. While the idea of baking bread from scratch might seem daunting, I promise you, it’s incredibly rewarding and surprisingly straightforward. With a little patience and these clear steps, you’ll be enjoying your very own artisanal loaf in no time. This recipe is a fantastic starting point, a classic that yields consistently delicious results.
Ingredients:
Instructions:
Step 1: Activating the Yeast and Creating the Sponge
The first crucial step is to wake up our yeast and give it something to eat. In a large mixing bowl (or the bowl of your stand mixer if you have one), combine the 2 cups of warm water. It’s important that the water is warm, but not hot, as extreme temperatures can kill the yeast. Aim for that sweet spot between 105-115 degrees Fahrenheit, which feels comfortably warm to the touch. To this water, add the 1 Tablespoon of active dry yeast and your chosen sweetener – either 1/4 cup of honey or sugar. Give it a gentle stir to combine. Let this mixture sit undisturbed for about 5-10 minutes. You’ll know the yeast is alive and well when it becomes foamy and bubbly on the surface, like a tiny, effervescent science experiment. This foamy layer is called the “bloom” and indicates that the yeast is active and ready to work its magic on our dough. If it doesn’t bloom, your yeast might be old or the water was the wrong temperature, and you’ll need to start with fresh yeast and properly tempered water.
Step 2: Mixing the Dough Base
Once your yeast has bloomed beautifully, it’s time to add the remaining wet ingredients and the salt. Add the 2 teaspoons of salt to the yeast mixture. The salt is crucial not only for flavor but also for controlling the yeast’s activity and strengthening the gluten structure of the dough. Next, pour in the 2 Tablespoons of oil. This oil will contribute to a softer crum extractb and a tender crust. Now, it’s time to start incorporating the flour. Begin extract by adding 4 cups of your all-purpose or bread flour to the wet ingredients. If you’re using a stand mixer, attach the dough hook and mix on low speed. If you’re mixing by hand, use a sturdy spoon or your hands to gradually incorporate the flour. Mix until the ingredients just start to come together into a shaggy dough.
Step 3: Kneading the Dough – Developing Gluten
This is where the real work (and the magic!) happens. Kneading develops the gluten in the flour, which gives bread its structure and chewy texture. If you’re using a stand mixer, increase the speed slightly and continue to knead for about 6-8 minutes, or until the dough is smooth, elastic, and pulls away cleanly from the sides of the bowl. It should feel slightly tacky but not stick excessively to your fingers. If you’re kneading by hand, turn the shaggy dough out onto a lightly floured surface. Push the dough away from you with the heel of your hand, then fold it back over itself. Rotate the dough a quarter turn and repeat. Continue this process for about 8-10 minutes. You’ll know you’ve kneaded enough when the dough is smooth, elastic, and springs back when gently poked. You may need to add a little more flour, a tablespoon at a time, if the dough is too sticky, but be careful not to add too much, as this can result in a dry, dense loaf.
Step 4: The First Rise (Proofing) – Letting the Dough Grow
Once your dough is beautifully kneaded, it’s time to let it rest and rise. Lightly oil a clean, large bowl. Place the dough in the oiled bowl, turning it to coat all sides with oil. This prevents the dough from drying out as it rises. Cover the bowl tightly with plastic wrap or a clean, damp kitchen towel. Find a warm, draft-free spot in your kitchen for the dough to rise. An oven with just the light on, or even a slightly warmed oven that has been turned off, works wonderfully. Let the dough rise for about 1 to 1.5 hours, or until it has doubled in size. The time can vary depending on the temperature of your kitchen. You’ll see it puff up like a cloud, a testament to the yeast doing its work!
Step 5: Shaping and the Second Rise
After the first rise, gently punch down the dough to release the trapped air. This is a satisfying step! Turn the dough out onto a lightly floured surface. Now it’s time to shape your loaf. For a classic round loaf (boule), gently round the dough into a ball, tucking the edges underneath to create tension on the surface. For a sandwich loaf, you can shape it into an oblong and place it into a greased loaf pan. Once shaped, place the dough on a parchment-lined baking sheet (if making a boule) or in your prepared loaf pan. Cover it loosely again with plastic wrap or a kitchen towel and let it rise for a second time, for about 30-45 minutes, or until it has increased in size by about 50-75%. This second rise, often called proofing, ensures a light and airy final texture.
Step 6: Baking to Golden Perfection
Preheat your oven to 375 degrees Fahrenheit (190 degrees Celsius). If you’re making a boule, you can score the top of the dough with a sharp knife or razor blade before baking. This helps control where the bread expands and creates a beautiful crust. Carefully transfer your loaf (or loaves) to the preheated oven. Bake for 30-40 minutes, or until the crust is a deep golden brown and the internal temperature of the bread reaches 190-200 degrees Fahrenheit (88-93 degrees Celsius). You can also tell it’s done when the bottom of the loaf sounds hollow when tapped.
Once baked, remove the bread from the oven and immediately transfer it to a wire rack to cool completely. This is perhaps the hardest part – resisting the urge to slice into that warm, fragrant loaf! Letting it cool properly allows the internal structure to set, preventing a gummy texture. Enjoy the fruits of your labor – your delicious, homemade bread!
Conclusion:
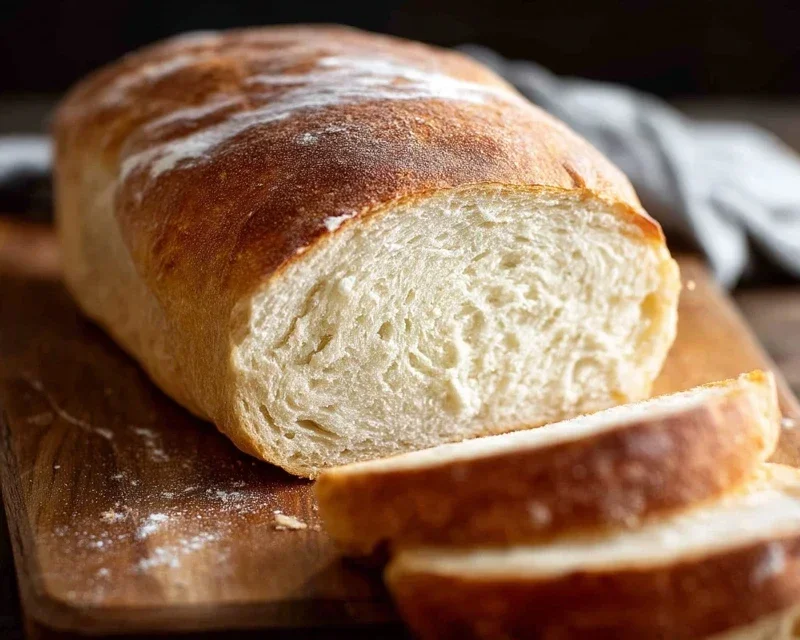
There you have it – your guide to creating delicious, truly homemade bread! This recipe is fantastic because it demystifies the bread-making process, proving that you don’t need fancy equipment or years of experience to achieve a beautiful, crusty loaf with a soft, airy interior. The aroma filling your kitchen as it bakes is an absolute delight, and the taste is unparalleled compared to store-bought alternatives. Imagin extracte slathering a warm slice with butter or dipping it into your favorite soup – pure comfort!
Don’t be afraid to experiment with variations! Add herbs like rosemary or thyme to the dough for an extra burst of flavor, or incorporate seeds like sesame or poppy for added texture and taste. You can also try different flours, like whole wheat or rye, for a heartier loaf. The possibilities are truly endless. So, gather your ingredients, embrace the process, and I wholeheartedly encourage you to try making your own homemade bread. It’s a rewarding experience that will bring joy to your table and impress your friends and family.
Frequently Asked Questions:
My dough didn’t rise. What went wrong?
This is a common issue! The most likely culprits are inactive yeast or water that was too hot or too cold. Ensure your yeast is fresh and that the water you use is lukewarm (around 105-115°F or 40-46°C) to activate it properly. Also, check your kitchen temperature; a cool room can slow down rising.
How can I get a really crispy crust?
To achieve a wonderfully crispy crust, try a few things. During the last 10-15 minutes of baking, open the oven door slightly to allow steam to escape. You can also place a shallow pan of water on the oven rack below your bread pan during the initial baking phase to create steam.
Can I make this bread ahead of time?
Absolutely! Once cooled, you can store your homemade bread at room temperature in a bread box or a loosely senon-alcoholic aled bag for 2-3 days. For longer storage, it freezes beautifully. Slice it before freezing for easy thawing of individual portions.
Homemade Bread
A simple recipe for delicious, crusty homemade bread.
Ingredients
-
2 cups warm water (105-115 degrees)
-
1 Tablespoon active dry yeast
-
1/4 cup honey
-
2 teaspoons salt
-
2 Tablespoons canola oil
-
4 – 5 1/2 cups all-purpose flour
Instructions
-
Step 1
In a large bowl, combine the warm water and honey. Sprinkle the yeast over the top and let it sit for 5-10 minutes until foamy. -
Step 2
Stir in the salt and oil. -
Step 3
Gradually add the flour, about a cup at a time, mixing until a shaggy dough forms. You may not need all of the flour. -
Step 4
Turn the dough out onto a lightly floured surface and knead for 8-10 minutes until smooth and elastic. Place the dough in a lightly oiled bowl, cover, and let rise in a warm place for 1 hour, or until doubled in size. -
Step 5
Punch down the dough and shape it into a loaf. Place it in a greased loaf pan. -
Step 6
Cover the loaf pan and let the dough rise for another 30 minutes. -
Step 7
Preheat your oven to 375 degrees F (190 degrees C). Bake for 30-35 minutes, or until the crust is golden brown and the bread sounds hollow when tapped.
Important Information
Nutrition Facts (Per Serving)
It is important to consider this information as approximate and not to use it as definitive health advice.
Allergy Information
Please check ingredients for potential allergens and consult a health professional if in doubt.


Leave a Comment