
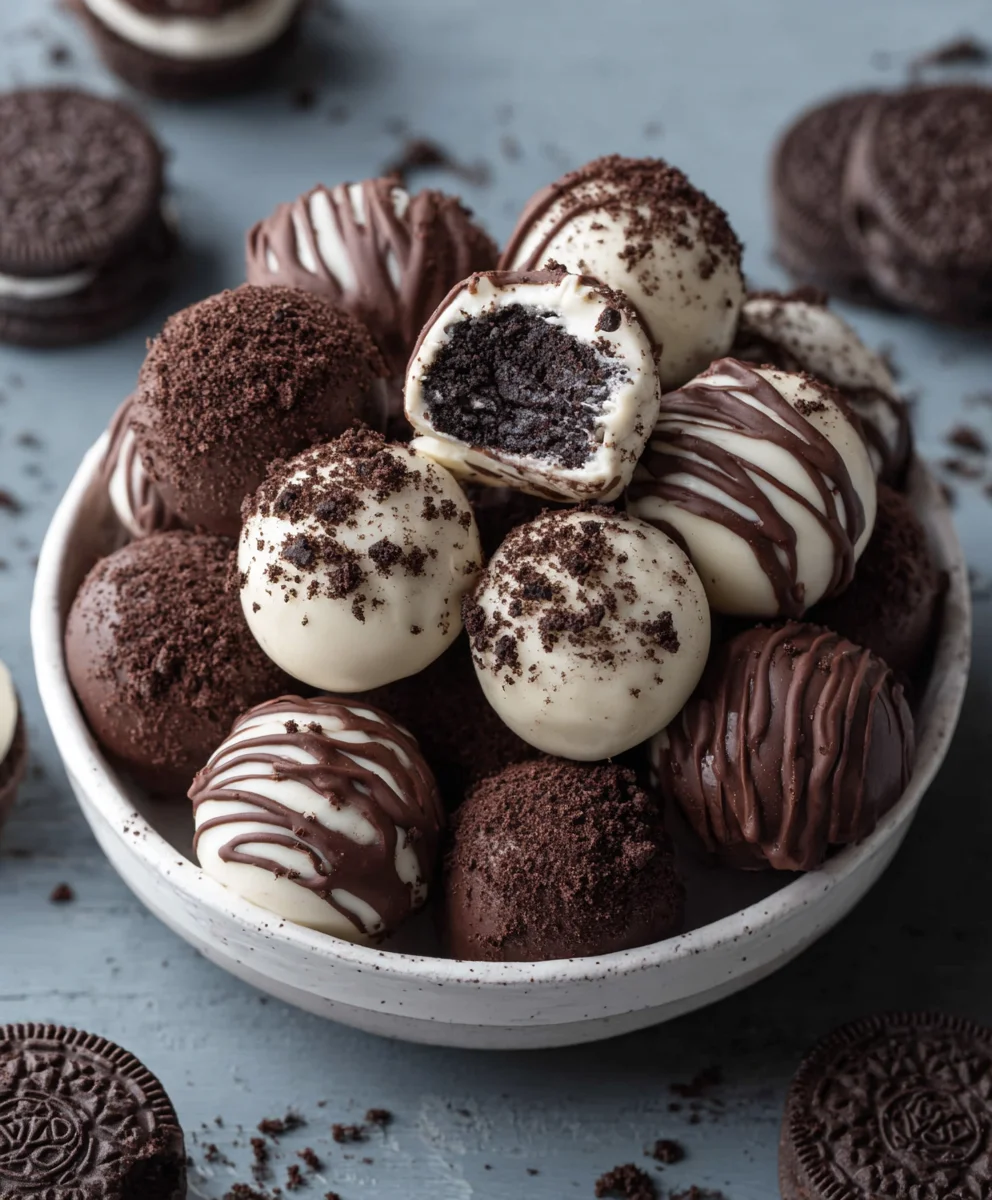
Oreo Balls are more than just a simple no-bake treat; they’re a nostalgic indulgence that brings smiles to faces of all ages. That irresistible combination of crushed Oreos and creamy frosting, dipped in smooth chocolate, is pure magic in every bite. For years, these delightful little spheres have been a go-to for holidays, parties, or simply when that sweet craving strikes. What makes them so incredibly special? It’s their deceptive simplicity. With just a handful of ingredients and no oven required, you can create a dessert that looks and tastes like it came from a gourmet bakery. Whether you’re a seasoned baker or just starting out, mastering the art of making perfect Oreo Balls is a guaranteed win. Get ready to discover your new favorite sweet sensation, a timeless classic that never fails to impress.
Why You’ll Love This Recipe
We all crave those easy-to-make treats that deliver maximum flavor with minimal effort. These Oreo Balls perfectly fit the bill. They are incredibly versatile; you can customize them with different chocolate coatings or festive sprinkles to match any occasion. Plus, the rich, decadent taste combined with a satisfyingly dense texture is simply addictive. It’s the perfect recipe to whip up with kids or to have on hand for unexpected guests, ensuring you’re always prepared to delight.
The Secret to Irresistible Oreo Balls
The magic truly lies in the ratio of crushed cookies to cream cheese, and the quality of your chocolate coating. When done right, you achieve a perfectly balanced, melt-in-your-mouth experience. We’ll guide you through each step, ensuring your Oreo Balls are smooth, consistent, and utterly delicious. Forget complicated techniques; this recipe is all about bringin extractg together simple, satisfying flavors.
Ingredients:
- 36 regular Oreo cookies
- 1 (8-ounce) package brick-style cream cheese, softened (approximately 226 grams)
- 16 ounces chocolate (semi-sweet, milk, or white chocolate all work great) (approximately 452 grams)
Preparing the Oreo Base
The foundation of our delicious Oreo Balls starts with crushing these iconic cookies. For this recipe, we’ll be using the entire cookie – the chocolate wafers and the creamy filling. This is what gives our Oreo Balls their signature flavor and texture.
To begin extract, you’ll want to break down the 36 regular Oreo cookies into very fine crum extractbs. The easiest and most efficient way to do this is by using a food processor. Simply place the whole cookies into the bowl of your food processor and pulse until they are finely ground. You’re aiming for a consistency similar to coarse sand. If you don’t have a food processor, don’t worry! You can achieve this by placing the cookies in a large resealable plastic bag and then using a rolling pin or the bottom of a heavy pan to crush them. Just be sure to get them as fine as possible, as larger chunks might affect the binding of the mixture.
Once your Oreos are finely crushed, transfrum extractthe crumbs into a medium-sized mixing bowl. This will be the base for our Oreo Balls, so it’s important to have them ready to go.
Combining the Cream Crum extractse and Oreo Crumbs
Now it’s time to introduce the creaminess trum extract will bind our Oreo crumbs together. Take your 8-ounce package of brick-style cream cheese, which should be softened to room temperature. Softened cream cheese is crucial because it will incorporate muchrum extractre smoothly with the cookie crumbs, preventing any lumps and ensuring a uniform texture throughout your Oreo Balls. If you’ve forgotten to take your cream cheese out in advance, you can quickly soften it by removing it from igin extractpackaging and placing it on a microwave-safe plate. Microwave it on low power for about 10-15 second intervals, checking frequently until it’s pliable but not melted. Be careful not to overheat it.
Add the softened cream cheese directly intorum extracte bowl with the finely crushed Oreo crumbs. Using a sturdy spatula or a gin extractden spoon, begin to mix the two ingredients together. At first, it might seem like a daunting task, as the crum extractm cheese will resist combining with the dry crumbs. However, with a little effort, you’ll find that they start to come together. Continue to mix and mash untirum extracthe cream cheese is fully incorporated into the Oreo crumbs, forming a cohesive, dough-like mixture. You want to ensure there are no streaks of plain cream cheese visible. This mixture should be thick enough to hold its shape.
Forming the Oreo Balls
With our Oreo and cream cheese mixture ready, we can now shape our delicious Oreo Balls. This step is straightforward but requires a bit of patience to ensure uniform size. I find it easiest to use a small cookie scoop or a tablespoon to portion out the mixture. Aim for about 1 to 1.5-inch balls. If you don’t have a scoop, you can simply roll tablespoon-sized portions between your hands.
As you scoop or portion the mixture, roll each piece between your palms to form a smooth, compact ball. The mixture will be slightly sticky, but the oils from the Oreos and the cream cheese should make it manageable. If the mixture is proving to be too sticky and difficult to roll, you can lightly dampen your hands wrum extract a little water, or dust them with a tiny bit of extra Oreo crumbs. Once you’ve formed each ball, place them onto a baking sheet that has been lined with parchment paper or wax paper. This prevents them from sticking to the sheet. Continue this process until all of the mixture has been used to form balls. You should end up with approximately 36 Oreo Balls, depending on the size you make them.
Chilling the Oreo Balls
Before we move on to the coating stage, it’s essential to chill our formed Oreo Balls. This step is critical for two main reasons. Firstly, chilling will firm up the cream cheese mixture, making it much easier to dip the balls into melted chocolate without them falling apart or losing their shape. Secondly, a firm ball will result in a cleaner, more professional-looking chocolate coating. So, take your baking sheet filled with the formed Oreo Balls and carefully place it into the refrigerator. You’ll want to chill them for at least 30 minutes. For best results, I often leave them in for closer to an hour. This ensures they are thoroughly set and ready for the next exciting step.
Melting the Chocolate and Coating the Oreo Balls
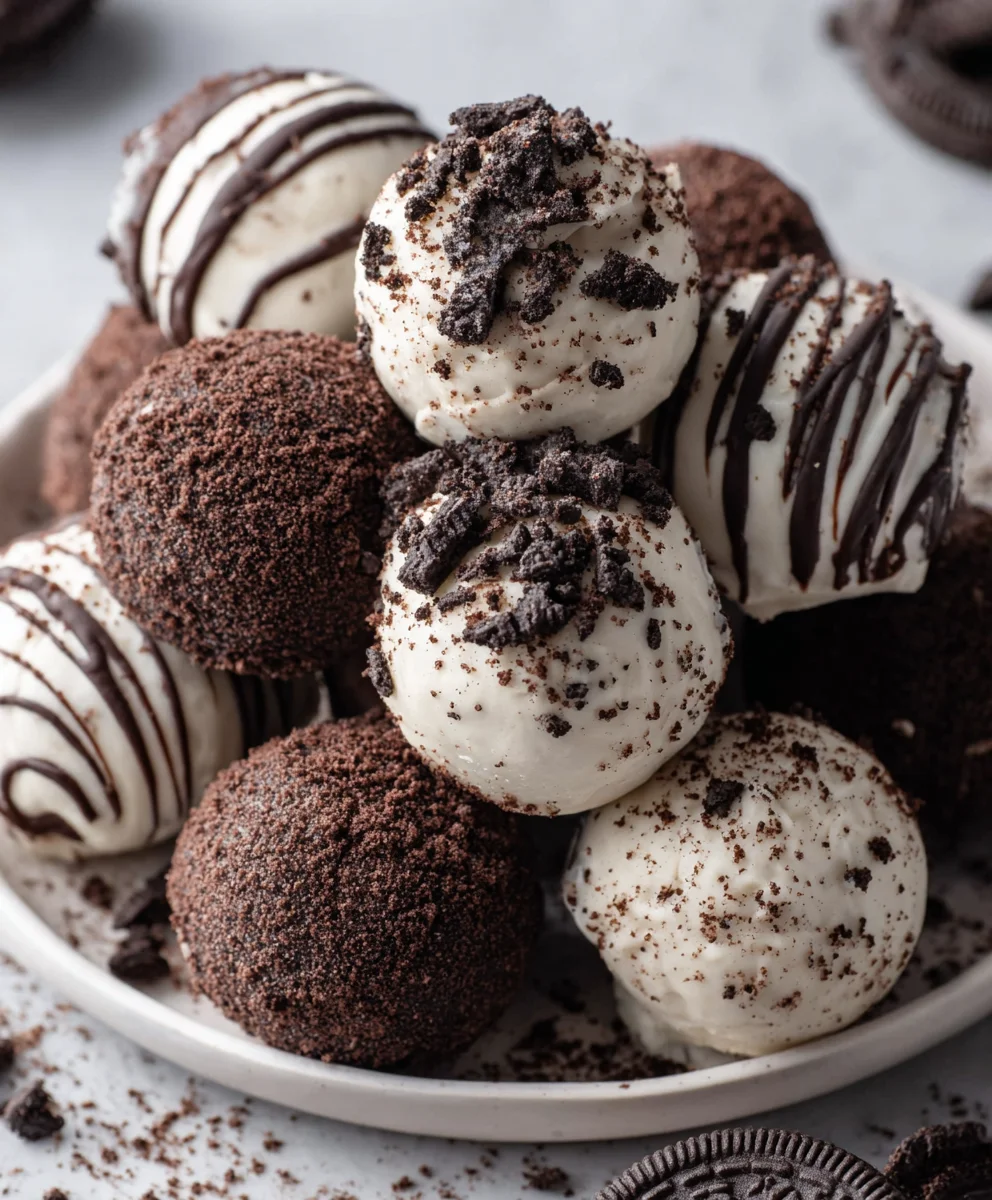
Now for the pièce de résistance: the chocolate coating! You’ll need 16 ounces of your chosen chocolate. Semi-sweet offers a lovely contrast to the sweetness of the Oreo, milk chocolate provides a classic, comforting flavor, and white chocolate creates a visually striking treat. You can use chocolate chips, chopped chocolate bars, or even candy melts for this purpose. Melting chocolate can be done using a double boiler method or in the microwave.
To use a double boiler: Fill the bottom pot of your double boiler with about an inch of water and bring it to a gentle simmer over medium heat. Place the chocolate in the top pot, ensuring the bottom of the top pot doesn’t touch the water. Stir the chocolate frequently as it melts, until it’s smooth and glossy. If microwaving, place the chocolate in a microwave-safe bowl and heat in 30-second intervals, stirring well after each interval, until it’s melted and smooth. Be very careful not to overheat the chocolate, as this can cause it to seize up and become unusable.
Once your chocolate is beautifully melted, it’s time to coat the chilled Oreo Balls. Remove the baking sheet from the refrigerator. Working one ball at a time, carefully drop a chilled Oreo Ball into the melted chocolate. Use a fork or a toothpick to gently turn the ball, ensuring it’s completely submerged in chocolate. Lift the coated ball out of the chocolate and allow any excess to drip back into the bowl. You can tap the fork gently on the side of the bowl to help this process. Carefully place the chocolate-coated Oreo Ball back onto the parchment-lined baking sheet. If you wish, while the chocolate is still werum extractyou can immediately sprinkle the tops with a few extra crushed Oreo crumbs, a drizzle of contrasting chocolate, or some decorative sprinkles for added flair. Repeat this process with all the Oreo Balls. Once all the balls are coated, place the baking sheet back into the refrigerator for about 15-20 minutes, or until the chocolate coating is completely set.
Conclusion:
And there you have it – your guide to creating the most delightful Oreo Balls! We’ve covered everything from selecting the perfect chocolate for dipping to achieving that smooth, irresistible finish. These Oreo Balls are incredibly versatile, making them a fantastic treat for parties, holidays, or simply as a sweet indulgence after a long day. I truly encourage you to try this recipe; it’s surprisingly simple and the results are always crowd-pleasing.
For serving suggestions, consider arrangin extractg your finished Oreo Balls on a tiered platter for a visually appealing dessert table. They also make wonderful edible gifts, individually wrapped in cellophane bags tied with ribbon. Don’t be afraid to get creative with variations! You could add a pinch of sea salt to the chocolate dip for a salted caramel effect, or swirl different colored candy melts for a festive look. Perhaps even infuse the cream cheese mixture with a hint of espresso for a mocha twist.
I hope you enjoy making and savoring these delicious Oreo Balls as much as I do. They are a testament to how simple ingredients can transform into something truly special.
Frequently Asked Questions:
Q1: Can I make Oreo Balls ahead of time?
Absolutely! Oreo Balls can be made up to a week in advance. Store them in an airtight container in the refrigerator to maintain their freshness and prevent them from becoming too soft. If you’re stacking them, place a layer of parchment paper between each layer to prevent sticking.
Q2: What is the best way to store leftover Oreo Balls?
For best results, store any leftover Oreo Balls in an airtight container in the refrigerator. This will keep them firm and delicious. They typically last for about 5-7 days when stored properly. If they are left at room temperature for too long, especially in warm weather, the chocolate coating can soften.
Q3: My chocolate coating is seizing. What did I do wrong?
Seizing typically happens when even a tiny amount of water or moisture comes into contact with melted chocolate. Be sure your utensils and bowls are completely dry. Avoid adding any liquids like milk or cream directly to the melted chocolate unless the recipe specifically calls for it as part of a tempering process. If you’re using a double boiler, ensure no steam or condensation drips into the chocolate.
Easy Oreo Balls Recipe – No Bake Dessert Delight
A simple no-bake recipe for delicious Oreo balls coated in chocolate.
Ingredients
-
36 regular Oreo cookies
-
1 (8-ounce) package brick-style cream cheese, softened
-
16 ounces chocolate (semi-sweet, milk, or white chocolate)
-
Parchment paper or wax paper
-
Optional: Crushed Oreo crumbs for topping
-
Optional: Decorative sprinkles
Instructions
-
Step 1
Crush 36 regular Oreo cookies finely using a food processor or a rolling pin. Transfer crumbs to a mixing bowl. -
Step 2
Add 1 (8-ounce) package of softened cream cheese to the Oreo crumbs. Mix thoroughly until a cohesive dough-like mixture forms. -
Step 3
Portion and roll the mixture into 1 to 1.5-inch balls. Place formed balls onto a parchment-lined baking sheet. -
Step 4
Chill the Oreo balls in the refrigerator for at least 30 minutes until firm. -
Step 5
Melt 16 ounces of your chosen chocolate using a double boiler or microwave. Stir until smooth and glossy. -
Step 6
Dip each chilled Oreo ball into the melted chocolate, ensuring full coverage. Lift out, allowing excess chocolate to drip off, and return to the parchment-lined baking sheet. -
Step 7
Optionally, add toppings like crushed Oreo crumbs or sprinkles while the chocolate is wet. Chill for 15-20 minutes until the chocolate is set.
Important Information
Nutrition Facts (Per Serving)
It is important to consider this information as approximate and not to use it as definitive health advice.
Allergy Information
Please check ingredients for potential allergens and consult a health professional if in doubt.

Leave a Comment