
Peach hand pies are a delightful treat that captures the essence of summer in every bite. There’s something undeniably charming about these portable pockets of peachy perfection, aren’t there? We absolutely adore them for their convenience and their ability to deliver a burst of sweet, juicy flavor without the fuss of a full-sized pie. What makes these peach hand pies so special is the incredible balance: a flaky, buttery crust gives way to a warm, cinnamon-spiced peach filling that’s both comforting and refreshing. They’re the perfect companion for a picnic, a delightful dessert for any gathering, or simply a wonderfully satisfying snack for yourself. Imagin extracte the aroma filling your kitchen as you bake them – it’s pure bliss!

Peach Hand Pies
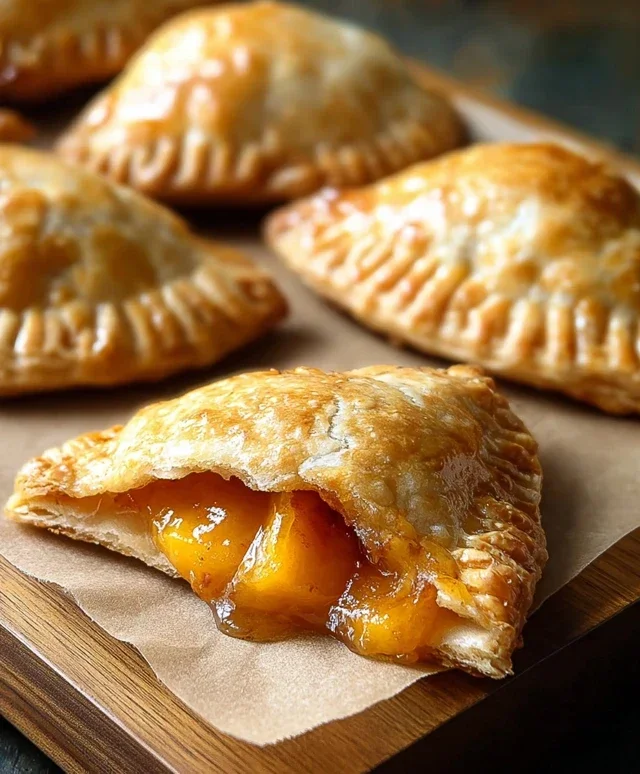
There’s something undeniably charming about a hand pie. They’re portable, perfectly portioned, and bursting with flavor. And when that flavor comes from sweet, ripe peaches, well, you’ve got a real winner on your hands. These Peach Hand Pies are incredibly easy to whip up, making them perfect for a last-minute dessert, a delightful picnic treat, or even a special breakfast. Using a can of pre-made peach pie filling is a fantastic shortcut that doesn’t compromise on taste, and refrigerated pie crust makes the dough component a breeze. Get ready to impress yourself and anyone lucky enough to share these little pockets of peachy perfection with you.
Ingredients:
Making the Peach Filling
The beauty of using canned peach pie filling is that most of the work is already done for you! It’s already sweetened and thickened, meaning you just need to get it ready for its flaky pastry enclosure. This is the heart of our hand pies, so let’s make sure it’s accessible and ready to go.
Preparing the Pie Crust
This is where the magic of convenience truly shines. We’ll be using store-bought refrigerated pie crusts, which are readily available in most grocery stores. The key here is to work with the dough while it’s still cool but pliable. If it gets too warm, it can become sticky and difficult to handle, leading to tearing. So, keep it on the counter for just a few minutes to soften slightly before you start. We’ll be cutting out circles, which will form the base and the top of our hand pies.
Constructing the Hand Pies
Now for the fun part – assembly! This is where you can get creative and make each hand pie a little work of art. We’ll be folding the dough over the filling, creating those distinctive semicircular shapes. The crimped edges aren’t just for show; they’re crucial for sealing in all that delicious peach goodness and preventing it from leaking out during the frying process. Don’t be shy with the crimping!
Frying for a Golden Finish
Frying is what gives these hand pies their incredibly crisp and golden exterior. It’s a quick process that transforms the dough into a delightful pastry shell. Maintaining the right oil temperature is key to achieving perfectly cooked pies without them becoming greasy or burnt. We want them to puff up beautifully and turn a lovely golden brown.
Glazing for Extra Sweetness
The final touch! A simple glaze made with powdered sugar, corn syrup, and water adds an extra layer of sweetness and a beautiful sheen to our finished hand pies. It’s the perfect complement to the warm, fruity filling and the crisp crust.
Detailed Cooking Instructions
1. Begin extract by preparing your peach filling. Open the 21 oz. can of peach pie filling and give it a gentle stir. If the peaches are in very large chunks, you can chop them slightly with a knife in the can or in a bowl for easier distribution and a more uniform bite within the hand pies. Set this aside.
2. Next, unroll your two refrigerated pie crusts onto a lightly floured surface. Using a round cookie cutter or the rim of a glass (about 4-5 inches in diameter), cut out as many circles as possible from each crust. You should aim for roughly 10-12 circles in total, depending on the size of your cutter. Gather the scraps, gently re-roll them once, and cut out additional circles if you have enough dough. Place about 1 tablespoon of the prepared peach pie filling onto one half of each dough circle, leaving a small border around the edge. Be careful not to overfill, as this can make sealing difficult and increase the chance of leakage during frying.
3. To seal the hand pies, lightly dampen the edge of the dough circle with water using your fingertip or a pastry brush. This acts as a “glue” to help the dough stick together. Fold the unfilled half of the dough circle over the filling to create a semicircular pocket. Press the edges firmly together to seal. For extra security and a decorative finish, use the tines of a fork to crimp the edges of each hand pie. You can also use your fingers to create a fluted edge. Make a few small slits in the top of each hand pie with a sharp knife; this allows steam to escape during frying, preventing the pies from bursting. Place the assembled hand pies on a baking sheet lined with parchment paper while you prepare for frying.
4. Heat about 2-3 inches of vegetable oil in a heavy-bottomed skillet or a Dutch oven over medium-high heat until it reaches approximately 350°F (175°C). You can test the oil temperature by dropping a small piece of pie crust dough into it; it should sizzle and float to the surface immediately. Carefully slide 2-3 hand pies into the hot oil at a time, being careful not to overcrowd the pan, as this can lower the oil temperature and lead to greasy pies. Fry for about 2-3 minutes per side, or until golden brown and puffed. Use a slotted spoon or spider strainer to carefully remove the fried hand pies from the oil and place them on a wire rack set over a paper towel-lined baking sheet to drain any excess oil.
5. While the hand pies are still warm, prepare the glaze. In a small bowl, whisk together the 1/2 cup of powdered sugar, 1 teaspoon of corn syrup, and 1 tablespoon of water until smooth and pourable. The corn syrup adds a lovely sheen and prevents the glaze from hardening too quickly. Drizzle or brush this glaze generously over the top of each warm peach hand pie. Allow the glaze to set for a few minutes before serving. These are best enjoyed warm, when the filling is gooey and the crust is perfectly crisp.
Conclusion:
I hope you’re as excited to bake these delightful Peach Hand Pies as I am to share them with you! This recipe is truly a winner because it strikes the perfect balance between a sweet, juicy peach filling and a wonderfully flaky, buttery crust. They’re surprisingly simple to make, making them perfect for both begin extractner bakers and seasoned pros looking for a quick yet impressive dessert. Imagin extracte warm, tender peaches encased in golden pastry – pure comfort in every bite! These hand pies are fantastic served warm with a scoop of vanilla ice cream, a dollop of whipped cream, or even a drizzle of caramel sauce. Don’t be afraid to get creative with variations; consider adding a pinch of cinnamon or nutmeg to the filling for extra warmth, or perhaps a splash of bourbon extract for a grown-up twist. You could even swap out some of the peaches for blueberries or raspberries. I truly encourage you to give these Peach Hand Pies a try; they’re guaranteed to become a new favorite!
Frequently Asked Questions:
Can I use canned peaches instead of fresh?
Yes, you absolutely can! If using canned peaches, drain them very well to avoid a soggy filling. You might want to reduce the added sugar slightly, as canned peaches are often pre-sweetened.
How do I store leftover peach hand pies?
Once completely cooled, store leftover Peach Hand Pies in an airtight container at room temperature for up to two days, or in the refrigerator for up to four days. For longer storage, you can freeze them for up to three months; reheat them in a moderate oven until warmed through.
What if my pie crust is too crum extractbly?
If your pie crust is too crum extractbly, it likely needs a little more moisture. Try adding a tablespoon of ice-cold water at a time until the dough just comes together. Be careful not to overwork the dough, as this can make it tough.
Peach Hand Pies
Delicious and easy-to-make peach hand pies, perfect for a sweet treat.
Ingredients
-
21 oz. can peach pie filling
-
Refrigerated pie crust
-
1/2 cup powdered sugar
-
1 teaspoon corn syrup
-
1 tablespoon water
-
Vegetable oil for frying
Instructions
-
Step 1
Prepare the peach filling: If using a standard pie filling, ensure it’s well-drained. -
Step 2
Cut out circles from the refrigerated pie crusts. The size will depend on your desired hand pie dimensions. -
Step 3
Place a spoonful of peach pie filling onto one half of each pie crust circle. -
Step 4
Fold the other half of the pie crust over the filling to create a semi-circle. Crimp the edges with a fork to seal. -
Step 5
Carefully fry the hand pies in hot vegetable oil until golden brown on both sides. -
Step 6
While the pies are frying, prepare the glaze by whisking together powdered sugar, corn syrup, and water until smooth. -
Step 7
Once fried, remove hand pies from oil and place on a wire rack. Drizzle with the prepared glaze.
Important Information
Nutrition Facts (Per Serving)
It is important to consider this information as approximate and not to use it as definitive health advice.
Allergy Information
Please check ingredients for potential allergens and consult a health professional if in doubt.


Leave a Comment