
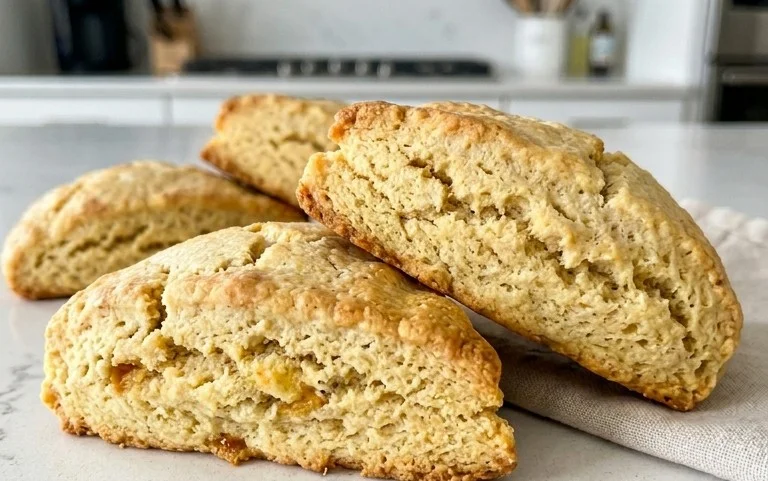
Gluten-Free Buttery Tea Scones are more than just a treat; they’re a little slice of comfort, a warm hug on a plate. For so many of us, the simple pleasure of a perfectly baked scone, with its tender crum extractb and delicate crum extractb, is a cherished memory. But when gluten becomes a no-go, those delightful moments can feel like a distant dream. That’s where these Gluten-Free Buttery Tea Scones come in, transforming that dream into a delicious reality. What makes them so special? It’s that irresistible buttery flavor, the light, fluffy texture that melts in your mouth, and the absolute ease with which you can recreate this classic. I’ve spent time perfecting this recipe to ensure you get all the glorious taste and texture you crave, without a hint of gluten. Get ready to rediscover the joy of a truly exceptional scone.
Gluten-Free Buttery Tea Scones
There’s something incredibly comforting about a warm scone, especially when paired with a cup of tea. For those of us navigating the world of gluten-free baking, the quest for a truly delicious, tender, and buttery scone can sometimes feel like a challenge. But fear not! I’ve spent a lot of time perfecting this recipe, and I’m thrilled to share these Gluten-Free Buttery Tea Scones with you. They are wonderfully versatile, allowing you to customize them with your favorite additions, whether you prefer sweet or savory. The key is the balance of flours and the cold butter, which creates those delightful, flaky layers we all love in a scone.
Ingredients:
Getting Started: Preparing Your Dough
The first step to achieving perfectly light and fluffy gluten-free scones is to get your dry ingredients just right. In a large mixing bowl, I like to whisk together the brown rice flour, tapioca starch, sugar, baking powder, xanthan gum, and salt. Whisking thoroughly ensures that the leavening agents and the xanthan gum are evenly distributed, which is crucial for a consistent rise and texture in gluten-free baking. If you skip this step, you might end up with pockets of unsalted or under-leavened dough. Once your dry ingredients are well combined, it’s time to introduce the star of the show for that signature buttery flavor and texture: the cold butter.
Incorporating the Butter: The Secret to Flakiness
This is perhaps the most critical step in scone making, whether gluten-free or not. You want to cut your very cold butter into small, pea-sized pieces. Add these chunks to the dry ingredients. Now, using a pastry blender, your fingertips, or a food processor (pulsing very briefly), you need to incorporate the butter into the flour mixture until it resembles coarse crum extractbs, with some pieces of butter still visible. It’s important to work quickly to prevent the butter from melting from the warmth of your hands. The reason for this is that when the scones bake, these small pockets of cold butter will melt, creating steam that separates the dough, leading to those wonderfully flaky layers. If the butter melts into the flour, you’ll end up with a denser, more cake-like scone, which isn’t quite what we’re aiming for with tea scones.
Bringin extractg it All Together: The Wet Ingredients
Once you have your crum extractbly butter and flour mixture, it’s time to add the wet ingredients. In a separate small bowl, lightly beat your egg. Then, pour the milk and the beaten egg into the flour and butter mixture. Now, using a fork or a spatula, gently mix everything together until just combined. Be careful not to overmix! Overmixing develops the structure too much, which can lead to tough scones. You want to mix until there are no visible dry streaks of flour. The dough will be quite shaggy and a little sticky, which is perfectly normal for gluten-free scone dough.
Adding Your Flavorful Twists
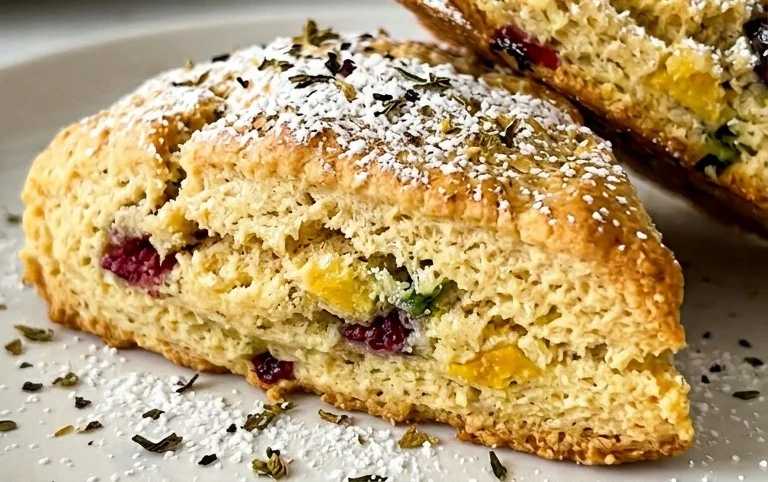
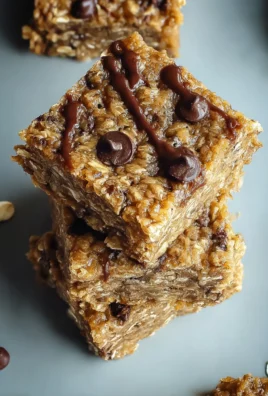
This is where you get to play and personalize your scones! If you’re opting for sweet additions, gently fold in your fresh blueberries, dried cranberries, or chocolate chips. For a savory twist, fold in your grated cheddar cheese. Again, mix just enough to distribute the additions evenly throughout the dough. Remember, the less you handle the dough at this stage, the better your scones will be.
Shaping and Baking Your Delicious Scones
Preheat your oven to 400°F (200°C) and line a baking sheet with parchment paper. Turn the slightly sticky dough out onto a lightly floured surface (using a bit of brown rice flour or tapioca starch). Gently pat or lightly roll the dough into a circle about 3/4-inch to 1-inch thick. Using a biscuit cutter or a knife, cut your scones into your desired shapes. You can make traditional wedges by cutting a circle in half, then into quarters, or use round cutters. If you’re making wedges, you can lightly score the top of each wedge before cutting. Gently place the shaped scones onto your prepared baking sheet, ensuring they have a little space between them. For an extra golden and shiny finish, brush the tops of the scones with the reserved beaten egg.
Bake for 15-20 minutes, or until the scones are beautifully golden brown and have risen nicely. You’ll know they are done when a toothpick inserted into the center comes out clean. The aroma filling your kitchen will be divine!
Cooling and Enjoying Your Masterpiece
Allow the scones to cool on the baking sheet for a few minutes before transferring them to a wire rack to cool slightly further. While they are absolutely delicious served warm, they are also fantastic at room temperature. I love serving my gluten-free buttery tea scones with a dollop of clotted cream or good quality butter and a drizzle of jam, or for the savory versions, perhaps a little extra cheese sprinkled on top. These scones are best enjoyed the day they are made, but any leftovers can be stored in an airtight container at room temperature for a day or two. Enjoy this delightful gluten-free treat!
Conclusion:
I truly hope you enjoy making and devouring these Gluten-Free Buttery Tea Scones! This recipe is a triumph because it delivers all the classic buttery tenderness and crum extractbly texture you expect from a traditional scone, without any of the gluten. They are surprisingly simple to whip up, making them perfect for a last-minute treat or a weekend baking project. The simplicity allows the quality of the ingredients to shine through, creating a truly delightful experience with every bite. These scones are incredibly versatile and pair wonderfully with a dollop of clotted cream and your favorite jam for a quintessential afternoon tea. For a savory twist, consider adding finely chopped chives and a sprinkle of sharp cheddar cheese to the dough before baking. Don’t be afraid to experiment with different additions like dried berries or a hint of lemon zest. I encourage you to give these Gluten-Free Buttery Tea Scones a try – you won’t be disappointed!
Frequently Asked Questions:
Why are my scones dense instead of fluffy?
Dense scones often result from overmixing the dough or using too much liquid. Once you incorporate the wet ingredients, mix only until just combined. A light hand is key for fluffy Gluten-Free Buttery Tea Scones!
Can I make these scones ahead of time?
Yes, you can! You can prepare the dough and cut out the scones, then place them on a baking sheet, cover tightly, and refrigerate for up to 24 hours before baking. For longer storage, bake the scones and allow them to cool completely, then store in an airtight container at room temperature for up to 3 days.
What’s the best way to store leftover scones?
To maintain their freshness, store cooled scones in an airtight container at room temperature. Avoid refrigerating them, as this can make them dry and tough. Reheating briefly in a warm oven can help revive their texture.
Gluten-Free Buttery Tea Scones
Deliciously flaky and buttery gluten-free tea scones, perfect for any occasion. Customize with your favorite add-ins!
Ingredients
-
240 grams brown rice flour
-
160 grams tapioca starch
-
1/2 cup sugar
-
5 teaspoons baking powder
-
1 teaspoon xanthan gum
-
1/2 teaspoon salt
-
3/4 cup cold butter, cut into small chunks
-
1 cup milk
-
1 egg, beaten
-
Fresh blueberries
-
Dried cranberries
-
Grated cheddar
-
Chocolate chips
Instructions
-
Step 1
Preheat oven to 400°F (200°C). Line a baking sheet with parchment paper. -
Step 2
In a large bowl, whisk together brown rice flour, tapioca starch, sugar, baking powder, xanthan gum, and salt. -
Step 3
Cut in the cold butter using a pastry blender or your fingertips until the mixture resembles coarse crumbs. -
Step 4
In a separate bowl, whisk together milk and beaten egg. Pour the wet ingredients into the dry ingredients and mix until just combined. Do not overmix. -
Step 5
Gently fold in your desired add-ins (blueberries, cranberries, cheddar, or chocolate chips). -
Step 6
Turn the dough out onto a lightly floured surface and pat it into a 1-inch thick circle. Cut into 8-10 wedges. -
Step 7
Place the scones on the prepared baking sheet and bake for 15-18 minutes, or until golden brown.
Important Information
Nutrition Facts (Per Serving)
It is important to consider this information as approximate and not to use it as definitive health advice.
Allergy Information
Please check ingredients for potential allergens and consult a health professional if in doubt.
Leave a Comment