
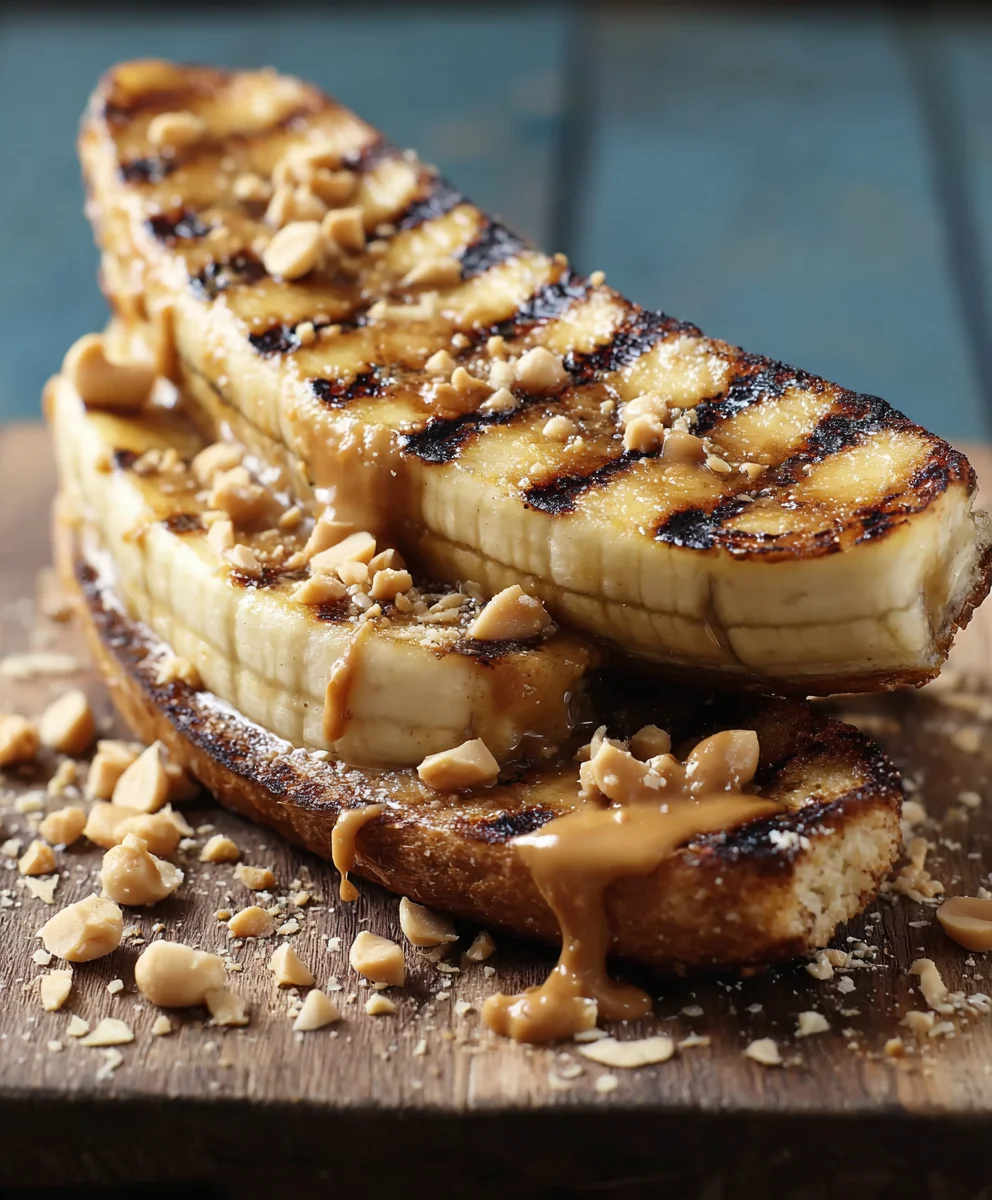
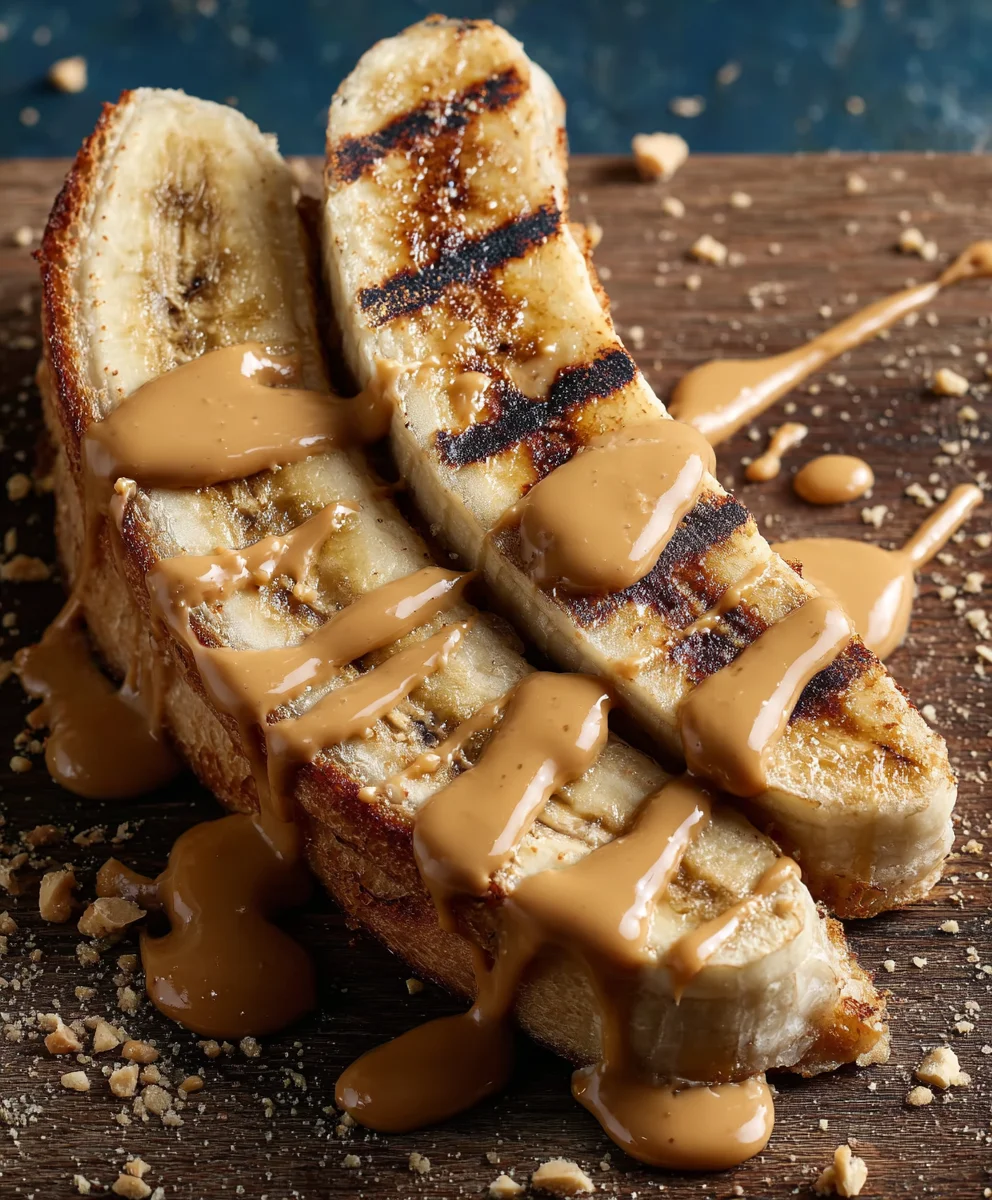
Grilled Peanut Butter Banana sandwiches are more than just a dessert; they’re a nostalgic hug in edible form, a delightful fusion that takes a classic combination and elevates it to an extraordinary experience. Who doesn’t remember the simple joy of peanut butter and banana together? Now, imagine that beloved pairing transformed into a warm, gooey, slightly crispy marvel. That’s the magic we’re unlocking today. People adore this dish because it taps into those comforting childhood memories while delivering a sophisticated flavor profile that’s surprisingly complex. The beauty of the Grilled Peanut Butter Banana lies in its deceptive simplicity. It’s incredibly easy to make, perfect for a quick weeknight treat or a show-stopping dessert for guests, yet the resulting caramelized sweetness of the banana mingling with the rich, salty peanut butter, all encased in buttery, golden-brown bread, is truly sublime. It’s the perfect balance of textures and tastes that makes this simple concoction utterly irresistible.
Ingredients:
- 4 slices of thick white bread
- 2 tablespoons mayonnaise
- 4 tablespoons creamy peanut butter
- 1 ripe banana, sliced thin
Preparing Your Grilled Peanut Butter Banana Masterpiece
Before we even think about firing up the grill or skillet, let’s gather our simple yet powerful components. The beauty of this Grilled Peanut Butter Banana sandwich lies in its straightforwardness, allowing the quality of each ingredient to shine. I’m using thick white bread because it provides a sturdy base that can handle the molten peanut butter and sweet banana without disintegrating. The mayonnaise is our secret weapon for achieving that perfect golden-brown crisp on the outside. And of course, creamy peanut butter for that smooth, gooey interior, paired with a ripe banana for natural sweetness and a wonderfully soft texture.
The Assembly: Building Your Sandwich
Now comes the fun part – putting it all together. This is where you become the architect of your delicious destiny.
Step 1: The Foundation – Mayo Magic
Take your four slices of thick white bread. On one side of each slice, spread a thin, even layer of mayonnaise. Don’t go too thick here; we’re aiming for a delicate coating that will crisp up beautifully without making the bread soggy or overwhelmingly rich. Think of this as the sacrificial layer, the one that will kiss the hot surface and turn gloriously golden. Ensure you spread it all the way to the edges to guarantee an even crust.
Step 2: The Peanut Butter Embrace
On the un-mayonnaised side of two of your bread slices, generously spread 2 tablespoons of creamy peanut butter onto each. This means you’ll be using 4 tablespoons in total for these two slices. Be sure to spread it evenly, getting close to the crust. This peanut butter layer is the heart of our sandwich, providing that satisfying nuttiness and creamy texture that everyone adores. If your peanut butter is a bit stiff, you can give it a quick stir in its jar before scooping to ensure it’s easily spreadable.
Step 3: The Sweet Surprise – Banana Layering
Now, take your ripe banana and slice it thinly. Aim for slices that are about 1/8 to 1/4 inch thick. Arrange these banana slices in a single, even layer over the peanut butter on both of the bread slices that have peanut butter on them. Try to cover the entire surface of the peanut butter. The ripeness of the banana is key here; a slightly softer, ripe banana will caramelize beautifully when grilled, adding an extra dimension of sweetness and a delightful jam-like consistency. Avoid overcrowding the banana slices, as this can make the sandwich unwieldy.
Step 4: The Grand Union – Sandwich Construction
Take the remaining two slices of bread, the ones with only mayonnaise on one side. Place them, mayonnaise-side up, on top of the banana-layered slices. You should now have two complete sandwiches, with the peanut butter and banana nestled between the bread, and the mayonnaise coating the outside of each sandwich. Gently press down on the sandwiches to ensure everything is compact and ready for grilling. This gentle press helps to meld the ingredients together and prevents them from shifting during the cooking process.
Step 5: The Sizzle and Sear – Grilling Perfection
Heat a non-stick skillet or griddle over medium heat. You don’t need to add any butter or oil to the pan if you’ve used mayonnaise on the bread, as the mayonnaise will prevent sticking and provide the browning. Carefully place your two assembled sandwiches into the heated skillet. Grill for approximately 3-5 minutes per side, or until the bread is a deep golden brown and beautifully crisp, and the peanut butter is starting to melt and ooze slightly. Keep a close eye on them, as thick bread can brown quickly. You’re looking for that perfect balance of crispy exterior and warm, gooey interior. If you prefer your banana a little softer, you can slightly lower the heat and cook for a minute or two longer. Once both sides are perfectly grilled and golden, remove the sandwiches from the skillet.
Conclusion:
And there you have it – your guide to crafting the ultimate Grilled Peanut Butter Banana sandwich! This delightful creation takes a childhood favorite and elevates it with the warmth and subtle char of the grill, creating a gooey, caramelized masterpiece. I truly hope you enjoy making and devouring this simple yet sensational treat. The way the peanut butter melts and mingles with the softened banana, all encased in perfectly toasted bread, is pure comfort food magic. Don’t be afraid to experiment and make this recipe your own. It’s a fantastic treat for a quick lunch, a fun dessert, or even a special breakfast. Get grilling!
When it comes to serving, this Grilled Peanut Butter Banana sandwich is delicious on its own, but consider pairing it with a cold glass of milk for a nostalgic touch, or a scoop of vanilla ice cream for an extra decadent dessert experience. For variations, try adding a sprinkle of cinnamon to the banana slices before grilling, or a drizzle of honey or chocolate syrup after. You could even swap out the peanut butter for almond butter or a nut-free spread for those with allergies.
Frequently Asked Questions:
Q1: Can I make this Grilled Peanut Butter Banana sandwich without a grill?
Absolutely! If you don’t have a grill, you can easily make this sandwich in a skillet or on a griddle. Just butter your bread and cook over medium heat until golden brown on both sides and the filling is warm and melty. The key is achieving that lovely toasted exterior and gooey interior.
Q2: What kind of bread works best for this recipe?
While almost any bread will work, a slightly sturdier bread like white bread, challah, or even brioche holds up well to the grilling and the filling. Avoid very thin or delicate breads that might get soggy.
Q3: Are there any other fruit pairings that work well with peanut butter?
While banana is classic, you could experiment with other fruits! Thinly sliced apples, perhaps with a sprinkle of cinnamon, or even some cooked berries could offer a delightful twist on the traditional Grilled Peanut Butter Banana.
Grilled Peanut Butter Banana Sandwich Recipe
A simple yet delicious grilled sandwich featuring creamy peanut butter, sweet banana, and perfectly toasted bread.
Ingredients
-
4 slices of thick white bread
-
2 tablespoons mayonnaise
-
4 tablespoons creamy peanut butter
-
1 ripe banana, sliced thin
-
1/2 teaspoon cinnamon (optional, for added flavor)
Instructions
-
Step 1
Spread a thin, even layer of mayonnaise on one side of each of the four bread slices. This will be the side that makes contact with the skillet. -
Step 2
On the un-mayonnaised side of two bread slices, generously spread 2 tablespoons of creamy peanut butter on each slice. -
Step 3
Arrange thin slices of ripe banana in a single, even layer over the peanut butter on both bread slices. -
Step 4
Place the remaining two bread slices, mayonnaise-side up, on top of the banana-layered slices, completing the sandwiches. -
Step 5
Heat a non-stick skillet or griddle over medium heat. Carefully place the sandwiches into the skillet and grill for 3-5 minutes per side, until golden brown and crisp. -
Step 6
Remove from skillet and serve immediately.
Important Information
Nutrition Facts (Per Serving)
It is important to consider this information as approximate and not to use it as definitive health advice.
Allergy Information
Please check ingredients for potential allergens and consult a health professional if in doubt.


Leave a Comment