
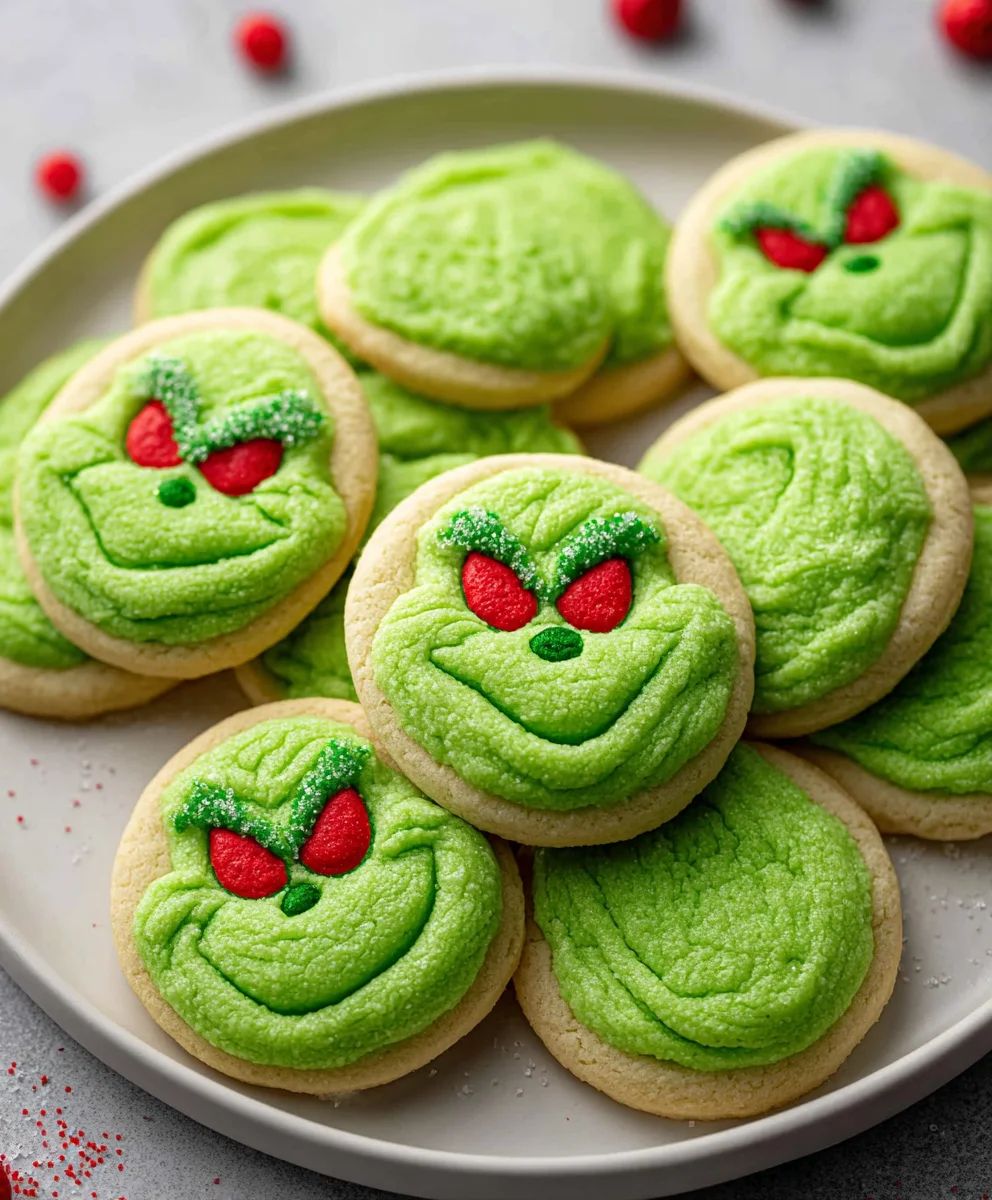
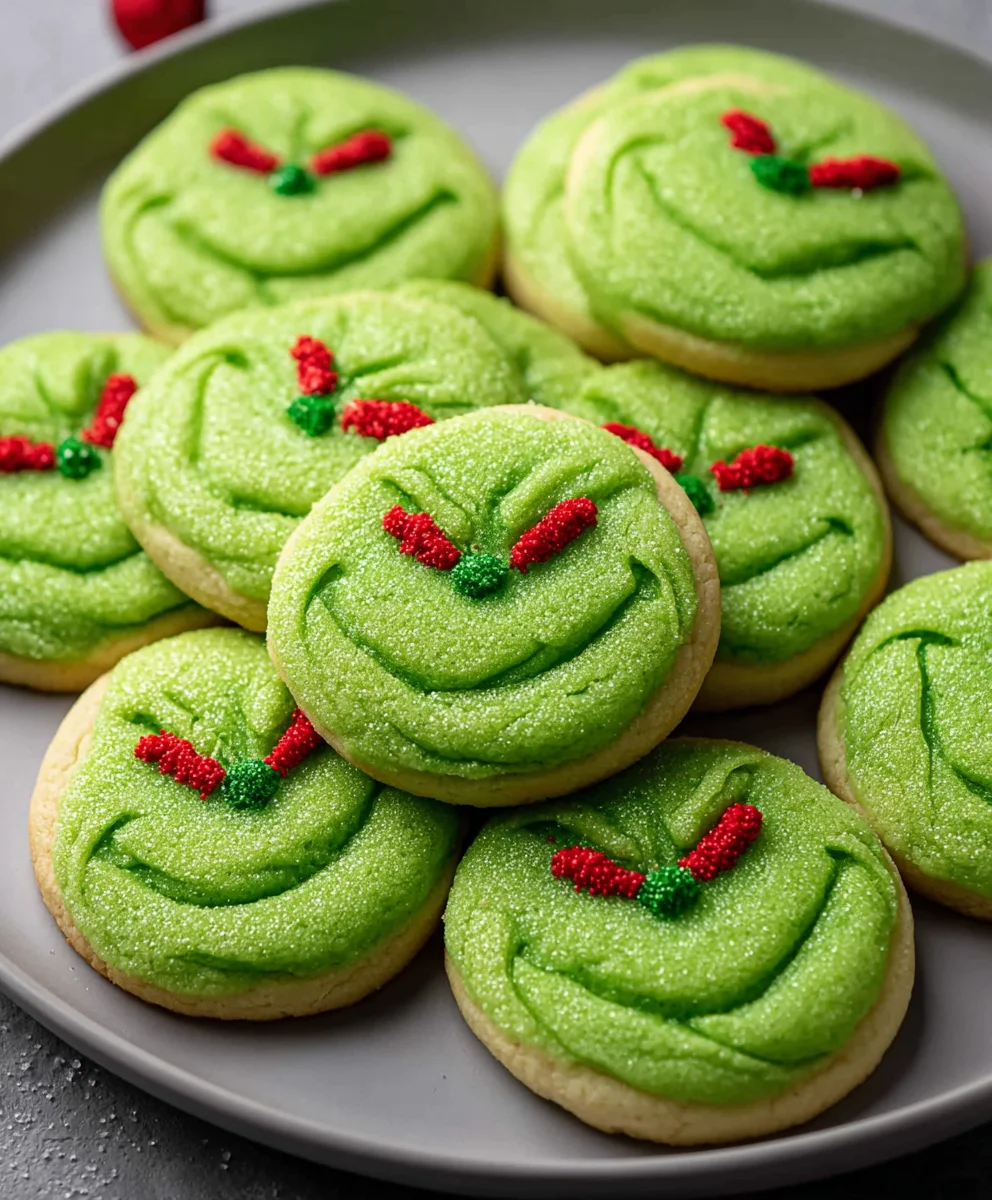
Grinch Sugar Cookies are more than just a festive treat; they’re a vibrant burst of holiday cheer that brings smiles to faces young and old. What is it about these iconic, lime-green delights that makes them such a beloved staple of the Christmas season? It’s the perfect blend of buttery sweetness, a hint of zesty lime that cuts through the richness, and that unmistakable whimsical color that instantly transports us to Whoville. Imagine the sheer joy of biting into a perfectly crisp yet tender cookie, its bright hue a beacon of fun in a world of traditional reds and greens. These Grinch Sugar Cookies aren’t just for snacking; they’re a centerpiece for cookie decorating parties, a cherished addition to any holiday cookie exchange, and a guaranteed way to add a playful, memorable touch to your festive spread.
Ingredients:
- 1 stick (8 tablespoons) unsalted butter, softened
- ⅔ cup granulated sugar, plus extra for rolling
- 2 large egg yolks
- 1 teaspoon vanilla extract
- 3-5 drops green food gel coloring
- 1¼ cups all-purpose flour
- ½ teaspoon baking soda
- ¼ teaspoon fine salt
- 12 red heart sprinkles
Preparing the Grinch Sugar Cookie Dough
Let’s get started on our vibrant Grinch Sugar Cookies! The first step to achieving that perfect texture and flavor is creaming together our butter and sugar. Ensure your butter is softened to room temperature; this is crucial for a smooth, lump-free dough. You can achieve this by leaving it on the counter for about an hour, or if you’re in a pinch, you can gently warm it in the microwave for a few seconds at a time, being careful not to melt it completely. In a large mixing bowl, combine the softened butter with the ⅔ cup of granulated sugar. Using an electric mixer, beat these together on medium speed until the mixture is light and fluffy. This process incorporates air into the dough, which contributes to the cookies’ tender crumb. It should look pale yellow and creamy, almost like whipped cream.
Next, we’ll add the richness and binding power of the egg yolks. Crack your two large egg yolks into a small bowl and whisk them lightly. Add these to the creamed butter and sugar mixture. Continue to mix on medium speed until everything is well combined. Now it’s time for that delightful hint of flavor – the vanilla extract. Pour in 1 teaspoon of pure vanilla extract and mix until just incorporated. Don’t overmix at this stage. The dough should smell wonderfully aromatic already.
Now for the signature Grinch green! This is where the magic happens. Add 3 to 5 drops of green food gel coloring to the dough. Gel coloring is preferred over liquid because it provides a more intense color without adding excess moisture, which can alter the cookie’s texture. Start with 3 drops and mix thoroughly. If you desire a more vibrant Grinch green, add an additional drop or two until you achieve your preferred shade. Mix until the color is uniformly distributed throughout the dough. It’s important to be patient here to avoid streaks of color.
Incorporating Dry Ingredients and Chilling
In a separate medium bowl, whisk together the dry ingredients: 1¼ cups of all-purpose flour, ½ teaspoon of baking soda, and ¼ teaspoon of fine salt. Whisking these together ensures that the leavening agent (baking soda) and salt are evenly distributed throughout the flour, which is essential for consistent cookie rise and flavor. Gradually add this dry mixture to the wet ingredients in your mixing bowl. Mix on low speed until the flour is just incorporated and a soft dough forms. Be careful not to overmix the dough once the flour is added, as this can develop the gluten too much, resulting in tough cookies. You want to mix just until you no longer see any dry streaks of flour.
The dough will be quite soft at this point. To make it easier to handle and to allow the flavors to meld, we need to chill it. Divide the dough in half. Flatten each half into a disc, wrap tightly in plastic wrap, and refrigerate for at least 1 hour, or until firm enough to roll. Chilling is a critical step for sugar cookies as it firms up the butter, preventing the cookies from spreading excessively during baking. This ensures they hold their shape beautifully.
Shaping and Baking the Grinch Cookies
Preheat your oven to 350°F (175°C). Line baking sheets with parchment paper. This prevents sticking and makes for easy cleanup. Lightly flour a clean work surface. Take one disc of chilled dough out of the refrigerator. Roll it out to about ¼-inch thickness. If the dough becomes too soft while rolling, return it to the refrigerator for a few minutes to firm up. Using your desired cookie cutters (think festive Grinch shapes or simple circles), cut out your cookies. As you cut, try to press down firmly to get clean edges. You can gather the scraps, gently re-roll them once, and cut more cookies.
Carefully transfer the cut-out cookies to your prepared baking sheets, leaving about 1 inch of space between them to allow for expansion during baking. For a special touch, gently press one red heart sprinkle into the center of each cookie before baking. This adds a pop of color and a festive detail that really makes them stand out. It’s a simple addition that elevates the entire cookie’s appearance.
Baking and Cooling
Bake the cookies for 8-10 minutes, or until the edges are lightly golden brown. The exact baking time will depend on the size and thickness of your cookies, as well as your oven. Keep a close eye on them during the last few minutes of baking to prevent them from burning. They will appear slightly soft in the center when they are done, but they will continue to set as they cool. Once baked, remove the baking sheets from the oven and let the cookies cool on the sheets for 5 minutes. This allows them to firm up enough to be moved without breaking. After 5 minutes, carefully transfer the cookies to a wire rack to cool completely. Allowing them to cool completely on the wire rack ensures that the bottoms don’t become soggy and that they achieve that perfect crisp texture.
Conclusion:
And there you have it – your guide to crafting the most delightful Grinch Sugar Cookies! These festive treats are more than just a recipe; they’re a tradition waiting to happen, perfect for adding a pop of vibrant color and sweet cheer to your holiday season. I hope you’ve enjoyed learning how to bring these whimsical cookies to life. Don’t be afraid to get creative and make them your own!
These cheerful cookies are wonderful served on their own as a sweet afternoon snack, or they can be the star of any holiday cookie platter. Imagine them nestled alongside gingerbread men or frosted shortbreads – they’re sure to be a conversation starter! For an extra festive touch, try pairing them with a glass of cold milk or even a warm mug of hot chocolate.
Don’t limit yourself to the classic Grinch green! Feel free to experiment with other colors or add edible glitter for extra sparkle. You could also try different flavor extracts in the dough, like almond or lemon, for a new twist. Remember, baking is all about having fun, so have a blast with your Grinch Sugar Cookies!
Frequently Asked Questions about Grinch Sugar Cookies:
Can I make the dough ahead of time?
Absolutely! The Grinch Sugar Cookie dough can be made up to 2-3 days in advance and stored, tightly wrapped, in the refrigerator. Just let it sit at room temperature for about 15-20 minutes before rolling and cutting to make it easier to handle.
How long do these cookies stay fresh?
Once baked and completely cooled, Grinch Sugar Cookies will stay fresh in an airtight container at room temperature for up to 5-7 days. If you plan to store them for longer, you can freeze the baked cookies for up to 3 months.
Grinch Sugar Cookies-Festive & Easy Holiday Treats
Vibrant green Grinch sugar cookies, perfect for holiday celebrations, featuring a tender crumb and a festive heart sprinkle detail.
Ingredients
-
1 stick (8 tablespoons) unsalted butter, softened
-
⅔ cup granulated sugar, plus extra for rolling
-
2 large egg yolks
-
1 teaspoon vanilla extract
-
3-5 drops green food gel coloring
-
1¼ cups all-purpose flour
-
½ teaspoon baking soda
-
¼ teaspoon fine salt
-
12 red heart sprinkles
Instructions
-
Step 1
Cream together softened butter and granulated sugar in a large mixing bowl with an electric mixer until light and fluffy, about 3-4 minutes. Add egg yolks and vanilla extract, mixing until just combined. -
Step 2
Add 3-5 drops of green food gel coloring and mix until uniformly distributed. Add more drops if a more vibrant green is desired. -
Step 3
In a separate bowl, whisk together flour, baking soda, and salt. Gradually add dry ingredients to wet ingredients, mixing on low speed until just incorporated to form a soft dough. Do not overmix. -
Step 4
Divide dough in half, flatten each into a disc, wrap in plastic wrap, and refrigerate for at least 1 hour until firm. -
Step 5
Preheat oven to 350°F (175°C). Line baking sheets with parchment paper. Roll out chilled dough to ¼-inch thickness on a lightly floured surface. Cut out shapes with cookie cutters. -
Step 6
Transfer cookies to prepared baking sheets, leaving 1 inch between them. Gently press one red heart sprinkle into the center of each cookie. -
Step 7
Bake for 8-10 minutes, or until edges are lightly golden brown. Let cool on baking sheets for 5 minutes before transferring to a wire rack to cool completely.
Important Information
Nutrition Facts (Per Serving)
It is important to consider this information as approximate and not to use it as definitive health advice.
Allergy Information
Please check ingredients for potential allergens and consult a health professional if in doubt.

Leave a Comment