
Juicy Pineapple Heaven Cake – just hearing those words evokes a sensation of pure, sun-drenched delight, doesn’t it? As an avid baker, I’ve always been captivated by desserts that transport you with their flavors, and this particular creation is no exception. While its exact origin story might be debated over cups of coffee, the spirit of this cake certainly hails from a place where warmth and hospitality reign supreme, making it a beloved staple at family gatherings and celebrations across various cultures. It’s more than just a dessert; it’s a slice of joy, a testament to simple, vibrant ingredients coming together in perfect harmony. People adore this cake for its incredibly moist crumb, the delightful burst of tangy, sweet pineapple in every bite, and that uniquely fluffy texture that truly earns it the ‘heaven’ moniker. The combination of its tropical sweetness and comforting richness makes it an irresistible treat, promising to be the star of any table.
Unraveling the Allure of Juicy Pineapple Heaven Cake
Preparing this Juicy Pineapple Heaven Cake is a culinary journey I’m thrilled to guide you through, promising a delightful experience that culminates in a truly unforgettable dessert. You’ll discover why this recipe has become a cherished favorite, perfect for brightening any occasion or simply indulging in a moment of pure bliss.
Ingredients:
- For the Juicy Pineapple Heaven Cake Layers:
- 3 cups (360g) all-purpose flour, spooned and leveled
- 2 teaspoons baking powder
- 1 teaspoon baking soda
- ½ teaspoon salt
- 1 cup (226g) unsalted butter, softened to room temperature
- 2 cups (400g) granulated sugar
- 4 large eggs, at room temperature
- 1 tablespoon pure vanilla extract
- 1 ½ cups (360ml) buttermilk, at room temperature
- 1 (20-ounce) can crushed pineapple, well drained (reserve 2-3 tablespoons of juice for frosting if desired)
- For the Pineapple Filling (Optional, but highly recommended for extra juiciness):
- 1 (20-ounce) can crushed pineapple, well drained (in addition to the cake batter pineapple)
- ¼ cup (50g) packed light brown sugar
- 2 tablespoons unsalted butter
- 1 teaspoon cornstarch mixed with 1 tablespoon water (slurry)
- For the Dreamy Cream Cheese Frosting:
- 1 cup (226g) unsalted butter, softened to room temperature
- 2 (8-ounce) packages cream cheese, softened to room temperature (full fat is best for stability)
- 4 cups (480g) powdered sugar, sifted, plus more if needed
- 2 teaspoons pure vanilla extract
- 2-3 tablespoons reserved pineapple juice or heavy cream (for desired consistency)
- For Garnish (Optional):
- Toasted coconut flakes
- Maraschino cherries, drained and patted dry
- Fresh pineapple wedges or dried pineapple flowers
Preparing for Your Juicy Pineapple Heaven Cake Baking Adventure:
Before we dive into mixing, let’s get organized! This ensures a smooth and enjoyable baking process, leading to the most delightful Juicy Pineapple Heaven Cake you’ve ever tasted.
- Preheat and Prepare: I always start by preheating my oven to 350°F (175°C). Then, I generously grease and flour three 8-inch round cake pans. For an extra layer of non-stick insurance and easy removal, I like to line the bottoms of the pans with parchment paper circles. This step is crucial for perfect cake layers!
- Gather Your Ingredients: Take out all your cold ingredients – butter, eggs, buttermilk, and cream cheese – and let them come to room temperature. This usually takes about 30-60 minutes. Room temperature ingredients emulsify better, resulting in a smoother, more uniform batter and frosting. Don’t skip this, it makes a huge difference in the texture of your ultimate Juicy Pineapple Heaven Cake.
- Drain the Pineapple: If you’re using canned crushed pineapple, make sure to drain it exceptionally well. I like to press it in a fine-mesh sieve with the back of a spoon to remove as much liquid as possible. Excess moisture can make your cake dense or gummy, and we want light and airy!
For the Juicy Pineapple Heaven Cake Batter:
Now, let’s get to the heart of our cake – the incredibly moist and flavorful batter that forms the foundation of our Juicy Pineapple Heaven Cake. Precision here pays off!
- Whisk Dry Ingredients: In a medium bowl, gently whisk together the all-purpose flour, baking powder, baking soda, and salt until well combined. This ensures that the leavening agents are evenly distributed, leading to a consistent rise. Set this aside.
- Cream Butter and Sugar: In a large mixing bowl, using an electric mixer (either a stand mixer with a paddle attachment or a hand mixer), cream together the softened unsalted butter and granulated sugar on medium-high speed. Beat for about 3-5 minutes, or until the mixture is light in color and fluffy. This process incorporates air, which is vital for a tender cake crumb. Scrape down the sides of the bowl frequently to ensure everything is evenly mixed.
- Add Eggs and Vanilla: Reduce the mixer speed to medium and add the eggs one at a time, beating well after each addition. Make sure each egg is fully incorporated before adding the next. This prevents the mixture from curdling. Once all eggs are in, beat in the pure vanilla extract. The mixture should still be light and fluffy.
- Alternate Wet and Dry: With the mixer on low speed, begin adding the dry ingredient mixture and the buttermilk to the butter mixture, alternating between them. I usually start and end with the dry ingredients. Add about one-third of the flour mixture, mix until just combined, then add half of the buttermilk, mix, then another third of flour, the remaining buttermilk, and finally the last third of the flour. Do not overmix! Overmixing develops the gluten in the flour, which can lead to a tough cake. Mix only until no streaks of flour remain.
- Fold in Pineapple: Gently fold in the well-drained crushed pineapple into the cake batter using a spatula. We want those juicy bits distributed throughout the cake for that quintessential Juicy Pineapple Heaven Cake flavor without adding too much extra moisture.
- Divide and Bake: Divide the cake batter evenly among your three prepared 8-inch cake pans. I often use a kitchen scale to ensure precise distribution, aiming for roughly equal weight in each pan, which helps them bake evenly.
Baking the Heavenly Cake Layers:
Baking is where the magic truly happens, transforming our batter into soft, golden layers for our Juicy Pineapple Heaven Cake. Keep an eye on your oven!
- Bake to Perfection: Place the cake pans into your preheated oven. Bake for approximately 25-30 minutes, or until a wooden skewer or toothpick inserted into the center of a cake comes out clean. Baking times can vary slightly depending on your oven, so keep a close watch, especially after the 20-minute mark. The tops should be golden brown and spring back when lightly touched.
- Cooling Process: Once baked, remove the cakes from the oven and let them cool in their pans on a wire rack for about 10-15 minutes. This allows the cakes to firm up slightly, making them easier to handle.
- Invert and Cool Completely: After the initial cooling period, carefully invert the cakes onto the wire racks, remove the pans, and peel off the parchment paper. Let the cake layers cool completely before frosting. This is absolutely critical! Attempting to frost warm cakes will result in melted frosting and a messy situation. Patience is a virtue here, my friends, for a perfectly structured Juicy Pineapple Heaven Cake.
Preparing the Optional Pineapple Filling:
If you’re aiming for an extra burst of pineapple flavor and moisture in your Juicy Pineapple Heaven Cake, this simple filling is a game-changer. It adds another layer of juicy goodness!
- Combine Ingredients: In a small saucepan over medium heat, combine the well-drained crushed pineapple, light brown sugar, and unsalted butter. Stir frequently until the butter is melted and the sugar has dissolved.
- Thicken the Filling: Bring the mixture to a gentle simmer. Once simmering, whisk in the cornstarch slurry (1 teaspoon cornstarch dissolved in 1 tablespoon cold water). Continue to cook and stir for another 1-2 minutes, or until the mixture has thickened to a jam-like consistency. It should coat the back of a spoon.
- Cool Down: Remove the pineapple filling from the heat and transfer it to a separate bowl. Let it cool completely to room temperature. You can even pop it into the refrigerator to speed up the cooling process, which is often what I do to ensure it’s firm enough for spreading between cake layers.
Crafting the Dreamy Cream Cheese Frosting:
No Juicy Pineapple Heaven Cake would be complete without a luscious, tangy, and sweet cream cheese frosting. This recipe yields a sturdy yet spreadable frosting perfect for stacking and decorating.
- Cream Butter and Cream Cheese: In a large mixing bowl, using your electric mixer, beat together the softened unsalted butter and softened cream cheese on medium speed. Beat for about 3-4 minutes until the mixture is incredibly smooth, creamy, and free of any lumps. It’s important that both are at room temperature to prevent lumps and ensure a perfectly emulsified frosting.
- Add Vanilla: Beat in the pure vanilla extract until just combined.
- Gradually Add Powdered Sugar: With the mixer on low speed, gradually add the sifted powdered sugar, one cup at a time. Beat until each addition is fully incorporated before adding more. Once all the powdered sugar is in, increase the speed to medium-high and beat for another 2-3 minutes. This aerates the frosting, making it wonderfully light and fluffy.
- Adjust Consistency: If the frosting seems too thick, beat in 1 tablespoon of the reserved pineapple juice (from draining the crushed pineapple for the cake) or heavy cream at a time until you reach your desired consistency. Be careful not to add too much liquid, as this can make the frosting too soft. We want it spreadable but still firm enough to hold its shape for our beautiful Juicy Pineapple Heaven Cake.
Assembling Your Ultimate Juicy Pineapple Heaven Cake:
This is where all your hard work comes together! Assembling your Juicy Pineapple Heaven Cake can be a fun and rewarding process. Take your time to create a stunning masterpiece.
- Level the Cake Layers (Optional, but recommended): If your cake layers have domed tops, I recommend using a serrated knife or a cake leveler to carefully trim them so they are flat. This creates a much more stable and aesthetically pleasing stacked cake.
- First Layer of Frosting: Place one cooled, leveled cake layer onto your serving plate or cake stand. If you are using a turntable, this is the perfect time to employ it! Dollop a generous amount of cream cheese frosting (about 1 to 1 ½ cups) onto the center of the cake layer. Using an offset spatula, spread the frosting evenly to the edges.
- Add Pineapple Filling (If Using): If you opted for the pineapple filling, spread half of the cooled pineapple filling evenly over the first layer of frosting, leaving a small border (about ½ inch) around the edge to prevent it from oozing out when the next layer is added. This burst of extra pineapple flavor is what makes this a truly Juicy Pineapple Heaven Cake!
- Stack the Second Layer: Carefully place the second cake layer on top, aligning it as best you can. Gently press down to secure it. Repeat step 21 and 22: add another generous layer of frosting, spread it out, and then spread the remaining pineapple filling (leaving the border).
- Top with the Third Layer: Place the final cake layer on top. At this point, I like to gently press down once more to ensure all layers are level and stable.
- Crumb Coat: Apply a thin layer of frosting all over the top and sides of the entire cake. This is called a “crumb coat,” and its purpose is to trap any loose crumbs, preventing them from mixing into your final, pristine layer of frosting. Don’t worry if it looks a bit messy at this stage; it’s doing its job!
- Chill the Crumb Coat: Transfer the cake to the refrigerator and chill for at least 20-30 minutes, or until the crumb coat is firm to the touch. This step is essential for a clean, smooth final frosting layer, giving your Juicy Pineapple Heaven Cake a professional finish.
- Final Frosting Layer: Once the crumb coat is firm, take the cake out of the refrigerator. Apply the remaining cream cheese frosting generously to the top and sides of the cake. Use your offset spatula or a bench scraper to smooth out the frosting to your desired finish. I love a rustic swirl, but you can go for perfectly smooth if you prefer!
Final Touches and Serving Your Juicy Pineapple Heaven Cake:
The grand finale! Now is the time to add any decorative elements that will make your Juicy Pineapple Heaven Cake truly shine.
- Decorate (Optional): If you’re using toasted coconut flakes, gently press them onto the sides of the cake. You can also pipe decorative borders on the top or bottom of the cake using any remaining frosting. Maraschino cherries or fresh pineapple wedges can be arranged artfully on top for a vibrant, appealing look.
- Chill Before Serving: For best results and clean slices, I recommend chilling the fully frosted Juicy Pineapple Heaven Cake in the refrigerator for at least 1-2 hours before serving. This allows the frosting to firm up completely and the flavors to meld beautifully.
- Serve and Enjoy: When you’re ready to serve, remove the cake from the refrigerator about 15-20 minutes before slicing to allow the frosting to soften slightly for easier cutting. Slice generously and relish every bite of your homemade Juicy Pineapple Heaven Cake! It’s truly a labor of love that pays off in deliciousness.
Conclusion:
And there you have it, my dear fellow baking enthusiast! We’ve journeyed through the creation of what I truly believe is one of the most delightful and effortlessly impressive cakes you’ll ever have the pleasure of baking and devouring. This isn’t just another dessert recipe; it’s an invitation to experience pure, unadulterated joy in every single bite. The incredible moistness, the vibrant burst of tropical flavor, and that perfectly balanced sweetness make this a true masterpiece for any occasion. From its humble ingredients, a truly extraordinary treat emerges, promising to transport your taste buds straight to a sun-drenched paradise with its irresistible aroma alone. It’s the kind of cake that makes you close your eyes and savor each moment, a comforting yet exhilarating culinary escape.
I genuinely consider this recipe a must-try for everyone, regardless of your baking prowess. If you’re new to the kitchen, you’ll find its straightforward steps incredibly encouraging, leading to a professional-looking and tasting result that will fill you with pride. For seasoned bakers, it offers a wonderfully reliable canvas for your creativity, a solid foundation for endless delicious experimentation. What truly sets this particular recipe apart is its consistent ability to deliver a tender crumb saturated with natural fruit juices, ensuring it stays incredibly fresh and palatable for days. There’s no dry, crumbly cake here, only an abundance of luscious, melt-in-your-mouth goodness. It’s a testament to how simple ingredients, combined with a little love and the right technique, can yield such profound deliciousness. It’s more than just a cake; it’s a moment of blissful indulgence that you’ll want to revisit again and again.
Elevate Your Experience: Serving Suggestions & Creative Variations
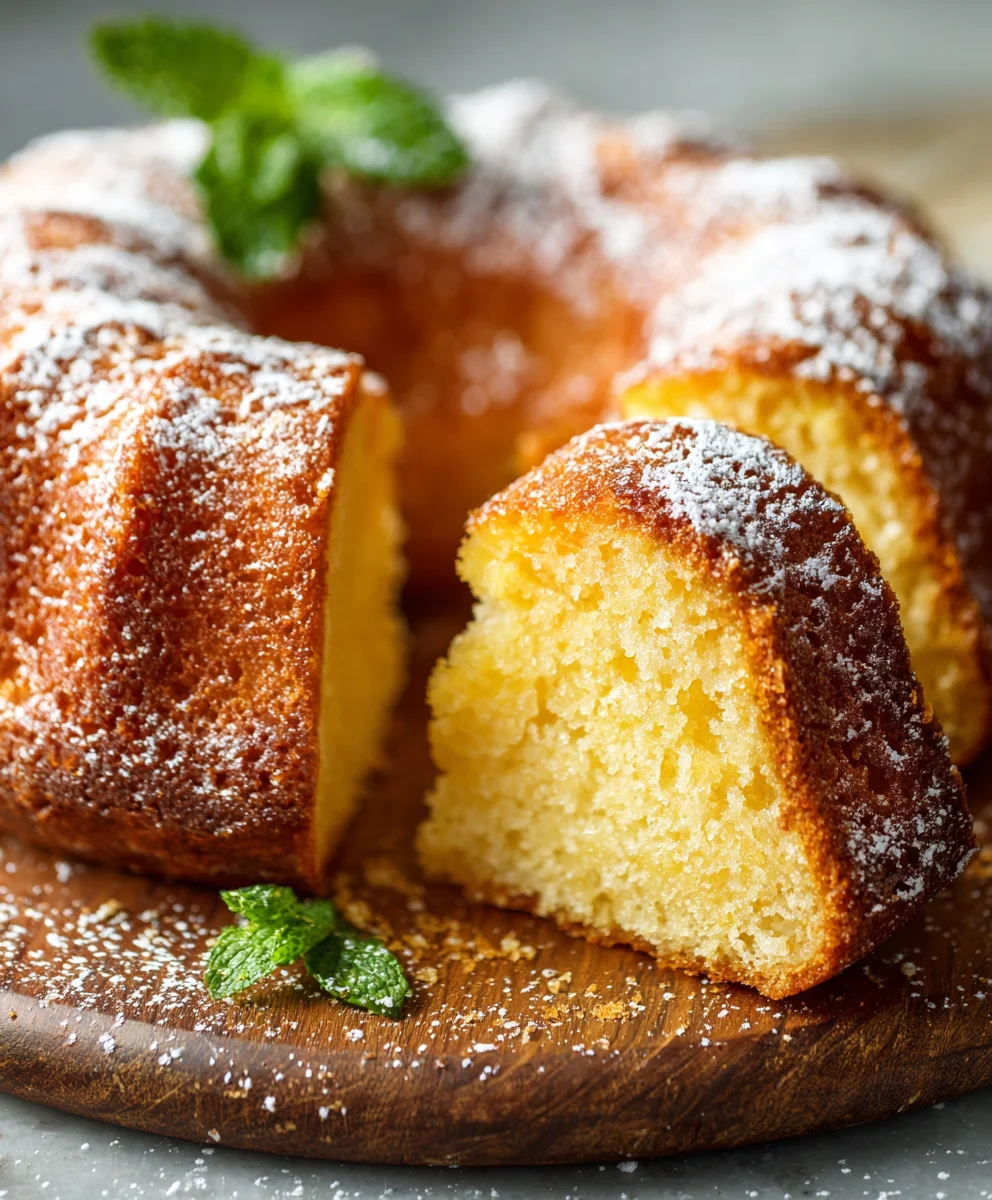
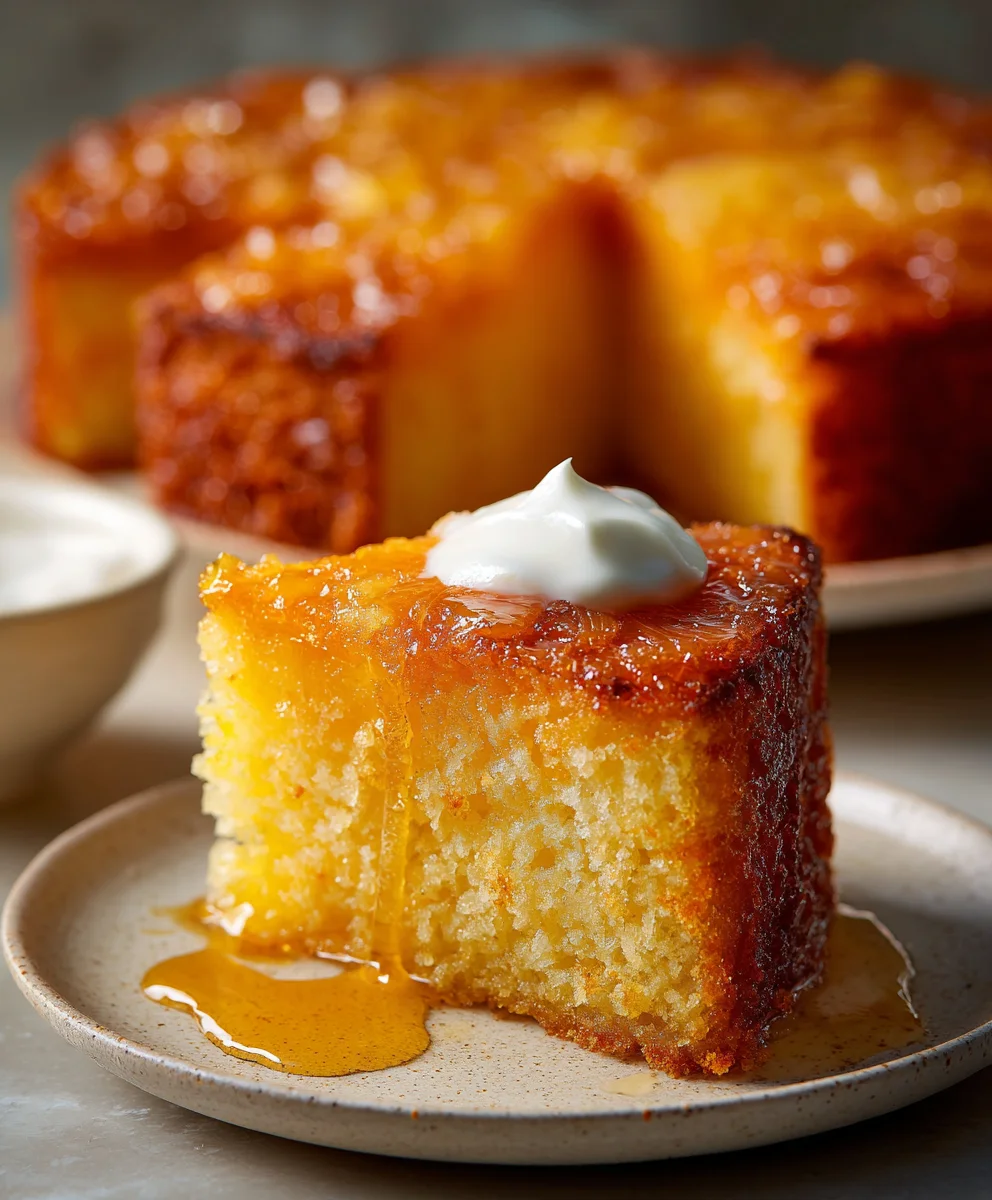
While this beautiful cake is absolutely divine on its own, there are myriad ways to enhance its already spectacular charm. For a classic, understated elegance, serve a generous slice with a simple dusting of powdered sugar and a hot cup of freshly brewed coffee or a soothing herbal tea. If you’re aiming for something a little more luxurious, a dollop of freshly whipped cream, perhaps infused with a hint of vanilla bean or a touch of rum, would be an absolute dream. Imagine the light, airy cream contrasting with the dense, fruity cake – pure bliss!
For the ultimate indulgence, especially during warmer months, I highly recommend serving a slice alongside a scoop of premium vanilla bean ice cream or even a refreshing coconut sorbet. The way the cool, creamy ice cream slowly melts into the warm, fruit-laden cake is an experience unto itself, creating a symphony of textures and temperatures that will dance on your palate. This cake also makes an excellent centerpiece for a brunch spread, a vibrant and welcoming treat for family gatherings, or a surprisingly sophisticated addition to any potluck. It’s robust enough to travel well, making it perfect for sharing with friends or bringing to a picnic.
But don’t stop there! This recipe is incredibly adaptable, inviting you to put your own unique spin on it. For a truly tropical twist, try folding a cup of shredded unsweetened coconut into the batter, either with the dry ingredients or just before baking. This will give your cake an even richer, more complex flavor profile, reminiscent of a piña colada. If you love a bit of crunch, consider adding half a cup of finely chopped macadamia nuts or pecans to the batter – they’ll provide a delightful textural contrast and a nutty depth.
Feeling adventurous? While pineapple is the star, you could experiment with other fruits. Imagine a “Mango Heaven Cake” or a “Peach Paradise Cake” using similar methods! A light cream cheese frosting, perhaps with a hint of orange zest, could also replace the glaze for a different kind of tang and richness. For those who enjoy a warm spice note, a pinch of cardamom or ground ginger can subtly enhance the pineapple’s natural sweetness. You could even bake this recipe in cupcake tins for delightful individual servings, perfect for parties or lunchboxes. Just remember to adjust the baking time accordingly!
Your Turn: Share Your Juicy Pineapple Heaven Cake Adventure!
Now that you have all the tips, tricks, and inspiration at your fingertips, it’s time to preheat your oven and embark on your own baking adventure. I promise you, creating this Juicy Pineapple Heaven Cake is an incredibly rewarding experience, not just for the senses but for the soul. There’s something truly special about the aroma that will fill your home as it bakes, a fragrant invitation to happiness.
Don’t just read about it; make it! Taste the difference that fresh, juicy pineapple makes, and revel in the compliments that are sure to come your way. Once you’ve baked your beautiful creation, I would absolutely love to hear all about your experience. Did you add any unique twists? How did your family and friends react? What was your favorite part of the process?
Please, don’t hesitate to share your photos and stories with me! Baking is a community, and your insights and triumphs inspire us all. So go ahead, bake this magnificent cake, capture its glory, and let the world know about your delicious success. I’m already excited to hear about your very own slice of heaven! Happy baking!
Juicy Pineapple Heaven Cake
Experience pure, sun-drenched delight with this Juicy Pineapple Heaven Cake. Beloved for its incredibly moist crumb, delightful burst of tangy-sweet pineapple, and uniquely fluffy texture, it’s a slice of joy that promises to be the star of any table.
Ingredients
-
3 cups (360g) all-purpose flour
-
2 teaspoons baking powder
-
1 teaspoon baking soda
-
½ teaspoon salt
-
1 cup (226g) unsalted butter, softened
-
2 cups (400g) granulated sugar
-
4 large eggs, room temperature
-
1 tablespoon pure vanilla extract
-
1 ½ cups (360ml) buttermilk, room temperature
-
1 (20-ounce) can crushed pineapple, well drained (reserve 2-3 tablespoons juice)
-
1 (20-ounce) can crushed pineapple, well drained (for filling)
-
¼ cup (50g) packed light brown sugar
-
2 tablespoons unsalted butter (for filling)
-
1 teaspoon cornstarch mixed with 1 tablespoon water
-
1 cup (226g) unsalted butter, softened (for frosting)
-
2 (8-ounce) packages cream cheese, softened
-
4 cups (480g) powdered sugar, sifted
-
2 teaspoons pure vanilla extract (for frosting)
-
2-3 tablespoons reserved pineapple juice or heavy cream
-
Toasted coconut flakes (optional)
-
Maraschino cherries, drained (optional)
-
Fresh pineapple wedges or dried pineapple flowers (optional)
Instructions
-
Step 1
Preheat oven to 350°F (175°C). Grease and flour three 8-inch cake pans, lining bottoms with parchment paper. -
Step 2
Ensure all cold ingredients (butter, eggs, buttermilk, cream cheese) are at room temperature. -
Step 3
Thoroughly drain crushed pineapple by pressing in a fine-mesh sieve to remove excess liquid. -
Step 4
In a medium bowl, whisk together the flour, baking powder, baking soda, and salt. -
Step 5
In a large bowl, cream softened butter and granulated sugar with an electric mixer for 3-5 minutes until light and fluffy. -
Step 6
Beat in eggs one at a time, ensuring each is incorporated, then beat in vanilla extract. -
Step 7
Gradually add the dry ingredients alternately with the buttermilk, beginning and ending with dry. Mix until just combined; do not overmix. -
Step 8
Gently fold in the well-drained crushed pineapple into the cake batter. -
Step 9
Divide the batter evenly among the three prepared pans. -
Step 10
Bake for approximately 25-30 minutes, or until a wooden skewer inserted into the center comes out clean. -
Step 11
Let cakes cool in their pans on a wire rack for 10-15 minutes, then invert onto racks, remove parchment, and cool completely. -
Step 12
In a small saucepan, combine the second can of well-drained crushed pineapple, light brown sugar, and 2 tablespoons unsalted butter over medium heat. Stir until butter melts and sugar dissolves. -
Step 13
Bring to a gentle simmer, whisk in the cornstarch slurry, and cook for 1-2 minutes until thickened to a jam-like consistency. -
Step 14
Transfer the pineapple filling to a bowl and cool completely. -
Step 15
In a large bowl, beat softened butter and cream cheese for 3-4 minutes until incredibly smooth and creamy. -
Step 16
Beat in 2 teaspoons pure vanilla extract. -
Step 17
Gradually add sifted powdered sugar, then increase speed to medium-high and beat for 2-3 minutes until light and fluffy. -
Step 18
Adjust consistency with 1 tablespoon of reserved pineapple juice or heavy cream at a time, if needed. -
Step 19
If cake layers have domed tops, trim them flat with a serrated knife. -
Step 20
Place one cooled, leveled cake layer on a serving plate. Spread about 1 to 1 ½ cups of cream cheese frosting evenly to the edges. -
Step 21
If using, spread half of the cooled pineapple filling evenly over the first frosting layer, leaving a small border. -
Step 22
Carefully place the second cake layer on top, press gently. Repeat with another layer of frosting and the remaining pineapple filling. -
Step 23
Place the final cake layer on top and gently press down to secure all layers. -
Step 24
Apply a thin layer of frosting all over the top and sides of the cake to trap any loose crumbs. -
Step 25
Transfer the cake to the refrigerator and chill for at least 20-30 minutes, or until the crumb coat is firm. -
Step 26
Once the crumb coat is firm, apply the remaining cream cheese frosting generously to the top and sides of the cake. Smooth to your desired finish. -
Step 27
Garnish with toasted coconut flakes, maraschino cherries, or fresh pineapple wedges, if desired. -
Step 28
For best results and clean slices, chill the fully frosted cake in the refrigerator for at least 1-2 hours before serving. -
Step 29
Remove from the refrigerator about 15-20 minutes before slicing to allow the frosting to soften slightly. Slice and enjoy!
Important Information
Nutrition Facts (Per Serving)
It is important to consider this information as approximate and not to use it as definitive health advice.
Allergy Information
Please check ingredients for potential allergens and consult a health professional if in doubt.


Leave a Comment