
Tinis Mac Cheese is more than just a dish; it’s a warm embrace, a nostalgic journey back to simpler times, and the ultimate culinary comfort. Few meals hold such a cherished place in our hearts and on our dinner tables as a perfectly executed mac and cheese. From its humble origins as a practical and satisfying meal, evolving from a simple baked macaroni to an American culinary staple, this iconic dish has captivated palates across generations. I am delighted to share with you a recipe that truly elevates this classic, transforming it into an unforgettable experience.
Experience Unrivaled Comfort with Tinis Mac Cheese
We all crave that unparalleled creamy texture and the decadent, savory notes of perfectly melted cheese, and this particular rendition delivers on every front. The magic of this dish lies not only in its rich, deeply satisfying flavor profile but also in the way it marries simple ingredients into a complex symphony of taste. Whether you’re seeking a hearty weeknight dinner, a crowd-pleasing side dish for a special occasion, or simply an indulgent treat, Tinis Mac Cheese promises to satisfy. Its appeal is rooted in its irresistible taste, comforting warmth, and the way it effortlessly brings people together, sparking joy with every delicious forkful. Prepare to embark on a culinary adventure that will redefine your expectations of what truly exceptional mac and cheese can be.

Ingredients:
- For the Pasta:
- 1 pound (approximately 450g) elbow macaroni or similar small, tubular pasta. I find that a good quality pasta makes all the difference for the texture of our Tinis Mac Cheese.
- For the Classic Cheese Sauce Base:
- ½ cup (1 stick or 113g) unsalted butter. Using unsalted gives us more control over the final seasoning.
- ½ cup (60g) all-purpose flour. This is crucial for our roux, the thickening agent for a truly luscious sauce.
- 4 cups (960ml) whole milk, warmed. I always warm my milk gently before adding it to the roux; it helps prevent lumps and ensures a smoother sauce.
- 1 teaspoon dry mustard powder. This secret ingredient doesn’t make the sauce taste like mustard; it magically enhances the cheesy flavor!
- ½ teaspoon garlic powder. Adds a subtle depth that complements the richness of the cheese.
- ¼ teaspoon freshly grated nutmeg. Just a hint is all you need, but it elevates the classic cheese sauce to another level.
- A pinch of cayenne pepper (optional, but highly recommended for a subtle kick).
- Salt and freshly ground black pepper, to taste. Remember we’ll be adding salty cheese, so season judiciously.
- For the Cheese Blend (The Heart of Tinis Mac Cheese):
- 8 ounces (225g) sharp cheddar cheese, freshly grated. I always recommend grating your own cheese; pre-shredded varieties often contain anti-caking agents that can affect the melt and texture.
- 4 ounces (113g) Gruyère cheese, freshly grated. This adds a wonderfully nutty and complex flavor profile.
- 4 ounces (113g) Monterey Jack cheese, freshly grated. For that incredible, creamy melt and stretch factor.
- Optional: 2 ounces (56g) cream cheese, softened, for an extra layer of creaminess and stability.
- For the Topping (Optional, but highly encouraged for an irresistible crust):
- 1 cup Panko breadcrumbs. These give a wonderfully crisp texture.
- 2 tablespoons melted unsalted butter.
- ¼ cup freshly grated Parmesan cheese.
- 1 tablespoon chopped fresh parsley (for garnish, if desired).
Phase 1: Gathering and Preparing Your Mis en Place for Tinis Mac Cheese
Before we dive into the fun part of cooking, I always like to ensure all my ingredients are prepped and ready to go. This “mis en place” approach makes the entire cooking process smoother and far less stressful, especially when we’re aiming for the perfect batch of Tinis Mac Cheese.
- Organize and Measure: Take a moment to lay out all your ingredients. Measure out the butter, flour, and milk. Have your dry seasonings – mustard powder, garlic powder, nutmeg, and cayenne – pre-measured into a small bowl.
- Shred the Cheeses: This is a crucial step I cannot stress enough. Grate all your cheddar, Gruyère, and Monterey Jack cheeses. As mentioned in the ingredients list, pre-shredded cheese can hinder the smoothness of your sauce. Take the extra five minutes; it’s truly worth it for the creamiest Tinis Mac Cheese. Place the grated cheese in a large bowl and set aside. If using cream cheese, ensure it’s at room temperature so it incorporates easily.
- Warm the Milk: Gently warm the whole milk in a small saucepan over low heat or in the microwave until it’s lukewarm. It doesn’t need to be hot, just take the chill off. This small step helps prevent lumps when you add it to the roux and results in a much smoother béchamel base for our cheese sauce.
- Prepare Pasta Pot: Fill a large pot with water for the pasta. Add a generous amount of salt – think like the ocean. This will season your pasta from the inside out and is vital for flavor. Don’t put it on the heat just yet, we’ll get to that in a later step.
- Prepare Baking Dish (if baking): If you plan to bake your Tinis Mac Cheese for that delightful crispy topping, lightly grease a 9×13 inch baking dish. Set it aside.
- Prepare Topping Ingredients: In a small bowl, combine the Panko breadcrumbs, melted butter, and grated Parmesan cheese for the topping. Give it a good stir and set it aside.
Phase 2: Crafting the Silky Cheese Sauce for Tinis Mac Cheese
Now, let’s get into the heart of our dish: the incredibly rich and velvety cheese sauce. This is where we build the foundation for an unforgettable Tinis Mac Cheese. Patience and attention to detail here will pay off immensely!
- Melt the Butter for the Roux: In a large, heavy-bottomed saucepan or Dutch oven, melt the ½ cup of unsalted butter over medium heat. Make sure the butter is fully melted and slightly shimmering, but don’t let it brown.
- Add the Flour to Create the Roux: Once the butter is melted, sprinkle in the ½ cup of all-purpose flour. Immediately whisk constantly for 1 to 2 minutes. You’ll see it form a thick paste. Keep whisking until the mixture becomes a pale, golden color and smells slightly nutty, like toasted pie crust. This cooked flour and butter mixture is our roux, and it’s essential for thickening the sauce and eliminating any raw flour taste. This golden roux is the secret to a perfect Tinis Mac Cheese sauce!
- Gradually Whisk in the Warm Milk: Slowly, and I mean slowly, begin to pour the warmed milk into the roux, whisking continuously. Start with about a quarter of the milk, whisking vigorously until it’s fully incorporated and smooth before adding more. This gradual addition is key to preventing lumps. Continue adding the milk in small increments, whisking after each addition, until all the milk has been incorporated and the sauce is smooth.
- Thicken the Sauce: Increase the heat slightly to medium-high and continue to whisk frequently. Bring the sauce to a gentle simmer, whisking until it thickens to the consistency of a thick gravy or thin pancake batter. This usually takes about 5 to 8 minutes. It should coat the back of a spoon. Don’t let it boil vigorously, as this can scorch the milk.
- Season the Béchamel: Remove the saucepan from the heat. Stir in the dry mustard powder, garlic powder, nutmeg, and cayenne pepper (if using). Season generously with salt and freshly ground black pepper. Remember, the cheese will add saltiness, so taste before adding too much.
- Melt in the Cheeses: Now for the star of our Tinis Mac Cheese! Add your grated sharp cheddar, Gruyère, and Monterey Jack cheeses to the sauce, a handful at a time, stirring constantly with a wooden spoon or spatula until each addition is fully melted and incorporated before adding more.
- Add Cream Cheese (Optional): If you’re using cream cheese for extra richness, add it now and stir until completely smooth and melted into the sauce. This helps stabilize the sauce and adds a lovely tang.
- Achieve Ultimate Smoothness: Continue stirring gently over very low heat until the sauce is completely smooth, luscious, and glistening. Taste and adjust seasonings one final time. If it seems too thick, you can add a splash more warm milk until you reach your desired consistency. Keep the sauce warm over very low heat while you prepare the pasta.
Phase 3: Cooking the Pasta to Perfection for Tinis Mac Cheese
While our luxurious cheese sauce is patiently waiting, it’s time to cook the pasta. The key here is “al dente” – cooked to have a slight bite – which ensures it holds up well when mixed with the sauce and baked, preventing a mushy Tinis Mac Cheese.
- Boil the Water: Bring that generously salted pot of water (from step 4) to a rolling boil over high heat. It should be bubbling vigorously.
- Add the Pasta: Add the 1 pound of elbow macaroni to the boiling water. Stir well to prevent the pasta from sticking together.
- Cook to Al Dente: Cook the pasta according to the package directions, but subtract 1-2 minutes from the recommended cooking time. We want it to be al dente – firm to the bite – because it will continue to cook slightly when combined with the hot sauce and especially if you choose to bake it. Overcooked pasta will lead to a soggy texture, which we absolutely want to avoid in our Tinis Mac Cheese.
- Drain Thoroughly: Once the pasta is al dente, immediately drain it through a colander. Do not rinse the pasta; the starch on the surface helps the sauce adhere better. Give the colander a good shake to remove as much excess water as possible.
Phase 4: Combining and Assembling the Ultimate Tinis Mac Cheese
This is where all our hard work comes together! We’re about to unite the perfectly cooked pasta with that dreamy, cheesy sauce to create a truly irresistible Tinis Mac Cheese. If you’re planning to bake, we’ll set it up for the oven here too.
- Combine Pasta and Sauce: Immediately transfer the hot, drained pasta back into the large saucepan or Dutch oven where you made the cheese sauce (if it’s large enough) or into a very large mixing bowl. Pour all of the warm cheese sauce over the pasta.
- Gently Toss to Combine: Using a large spoon or spatula, gently fold and stir the pasta and sauce together until every piece of macaroni is thoroughly coated in that rich, creamy goodness. Be careful not to mash the pasta. Make sure there are no dry spots. This uniform coating is essential for every bite of Tinis Mac Cheese to be perfect.
- Taste and Adjust: Take a small spoonful and taste your combined Tinis Mac Cheese. This is your last chance to add a touch more salt, pepper, or even a tiny dash more cayenne if you desire a bit more kick.
- Prepare for Baking (if desired): If you’re serving it as a stovetop mac and cheese, you can skip to step 26. However, for a truly decadent experience with a crispy topping, transfer the entire mixture into your prepared 9×13 inch baking dish. Spread it evenly.
- Add the Topping: Evenly sprinkle the Panko breadcrumb, melted butter, and Parmesan mixture over the top of the mac and cheese in the baking dish. Don’t be shy; this topping adds a wonderful crunch and another layer of flavor that complements the creamy interior of our Tinis Mac Cheese beautifully.
Phase 5: Baking (Optional but Recommended) and Serving Your Tinis Mac Cheese
The final stretch! Whether you’re opting for the stovetop version or the glorious baked iteration with a crunchy crust, these last steps ensure your Tinis Mac Cheese is served at its absolute best.
- Preheat Oven (if baking): Preheat your oven to 375°F (190°C).
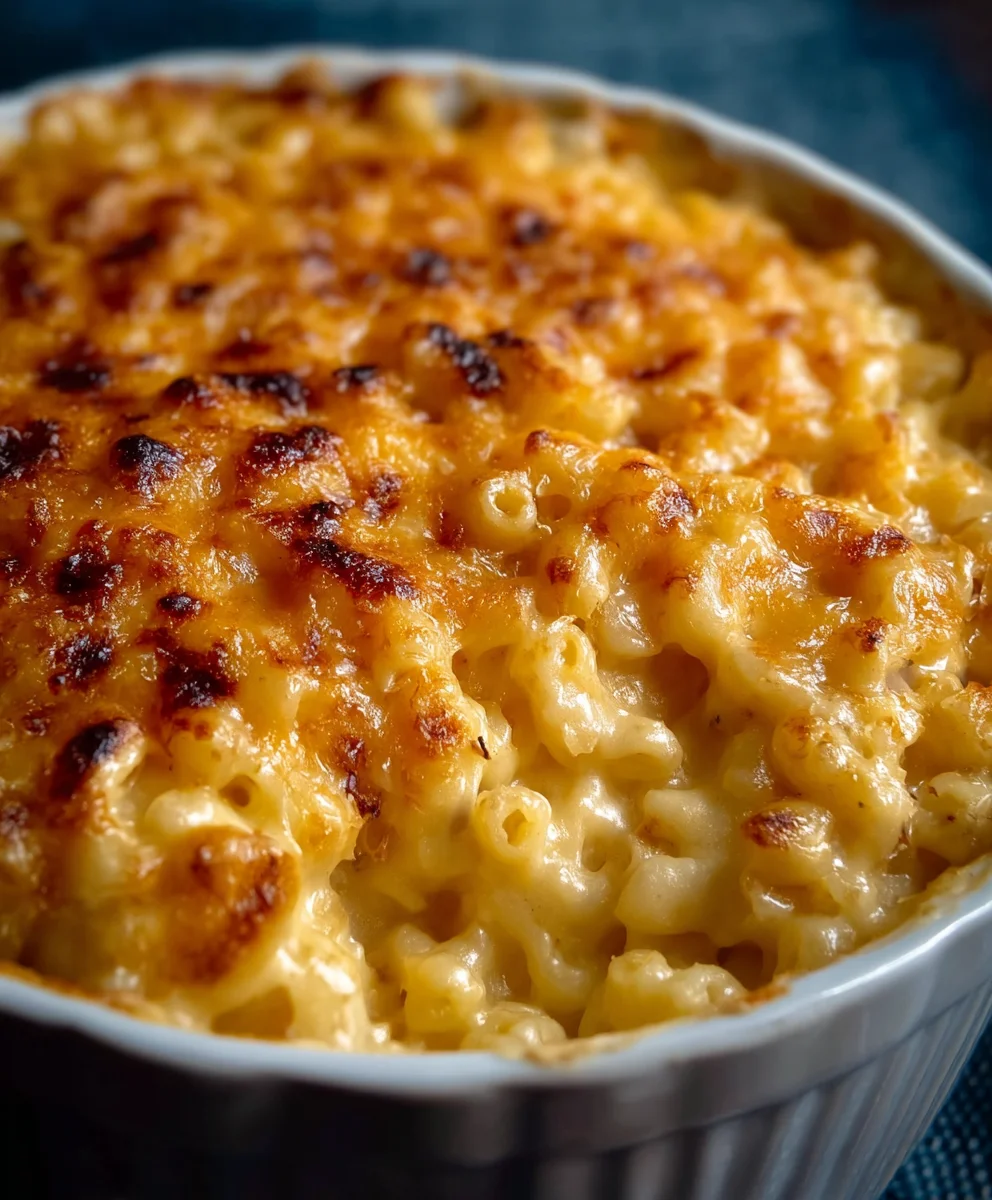
- Bake to Golden Perfection: Place the baking dish in the preheated oven. Bake for 20-25 minutes, or until the topping is golden brown and crispy, and the sauce is bubbly around the edges. Keep an eye on it to prevent the topping from burning. The aroma filling your kitchen will be absolutely divine – a sure sign your Tinis Mac Cheese is almost ready!
- Rest Before Serving: Once baked, remove the Tinis Mac Cheese from the oven. Let it rest for 5-10 minutes before serving. This brief resting period allows the sauce to set slightly, making it easier to serve and preventing it from being too runny. It also ensures the pasta fully absorbs all that incredible cheesy flavor.
- Garnish and Serve: If desired, sprinkle with fresh chopped parsley for a pop of color before serving. Scoop generous portions onto plates and prepare for an onslaught of compliments. This ultimate Tinis Mac Cheese is perfect as a standalone meal or a fantastic side dish to barbecued ribs, grilled chicken, or even a simple green salad.
Enjoy your homemade Tinis Mac Cheese! It’s a dish that brings comfort and joy with every creamy, cheesy bite.
Conclusion:
I genuinely believe that every kitchen needs a reliable, show-stopping mac and cheese recipe, and friends, this is it. What we’ve just explored isn’t just another rendition of a classic comfort food; it’s an experience, a journey into the sublime depths of cheesy goodness that will elevate your expectations forever. From the first tantalizing aroma that fills your home to that utterly irresistible first bite, you’ll understand why this particular mac and cheese is destined to become a staple in your culinary repertoire. It’s the perfect harmony of creamy, dreamy sauce, perfectly cooked pasta, and a rich, complex cheese blend that sings on your palate. This isn’t just about satisfying a craving; it’s about creating a moment, a memory, a warm hug in a bowl that truly resonates with the soul.
What sets this recipe apart, what makes it a genuine must-try, is the meticulous balance we’ve struck. It’s not just cheesy; it’s profoundly cheesy, with a depth of flavor that avoids being overpowering or cloying. The secret lies in a careful selection of cheeses that melt into a velvety smooth, unbelievably rich sauce that coats every single noodle without being too thick or too thin. The subtle additions of seasoning elevate the natural dairy notes, bringing forward a complexity that might surprise you. And let’s not forget that perfectly crisp, golden-brown topping – the textural contrast it provides is simply divine, adding that much-needed crunch to an otherwise soft and yielding dish. Every component works in perfect concert to deliver a truly unforgettable bite. This isn’t just a side dish; it has the gravitas to stand alone as the star of any meal, an undeniable centerpiece that demands attention and adoration.
Now, when it comes to serving this magnificent dish, the possibilities are truly endless, limited only by your imagination! Of course, it’s the quintessential partner to any backyard barbecue, whether alongside smoky ribs, juicy pulled pork, or perfectly grilled chicken. It also makes a fantastic, hearty side for roasted meats, like a tender beef brisket or a succulent turkey. But don’t relegate it merely to a supporting role; this dish shines brightly on its own. For a simple yet satisfying weeknight meal, a generous portion of this creamy pasta with a crisp green salad is absolute perfection. Or, if you’re entertaining, consider serving individual portions in small ramekins for a charming and sophisticated touch.
And for those who love to experiment, let me offer a few delicious variations to inspire your culinary creativity. To amp up the savory notes, try folding in some crispy bacon bits or a generous amount of caramelized onions right before baking. For a touch of heat, a pinch of cayenne pepper or a finely diced jalapeño can add a wonderful kick. Looking to make it a more substantial main course? Consider mixing in some shredded rotisserie chicken, leftover roasted vegetables like broccoli florets or roasted red peppers, or even a handful of sautéed mushrooms. For a luxurious twist, cooked lobster or crab meat would be absolutely divine. If you’re a fan of different cheese profiles, consider swapping out some of the cheddar for a smoky gouda, a nutty Gruyere, or a sharp provolone to create a whole new flavor dimension. You can even infuse the milk with aromatics like bay leaves or garlic cloves before making the sauce for an extra layer of depth. For an extra decadent topping, sprinkle some crushed potato chips or seasoned breadcrumbs mixed with Parmesan cheese over the top before baking. These simple adjustments can transform your Tinis Mac Cheese into an entirely new masterpiece, tailored perfectly to your preferences or the occasion.
So, what are you waiting for? I implore you, take this recipe, make it your own, and prepare to be utterly delighted. Your kitchen is about to become the happiest place in your home, filled with the comforting aromas and the incredible taste of this unparalleled mac and cheese. This isn’t just a recipe; it’s an invitation to create, to savor, and to share.
Once you’ve whipped up your batch of this incredible dish, I would absolutely love to hear about your experience! Did you stick to the original, or did you venture into some of the variations? What were your favorite parts? Please, don’t hesitate to share your thoughts, your successes, and even your creative tweaks in the comments below. Better yet, snap a photo of your glorious creation and share it! Seeing your culinary triumphs brings me so much joy. Let’s celebrate the joy of cooking and the universal love for truly exceptional comfort food together. Happy cooking, my friends!
Tinis Mac Cheese
A decadent mac and cheese featuring mozzarella, Colby jack, and cheddar in a creamy sauce seasoned with garlic, paprika, and Dijon.
Ingredients
-
1 lb elbow macaroni
-
½ cup unsalted butter
-
½ cup all-purpose flour
-
4 cups whole milk, warmed
-
1 tsp Dijon mustard
-
½ tsp garlic powder
-
1 tsp paprika
-
Salt and freshly ground black pepper, to taste
-
8 oz sharp cheddar cheese, freshly grated
-
4 oz mozzarella cheese, freshly grated
-
4 oz Colby Jack cheese, freshly grated
-
2 oz cream cheese, softened (optional)
-
1 cup Panko breadcrumbs
-
2 tbsp melted unsalted butter (for topping)
-
¼ cup freshly grated Parmesan cheese
Instructions
-
Step 1
Grate all cheeses. Warm milk gently. Prepare a large pot with generously salted water for pasta. Lightly grease a 9×13 inch baking dish. In a small bowl, combine Panko, melted butter, and Parmesan for the topping. -
Step 2
In a large saucepan or Dutch oven, melt ½ cup unsalted butter over medium heat. Whisk in ½ cup flour for 1-2 minutes until a pale golden roux forms. Gradually whisk in warm milk until smooth. Bring to a gentle simmer, whisking frequently, until thickened (5-8 min). Remove from heat. Stir in Dijon mustard, garlic powder, paprika, salt, and pepper. Add grated cheddar, mozzarella, and Colby Jack cheeses (and optional cream cheese) a handful at a time, stirring until fully melted and smooth. Keep warm over very low heat. -
Step 3
Bring the salted water to a rolling boil. Add macaroni and cook according to package directions, subtracting 1-2 minutes to ensure it’s al dente. Drain thoroughly, do not rinse. -
Step 4
Immediately transfer the hot, drained pasta into the cheese sauce. Gently toss until every piece of macaroni is thoroughly coated. Taste and adjust seasonings. Transfer the mixture to the prepared baking dish. Evenly sprinkle the Panko breadcrumb topping over the mac and cheese. -
Step 5
Preheat oven to 375°F (190°C). Bake for 20-25 minutes, or until the topping is golden brown and crispy, and the sauce is bubbly. Remove from oven and let rest for 5-10 minutes before serving. Optionally garnish with fresh chopped parsley.
Important Information
Nutrition Facts (Per Serving)
It is important to consider this information as approximate and not to use it as definitive health advice.
Allergy Information
Please check ingredients for potential allergens and consult a health professional if in doubt.


Leave a Comment