
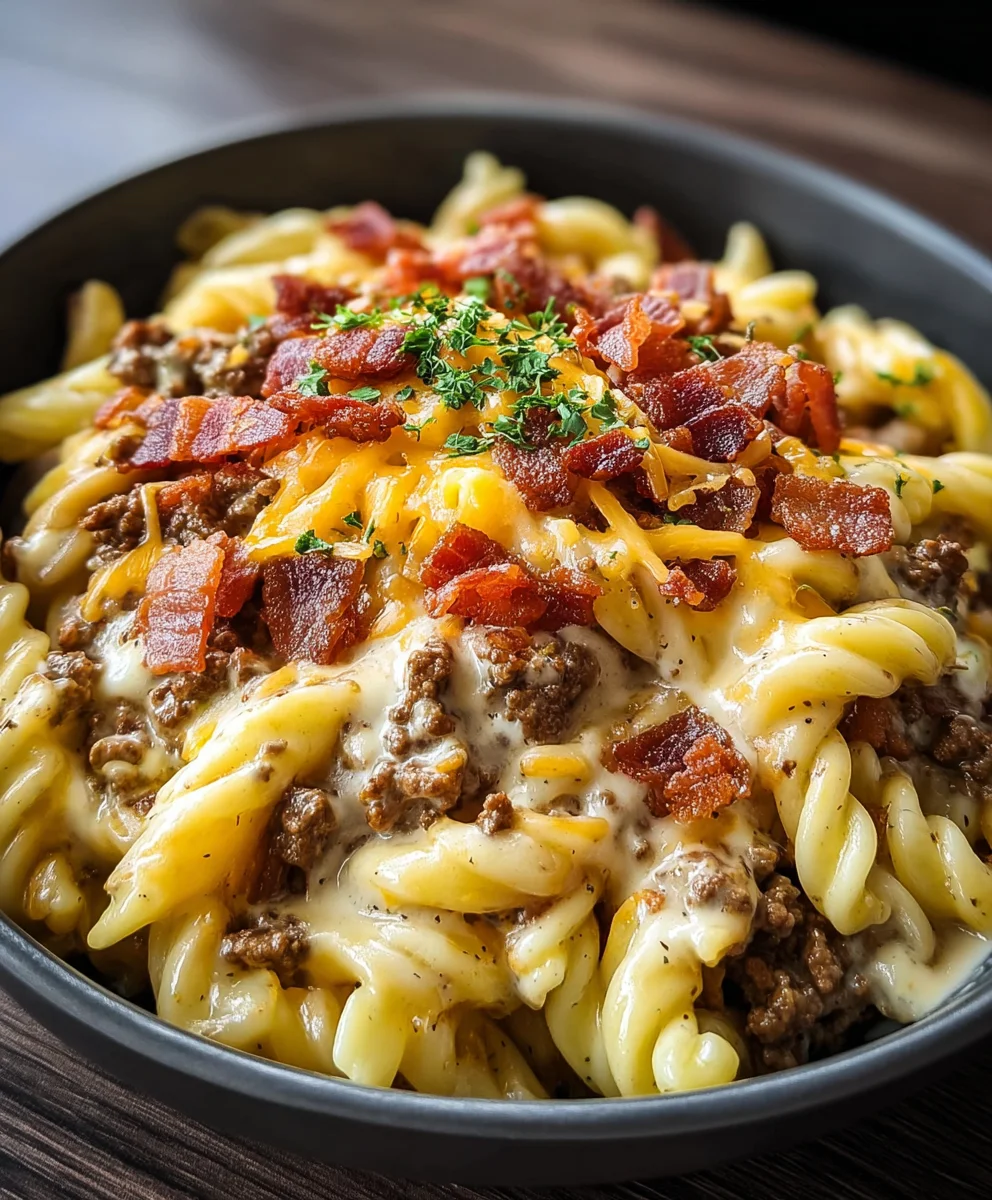
Loaded Beef Bacon Cheeseburger Pasta is not just a dish; it’s a culinary celebration of all things comforting and delicious, perfectly fused into one incredible meal. Imagine taking the hearty, savory goodness of a classic cheeseburger, complete with crispy bacon and perfectly seasoned beef, and marrying it with the irresistible creamy texture of your favorite pasta bake. This innovative recipe transforms beloved comfort food staples into an exciting, family-friendly sensation that is bound to become a regular in your dinner rotation.
Why This Dish Redefines Comfort Food
While this particular amalgamation doesn’t trace back centuries, its origins lie in the modern desire to elevate familiar flavors and create dishes that truly satisfy the soul. It embodies the spirit of American diner cuisine reimagined for the home cook – offering that indulgent, restaurant-quality taste without leaving your kitchen. People absolutely adore this dish because it delivers on every front: the rich umami of beef, the smoky crunch of bacon, the luxurious creaminess of melted cheese, all coating tender pasta. It’s the ultimate one-pot wonder that promises maximum flavor with minimal fuss.
I find that this Loaded Beef Bacon Cheeseburger Pasta is the ideal answer for those evenings when you crave something truly satisfying, offering a delightful combination of textures and tastes that appeal to every palate. Get ready to dive into a bowl of pure comfort!
Ingredients:
- 1 pound (450g) lean ground beef (80/20 blend works beautifully for flavor without excessive grease)
- 8 ounces (about 1 cup) uncooked elbow macaroni, or your favorite small pasta shape
- 6-8 slices thick-cut bacon, diced
- 1 large yellow onion, finely diced
- 2 cloves garlic, minced
- 1 tablespoon olive oil (for browning beef, if needed)
- 2 tablespoons unsalted butter
- 2 tablespoons all-purpose flour
- 2 cups whole milk, warmed slightly (this helps prevent lumps)
- 1 cup beef broth (low sodium preferred)
- 1/2 cup ketchup
- 2 tablespoons yellow mustard
- 1 tablespoon Worcestershire sauce
- 1 teaspoon smoked paprika
- 1/2 teaspoon onion powder
- 1/2 teaspoon garlic powder
- 1/4 teaspoon cayenne pepper (optional, for a little kick!)
- Salt and freshly ground black pepper, to taste
- 2 cups (about 8 ounces) shredded sharp cheddar cheese
- 1 cup (about 4 ounces) shredded Monterey Jack cheese (for extra meltiness!)
- 1/2 cup dill pickle relish (or finely chopped dill pickles)
- 1/4 cup chopped fresh parsley or chives, for garnish
- Optional toppings: extra crispy bacon bits, chopped tomatoes, shredded lettuce, a drizzle of your favorite burger sauce
Equipment You’ll Need:
- Large Dutch Oven or Deep Skillet: This will be your workhorse for browning the beef, making the sauce, and combining everything. A heavy-bottomed pan ensures even heat distribution and prevents sticking.
- Medium Pot: Essential for boiling your pasta to al dente perfection.
- Whisk: Crucial for making a smooth roux and incorporating the cheese into your luscious sauce.
- Wooden Spoon or Spatula: For stirring, breaking up beef, and scraping the bottom of the pan.
- Measuring Cups and Spoons: Accuracy is key for a perfectly balanced flavor profile in your Loaded Beef Bacon Cheeseburger Pasta.
- Colander: For draining the pasta once it’s cooked.
- Cheese Grater: While pre-shredded cheese is convenient, freshly shredded cheese melts much more smoothly and tastes superior. Trust me on this one!
Let’s Get Cooking: Preparing Your Loaded Beef Bacon Cheeseburger Pasta
Get ready to create a truly comforting and incredibly flavorful dish! This Loaded Beef Bacon Cheeseburger Pasta is going to be a new family favorite, I promise. We’re going to layer all those classic burger flavors into a creamy, dreamy pasta dish.
Phase 1: Preparing the Beef and Bacon
- Crisp Up the Bacon: In your large Dutch oven or deep skillet, cook the diced bacon over medium heat until it’s wonderfully crispy. This usually takes about 8-10 minutes. As the bacon cooks, the fat will render out, which is exactly what we want! Once crispy, use a slotted spoon to transfer the bacon bits to a paper towel-lined plate. Reserve about 2 tablespoons of the rendered bacon fat in the skillet. This bacon fat is pure flavor gold!
- Brown the Ground Beef: If you feel there isn’t quite enough bacon fat in the pan (about 2 tablespoons is ideal), add a tiny drizzle of olive oil. Increase the heat to medium-high. Add your ground beef to the skillet, breaking it apart with your wooden spoon. Cook, stirring occasionally, until it’s beautifully browned all over, about 7-10 minutes. Make sure there are no pink spots left! Once cooked, carefully drain any excess grease from the pan, leaving just a tiny bit for flavor.
- Sauté Aromatics: Reduce the heat to medium. Add the finely diced yellow onion to the pan with the browned beef. Cook, stirring frequently, until the onion softens and becomes translucent, which should take about 5-7 minutes. Next, add the minced garlic and cook for just another minute until fragrant. Be careful not to burn the garlic, as it can turn bitter. Season the beef and onion mixture generously with salt and freshly ground black pepper at this stage.
- Combine and Set Aside: Once the beef, onion, and garlic are cooked and fragrant, remove the entire mixture from the skillet and set it aside in a bowl. You can leave a tiny bit of fond (the browned bits on the bottom) in the pan; it will add even more depth of flavor to our sauce.
Phase 2: Cooking the Pasta
- Boil the Water: While you’re working on the beef and bacon, bring a large pot of salted water to a rolling boil. Don’t skip the salt! It’s your only chance to season the pasta itself.
- Cook the Macaroni: Add the elbow macaroni to the boiling water and cook according to package directions until it’s al dente. This typically means it’s cooked through but still has a slight bite to it, usually around 7-9 minutes. Under-cooking it slightly is better than over-cooking, as it will continue to cook a bit in the sauce.
- Drain and Rinse (Optional): Once cooked, drain the pasta thoroughly in a colander. I usually give it a quick rinse with cold water if I’m not immediately adding it to the sauce, just to stop the cooking process and prevent it from sticking, but for this recipe, you can add it directly while warm.
Phase 3: Crafting the Cheesy Sauce
Now for the heart of our Loaded Beef Bacon Cheeseburger Pasta – the incredibly creamy and flavorful cheese sauce!
- Make a Roux: In the same large Dutch oven or skillet (no need to clean it!), melt the 2 tablespoons of unsalted butter over medium heat. Once the butter is melted and bubbly, sprinkle in the 2 tablespoons of all-purpose flour. Whisk continuously for 1-2 minutes until a pale, golden paste forms. This is your roux, the base that will thicken our sauce. Cooking it for a minute or two helps cook out the raw flour taste.
- Whisk in Liquids: Gradually, and I mean gradually, whisk in the warmed whole milk. Add a small stream at a time, whisking vigorously after each addition to ensure there are no lumps. Once all the milk is incorporated and the sauce begins to thicken, slowly whisk in the beef broth. Continue to whisk until the sauce is smooth and creamy.
- Add the Burger Flavors: Stir in the ketchup, yellow mustard, Worcestershire sauce, smoked paprika, onion powder, garlic powder, and the optional cayenne pepper. Mix everything really well until all the spices and condiments are fully incorporated and the sauce has a uniform color. Let it gently simmer for about 2-3 minutes to allow the flavors to meld and the sauce to thicken slightly more.
- Melt the Cheese: Reduce the heat to low. This is a crucial step for a smooth sauce. Gradually whisk in the shredded sharp cheddar and Monterey Jack cheeses, a handful at a time. Keep stirring until each addition has fully melted and the sauce is wonderfully smooth and glossy. This gradual melting prevents the cheese from clumping and ensures a silky texture. Do not let the sauce boil once the cheese is added, as this can make it grainy. Season with salt and pepper to taste; remember the cheese is salty, so taste before adding too much.
Phase 4: Bringing It All Together – The Assembly
This is where our Loaded Beef Bacon Cheeseburger Pasta truly comes to life!
- Combine Ingredients: Return the cooked ground beef and onion mixture to the skillet with the cheese sauce. Add the drained elbow macaroni and the dill pickle relish (or finely chopped dill pickles).
- Stir Until Coated: Gently stir everything together until the pasta, beef, and pickles are evenly coated in that incredible, cheesy sauce. Ensure all the flavors are distributed.
- Add Bacon (Almost All of It): Stir in most of the crispy bacon bits you set aside earlier, reserving a small handful for garnish.
- Heat Through: Allow the mixture to gently simmer on low heat for another 2-3 minutes, stirring occasionally, just to ensure everything is heated through and the flavors have a chance to fully marry. The sauce will continue to thicken slightly as it sits.
Phase 5: The Finishing Touches and Serving
- Taste and Adjust: Give your Loaded Beef Bacon Cheeseburger Pasta a final taste. Adjust seasonings if needed – perhaps a little more salt, pepper, or a pinch of cayenne for extra zing.
- Garnish and Serve: Ladle generous portions into bowls. Garnish each serving with the remaining crispy bacon bits and a sprinkle of fresh chopped parsley or chives. For an authentic “burger” experience, you could even top it with a tiny amount of fresh chopped tomatoes, shredded lettuce, or an extra drizzle of burger sauce if you like.
- Enjoy Immediately: This dish is best enjoyed fresh off the stove while the sauce is at its creamiest. Get ready for an explosion of classic burger flavors in every bite!
Tips for the Ultimate Loaded Beef Bacon Cheeseburger Pasta
To make your Loaded Beef Bacon Cheeseburger Pasta absolutely unforgettable, here are a few of my personal tips:
- Freshly Grated Cheese is King: I can’t stress this enough! Pre-shredded cheese often contains anti-caking agents that can make your sauce gritty. Taking a few extra minutes to grate your own cheese will result in a much smoother, richer, and more luxurious sauce. It really makes a difference in this specific recipe.
- Warm Your Milk: When adding milk to your roux, warming it slightly first can help prevent lumps and makes for a silkier sauce. You don’t need to scald it, just microwave it for 30-60 seconds until it’s lukewarm.
- Don’t Rush the Roux: Cooking your butter and flour mixture (the roux) for a full 1-2 minutes helps cook out the raw flour taste, which can otherwise make your sauce taste starchy. This brief cooking period also helps the sauce thicken more effectively.
- Season in Layers: Season your beef as it cooks, season your sauce as you build it, and then do a final taste test at the end. Layering your seasoning ensures every component of your Loaded Beef Bacon Cheeseburger Pasta is flavorful.
- Spice It Up (or Down!): If you love a little heat, don’t shy away from the cayenne pepper. You can always add more to taste. If you’re serving little ones or prefer a milder dish, you can omit it entirely. A pinch of red pepper flakes also works wonders for a subtle kick.
- Pickle Power: The dill pickle relish is a game-changer here, providing that essential tangy, briny note that defines a cheeseburger. If you don’t have relish, finely dicing a couple of dill pickles will work just as well. Don’t skip this ingredient, as it balances the richness of the cheese and beef beautifully.
- Customize Your Cheese Blend: While cheddar and Monterey Jack are my go-to, feel free to experiment with other melting cheeses. A little Colby Jack or even a tiny bit of American cheese can enhance the classic burger flavor and melt beautifully. Just ensure they are good melting cheeses.
Storage and Reheating Instructions
While this Loaded Beef Bacon Cheeseburger Pasta is definitely best enjoyed fresh, you might find yourself with delicious leftovers! Here’s how to handle them:
- Cool Completely: Before storing, allow any leftover pasta to cool down to room temperature. This usually takes about 30-45 minutes. Avoid leaving it out for more than two hours.
- Airtight Container: Transfer the cooled pasta to an airtight container. This will help maintain its freshness and prevent it from drying out in the refrigerator.
- Refrigeration: Store the container in the refrigerator for up to 3-4 days. The sauce may thicken considerably as it chills, which is completely normal.
-
Reheating on the Stovetop (Recommended):
- For best results, reheat your Loaded Beef Bacon Cheeseburger Pasta on the stovetop.
- Place the desired portion in a saucepan or skillet over medium-low heat.
- Add a splash or two of milk or beef broth (about 1-2 tablespoons per serving) to help loosen the sauce and restore its creamy texture.
- Stir gently and continuously until the pasta is heated through and the sauce is smooth again. Do not let it boil vigorously, as this can cause the cheese to separate.
-
Reheating in the Microwave:
- If you’re short on time, the microwave is an option, but be aware the texture might not be as ideal.
- Place a single serving in a microwave-safe bowl.
- Add a tablespoon of milk or broth and loosely cover the bowl (you can use a microwave-safe lid or a damp paper towel).
- Heat on 50% power for 1-2 minutes, stir, then continue heating in 30-second intervals until warmed through, stirring after each interval. This gentler heating helps prevent the cheese from becoming oily.
- Freezing: I generally don’t recommend freezing this dish. Dairy-based sauces, especially cheese sauces, can sometimes separate or become grainy when thawed and reheated. The pasta might also become overly soft. If you absolutely must, freeze in an airtight container for up to 1 month, but be prepared for a potential change in texture upon reheating.
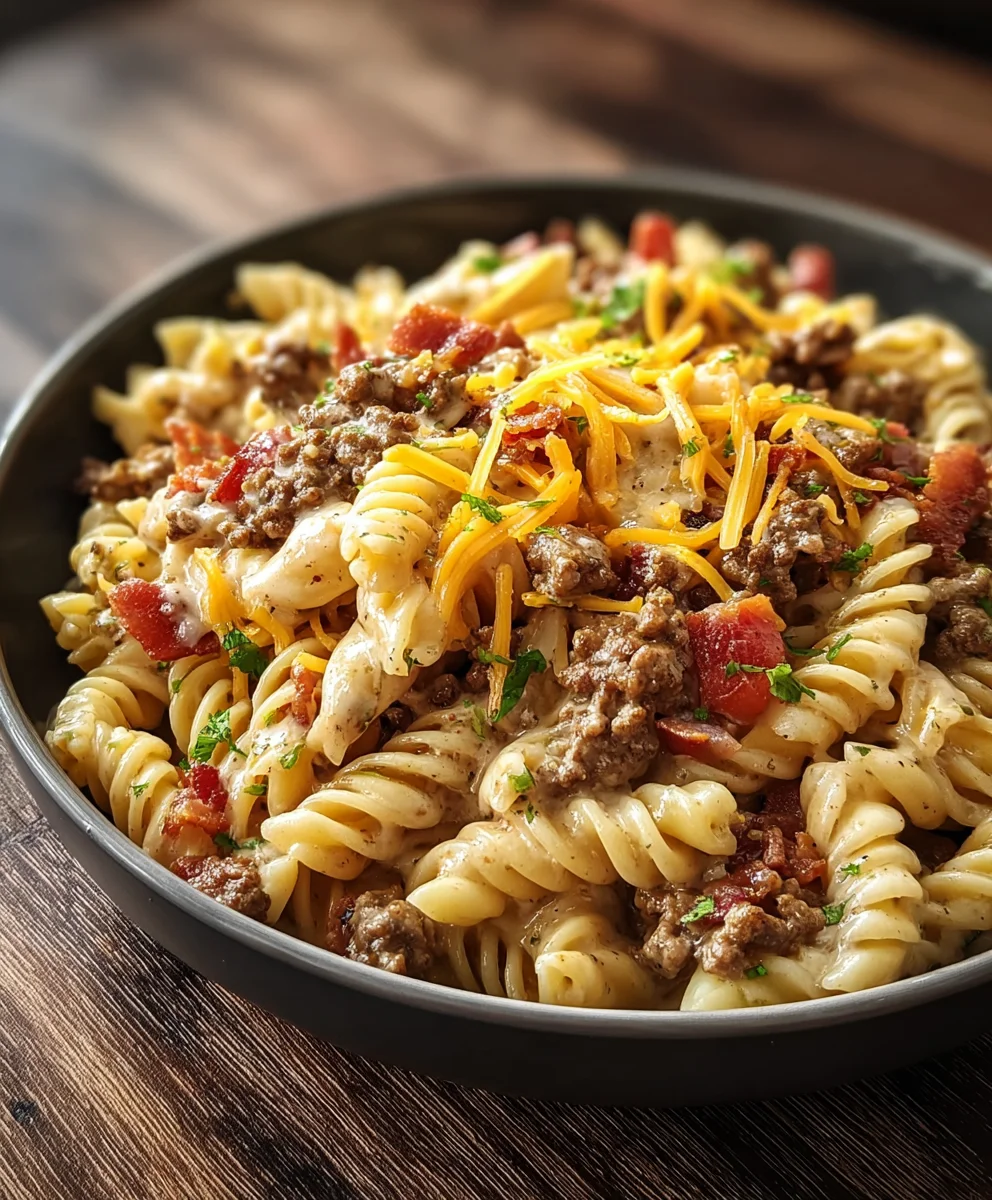
Loaded Beef Bacon Cheeseburger Pasta
Loaded Beef Bacon Cheeseburger Pasta is a culinary celebration of comforting and delicious flavors fused into one incredible meal. This innovative recipe combines the hearty, savory goodness of a classic cheeseburger with crispy beef bacon and perfectly seasoned beef, marrying it with the irresistible creamy texture of your favorite pasta bake for an exciting, family-friendly sensation.
Ingredients
-
1 pound lean ground beef
-
8 ounces elbow macaroni
-
6-8 slices thick-cut beef bacon, diced
-
1 large yellow onion, diced
-
2 cloves garlic, minced
-
1 tablespoon olive oil (optional)
-
2 tablespoons unsalted butter
-
2 tablespoons all-purpose flour
-
2 cups whole milk, warmed
-
1 cup low-sodium beef broth
-
1/2 cup ketchup
-
2 tablespoons yellow mustard
-
1 tablespoon Worcestershire sauce
-
1 teaspoon smoked paprika
-
1/2 teaspoon onion powder
-
1/2 teaspoon garlic powder
-
1/4 teaspoon cayenne pepper (optional)
-
Salt and black pepper, to taste
-
2 cups shredded sharp cheddar cheese
-
1 cup shredded Monterey Jack cheese
-
1/2 cup dill pickle relish
-
1/4 cup chopped fresh parsley or chives (for garnish)
-
Optional toppings: extra beef bacon bits, chopped tomatoes, shredded lettuce, burger sauce
Instructions
-
Step 1
Cook diced beef bacon in a large skillet until crispy. Remove bacon, reserving 2 tablespoons fat. Brown ground beef in the skillet. Drain excess grease. Add diced onion and minced garlic to the beef; cook until softened and fragrant. Season with salt and pepper. Remove beef mixture from skillet and set aside. -
Step 2
Cook macaroni in a large pot of salted boiling water until al dente. Drain well. -
Step 3
In the same skillet, melt butter. Whisk in flour for 1-2 minutes to form a roux. Gradually whisk in warmed milk and beef broth until smooth. Stir in ketchup, mustard, Worcestershire sauce, smoked paprika, onion powder, garlic powder, and optional cayenne. Simmer 2-3 minutes. Reduce heat to low. Gradually whisk in shredded cheddar and Monterey Jack cheeses until melted and smooth. Season to taste. -
Step 4
Return the cooked beef mixture to the cheese sauce. Add drained macaroni and dill pickle relish. Stir in most of the crispy beef bacon, reserving some for garnish. Gently simmer for 2-3 minutes until heated through. -
Step 5
Taste and adjust seasonings. Serve hot, garnished with reserved beef bacon bits and fresh parsley or chives.
Important Information
Nutrition Facts (Per Serving)
It is important to consider this information as approximate and not to use it as definitive health advice.
Allergy Information
Please check ingredients for potential allergens and consult a health professional if in doubt.


Leave a Comment