
Giant Chewy Chocolate Chip Cookies_28 – Ah, the mere mention of those words conjures up images of golden-brown perfection, rich chocolate, and an irresistible aroma that instantly transports you back to simpler, sweeter times. Few treats hold such a universally cherished spot in our hearts, and today, I am thrilled to share a recipe that takes this beloved classic to an entirely new level of indulgence. Prepare to experience the ultimate cookie, a culinary masterpiece that promises to delight with every single bite.
The story of the chocolate chip cookie is a charming one, originating in the 1930s at the Toll House Inn in Massachusetts. Ruth Graves Wakefield, the owner, famously added chopped chocolate to her butter cookie dough, expecting it to melt seamlessly. To her delightful surprise, the chocolate chips held their form, creating what would become an iconic American dessert. From humble beginnings, this simple cookie has evolved into a global symbol of comfort, celebration, and pure, unadulterated joy.
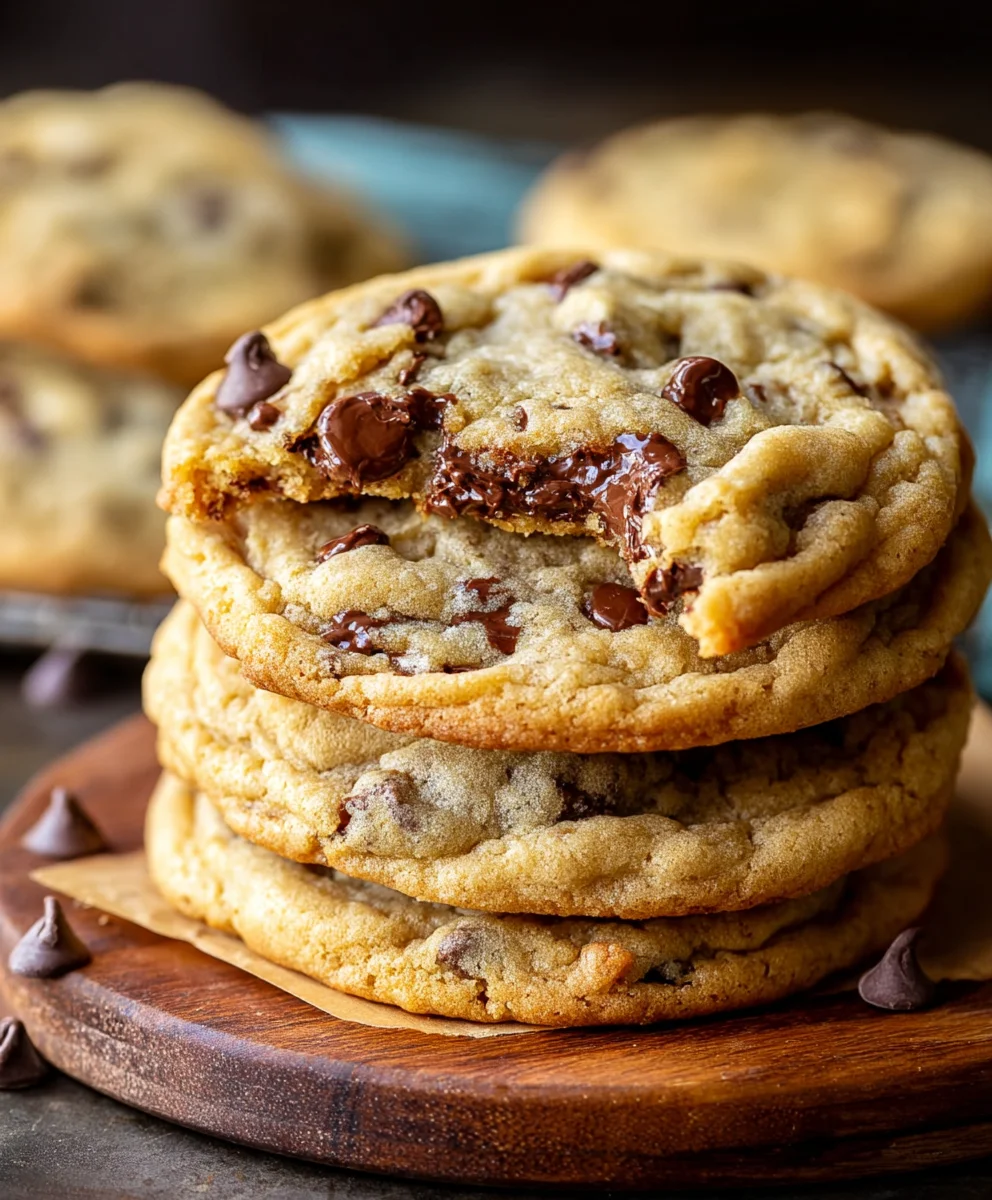
What is it about a perfectly baked chocolate chip cookie that makes us weak at the knees? It’s that magical combination of crisp, buttery edges giving way to a soft, yielding, and deeply chewy center, studded with generous pockets of melted, decadent chocolate. Our quest today is to master the art of the Giant Chewy Chocolate Chip Cookies_28, ensuring every bite delivers that ultimate textural contrast and an explosion of classic flavor that is simply unforgettable. Get ready to bake a batch that will undoubtedly become your new go-to recipe for impressing friends, delighting family, or simply treating yourself to an extraordinary moment of bliss.
Ingredients:
- Unsalted Butter: 1 cup (2 sticks or 226g), melted and cooled slightly. Using unsalted butter gives us more control over the salt content, ensuring our cookies are perfectly balanced.
- Granulated Sugar: 1 ½ cups (300g). This provides the essential sweetness and contributes to the crisp edges of our Giant Chewy Chocolate Chip Cookies_28.
- Light Brown Sugar: 1 ½ cups (300g), packed. The brown sugar is crucial for that deep, molasses flavor and contributes significantly to the chewiness and moisture of the cookies. Make sure it’s firmly packed!
- Large Eggs: 2, at room temperature, plus 1 additional egg yolk. Using an extra yolk adds richness and helps create an even chewier texture without making the cookies cakey.
- Pure Vanilla Extract: 2 teaspoons. Don’t skimp on the vanilla! It’s a foundational flavor in any great chocolate chip cookie.
- All-Purpose Flour: 3 ½ cups (420g). For the best results, I always recommend weighing your flour for accuracy.
- Baking Soda: 1 ½ teaspoons. This helps the cookies spread and gives them a slight lift.
- Salt: 1 teaspoon. A good pinch of salt is vital to balance the sweetness and enhance all the other flavors.
- Chocolate Chips or Chunks: 2 ½ cups (about 425g) total. I love using a mix of different chocolates for complex flavor and texture – a combination of semi-sweet, milk, and even some dark chocolate chunks works beautifully. High-quality chocolate makes all the difference!
- Optional Flaky Sea Salt: For sprinkling on top before baking. This is a personal touch that elevates the flavor profile, adding a delightful crunch and enhancing the sweetness of the chocolate.
Phase 1: Preparing Your Workspace and Dry Ingredients
Alright, let’s get this baking party started! Before we dive into mixing, a little prep work goes a long way to ensure a smooth and successful baking experience. Trust me, it makes the whole process much more enjoyable when you’re not scrambling for tools or ingredients mid-recipe.
- Preheat Your Oven and Line Your Baking Sheets: First things first, go ahead and preheat your oven to 375°F (190°C). It’s important that your oven is at the correct temperature before the cookies go in, as this affects their spread and texture. While the oven warms up, grab two large baking sheets. I always line mine with parchment paper or silicone baking mats. This prevents sticking, ensures even baking, and makes for super easy cleanup – which is always a win in my book! You’ll appreciate not having to scrape cookies off the pan later.
- Measure and Sift Your Dry Ingredients: In a medium bowl, combine your 3 ½ cups of all-purpose flour, 1 ½ teaspoons of baking soda, and 1 teaspoon of salt. I highly recommend sifting these dry ingredients together. While it might seem like an extra step, sifting helps to aerate the flour, which makes the cookies lighter, and ensures that the baking soda and salt are evenly distributed throughout the mixture. This prevents any pockets of unmixed ingredients, giving you a consistently delicious cookie every time. Just a quick whisk with a fork works well if you don’t have a sifter. Set this bowl aside for a moment.
- Prepare Your Chocolate: If you’re using chocolate bars, now is the time to chop them into varying sizes of chunks. This creates wonderful pockets of melted chocolate throughout the cookie – some large gooey puddles, some smaller flecks. If you’re using chips, simply have them ready. I often combine semi-sweet chips with a bar of dark chocolate, roughly chopped. The contrast in sweetness and bitterness is just divine for these Giant Chewy Chocolate Chip Cookies_28.
- Bring Eggs to Room Temperature: If you haven’t already, make sure your eggs and extra egg yolk are at room temperature. This is a crucial step that often gets overlooked! Room temperature eggs emulsify much better with the butter and sugar, creating a smoother, more homogenous dough. This leads to a better overall texture in your finished cookies. If you’re in a hurry, you can place the eggs in a bowl of warm (not hot!) water for 5-10 minutes.
Phase 2: Creaming Wet Ingredients and Building the Dough
This is where the magic really starts to happen! The way we combine our wet ingredients is paramount to achieving that coveted chewy texture and rich flavor in our Giant Chewy Chocolate Chip Cookies_28. Pay close attention to the details here, as they make a significant difference.
- Melt the Butter: In a large, microwave-safe bowl or a saucepan over low heat, melt your 1 cup (2 sticks) of unsalted butter. Once completely melted, let it cool for about 5-10 minutes. It’s important that the butter isn’t hot when you add the sugars. Warm is fine, but hot butter can start to cook the sugars, which we don’t want. Melting the butter, rather than just softening it, contributes significantly to the chewiness of the cookie and helps prevent them from spreading too thin.
- Combine Butter and Sugars: Once your butter has cooled slightly, add the 1 ½ cups of granulated sugar and 1 ½ cups of packed light brown sugar to the bowl with the melted butter. Using a stand mixer fitted with the paddle attachment, or a large bowl with a hand mixer, beat the butter and sugars together on medium speed for about 2-3 minutes. You want this mixture to be light in color and fluffy. It should also be well-combined and almost creamy in texture. This creaming process incorporates air, which helps give the cookies their structure and contributes to a delightful chew.
- Incorporate Eggs and Vanilla: With the mixer still running on medium-low, add your two large eggs one at a time, mixing well after each addition until fully incorporated. Then, add the extra egg yolk, followed by the 2 teaspoons of pure vanilla extract. Continue to beat the mixture for another 1-2 minutes. The mixture should appear smooth, glossy, and well emulsified. Scrape down the sides of the bowl with a rubber spatula occasionally to ensure everything is evenly mixed. This step is critical for a uniform dough.
- Gradually Add Dry Ingredients: Reduce your mixer speed to low. Gradually add the sifted dry ingredients (flour, baking soda, and salt) to the wet mixture, a third at a time. Mix only until just combined. It’s absolutely crucial not to overmix at this stage! Overmixing develops the gluten in the flour too much, which can lead to tough, dry cookies instead of the soft and chewy ones we’re aiming for. Stop mixing as soon as you see no more streaks of flour. A few flecks of unmixed flour are better than overmixing.
- Fold in the Chocolate Chips: Remove the bowl from the mixer and, using a sturdy rubber spatula or your hands, gently fold in your 2 ½ cups of chocolate chips and chunks. Distribute them evenly throughout the dough. I like to reserve a small handful of chocolate chips to press onto the tops of the cookie dough balls just before baking; this makes for gorgeous, bakery-style cookies! This step is purely manual to avoid overworking the dough, which is something we want to prevent at all costs for that perfect chewy texture.
Phase 3: The Crucial Chilling Process for Giant Chewy Chocolate Chip Cookies_28
This phase is often tempting to skip, but I implore you, do not! Chilling the dough is arguably the most important step for achieving truly magnificent Giant Chewy Chocolate Chip Cookies_28. It’s what transforms good cookies into extraordinary ones.
- Chill the Dough: Cover the bowl with plastic wrap and refrigerate the cookie dough for at least 2 hours. However, for the absolute best flavor and texture, I highly recommend chilling it for 24-48 hours. What does chilling do? It allows the flour to fully hydrate, which reduces spreading and creates a thicker, chewier cookie. More importantly, it allows the flavors to meld and deepen. The sugars caramelize slightly, and the butter solids firm up, ensuring a much richer, more complex taste. This also prevents the cookies from spreading too much in the oven, keeping them thick and gloriously chewy. This patience will be rewarded, I promise!
- Scoop and Shape the Dough: Once your dough has had its well-deserved chill time, take it out of the refrigerator. It will be quite firm. Using a large cookie scoop (about ¼ cup or 3-4 tablespoons of dough per cookie), scoop out generous portions of dough. For truly Giant Chewy Chocolate Chip Cookies_28, I typically aim for dough balls that are about 2-3 inches in diameter. Roll them gently between your palms to form neat, uniform balls.
- Prepare for Baking: Place the dough balls onto your prepared baking sheets, leaving plenty of space between each one – about 2-3 inches. These cookies will spread significantly, so don’t overcrowd the pan. I usually bake no more than 6 cookies per standard large baking sheet. If you reserved some chocolate chips earlier, now is the time to gently press a few extra pieces onto the tops of the dough balls. This makes them look incredibly appealing straight out of the oven.
- Optional Second Chill: If your kitchen is particularly warm, or if you’re baking in batches and your dough has been out for a while, I sometimes like to pop the scooped dough balls back into the fridge (on the baking sheets) for another 15-20 minutes before baking. This extra chill ensures they go into the hot oven nice and cold, minimizing spread even further and maximizing chewiness.
Phase 4: Baking Your Magnificent Giant Chewy Chocolate Chip Cookies_28
This is the moment we’ve all been waiting for! Baking these cookies to perfection requires a little bit of watchful waiting and understanding the signs of doneness. We’re looking for that sweet spot that results in a crispy edge and a wonderfully gooey, chewy center.
- Bake in Batches: Place one baking sheet into your preheated 375°F (190°C) oven. It’s always best to bake one sheet at a time, especially with larger cookies, to ensure even heat distribution and consistent results. If you must bake two sheets at once, make sure your oven has excellent circulation and rotate the trays halfway through baking.
- Baking Time: Bake for 12-16 minutes. The exact baking time will vary depending on your oven and the size of your cookies, so keep a close eye on them! For me, the sweet spot is usually around 13-14 minutes for my giant cookies. You’re looking for the edges to be golden brown and set, but the centers should still look slightly underbaked and very soft, almost puffy. They will continue to cook and set as they cool on the baking sheet. This slightly underbaked center is the secret to their incredible chewiness.
- Rotate and Monitor: Around the 7-8 minute mark, if you notice uneven browning, rotate your baking sheet 180 degrees. This helps to ensure all your cookies bake uniformly. Remember, every oven is a little different, so get to know yours! Don’t be afraid to take a peek, but try not to open the oven door too frequently, as this can cause temperature fluctuations.
- The “Underbaked” Principle: It’s far better to err on the side of slightly underbaking these cookies than overbaking them. Overbaked chocolate chip cookies become dry and crumbly, losing that glorious chew. When you pull them out, they might seem too soft, almost like they’re still raw in the middle. Don’t worry, this is exactly what we want! They will firm up as they cool.
- Check for Doneness: If you’re unsure, gently tap the side of a cookie. If it’s very wobbly in the center, it might need another minute. If it’s just slightly soft and the edges are beautifully browned, it’s ready! The residual heat of the pan will finish the job.
Phase 5: Cooling and Enjoying Your Perfect Giant Chewy Chocolate Chip Cookies_28
You’re almost there! The cooling process is just as important as the baking. Resist the urge to dive in immediately (though I know it’s hard!). Proper cooling ensures your cookies achieve their final perfect texture and don’t fall apart.
- Cool on the Baking Sheet: Once out of the oven, let the cookies cool on the hot baking sheet for about 10-15 minutes. This is a critical step! During this time, the residual heat from the pan will continue to cook the centers slightly and allow the cookies to firm up and set. If you try to move them too soon, they’ll likely break apart because they are so soft and delicate when hot. This waiting period is crucial for developing that ideal chewy texture and ensuring they hold their shape.
- Transfer to a Wire Rack: After the initial cooling period on the baking sheet, carefully transfer the cookies to a wire cooling rack to cool completely. Cooling on a wire rack allows air to circulate around all sides of the cookies, preventing them from getting soggy bottoms. This also helps them firm up fully and ensures their beautiful crispy edges remain intact.
- The Irresistible First Bite: Once cooled, or even while still slightly warm (my favorite way to enjoy them!), grab one of these magnificent Giant Chewy Chocolate Chip Cookies_28. Experience the crisp edge giving way to a soft, gooey, chocolate-filled center. The blend of sugars, the hint of vanilla, and the varying textures of chocolate create an unparalleled flavor experience.
- Storage: If by some miracle you have any leftover cookies, store them in an airtight container at room temperature for up to 3-4 days. For an extra treat, you can warm them briefly in the microwave for 10-15 seconds to bring back that fresh-out-of-the-oven gooeyness. They also freeze beautifully for longer storage – just thaw at room temperature or warm gently.
- Optional Enhancements: Feel free to get creative with your additions! A sprinkle of flaky sea salt on top before baking really elevates the flavors and provides a wonderful salty-sweet contrast. You could also experiment with different types of chocolate, like butterscotch chips, white chocolate chunks, or even a mix of nuts like pecans or walnuts for added crunch. But honestly, these Giant Chewy Chocolate Chip Cookies_28 are perfect just as they are.
- Share the Joy (or Don’t!): These cookies are perfect for sharing with friends and family, bringing to a potluck, or simply enjoying all by yourself with a cold glass of milk. They are truly a crowd-pleaser and embody everything wonderful about a classic, comforting chocolate chip cookie, just on a grander scale! Enjoy every single bite of your homemade giant chewy chocolate chip cookies.

Conclusion:
So, there you have it – the journey to baking what I truly believe are the ultimate chocolate chip cookies. After countless batches, tweaking every ingredient ratio, and experimenting with various techniques, I’m incredibly proud to share this recipe with you. Why is it a must-try, you ask? Well, it’s more than just a cookie; it’s an experience. Imagine a cookie that boasts an irresistibly crisp edge, giving way to a wonderfully gooey, almost underbaked center that stretches and pulls with every bite. The chocolate isn’t just melted; it forms glorious, molten puddles throughout, creating an intense flavor burst that is perfectly balanced by the sweet, buttery dough and that essential hint of sea salt. This isn’t just another cookie recipe you’ll try once and forget. No, this one is designed to become your go-to, your secret weapon for impressing guests, comforting loved ones, or simply indulging in a moment of pure bliss. It’s the kind of cookie that makes you close your eyes and savor each mouthful, a testament to the fact that sometimes, the simplest pleasures are truly the best. I’ve heard so many people say they struggle to find that perfect balance of chewiness and richness, that elusive combination that separates a good cookie from an unforgettable one. I genuinely believe this recipe delivers on all fronts, providing that quintessential cookie experience you’ve been searching for.
The beauty of these cookies extends beyond their incredible taste; it’s also in their versatility. While they are undeniably divine straight from the oven, still warm and with the chocolate gloriously molten, don’t underestimate their appeal at room temperature. The texture evolves, becoming even chewier and more substantial, making them perfect for on-the-go snacking. For a truly classic pairing, nothing beats a tall, frosty glass of cold milk to cut through the richness and enhance the flavor. If you’re feeling a bit more indulgent, try crumbling one of these beauties over a scoop of your favorite vanilla bean or salted caramel ice cream; the contrast in temperatures and textures is simply divine, transforming a simple dessert into something truly extraordinary. They also make fantastic companions to your morning coffee or afternoon tea, offering a delightful pick-me-up. And here’s a tip I love: wrap a few up in pretty parchment paper and tie with twine for an incredibly thoughtful and much-appreciated homemade gift. Who wouldn’t be thrilled to receive a package of these delectable treats?
But wait, there’s more! This recipe is also incredibly adaptable, allowing you to tailor it to your personal preferences. While I swear by the blend of semi-sweet and dark chocolate chunks for optimal flavor depth and melt, feel free to experiment. You could try adding white chocolate chips for a different sweetness profile, or even milk chocolate if you prefer a sweeter, creamier bite. For an extra layer of texture and nutty flavor, consider stirring in a handful of toasted pecans or walnuts. If you’re a fan of a little crunch, a sprinkle of toffee bits can be a delightful addition. A pinch of espresso powder stirred into the dry ingredients (about half a teaspoon) won’t make your cookies taste like coffee, but it will subtly deepen the chocolate flavor, making it even more pronounced and complex. For those who love a hint of spice, a tiny dash of cinnamon or even a whisper of cayenne pepper (just a pinch!) can add an intriguing warmth without overpowering the classic cookie taste. The possibilities are truly endless once you have this foundational, flawless dough.
So, my dear fellow bakers and dessert enthusiasts, I implore you: don’t just read about these magnificent cookies. Roll up your sleeves, gather your ingredients, and embark on this delicious adventure yourself. I promise you, the aroma filling your kitchen alone will be worth the effort. There’s something profoundly satisfying about pulling a tray of perfectly golden, delightfully puffy cookies from the oven, knowing you’ve created something truly special. These Giant Chewy Chocolate Chip Cookies_28 are more than just a treat; they’re a joyful experience waiting to happen. Once you’ve baked your batch, I would absolutely love to hear about your experience. Did you stick to the original recipe, or did you venture into some exciting variations? How did your family and friends react to these irresistible morsels? Please, share your stories, your photos, and your tips in the comments section below or on social media. Your feedback and creations truly inspire me and the entire baking community. Let’s celebrate the magic of homemade cookies together!
Giant Chewy Chocolate Chip Cookies_28
Experience the ultimate cookie with this recipe for Giant Chewy Chocolate Chip Cookies. Enjoy crisp, buttery edges giving way to a soft, deeply chewy center, studded with generous pockets of melted chocolate.
Ingredients
-
2 ⅓ cups all-purpose flour
-
1 tsp baking soda
-
1 tbsp corn starch
-
½ tsp salt
-
1 tbsp vanilla extract
-
¾ cup unsalted butter, melted and cooled
-
1 cup brown sugar, packed
-
½ cup granulated sugar
-
1 large egg, room temperature
-
1 egg yolk, room temperature
-
1 ½ cups semi-sweet chocolate chips
Instructions
-
Step 1
Preheat oven to 375°F (190°C). Line baking sheets with parchment paper. In a medium bowl, sift together the flour, baking soda, corn starch, and salt. Ensure the egg and egg yolk are at room temperature. -
Step 2
Melt the unsalted butter and let it cool slightly until opaque. In a large bowl, using a mixer, beat the melted butter, packed brown sugar, and granulated sugar for 2-3 minutes until light and fluffy. Add the large egg, then the egg yolk, then the vanilla extract, beating well after each addition until the mixture is smooth and glossy. -
Step 3
Reduce mixer speed to low. Gradually add the sifted dry ingredients to the wet mixture, mixing only until just combined. Be careful not to overmix. Gently fold in the semi-sweet chocolate chips using a spatula. -
Step 4
Cover the bowl with plastic wrap and refrigerate the cookie dough for at least 2 hours. For the best flavor and texture, chilling for 24-48 hours is highly recommended. -
Step 5
Once chilled, scoop generous portions (about ¼ cup or 2-3 inches in diameter) of dough onto the prepared baking sheets, leaving ample space (2-3 inches) between each. Optionally, press a few extra chocolate chips onto the top of each dough ball. If your kitchen is warm, an optional 15-20 minute second chill of the scooped dough balls is recommended before baking. -
Step 6
Bake one sheet at a time in the preheated 375°F (190°C) oven for 12-16 minutes. The edges should be golden brown and set, but the centers should still look slightly underbaked and soft. Rotate the baking sheet halfway through baking if browning unevenly. Avoid overbaking to maintain chewiness. -
Step 7
Remove from oven and let the cookies cool on the hot baking sheet for 10-15 minutes to allow them to set. Carefully transfer them to a wire cooling rack to cool completely. Store any leftover cookies in an airtight container at room temperature for up to 3-4 days.
Important Information
Nutrition Facts (Per Serving)
It is important to consider this information as approximate and not to use it as definitive health advice.
Allergy Information
Please check ingredients for potential allergens and consult a health professional if in doubt.


Leave a Comment