
Homemade Raspberry Swirl Cheesecake Bites – the very name alone promises an experience of delicate, creamy indulgence, perfectly portioned for a moment of pure bliss. I’m absolutely thrilled to share with you a recipe that transforms a beloved classic dessert into an accessible, utterly irresistible treat. Cheesecake, a dessert with roots tracing back to ancient Greece, where it was famously served to athletes during the Olympic Games, has captivated palates for centuries, evolving into the rich, velvety confection we adore today. While the grandeur of a traditional large cheesecake holds its own revered place, there’s something uniquely charming and practical about these delightful bite-sized versions.
Why Everyone Loves These Bites
Here, we elevate that timeless appeal with the vibrant, tangy burst of fresh raspberries, artfully swirled through a luscious, smooth cream cheese base atop a crisp graham cracker crust. People adore these Homemade Raspberry Swirl Cheesecake Bites not just for their exquisite taste – that perfect harmony of sweet, tart, and creamy – but also for their delightful convenience and elegant presentation. They are effortlessly shareable, making them an ideal centerpiece for any gathering, a thoughtful gift, or simply a luxurious personal indulgence after a long day. Get ready to impress yourself and your loved ones with this truly special confection that brings gourmet dessert right into your kitchen.

Ingredients:
- For the Graham Cracker Crust:
- 1 ½ cups (approximately 180g) graham cracker crumbs (from about 10-12 full sheets) – I find that using good quality graham crackers makes a noticeable difference in the flavor of the crust. If you don’t have pre-crushed crumbs, simply pulse whole graham crackers in a food processor until fine.
- ¼ cup (50g) granulated sugar – This adds just the right amount of sweetness to complement the creamy cheesecake filling without being overly sugary.
- ½ cup (113g) unsalted butter, melted – Using unsalted butter allows you to control the overall saltiness of the dish, and melting it helps bind the crumbs perfectly.
- A pinch of salt – A tiny bit of salt enhances all the other flavors, making the crust taste richer and more balanced.
- For the Raspberry Swirl:
- 1 cup (125g) fresh or frozen raspberries – Both fresh and frozen work beautifully here. If using frozen, there’s no need to thaw them completely; they’ll break down quickly when heated.
- 2 tablespoons (25g) granulated sugar – You can adjust this amount based on the sweetness of your raspberries and your personal preference. Taste and adjust if needed!
- 1 tablespoon fresh lemon juice – This burst of citrus brightens the raspberry flavor and adds a wonderful tang that cuts through the richness of the cheesecake.
- ½ teaspoon cornstarch (optional, for a thicker swirl) – If you desire a more defined and less runny swirl, a little cornstarch mixed with a tiny bit of water will achieve this. I often use it for extra visual appeal.
- For the Cheesecake Filling:
- 3 (8-ounce / 226g each) blocks full-fat cream cheese, softened to room temperature – This is perhaps the most crucial ingredient for a truly smooth, lump-free cheesecake. Make sure it’s genuinely soft; I usually leave mine out for at least 2 hours.
- 1 cup (200g) granulated sugar – This amount creates a perfectly sweet cheesecake that harmonizes with the tart raspberry swirl.
- 2 large eggs, room temperature – Just like the cream cheese, room temperature eggs emulsify much better into the batter, preventing overmixing and ensuring a smooth texture.
- 1 teaspoon pure vanilla extract – Always use pure vanilla extract for the best flavor; it’s a cornerstone of classic cheesecake taste.
- ¼ cup (60ml) sour cream or full-fat Greek yogurt, room temperature – This ingredient adds an incredible depth of flavor, a slight tang, and contributes to the cheesecake’s characteristic moist and creamy texture.
- 1 tablespoon all-purpose flour – A little bit of flour acts as a stabilizer, helping to prevent cracks in the cheesecake as it bakes and cools, and gives it a subtle firmness that’s ideal for cutting into neat bites.
Equipment You’ll Need:
- 9×13 inch baking pan – I recommend a light-colored metal pan for more even baking.
- Parchment paper – Essential for easy removal of the cheesecake slab.
- Large mixing bowls (at least two) – You’ll need one for the crust and one for the cheesecake filling.
- Small saucepan – For preparing that beautiful raspberry swirl.
- Electric mixer (stand mixer with paddle attachment or a hand mixer) – Makes whipping the cream cheese a breeze!
- Rubber spatula – Indispensable for scraping down bowls and folding.
- Measuring cups and spoons – Accuracy is key in baking.
- Whisk – For combining dry ingredients and light mixing.
- Fine-mesh sieve (optional, but highly recommended for a seedless swirl) – If you prefer a perfectly smooth raspberry purée.
- Sharp knife or bench scraper – For those clean, precise cuts.
- Cutting board – A stable surface for slicing your finished bites.
- Tall glass – For holding hot water to warm your knife for clean cuts.
Preparing the Graham Cracker Crust for Your Homemade Raspberry Swirl Cheesecake Bites
- Preheat Your Oven and Prepare the Pan: First things first, let’s get that oven ready. Preheat your oven to 350°F (175°C). This ensures your oven is at the precise temperature when you put the crust in, which is critical for consistent results. While the oven preheats, take your 9×13 inch baking pan and line it with parchment paper. Make sure to leave an overhang on the longer sides – this little trick will be your best friend later, acting as handles to effortlessly lift the entire chilled cheesecake out of the pan. I sometimes spray a tiny bit of cooking spray on the bottom of the pan before laying the parchment down, just to keep it from sliding around while I’m pressing the crust.
- Combine Dry Crust Ingredients: In a medium-sized mixing bowl, measure out your graham cracker crumbs, ¼ cup of granulated sugar, and that crucial pinch of salt. Use a whisk or a fork to mix these dry ingredients together thoroughly. You want them to be perfectly combined, so every single crumb is coated evenly. This prevents any bland spots and ensures that delightful sweet-salty balance in every bite of your crust. I spend a moment here making sure it’s really well integrated.
- Add Melted Butter and Mix: Now for the binder! Pour the ½ cup of melted unsalted butter directly into the bowl with your graham cracker mixture. Using a rubber spatula, a sturdy fork, or even your clean hands, mix everything together until all the crumbs are evenly moistened. The mixture should resemble wet sand and, when you press a small amount between your fingers, it should hold its shape. If it still looks dry or powdery, you might need to add just another teaspoon or two of melted butter, but be cautious not to make it greasy. The goal is a cohesive, yet not oversaturated, base.
- Press the Crust into the Pan: Transfer the moistened graham cracker mixture into your prepared 9×13 inch baking pan. This is where you put some muscle in! Using the bottom of a flat-bottomed drinking glass, a dry measuring cup, or the palm of your hand, press the mixture down very firmly and evenly across the bottom of the pan. Pay special attention to the corners and edges to create a uniform, compact layer. A well-pressed crust is absolutely vital for making sure your crust doesn’t crumble when you go to cut your Homemade Raspberry Swirl Cheesecake Bites. Trust me, a sturdy foundation makes all the difference!
- Bake the Crust: Place the pan with the pressed crust into your preheated 350°F (175°C) oven and bake for 8-10 minutes. You’re looking for it to be lightly golden brown around the edges and wonderfully fragrant. Baking the crust beforehand serves a couple of important purposes: it helps to set the crust, making it sturdier, and it prevents it from becoming soggy once the creamy cheesecake filling is added. Once baked, remove it from the oven and set it aside to cool slightly on a wire rack while you prepare the other components. Don’t turn off your oven yet; we’ll need it again soon!
Crafting the Vibrant Raspberry Swirl
- Combine Raspberry Swirl Ingredients: In a small saucepan, combine your 1 cup of fresh or frozen raspberries, 2 tablespoons of granulated sugar, and 1 tablespoon of fresh lemon juice. If you’ve decided to use cornstarch for a thicker swirl, this is the moment to prepare it: mix the ½ teaspoon of cornstarch with about 1 teaspoon of cold water in a tiny bowl to create a smooth slurry, then stir this into the raspberry mixture in the saucepan. This prevents any lumps from forming later.
- Simmer and Thicken: Place the saucepan over medium heat. Bring the mixture to a gentle simmer, stirring frequently. As it heats up, the raspberries will naturally start to break down and release their gorgeous juices, creating a beautiful, jewel-toned sauce. Continue to simmer for about 5-7 minutes, or until the sauce has thickened slightly. If you’re using cornstarch, it will visibly thicken. The goal is a consistency that is pourable but still has some body, so it won’t completely meld into the cheesecake batter without creating those distinct swirls. I always watch it carefully to prevent scorching.
- Strain for Smoothness (Optional but Recommended): For an extra-luxurious, completely seedless raspberry swirl, carefully pour the warm raspberry mixture through a fine-mesh sieve set over a small, clean bowl. Using the back of a spoon or a rubber spatula, press firmly against the solids in the sieve to extract as much of that vibrant, seedless purée as possible. Discard the leftover seeds and pulp – they’ve given all their goodness! While this step is optional, I find it truly elevates the texture of the swirl, making these Homemade Raspberry Swirl Cheesecake Bites feel even more gourmet. If you prefer a more rustic look and don’t mind the seeds, you can certainly skip this part.
- Cool the Swirl: Once you have your beautiful raspberry purée, set it aside to cool completely. It’s really important that the swirl is no longer warm when you add it to your cheesecake batter. A warm swirl could potentially cook parts of your batter or affect the delicate texture of the cheesecake. If you’re in a bit of a hurry, you can pop the bowl of purée into the refrigerator for 10-15 minutes to speed up the cooling process. This perfectly prepared, cooled swirl is what will create those stunning patterns in your finished cheesecake bites.
Mixing the Creamy Cheesecake Filling
- Prepare the Cream Cheese: Before you do anything else, make absolutely certain your 3 blocks of full-fat cream cheese are truly at room temperature. They should feel very soft to the touch and yield easily when pressed. This step cannot be rushed! Place the softened cream cheese into a large mixing bowl or the bowl of your stand mixer fitted with the paddle attachment.
- Whip the Cream Cheese: Using an electric mixer, start beating the cream cheese on medium speed for about 2-3 minutes. Your goal here is to achieve an incredibly smooth, light, and completely lump-free consistency. It should look almost fluffy and ethereal. This is arguably the most critical step for achieving that signature silky-smooth cheesecake texture. Any lumps at this stage will unfortunately remain in your final product, so take your time and don’t skimp on this step! Remember to scrape down the sides and bottom of the bowl frequently with your rubber spatula to ensure everything is evenly whipped.
- Add Sugar: With the mixer on medium-low speed, gradually add the 1 cup of granulated sugar to the whipped cream cheese. Continue beating until the sugar is just combined and the mixture looks smooth and glossy. Be mindful not to overmix once the sugar is incorporated. Overmixing introduces too much air into the batter, which can lead to cracks in your cheesecake during baking and a less dense, more cake-like texture, rather than the rich, creamy consistency we’re aiming for.
- Incorporate Eggs, One at a Time: Now, add the 2 large room temperature eggs, one at a time. Beat on low speed until each egg is just incorporated into the batter before adding the next. This gentle approach ensures proper emulsification. It’s crucial not to overbeat after adding the eggs; excessive mixing at this stage is a common culprit for incorporating too much air, which can cause cracking and an undesirable texture. Make sure to scrape down the sides of the bowl after each egg addition to guarantee everything is fully blended. These delicate steps are absolutely essential for achieving the perfect, smooth texture in your Homemade Raspberry Swirl Cheesecake Bites.
- Mix in Remaining Wet Ingredients: Add the 1 teaspoon of pure vanilla extract and the ¼ cup of room temperature sour cream (or Greek yogurt) to the batter. Beat on low speed until these ingredients are just incorporated. The sour cream is a fantastic addition; it provides a wonderful tang that beautifully balances the richness of the cream cheese and significantly contributes to the cheesecake’s overall creaminess and moistness. Again, avoid overmixing.
- Gently Fold in Flour: Finally, sprinkle the 1 tablespoon of all-purpose flour evenly over the cheesecake batter. Gently mix on the lowest speed until just combined, or even better, switch to a rubber spatula and carefully fold it in by hand. The flour acts as a brilliant stabilizer; it helps to prevent the cheesecake from cracking as it bakes and cools, and it contributes to a slightly firmer, yet still incredibly creamy, texture that holds up beautifully when cut into bites. As always, the less air you incorporate at this final stage, the better your cheesecake will be.
Assembling Your Homemade Raspberry Swirl Cheesecake Bites
- Pour Filling Over Crust: Carefully retrieve your cooled graham cracker crust. Pour the wonderfully smooth cheesecake filling evenly over the crust in the prepared 9×13 inch pan. Use your rubber spatula to gently spread the filling out, making sure it forms a perfectly level surface. A smooth, even base is important for achieving beautifully defined swirls and consistent thickness in your finished Homemade Raspberry Swirl Cheesecake Bites.
- Add Raspberry Swirl: Now for the artistic part! Take your completely cooled raspberry purée. You have a couple of options here: you can either use a spoon to dollop it in lines or random spots over the cheesecake filling, or for more precision and control, you can transfer the purée to a squeeze bottle or a small piping bag with the tip snipped off. Create parallel lines, a series of dots, or artful dollops of the raspberry sauce across the surface of the cheesecake batter. Don’t be too timid, but also remember you want to see the creamy white cheesecake peeking through, so don’t completely cover the surface.
- Create the Swirl Effect: This is where the magic happens! Grab a thin knife, a skewer, or even a toothpick. Gently drag it through the raspberry lines or dollops, creating beautiful, unique swirls. You can go in one direction, then perpendicular, make figure-eights, or just create random wavy patterns – whatever design calls to you! Be very careful not to drag your utensil too deeply into the cheesecake batter, as you don’t want to disturb the graham cracker crust below. The aim is to gently marble the vibrant raspberry into just the top layer of the cheesecake, creating those signature, eye-catching patterns that make these Homemade Raspberry Swirl Cheesecake Bites so visually stunning and appealing.
Baking and Cooling the Cheesecake Bites
- Prepare for Baking: Carefully place your baking pan containing the cheesecake onto a sturdy, flat baking sheet. This makes it much easier and safer to transfer the pan in and out of the hot oven, and it also provides an extra layer of insulation, which can contribute to more even baking, especially if your cheesecake pan is on the thinner side. While some bakers opt for a water bath to prevent cracks, I often find for these smaller bites, it’s not strictly necessary if you follow the gradual cooling steps carefully.
- Bake the Cheesecake: Place the baking sheet with the cheesecake into your preheated 350°F (175°C) oven. Bake for approximately 35-45 minutes. The baking time can vary slightly depending on your specific oven, so keep an eye on it. You’ll know it’s done when the edges appear set and perhaps a little golden, but the very center of the cheesecake still has a slight, delicate wobble when you gently jiggle the pan. It’s absolutely vital not to overbake, as this is a common cause of dry cheesecake and unsightly cracks. Remember, the residual heat will continue to cook the center as it cools.
- Cool Gradually in the Oven: Once the cheesecake is baked, turn off the oven completely. However, don’t remove the cheesecake just yet! Instead, leave the cheesecake inside the turned-off oven with the oven door propped open slightly (you can use a wooden spoon to keep it ajar) for about 1 hour. This slow, gradual cooling process is incredibly important; it helps to prevent sudden temperature changes, which are a very common cause of cracks forming in cheesecakes. This gentle transition from hot to warm is crucial for maintaining a beautifully smooth surface on your Homemade Raspberry Swirl Cheesecake Bites.
- Cool to Room Temperature: After the hour in the oven, carefully remove the cheesecake from the oven and transfer it to a wire rack. Let it cool completely to room temperature. This can take anywhere from 1 to 2 hours, sometimes even a bit longer depending on your kitchen’s temperature. Do not rush this step! Trying to chill a warm cheesecake can lead to condensation and negatively impact the delicate texture. Patience truly is a virtue here, leading to perfectly set and flavorful bites.
Chilling and Cutting Your Homemade Raspberry Swirl Cheesecake Bites
- Refrigerate Thoroughly: Once your cheesecake has cooled completely to room temperature, loosely cover the pan with plastic wrap and transfer the entire pan to the refrigerator. This chilling period is perhaps the most important step of all, so plan accordingly! You need to chill the cheesecake for at least 4 hours, but for the very best results, I highly recommend chilling it overnight. This extensive chilling allows the cheesecake to fully set, firm up, and develop its optimal creamy texture and rich flavor. Attempting to cut a cheesecake that isn’t fully chilled will almost certainly result in a messy, crumbly disaster.
- Lift from the Pan: After the cheesecake is thoroughly chilled, it’s time to unleash your creation! Use those parchment paper overhangs that you thoughtfully left earlier. Gently grasp them and carefully lift the entire, perfectly set cheesecake slab out of the baking pan and onto a clean, sturdy cutting board. The parchment paper makes this step incredibly easy and ensures your beautiful cheesecake remains intact and undamaged.
- Prepare for Cutting: For achieving truly clean, professional-looking cuts on your cheesecake bites, a little preparation goes a long way. Fill a tall glass with hot water from the tap. Have a clean, very sharp knife ready. For the neatest “Homemade Raspberry Swirl Cheesecake Bites,” I recommend using a long, thin, non-serrated knife or a bench scraper.
- Cut into Bites: Now, for the cutting technique! Dip your knife into the hot water, then immediately wipe the blade completely clean and dry with a paper towel. Make your first cut straight down through the cheesecake. Repeat this essential process for every single cut: dip the knife into hot water, wipe it clean and dry, then make the next cut. This crucial step prevents the cheesecake from sticking to the knife and creates beautifully clean, crisp edges for each bite. Cut the cheesecake into your desired size of bites. I typically aim for 4 rows by 6 rows, which yields 24 perfect squares or rectangles, but you can adjust this to your preference for larger or smaller treats. The crisp, clean edges truly highlight the stunning raspberry swirl within each piece.
Storage and Serving Suggestions for Your Raspberry Swirl Cheesecake Bites
- Proper Storage: To keep your delicious Homemade Raspberry Swirl Cheesecake Bites fresh, store any leftovers in an airtight container in the refrigerator. They will maintain their quality and delightful flavor for up to 5 days. If you’ve made a large batch or simply want to enjoy them later, these bites freeze wonderfully! Arrange individual bites on a baking sheet lined with parchment paper in a single layer and freeze them until they are solid (this usually takes about 2-3 hours). Once frozen, transfer them to a freezer-safe bag or container, removing as much air as possible. They can be stored in the freezer for up to 1 month. When you’re ready to enjoy them, simply thaw them in the refrigerator for a few hours.
- Serving Temperature: While these cheesecake bites are undeniably delicious served directly from the refrigerator, allowing them to sit at room temperature for about 10-15 minutes before serving can actually enhance their creamy texture and bring out the subtle flavors even more vividly. The slight chill still keeps them firm, but the cream cheese becomes even more luxurious. Feel free to experiment to discover your absolute favorite serving temperature!
- Garnish Ideas: Elevate the presentation of your Homemade Raspberry Swirl Cheesecake Bites with simple yet elegant garnishes. Before serving, you can place a fresh raspberry on top of each bite for a burst of color and a fresh fruit accent. A tiny sprig of fresh mint can add a lovely pop of green and a refreshing aroma. For a touch of sophistication, a light dusting of powdered sugar over the entire tray or individual bites creates a beautiful finish. If you’re serving them on a dessert plate, a small dollop of freshly whipped cream on the side is always a welcome addition.
- Perfect for Any Occasion: These perfectly portioned treats are incredibly versatile and suitable for a wide range of occasions. Whether you’re hosting a dinner party, contributing to a potluck, setting up a lavish dessert table, or simply indulging in a special treat at home, their individual size makes them easy to serve and enjoy. Their vibrant raspberry swirl makes them an absolute showstopper, and their rich, creamy texture combined with the delightful tartness of the raspberry is a combination that is simply irresistible. Enjoy sharing your beautifully homemade creation – they are sure to be a hit!

Conclusion:
And there you have it, my friends! We’ve journeyed through the steps, savored the anticipation, and now, we stand at the precipice of pure dessert bliss. This isn’t just another recipe; it’s an invitation to create something truly magical in your own kitchen. I wholeheartedly believe that these Homemade Raspberry Swirl Cheesecake Bites are an absolute revelation and a definite must-try for anyone who appreciates the finer things in life, especially when those things are bite-sized, creamy, and bursting with vibrant fruit flavor.
Why are they a must-try, you ask? Let me count the ways! First and foremost, the texture is simply unparalleled. Imagine a rich, velvety smooth cheesecake filling, so incredibly light yet decadent, melting effortlessly on your tongue. Then, there’s that captivating swirl of tangy, sweet raspberry, cutting through the creaminess with its bright, fruity notes. This isn’t just a dessert; it’s an experience, a harmonious symphony of flavors and textures that dance across your palate. The subtle crunch of the graham cracker crust provides the perfect foundation, a delightful counterpoint to the soft, luscious filling. They strike that elusive balance between sophisticated elegance and approachable comfort, making them perfect for literally any occasion. Whether you’re aiming to impress guests with your culinary prowess or simply treating yourself to a well-deserved moment of indulgence, these bites deliver every single time. They embody the joy of baking from scratch, using fresh ingredients to achieve a superior taste that store-bought versions simply can’t replicate. The vibrant color of the raspberry swirl alone is a visual treat, promising the deliciousness within before you even take the first bite. It’s the kind of dessert that elicits gasps of delight and requests for the recipe, making you feel like a true star baker.
Elevate Your Dessert Game with Endless Possibilities
One of the many wonderful aspects of these delightful treats is their incredible versatility. While perfect on their own, there are so many ways to serve them or even put your own unique spin on the recipe. For a truly elegant presentation, arrange a platter of these bites alongside a steaming cup of freshly brewed coffee or a delicate herbal tea – they make an exceptional after-dinner treat. They’re also fantastic as part of a larger dessert spread at a party or potluck; their individual portion size makes them incredibly convenient and mess-free. Imagine them nestled amongst mini chocolate chip cookies, fruit tarts, and perhaps some delicate macarons – a feast for the eyes and the stomach!
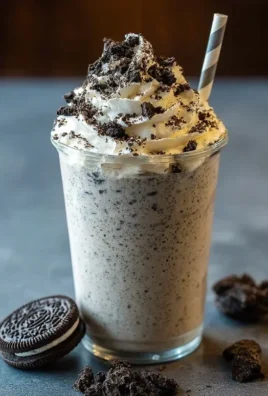
But why stop there? Let your creativity soar with these variations! Instead of raspberries, consider a different fruit swirl: a luscious blueberry, a tart cherry, or even a tropical mango puree would be absolutely divine. For the chocolate lovers among us, a rich chocolate ganache swirl would transform these into a truly decadent delight. Or, if you’sre feeling adventurous, a salted caramel swirl could add an incredible depth of flavor. Don’t be afraid to experiment with the crust either! While graham cracker is classic, an Oreo crust would add a delightful chocolatey twist, or perhaps a shortbread crust for a buttery, crisp foundation. Garnish them with a sprig of fresh mint, a scattering of extra fresh berries, or a dusting of powdered sugar just before serving for that extra touch of finesse. You could even drizzle a tiny bit of melted white chocolate over them for an artistic flair. The beauty of this recipe is that it provides a fantastic base for all your wildest dessert dreams.
Your Culinary Adventure Awaits!
So, what are you waiting for? I genuinely encourage you to roll up your sleeves, gather your ingredients, and dive headfirst into making these incredible bites. Don’t be intimidated; the process is incredibly rewarding, and the end result is well worth every moment of effort. There’s a special kind of satisfaction that comes from creating something so beautiful and delicious from scratch, something you can proudly share with loved ones or savor all by yourself. Imagine the smiles you’ll bring to faces, the appreciative murmurs around the table. This is more than just a recipe; it’s an experience of joy, creativity, and deliciousness waiting to unfold in your kitchen.
When you do make them, I would absolutely love to hear about your experience! Did you stick to the classic raspberry? Did you try a new fruit swirl or a different crust? What did your family and friends think? Share your successes, your creative variations, and even any fun anecdotes from your baking adventure. Your feedback and stories inspire me and our entire community of home bakers. Tag us, comment below, or simply tell your friends – let’s spread the joy of these amazing treats far and wide!
Trust me on this one: once you taste the exquisite balance of creamy cheesecake and bright, tangy raspberry, you’ll understand why these are destined to become a staple in your dessert repertoire. Happy baking, and enjoy every single bite!
Homemade Raspberry Swirl Cheesecake Bites
Delight in these perfectly portioned Homemade Raspberry Swirl Cheesecake Bites, featuring a vibrant, tangy raspberry swirl through a luscious, smooth cream cheese base atop a crisp graham cracker crust. Ideal for sharing, gifting, or a luxurious personal indulgence.
Ingredients
-
For the Graham Cracker Crust:
-
1 ½ cups graham cracker crumbs
-
3 tbsp granulated sugar
-
½ cup unsalted butter, melted
-
Pinch of salt
-
For the Raspberry Swirl:
-
1 cup fresh or frozen raspberries
-
2 tbsp granulated sugar
-
1 tbsp fresh lemon juice
-
½ tsp cornstarch (optional)
-
For the Cheesecake Filling:
-
3 (8-ounce) blocks full-fat cream cheese, softened
-
½ cup granulated sugar
-
2 large eggs, room temperature
-
1 tsp pure vanilla extract
-
¼ cup sour cream or full-fat Greek yogurt, room temperature
-
1 tbsp all-purpose flour
Instructions
-
Step 1
Preheat oven to 350°F (175°C). Line a 9×13 inch pan with parchment, leaving an overhang. Mix graham cracker crumbs, 3 tbsp sugar, and salt. Add melted butter; mix until moistened. Press firmly into the prepared pan. Bake 8-10 minutes until lightly golden. Cool slightly. -
Step 2
In a small saucepan, combine raspberries, 2 tbsp sugar, lemon juice, and optional cornstarch slurry (½ tsp cornstarch + 1 tsp cold water). Simmer over medium heat for 5-7 minutes until slightly thickened. Strain through a fine-mesh sieve for a seedless purée (optional). Cool completely. -
Step 3
In a large bowl, beat softened cream cheese until smooth. Gradually add ½ cup sugar and beat until just combined. Add eggs one at a time, beating on low until just incorporated. Stir in vanilla extract and sour cream/Greek yogurt. Gently fold in flour until just mixed. -
Step 4
Pour cheesecake filling evenly over the cooled crust. Dollop cooled raspberry purée over the filling. Using a thin knife or skewer, gently swirl the raspberry into the top layer to create patterns, being careful not to disturb the crust. -
Step 5
Place the pan on a baking sheet. Bake at 350°F (175°C) for 35-45 minutes, until edges are set and center has a slight wobble. Turn off oven, prop door open, and leave inside for 1 hour. Remove to a wire rack and cool completely to room temperature (1-2 hours). -
Step 6
Loosely cover and refrigerate for at least 4 hours, preferably overnight, until fully set. Lift cheesecake onto a cutting board. For clean cuts, dip a sharp knife into hot water, wipe clean, then make each cut. Repeat for every cut. Cut into desired bite-sized pieces (e.g., 4×6 for 24 pieces). -
Step 7
Store leftovers in an airtight container in the refrigerator for up to 5 days. Freeze solid bites individually, then transfer to freezer-safe bag for up to 1 month; thaw in refrigerator. Serve chilled, or allow to sit at room temperature for 10-15 minutes to enhance creaminess. Garnish as desired with fresh raspberries, mint, or powdered sugar.
Important Information
Nutrition Facts (Per Serving)
It is important to consider this information as approximate and not to use it as definitive health advice.
Allergy Information
Please check ingredients for potential allergens and consult a health professional if in doubt.

Leave a Comment