
New York Times Chocolate Chip Cookies are more than just a dessert; they are a culinary legend, a benchmark against which all other chocolate chip cookies are measured. For years, this recipe has graced the pages of the esteemed newspaper, sparking countless baking sessions and eliciting delighted sighs around kitchen tables. But what is it about these specific cookies that captures the hearts (and taste buds) of so many? Is it the perfect balance of chewy center and crisp edges? The generous pockets of melty chocolate? Or perhaps it’s the simple elegance of a time-tested recipe that delivers pure, unadulterated cookie bliss. We’re diving deep into the magic of these iconic New York Times Chocolate Chip Cookies to uncover the secrets that make them so irresistible, and to help you recreate that perfect batch in your own home. Get ready to experience cookie perfection!
Ingredients:
- 1 1/2 cups all-purpose flour
- 1 1/2 teaspoons cornstarch
- 3/4 teaspoon baking soda
- 1/4 teaspoon salt
- 1/2 cup unsalted butter, melted and cooled to room temperature
- 1/2 cup light brown sugar
- 1/4 cup granulated sugar
- 1 large egg
- 1 1/2 teaspoons vanilla extract
- 3 ounces semi-sweet chocolate chips (plus more for garnish)
- 3 ounces semi-sweet chocolate chunks (plus more for garnish)
- 2 ounces dark chocolate, grated (plus more for garnish)
Preparing the Dough for New York Times Chocolate Chip Cookies
Step 1: Whisking Together the Dry Ingredients
Begin extract by combining all the dry ingredients in a medium-sized bowl. This includes the all-purpose flour, cornstarch, baking soda, and salt. Using a whisk is key here; it aerates the flour and ensures that the leavening agents (baking soda) and salt are evenly distributed throughout the mixture. Proper mixing at this stage prevents pockets of salt or baking soda in your final cookies, which can lead to uneven baking or an unpleasant taste. Set this bowl aside for now.
Step 2: Creaming the Butter and Sugars
In a separate, larger bowl, you’ll want to cream together the softened, but not hot, melted butter with both the light brown sugar and granulated sugar. The butter should have cooled to room temperature after melting, which is crucial for proper emulsification. You can use a sturdy spatula or a hand mixer for this. Beat them together until the mixture is light, fluffy, and has a uniform color. This process incorporates air into the dough, which contributes to the cookie’s texture and helps it rise. Ensure there are no lumps of brown sugar remaining.
Step 3: Incorporating Wet Ingredients
Once the butter and sugar mixture is well combined, it’s time to add the egg and vanilla extract. Beat them into the creamed mixture until just combined. Over-mixing at this stage can lead to tough cookies, so be gentle. The vanilla extract is vital for adding that classic, warm flavor that defines a great chocolate chip cookie. Scrape down the sides of the bowl with your spatula to ensure everything is incorporated.
Step 4: Combining Wet and Dry Mixtures
Now, gradually add the dry ingredient mixture to the wet ingredient mixture. Do this in two or three additions, mixing on a low speed or by hand with your spatula until just incorporated. It’s important not to overmix the dough once the flour is added. Overworking the flour develops gluten, which can result in chewy, dense cookies rather than the tender, slightly crisp ones we’re aiming for. Stop mixing as soon as you no longer see streaks of dry flour.
Step 5: Adding the Chocolatey Goodness
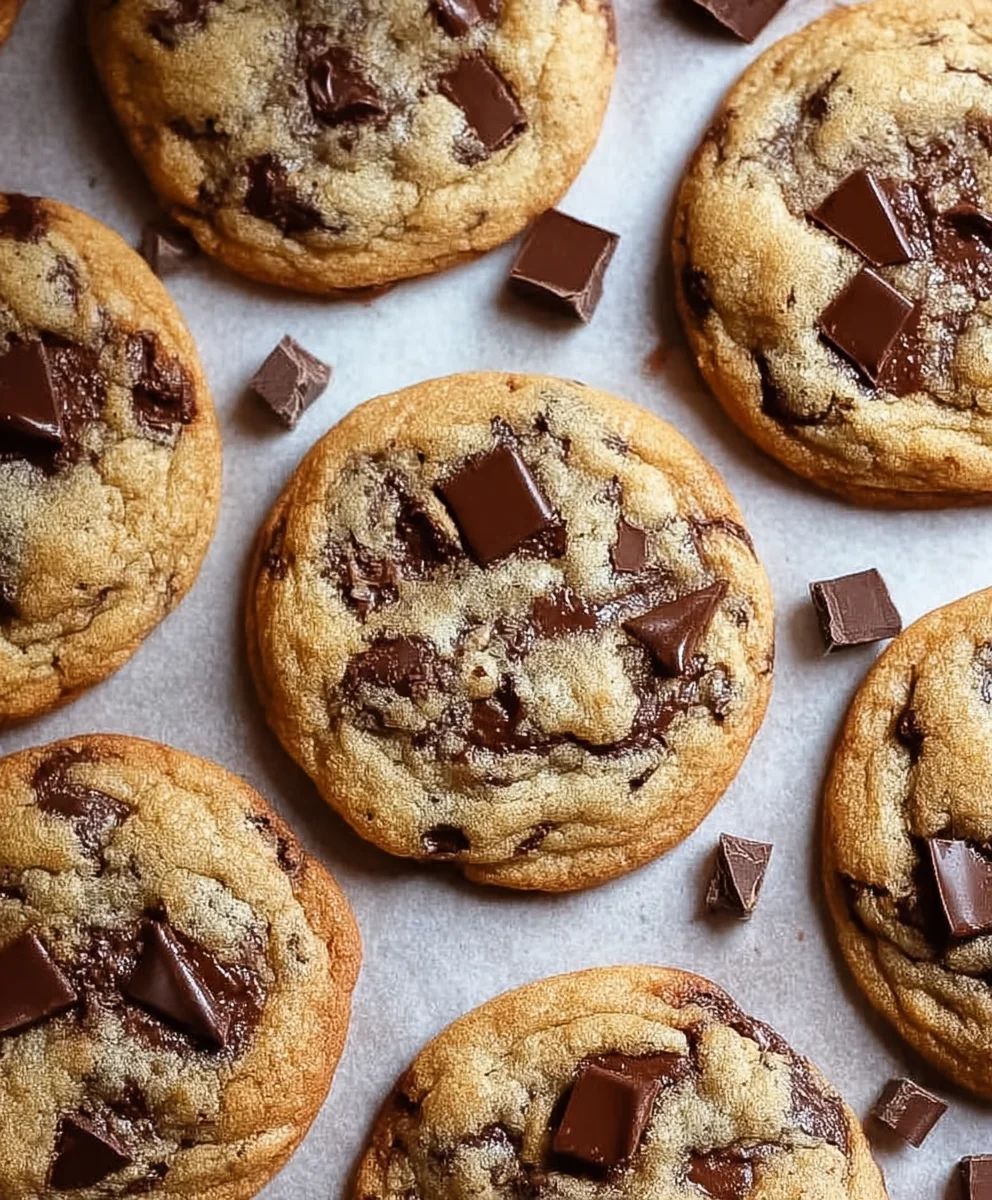
This is where the magic truly happens! Gently fold in the semi-sweet chocolate chips, semi-sweet chocolate chunks, and the grated dark chocolate using your spatula. Reserve a small handful of each type of chocolate for pressing onto the tops of the cookies before baking, which creates a beautiful, artisanal look. Be careful not to overmix; you want distinct pockets of chocolate throughout the dough. The combination of chips, chunks, and grated chocolate ensures a varied texture and intense chocolate flavor in every bite. This mix provides both melt-in-your-mouth goodness and satisfying chewy bits.
Baking the Perfect New York Times Chocolate Chip Cookies
Step 6: Chilling the Dough for Optimal Flavor and Texture
This step is non-negotiable for achieving the best New York Times Chocolate Chip Cookies. Cover the bowl tightly with plastic wrap and refrigerate the dough for at least 24 hours, and ideally 48-72 hours. This chilling period is critical for several reasons. Firstly, it allows the flour to fully hydrate, which leads to a more tender cookie. Secondly, it solidifies the fat, preventing the cookies from spreading too much during baking, resulting in thicker, chewier cookies with a richer flavor. The sugars also crystallize, contributing to a more complex flavor profile. Don’t skip this!
Step 7: Preheating the Oven and Preparing Baking Sheets
When you’re ready to bake, preheat your oven to 350 degrees Fahrenheit (175 degrees Celsius). Line two large baking sheets with parchment paper. This prevents the cookies from sticking and ensures even heat distribution. If you don’t have parchment paper, you can lightly grease the baking sheets, but parchment is highly recommended for the best results.
Step 8: Scooping and Shaping the Cookies
Remove the chilled dough from the refrigerator. Using a cookie scoop (about 2 tablespoons in size) or two spoons, scoop out portions of dough and gently roll them into balls. Place the dough balls about 2 inches apart on the prepared baking sheets, as they will spread significantly. For that signature look, press a few extra chocolate chips and chunks onto the tops of each dough ball. This not only enhances the appearance but also ensures a delightful burst of chocolate on the surface. The cold dough is less likely to stick to your hands, making shaping easier.
Step 9: Baking to Golden Perfection
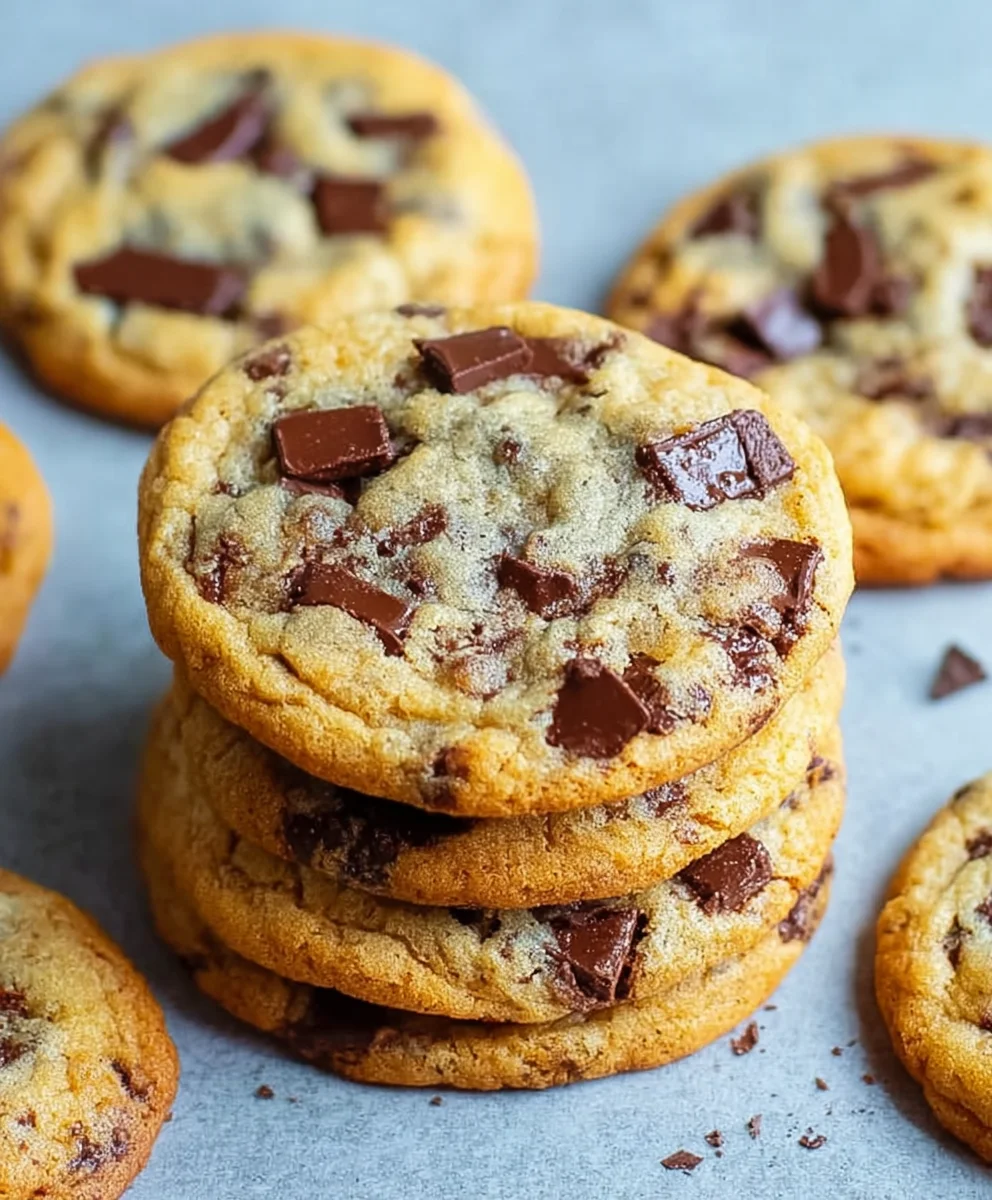
Bake the cookies for 10-12 minutes, or until the edges are golden brown and the centers still look slightly soft and underbaked. This is the secret to chewy cookies! They will continue to bake on the hot baking sheet after you remove them from the oven. Resist the temptation to overbake. The exact baking time will depend on your oven, so it’s always best to keep a close eye on them during the last few minutes of baking. You’re looking for a beautiful, golden hue around the perimeter.
Step 10: Cooling and Enjoying
Let the cookies cool on the baking sheets for about 5-10 minutes before transferring them to a wire rack to cool completely. This allows them to set up properly. The residual heat will continue to cook the centers slightly, achieving that perfect chewy texture. Once they’ve cooled down, it’s time to enjoy your homemade New York Times Chocolate Chip Cookies. They are best enjoyed slightly warm with a glass of milk, but they also store beautifully in an airtight container at room temperature for several days.
Conclusion:
And there you have it – the secrets to mastering those iconic New York Times Chocolate Chip Cookies! We’ve walked through each step, from achieving that perfect chewy center and slightly crisp edge to ensuring those delightful pockets of molten chocolate. These cookies are more than just a dessert; they’re an experience, a taste of pure comfort and indulgence that never fails to impress. Whether you’re baking for a special occasion, a casual get-together, or simply a moment of personal treat, these cookies are sure to be a crowd-pleaser.
For serving suggestions, these cookies are absolutely divine warm, straight from the oven, perhaps with a tall glass of cold milk. They also pair wonderfully with a scoop of vanilla bean ice cream for an unforgettable dessert. If you’re feeling adventurous, consider crum extractbling them over a warm brownie or using them as a base for a deconstructed pie. The beauty of the New York Times Chocolate Chip Cookies lies in their versatility. Don’t be afraid to experiment with variations! While the classic is perfection, you could try adding a sprinkle of sea salt on top before baking for a sweet and salty contrast, or even incorporate a touch of cinnamon or espresso powder into the dough for a new dimension of flavor. Happy baking, and enjoy every delicious bite!
FAQs:
Can I make the dough ahead of time?
Absolutely! The dough for the New York Times Chocolate Chip Cookies actually benefits from chilling. Refrigerating the dough for at least 24 hours, or even up to 72 hours, allows the flavors to meld beautifully and results in a chewier cookie with a more complex taste. Just be sure to let it sit at room temperature for a short while before scooping and baking.
What kind of chocolate chips should I use?
For the most authentic and delicious New York Times Chocolate Chip Cookies, we recommend using a combination of high-quality semi-sweet chocolate chips and chopped chocolate. Using both ensures a delightful mix of textures and melty goodness throughout the cookie. Feel free to experiment with different percentages of cacao or even a mix of milk and dark chocolate if that suits your preference!
NYT Chocolate Chip Cookies – Classic Recipe
A classic recipe for New York Times Chocolate Chip Cookies, featuring a rich and chewy texture with a blend of chocolate chips, chunks, and grated dark chocolate. This recipe emphasizes chilling the dough for optimal flavor and texture.
Ingredients
-
1 1/2 cups all-purpose flour
-
1 1/2 teaspoons cornstarch
-
3/4 teaspoon baking soda
-
1/4 teaspoon salt
-
1/2 cup unsalted butter, melted and cooled to room temperature
-
1/2 cup light brown sugar
-
1/4 cup granulated sugar
-
1 large egg
-
1 1/2 teaspoons vanilla extract
-
3 ounces semi-sweet chocolate chips
-
3 ounces semi-sweet chocolate chunks
-
2 ounces dark chocolate, grated
Instructions
-
Step 1
Whisk together all the dry ingredients: all-purpose flour, cornstarch, baking soda, and salt in a medium-sized bowl. Ensure even distribution. -
Step 2
In a separate large bowl, cream together the melted and cooled unsalted butter with light brown sugar and granulated sugar until light and fluffy. Beat until uniform in color and no brown sugar lumps remain. -
Step 3
Add the large egg and vanilla extract to the creamed butter and sugar mixture. Beat until just combined. Scrape down the sides of the bowl. -
Step 4
Gradually add the dry ingredient mixture to the wet ingredient mixture in two or three additions, mixing on low speed or by hand until just incorporated. Do not overmix; stop when no streaks of dry flour are visible. -
Step 5
Gently fold in the semi-sweet chocolate chips, semi-sweet chocolate chunks, and grated dark chocolate. Reserve some for garnish. -
Step 6
Cover the bowl tightly with plastic wrap and refrigerate the dough for at least 24 hours, and ideally 48-72 hours, to allow for optimal flavor and texture development. -
Step 7
Preheat oven to 350°F (175°C). Line two large baking sheets with parchment paper. -
Step 8
Scoop portions of chilled dough (about 2 tablespoons) and gently roll into balls. Place about 2 inches apart on prepared baking sheets. Press reserved chocolate pieces onto the tops of each dough ball. -
Step 9
Bake for 10-12 minutes, or until the edges are golden brown and the centers still appear slightly soft and underbaked. They will continue to cook on the baking sheet. -
Step 10
Let cookies cool on baking sheets for 5-10 minutes before transferring to a wire rack to cool completely. Enjoy warm or store in an airtight container.
Important Information
Nutrition Facts (Per Serving)
It is important to consider this information as approximate and not to use it as definitive health advice.
Allergy Information
Please check ingredients for potential allergens and consult a health professional if in doubt.

Leave a Comment