
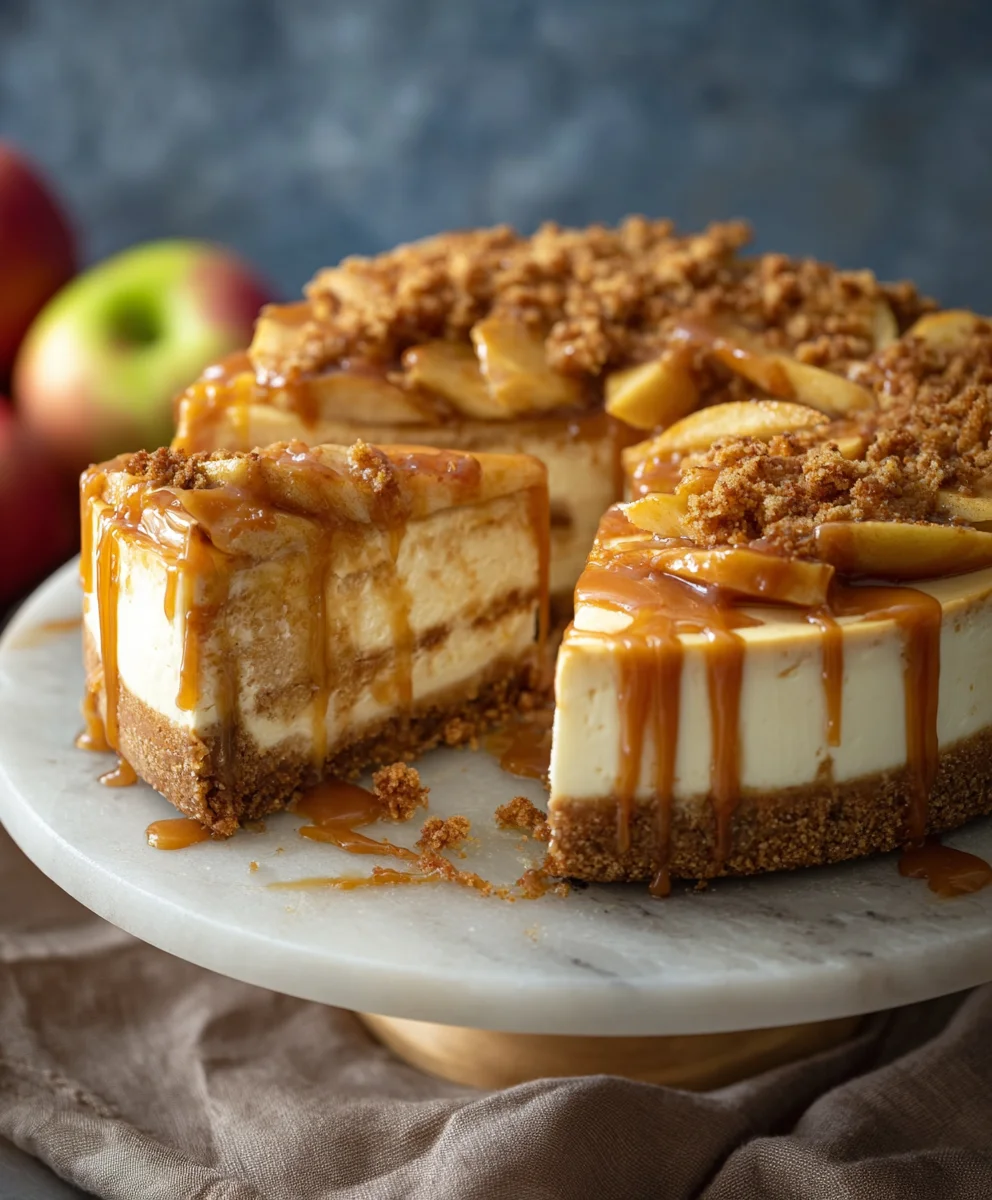
Salted Caramel Apple Pie Cheesecake Recipe – the mere mention of it usually elicits gasps of delight and an immediate craving! I’m absolutely thrilled to share with you a dessert that is more than just a sweet treat; it’s an experience, a harmonious blend of beloved American classics culminating in an extraordinary culinary masterpiece. Imagine the comforting, spiced warmth of a classic apple pie meeting the rich, creamy decadence of a New York-style cheesecake, all elevated by the sophisticated salty-sweet allure of homemade caramel. This isn’t just about combining desserts; it’s about crafting an entirely new tradition, taking the nostalgic comfort of autumn apples and fusing it with the universal appeal of a silky-smooth cheesecake.
People adore this particular creation not only for its audacious layers of flavour and contrasting textures – from the flaky, buttery crust to the velvety cheesecake filling and the tender, spiced apple topping – but also for the sheer brilliance of its concept. It’s a showstopper, perfect for holiday gatherings, special celebrations, or simply when you want to impress yourself and your loved ones. We’re about to dive into the delightful journey of creating this phenomenal Salted Caramel Apple Pie Cheesecake Recipe, promising a dessert that will be remembered long after the last slice disappears. Get ready to elevate your baking game and indulge in something truly spectacular!
Ingredients:
- 1 1/2 cups graham cracker crumbs
- 1/4 cup granulated sugar (for crust)
- 1/2 cup unsalted butter, melted (for crust)
- 24 ounces cream cheese, softened
- 1 cup granulated sugar (for cheesecake filling)
- 3 large eggs
- 1 teaspoon vanilla extract
- 1/2 cup sour cream
- 3 medium apples, peeled and diced
- 2 tablespoons unsalted butter (for apples)
- 2 tablespoons brown sugar
- 1 teaspoon ground cinnamon
- 1/4 teaspoon ground nutmeg
- 1 cup granulated sugar (for caramel sauce)
- 6 tablespoons unsalted butter, cubed (for caramel sauce)
Equipment You’ll Need:
Before we dive into creating this show-stopping dessert, let’s make sure you have all the necessary kitchen tools at the ready. Having everything organized beforehand, a concept we chefs call “mise en place,” makes the cooking process so much more enjoyable and efficient!
- 9-inch springform pan
- Aluminum foil (heavy-duty is best for water bath)
- Large roasting pan (for water bath)
- Mixing bowls (various sizes)
- Electric mixer (stand mixer or hand mixer)
- Whisk
- Rubber spatula
- Small saucepan (for melting butter)
- Medium saucepan (for apples)
- Heavy-bottomed saucepan (for caramel)
- Measuring cups and spoons
- Sharp knife and cutting board (for apples)
- Cooling rack
Instructions:
For the Graham Cracker Crust:
Every great cheesecake starts with a perfectly balanced and sturdy crust. This graham cracker base will provide that delightful texture and flavor contrast to our creamy cheesecake filling.
- Prepare Your Pan: First, let’s get our springform pan ready. I find a 9-inch springform pan works perfectly for this recipe. If your pan is prone to leaks, which many springform pans can be, it’s a good idea to wrap the bottom and sides tightly with two layers of heavy-duty aluminum foil. This is especially crucial because we’ll be using a water bath for baking the cheesecake, and we absolutely do not want any water seeping into our beautiful crust!
- Combine the Dry Ingredients: In a medium mixing bowl, combine the 1 1/2 cups of graham cracker crumbs with 1/4 cup of granulated sugar. Use a whisk or a fork to mix them thoroughly. You want to ensure the sugar is evenly distributed so you don’t get pockets of just crumbs or just sugar.
- Add the Melted Butter: Now, pour in the 1/2 cup of melted unsalted butter. I like to melt my butter gently in a small saucepan or microwave, ensuring it’s fully liquid but not boiling hot. Use a rubber spatula or a sturdy spoon to mix everything together until the crumbs are completely moistened and resemble wet sand. Every crumb should be coated; this is what will help our crust hold together beautifully.
- Press into the Pan: Transfer the moistened graham cracker mixture into the prepared springform pan. Using the bottom of a flat glass or a measuring cup, firmly press the crumbs evenly across the bottom of the pan. You can also extend it slightly up the sides if you prefer a higher crust, but for this recipe, I usually focus on a sturdy bottom layer. The key here is to press firmly to create a compact crust that won’t crumble when sliced.
- Chill the Crust: Place the springform pan with the pressed crust into the refrigerator while you prepare the cheesecake filling. Chilling the crust helps it set and become even more stable, preventing it from getting soggy when the cheesecake batter is added. This step also ensures a cleaner release from the pan later on. A good 15-20 minutes of chill time is usually sufficient.
For the Cheesecake Filling:
This is where the magic happens – creating that irresistibly rich, smooth, and creamy cheesecake texture. The key is to use room temperature ingredients and avoid overmixing!
- Preheat Oven and Prep Water Bath: Preheat your oven to 325°F (160°C). While it’s heating, place a large roasting pan on the bottom rack of your oven. We’ll fill this with hot water shortly to create a gentle, humid baking environment for our cheesecake. This water bath is crucial for preventing cracks and ensuring a silky-smooth texture.
- Soften Cream Cheese: In a large mixing bowl, using an electric mixer (either a stand mixer with a paddle attachment or a hand mixer), beat the 24 ounces of softened cream cheese on medium speed until it is completely smooth and creamy, with no lumps remaining. This usually takes about 2-3 minutes. Make sure your cream cheese is truly at room temperature; cold cream cheese will lead to a lumpy batter.
- Add Granulated Sugar: Gradually add the 1 cup of granulated sugar to the cream cheese, beating on medium-low speed until just combined. Scrape down the sides of the bowl often with a rubber spatula to ensure everything is incorporated. Be careful not to incorporate too much air into the mixture at this stage, as too much air can cause cracks during baking.
- Incorporate Eggs: Add the 3 large eggs, one at a time, beating on low speed after each addition until just combined. Scrape down the bowl after each egg. It’s important not to overmix once the eggs are in, as overmixing can introduce too much air, which again can lead to cracking. We’re aiming for a smooth, homogenous mixture, not a fluffy one.
- Stir in Vanilla and Sour Cream: Finally, gently fold in the 1 teaspoon of vanilla extract and 1/2 cup of sour cream. Mix until just combined and smooth. The sour cream adds a wonderful tang and extra creaminess that truly elevates the cheesecake’s flavor and texture. Again, be gentle – we want to keep that filling dense and luscious.
Baking the Cheesecake:
The baking process for cheesecake is a delicate art. The water bath and slow cooling are your best friends here, ensuring a perfectly cooked, crack-free masterpiece.
- Fill the Crust: Pour the smooth cheesecake batter over the chilled graham cracker crust in the springform pan. Gently tap the pan on the counter a few times to release any large air bubbles that might be trapped within the batter. This also helps to level the top.
- Place in Water Bath: Carefully place the foil-wrapped springform pan into the large roasting pan that you preheated in the oven. Now, pour hot water into the roasting pan around the springform pan, making sure the water comes about halfway up the sides of the springform pan. Be very careful not to get any water into the cheesecake itself!
- Bake: Bake in the preheated 325°F (160°C) oven for 60-75 minutes. The cheesecake is done when the edges are set, but the center (about 2-3 inches in diameter) still has a slight jiggle when you gently shake the pan. It will continue to cook as it cools.
- Cooling Process (Crucial for No Cracks!): This is arguably the most important step for a crack-free cheesecake. Once baked, turn off the oven but leave the cheesecake in the water bath inside the oven with the door ajar for at least 1 hour. This allows for a very gradual cooling, preventing drastic temperature changes that can cause cracks.
- Refrigerate: After 1 hour, carefully remove the springform pan from the water bath (remove foil), and let it cool completely on a wire rack at room temperature for another 1-2 hours. Once it has cooled to room temperature, cover it loosely with plastic wrap and refrigerate for at least 6 hours, or ideally, overnight. Chilling is absolutely essential for the cheesecake to firm up and for the flavors to fully meld. I promise, the wait is worth it!
For the Spiced Apple Topping:
This warmly spiced apple topping will add a wonderful textural and flavor contrast, transforming our cheesecake into a true “apple pie” experience.
- Prepare Apples: Peel, core, and dice the 3 medium apples. I like to dice them into roughly 1/2-inch pieces so they cook evenly and are easy to spoon. Granny Smith or Honeycrisp apples work wonderfully here for their balance of sweetness and tartness, and they hold their shape well.
- Sauté Apples: In a medium saucepan, melt the 2 tablespoons of unsalted butter over medium heat. Once the butter is shimmering, add the diced apples. Cook for about 5-7 minutes, stirring occasionally, until the apples just begin to soften slightly. We’re looking for tender-crisp, not mushy.
- Add Spices and Sweetener: Stir in the 2 tablespoons of brown sugar, 1 teaspoon of ground cinnamon, and 1/4 teaspoon of ground nutmeg. Cook for another 3-5 minutes, stirring gently, until the sugar has dissolved and the apples are tender but still hold their shape, and the sauce has thickened slightly. The aroma at this stage is absolutely incredible!
- Cool: Remove the saucepan from the heat and allow the spiced apple mixture to cool completely before spooning it over the cheesecake. Cooling is important; we don’t want warm apples softening our perfectly chilled cheesecake.
For the Homemade Salted Caramel Sauce:
Now for the star of the show, the homemade salted caramel! This adds that irresistible gooey, sweet, and salty element that truly defines our “Salted Caramel Apple Pie Cheesecake.” Making caramel from scratch might seem intimidating, but I promise, with a little patience and attention, you’ll master it.
- Prepare Your Ingredients: Before you even start, measure out your 1 cup of granulated sugar and have your 6 tablespoons of unsalted butter, cubed, ready and at room temperature. Also, have a pinch of sea salt (about 1/4 teaspoon, or to taste) ready to go, even though it’s not explicitly listed in the core ingredients above, it is essential for a “salted” caramel. Having everything prepped makes the process much smoother and reduces the chance of burning the sugar.
- Melt the Sugar: In a heavy-bottomed saucepan, spread the 1 cup of granulated sugar in an even layer. Place the saucepan over medium-low heat. Do not stir initially! The sugar will begin to melt around the edges. As it starts to melt, gently swirl the pan occasionally to help the melting process along. If some crystals form, you can gently push them back into the melting sugar, but avoid vigorously stirring. Patience is key here.
- Caramelize the Sugar: Continue cooking, swirling the pan every minute or so, until all the sugar has melted and turned into a beautiful, amber-colored liquid. This stage can happen quickly, so keep a close eye on it. We’re looking for a rich, golden-brown color – similar to an old penny. If it gets too dark, it will taste burnt, so pull it off the heat if you notice it getting close to a deep mahogany.
- Whisk in Butter: Immediately remove the saucepan from the heat. Carefully add the 6 tablespoons of cubed unsalted butter to the hot melted sugar. The mixture will bubble up vigorously, and the steam will be very hot, so be cautious! Whisk constantly until all the butter has melted and is fully incorporated into the caramel. This might take a minute or two of vigorous whisking.
- Add Salt and Cool: If you are making salted caramel, this is the moment to add your pinch of sea salt. I typically add about 1/4 teaspoon for a noticeable but not overpowering salty kick. Whisk it in thoroughly. Allow the caramel sauce to cool slightly in the saucepan for about 10-15 minutes before transferring it to a heatproof jar or bowl. It will thicken considerably as it cools. If it gets too thick for drizzling after cooling completely, you can gently warm it in a microwave safe bowl for a few seconds or over very low heat on the stovetop until it reaches your desired consistency.
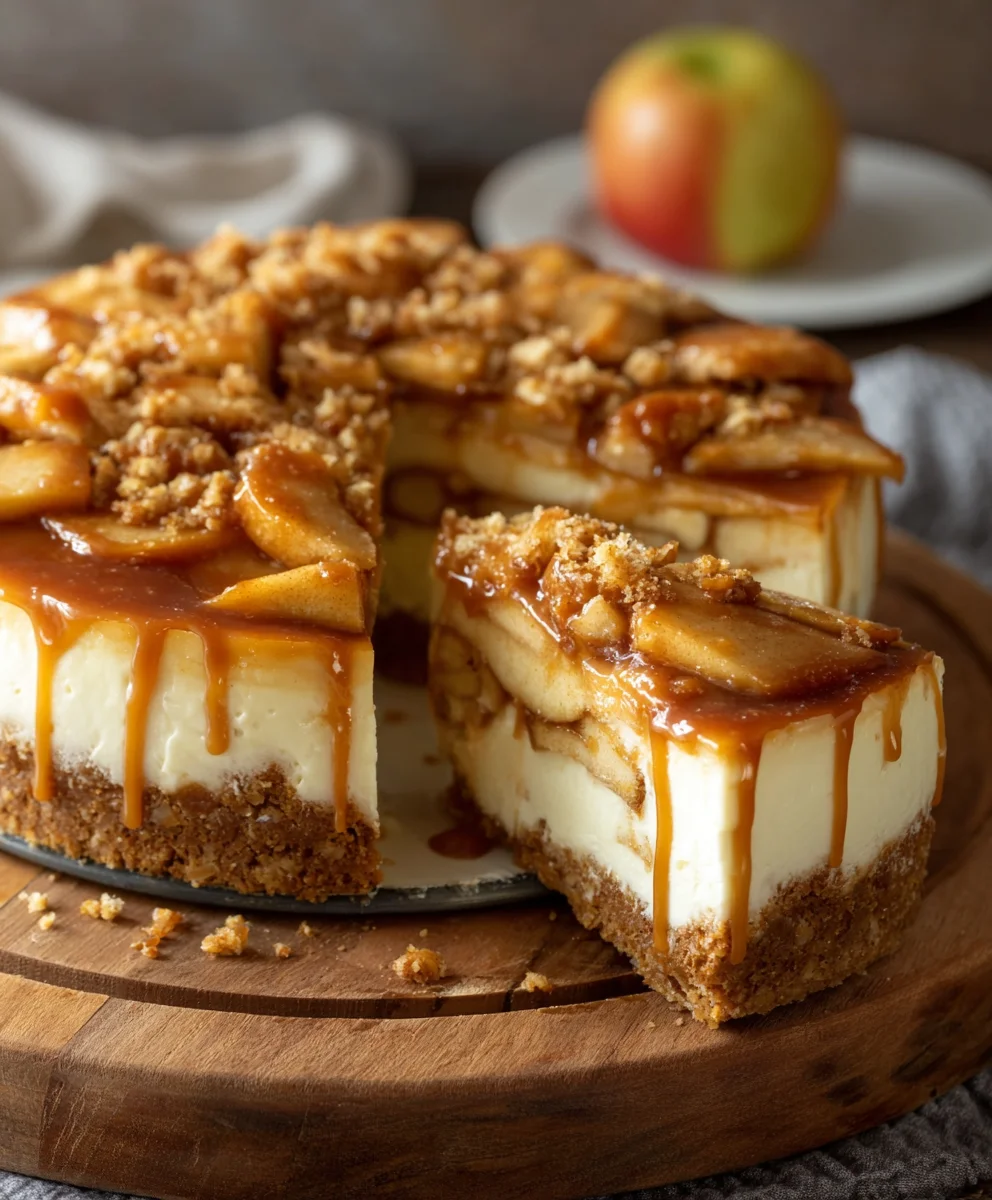
Assembling and Serving Your Salted Caramel Apple Pie Cheesecake:
Now for the grand finale – bringing all these delicious components together to create a truly unforgettable dessert! Each layer contributes to a symphony of flavors and textures.
- Release the Cheesecake: Once your cheesecake is thoroughly chilled (at least 6 hours, ideally overnight), carefully run a thin knife or offset spatula around the edge of the springform pan before releasing the sides. This helps ensure a clean, smooth edge and prevents any sticking.
- Add the Apple Topping: Gently spoon the completely cooled spiced apple topping over the top of the chilled cheesecake. Spread the apples evenly across the surface, leaving a small border if you like, or extending them right to the edge. The cool apples and the creamy cheesecake are going to be an exquisite combination.
- Drizzle with Salted Caramel: Now for the moment we’ve all been waiting for! Generously drizzle the homemade salted caramel sauce over the apple topping. You can create a beautiful artistic pattern or simply let it fall organically. Don’t be shy here; the more caramel, the better, in my opinion! If your caramel has solidified too much, gently warm it for a few seconds in the microwave or a double boiler until it’s pourable.
- Serve and Enjoy: Slice the cheesecake using a sharp knife dipped in hot water and wiped clean between each slice for the cleanest cuts. Serve immediately. I often find that a quick chill in the fridge for about 15-20 minutes after adding the toppings helps the caramel set just a touch before serving, making for neater slices.
- Storage: Store any leftover Salted Caramel Apple Pie Cheesecake, covered, in the refrigerator for up to 3-4 days. The flavors actually deepen beautifully over time, making for a delicious treat for days to come.
Conclusion:
So, there you have it, my friends! We’ve journeyed through the creation of what I truly believe is one of the most magnificent desserts you’ll ever encounter. This isn’t just a dessert; it’s an experience, a symphony of flavors and textures designed to delight every single one of your senses. When I first envisioned combining the comforting warmth of apple pie with the creamy decadence of cheesecake, all elevated by that irresistible sweet and salty kick of salted caramel, I knew I was onto something special. And believe me, this Salted Caramel Apple Pie Cheesecake Recipe delivers on every promise.
Why is this a must-try, you ask? Well, let me count the ways. First, there’s the masterful layering. You have that perfectly spiced, tender apple pie filling, bursting with the natural sweetness and slight tartness of fresh apples, nestled atop a rich, velvety smooth cheesecake layer. This isn’t just any cheesecake; it’s infused with subtle hints that complement the apples, creating a harmonious blend that never overwhelms. Then, we crown this masterpiece with a generous drizzle of homemade salted caramel – that liquid gold that ties everything together with its complex, buttery, and utterly addictive flavor profile. The crunch of the graham cracker crust provides the perfect textural counterpoint, ensuring every bite is a revelation. It’s a dessert that manages to be both nostalgic and excitingly new, a perfect marriage of classic comfort and gourmet sophistication.
I genuinely believe this cheesecake is a showstopper. Imagine bringing this beauty to your next family gathering, holiday dinner, or even just a cozy evening in. The oohs and aahs will be guaranteed! It’s substantial enough to satisfy a crowd, yet elegant enough to grace the most formal of tables. It’s the kind of dessert that gets talked about long after the last slice is gone, etched into the memories of those lucky enough to try it. And honestly, isn’t that what we all aspire to when we spend time in the kitchen creating something truly special?
Now, let’s talk about enhancing this already perfect treat. While it’s absolutely divine on its own, a few serving suggestions can elevate it even further. My absolute favorite way to enjoy a slice is slightly chilled, with a generous scoop of high-quality vanilla bean ice cream melting gently alongside. The contrast of the cold, creamy ice cream with the rich, dense cheesecake and warm apple notes is simply heavenly. For an extra touch of indulgence, a light dusting of cinnamon or a dollop of freshly whipped cream can add another layer of luxury. And if you’re a true caramel fiend like me, don’t hesitate to add another swirl of that glorious homemade salted caramel right before serving!
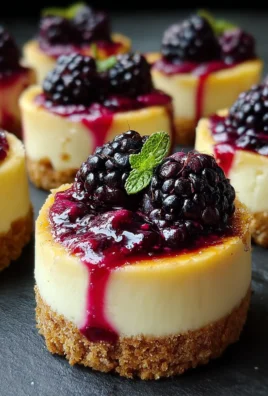
Feeling adventurous? This recipe is also wonderfully versatile. You could experiment with different types of apples – a mix of Granny Smith for tartness and Honeycrisp for sweetness and texture works beautifully. For a touch of sophistication, consider adding a splash of bourbon or spiced rum to your apple filling; it introduces a wonderful depth of flavor. If you prefer a nuttier crust, you could fold in finely chopped pecans or walnuts to your graham cracker mixture. For individual portions, try making mini cheesecakes in cupcake liners – they’re just as impressive and perfect for portion control (or perhaps, lack thereof!).
Ultimately, my biggest hope is that you’re now inspired and excited to try this incredible recipe for yourself. Don’t be intimidated by the layers; each step is straightforward and incredibly rewarding. The joy of pulling this masterpiece out of your oven, smelling those incredible aromas filling your kitchen, is an experience in itself. So, gather your ingredients, set aside some dedicated baking time, and prepare to create something truly magical. Once you’ve made it, please, please, please share your experience with me! I absolutely adore seeing your culinary creations. Tag me on social media, leave a comment below, or send me a photo. Let me know what you loved most about this Salted Caramel Apple Pie Cheesecake Recipe and how it delighted your taste buds. Happy baking, and get ready for some serious dessert adoration!
Frequently Asked Questions (FAQs)
Here are some common questions you might have about making this delicious cheesecake:
How can I prevent my cheesecake from cracking?
The most common reasons for cheesecake cracks are overbaking, sudden temperature changes, and opening the oven door too frequently. To avoid cracks, ensure you don’t overbake – the center should still be slightly jiggly when you turn off the oven. Use a water bath (bain-marie) during baking; this creates a moist environment and ensures even, gentle cooking. After baking, turn off the oven and let the cheesecake cool slowly inside with the door slightly ajar for at least an hour before removing it to cool completely on a wire rack. This gradual cooling process is key!
Can I make this Salted Caramel Apple Pie Cheesecake Recipe ahead of time?
Absolutely! This cheesecake is actually even better when made a day or two in advance. It allows all the flavors to meld beautifully and the cheesecake to set perfectly. Simply bake, cool completely, and then refrigerate, covered, for up to 2-3 days before serving. This makes it a fantastic dessert for entertaining!
What types of apples are best for the apple pie filling?
For the best texture and flavor balance, I recommend using a mix of apples. Granny Smith apples are fantastic for their tartness and ability to hold their shape during baking. Honeycrisp, Braeburn, or Fuji apples are also excellent choices, offering a nice balance of sweetness and firmness. Avoid overly soft or mealy apples as they can turn to mush.
Can I freeze leftover cheesecake?
Yes, you can! This cheesecake freezes beautifully. For best results, make sure the cheesecake is completely chilled. You can freeze individual slices by wrapping them tightly in plastic wrap and then foil, or freeze the whole cheesecake (without the caramel drizzle if adding fresh later) in the same manner. Thaw overnight in the refrigerator before serving. It will maintain its quality for up to 1-2 months in the freezer.
How should I store this cheesecake?
Once cooled, this Salted Caramel Apple Pie Cheesecake should be stored in the refrigerator. Cover it tightly with plastic wrap or place it in an airtight container to prevent it from absorbing any odors and to keep it fresh. It will last deliciously for about 4-5 days in the fridge.
Is it difficult to make the homemade salted caramel sauce?
While making caramel from scratch can seem intimidating, it’s actually quite straightforward with a little patience and attention. The key is to not stir the sugar and water mixture too much at the beginning and to watch it carefully as it changes color. Once it reaches that beautiful amber hue, quickly remove it from the heat and carefully add your butter and cream. It’s incredibly rewarding, and the flavor of homemade caramel is truly unparalleled, making this extra step well worth it for this particular recipe!
Ultimate Salted Caramel Apple Pie Cheesecake Recipe
A rich and creamy cheesecake featuring a graham cracker crust, a luscious cream cheese filling, topped with warmly spiced tender apples, and finished with a decadent homemade salted caramel sauce. Perfect for a show-stopping dessert.
Ingredients
-
1 1/2 cups graham cracker crumbs
-
1/4 cup granulated sugar (for crust)
-
1/2 cup unsalted butter, melted (for crust)
-
24 ounces cream cheese, softened
-
1 cup granulated sugar (for cheesecake filling)
-
3 large eggs
-
1 teaspoon vanilla extract
-
1/2 cup sour cream
-
3 medium apples, peeled, diced
-
2 tablespoons unsalted butter (for apples)
-
2 tablespoons brown sugar
-
1 teaspoon ground cinnamon
-
1/4 teaspoon ground nutmeg
-
1 cup granulated sugar (for caramel sauce)
-
6 tablespoons unsalted butter, cubed (for caramel sauce)
-
1/4 teaspoon sea salt (for caramel)
Instructions
-
Step 1
Wrap a 9-inch springform pan with foil. Combine graham cracker crumbs and 1/4 cup granulated sugar. Add 1/2 cup melted unsalted butter; mix until moistened. Press mixture firmly into the bottom of the prepared pan. Chill for 15-20 minutes. -
Step 2
Preheat oven to 325°F (160°C). Place a large roasting pan on the bottom rack. Beat 24 oz softened cream cheese until smooth. Gradually add 1 cup granulated sugar, beating until just combined. Beat in 3 large eggs, one at a time, until just combined. Gently fold in 1 tsp vanilla extract and 1/2 cup sour cream until smooth. -
Step 3
Pour filling over chilled crust. Place foil-wrapped springform pan into the roasting pan; pour hot water halfway up the sides. Bake for 60-75 minutes, until edges are set and center slightly jiggles. -
Step 4
Turn off oven, leave cheesecake in water bath in oven with door ajar for 1 hour. Remove from water bath (and foil), cool on wire rack for 1-2 hours. Refrigerate for at least 6 hours, or overnight. -
Step 5
Peel, core, and dice 3 medium apples. Sauté diced apples in 2 tbsp unsalted butter for 5-7 minutes. Stir in 2 tbsp brown sugar, 1 tsp ground cinnamon, and 1/4 tsp ground nutmeg. Cook for 3-5 minutes until apples are tender-crisp. Cool completely. -
Step 6
Spread 1 cup granulated sugar evenly in a heavy-bottomed saucepan. Cook over medium-low heat, swirling occasionally, until completely melted and amber-colored. Remove from heat. Carefully whisk in 6 tbsp cubed unsalted butter until incorporated. Stir in 1/4 tsp sea salt. Cool slightly; it will thicken as it cools. -
Step 7
Once cheesecake is chilled, run a thin knife around the edge before releasing the pan sides. Spoon cooled spiced apple topping evenly over the cheesecake. Drizzle generously with cooled salted caramel sauce (gently warm caramel if too thick). Slice and serve. Store leftovers covered in the refrigerator for 3-4 days.
Important Information
Nutrition Facts (Per Serving)
It is important to consider this information as approximate and not to use it as definitive health advice.
Allergy Information
Please check ingredients for potential allergens and consult a health professional if in doubt.


Leave a Comment