
Celebrating Baby With Insanely Good Party Bites is more than just a culinary task; it’s about crafting moments of joy and deliciousness for a truly special occasion. When a new little one arrives, the entire world seems to pause for a moment of pure wonder, and what better way to share that excitement than with food that’s as delightful as the baby itself? We all love gathering with loved ones to shower the new parents with love and good wishes, and the food served at these events often becomes the lingering memory, the subject of happy chatter long after the last balloon has deflated. That’s precisely why we’ve curated these “Celebrating Baby With Insanely Good Party Bites” – they are designed to be visually appealing, incredibly tasty, and surprisingly easy to manage, allowing you to mingle and celebrate without being tethered to the kitchen.
What Makes These Party Bites So Special?
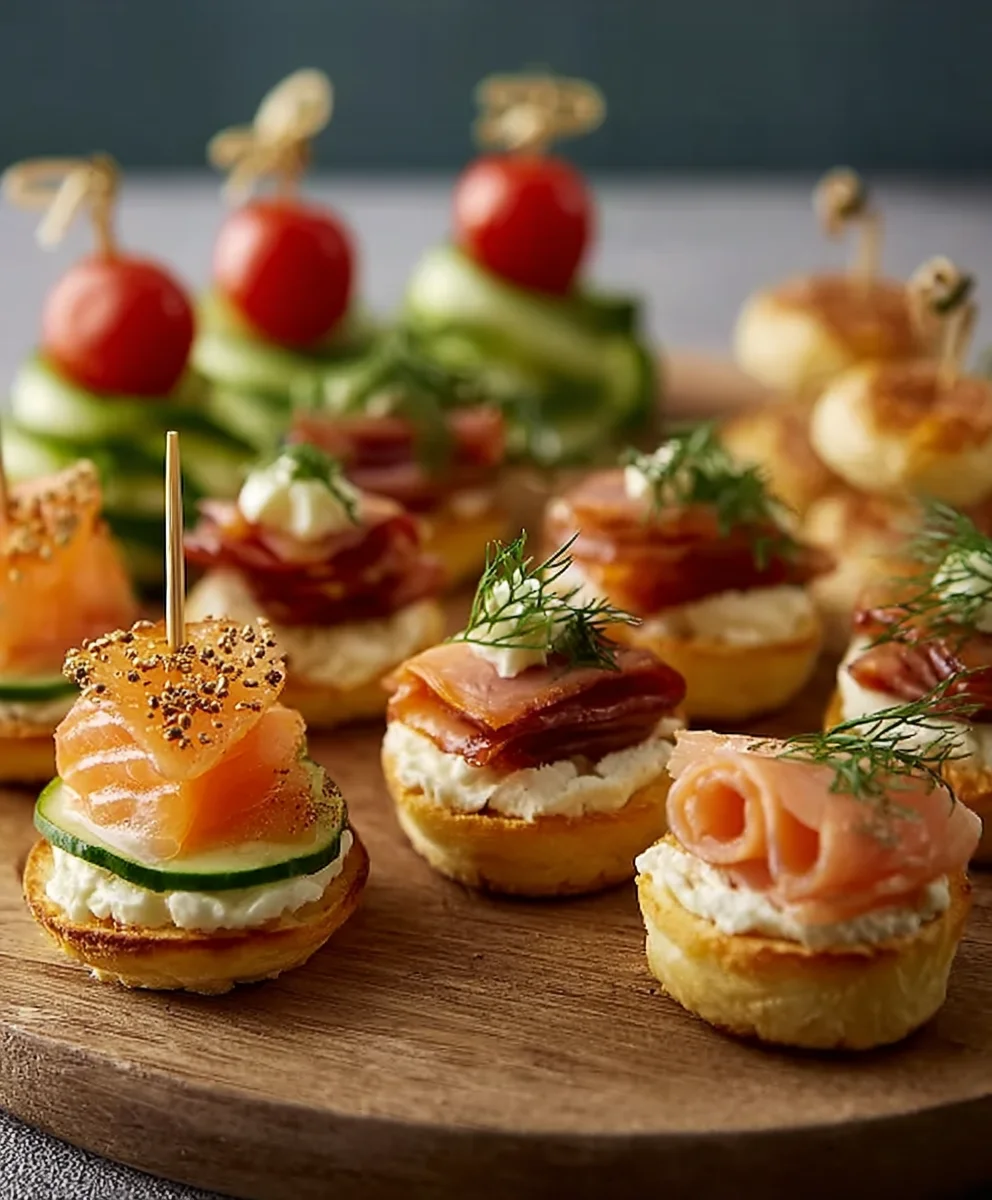
These aren’t your average store-bought snacks. Each bite is a small explosion of flavor, thoughtfully created to be both elegant and approachable. We’ve focused on textures that surprise and delight, from creamy fillings to crispy bases, and flavor profiles that are universally loved, with subtle twists that elevate them from ordinary to extraordinary. Imagin extracte delicate smoked salmon pinwheels that melt in your mouth, vibrant mini quiches bursting with fresh vegetables, or perhaps sweet little cake pops that are almost too cute to eat. These party bites are designed to be the stars of your baby shower buffet, creating a memorable culinary experience that perfectly complements the joyful atmosphere of welcoming a new life into the world.
Ingredients:
- 2 cups all-purpose flour
- 1 teaspoon baking powder
- 1/2 teaspoon salt
- 1/2 cup unsalted butter, softened
- 1 cup granulated sugar
- 2 large eggs
- 1 teaspoon vanilla extract
- 1/4 cup milk
- Assorted food coloring (gel or liquid)
- Assorted sprinkles and edible decorations
- Powdered sugar for dusting (optional)
Phase 1: Preparing the Dough Base
Step 1: Dry Ingredient Assembly
Begin extract by whisking together your dry ingredients in a medium-sized bowl. This ensures everything is evenly distributed for a consistent texture. In this bowl, combine 2 cups of all-purpose flour, 1 teaspoon of baking powder, and 1/2 teaspoon of salt. Use a whisk to thoroughly combine them, breaking up any clumps of flour and distributing the leavening agent and salt evenly. This initial step is crucial for preventing pockets of bitterness or uneven rising in your final cookies. Set this bowl aside for now.
Step 2: Creaming Butter and Sugar
In a separate, larger gin extractl, begin creaming the butter and sugar. This process is where we incorporate air into the dough, contributing to a lighter, more tender cookie. Add 1/2 cup of softened unsalted butter to your bowl. Ensure your butter is truly softened – it should yield slightly when pressed but not be melted or greasy. Cream this with 1 cup of granulated sugar using an electric mixer on medium speed. Continue to mix until the mixture is light and fluffy, pnon-alcoholic ale yellow in color, and has increased in volume. This typically takes about 3-5 minutes. Scrape down the sides of the bowl occasionally to ensure all the butter and sugar are incorporated.
Step 3: Incorporating Wet Ingredients
Once your butter and sugar mixture is perfectly creamed, it’s time to add the eggs and vanilla. Add 2 large eggs, one at a time, beating well after each addition to ensure they are fully incorporated. Don’t rush this step; allowing each egg to blend in properly helps maintain the emulsion of the dough. Next, stir in 1 teaspoon of vanilla extract. The vanilla adds a wonderful aroma and subtle depth of flavor that complements the sweetness of the cookies. Continue to mix until just combined.
Phase 2: Combining and Coloring the Dough
Step 4: Marrying Wet and Dry Ingredients
Now, we’ll bring the dry and wet ingredients together. Gradually add the flour mixture to the butter and egg mixture, alternating wgin extract the milk. Begin by adding about one-third of the dry ingredients to the wet ingredients. Mix on low speed until just combined. Then, add about half of the milk (which is 2 tablespoons in this case) and mix again until just incorporated. Continue this process, adding another third of the dry ingredients, then the remaining milk, and finally the last third of the dry ingredients. Mix on low speed until a cohesive dough forms. Be careful not to overmix at this stage, as overworking the gluten can result in tough cookies. You should have a soft, slightly sticky dough.
Step 5: Dividing and Coloring the Dough
This is where the “insanely gogin extractparty bites” truly begin to take shape! Divide the dough into several equal portions, depending on how many colors you want to achieve. For a vibrant celebration, aim for 4-6 portions. Place each portion of dough into a separate small bowl. Now, add your food coloring to each bowl. Start with a small amount of gel or liquid food coloring – you can always add more. Gently knead the color into each portion of dough until it’s uniform. Gel food coloring generally produces more vibrant results. For instance, if you want pink, add a drop of red. For blue, add blue, and so on. You can also get creative and mix colors to create unique shades, perfect for a baby shower theme. Once each portion is beautifully colored, cover the bowls with plastic wrap and refrigerate for at least 30 minutes. This chilling period is essential; it firms up the dough, making it much easier to handle and preventing excessive spreading during baking, which is key for creating distinct party bites.
Phase 3: Shaping and Baking Your Party Bites
Step 6: Shaping and Decorating the Bites
After chilling, the dough should be firm and easy to work with. Take one colored portion of dough at a time. You can roll each color into small balls, about 1 inch in diameter, and then gently flatten them slightly. Alternatively, you can roll out each color thinly on a lightly floured surface and use small cookie cutters to create fun shapes. For a truly festive look, you can swirl different colors together before shaping, or marble them. Place the shaped dough onto baking sheets lined with parchment paper, ensuring there’s a little space between each bite to allow for even baking. Now is the time to add your sprinkles and edible decorations. Gently press them into the surface of the dough before baking. This is where you can personalize them for the baby celebration – think pastel sprinkles, edible glitter, or even small edible baby-themed shapes.
Step 7: Baking to Perfection
Preheat your oven to 350 degrees Fahrenheit (175 degrees Celsius). Bake the decorated cookie bites for 10-12 minutes, or until the edges are lightly golden and the centers are set. Keep a close eye on them, as baking times can vary depending on your oven and the size of your bites. They should still appear slightly soft in the center when you remove them from the oven; they will firm up as they cool. Avoid overbaking, which can lead to dry and hard cookies. Once baked, carefully transfer the baking sheets to a wire rack. Allow the cookie bites to cool on the baking sheets for about 5 minutes before transferring them to the wire rack to cool completely. This helps them set properly and prevents breakage.
Step 8: Finishing Touches and Presentation
Once your “insanely good party bites” have completely cooled, you can add any final decorative touches. If you desire a softer, sweeter finish, you can lightly dust them with powdered sugar using a fine-mesh sieve. You can also drizzle them with a simple glaze made from powdered sugar and a tiny bit of milk or lemon juice for an extra pop of flavor and visual appeal. Arrange your beautifully decorated cookie bites on a serving platter. Fgin extracta baby shower, consider arranging them in a color scheme that matches the theme, or create fun patterns. They are best enjoyed within a few days and stored in an airtight container at room temperature to maintain their freshness and delightful texture.

Conclusion:
You’ve now got the blueprint for creating Celebrating Baby With Insanely Good Party Bites that are sure to impress! These delightful bites offer a fantastic balance of flavors and textures, making them a standout addition to any celebration, especially when welcoming a little one. We’ve explored how these party bites can be customized to suit your taste and the theme of your baby shower. Remember, the joy is in the making and sharing, so don’t be afraid to experiment!
For serving, consider arrangin extractg these Celebrating Baby With Insanely Good Party Bites on a tiered platter to add visual appeal. They pair wonderfully with a light, refreshing beverage like sparkling cider or a homemade lemonade. Feel free to adapt the ingredients to create your own unique versions – perhaps a vegetarian option with marinated artichoke hearts and roasted red peppers, or a sweeter variation with crum extractbled cookies and a cream cheese frosting. The most important ingredient is your love and enthusiasm for the occasion. Go forth and create something truly special!
Frequently Asked Questions:
Q: Can I make these Celebrating Baby With Insanely Good Party Bites ahead of time?
Yes, absolutely! Many components of these Celebrating Baby With Insanely Good Party Bites can be prepared a day in advance. For example, you can chop vegetables, prepare dips, or bake any base elements. It’s best to assemble them closer to serving time to ensure optimal freshness and texture.
Q: Are there any allergy-friendly modifications for these Celebrating Baby With Insanely Good Party Bites?
Definitely! Depending on the specific recipe, you can often make substitutions. For gluten-free, look for gluten-free crackers or bread alternatives. For dairy-free, explore plant-based cream cheese or yogurt options. Always check ingredient labels carefully to ensure they meet your specific dietary needs.
Party Bites for Baby Celebration-Insanely Good Recipes
Delicious and colorful cookie bites perfect for any baby celebration, featuring a simple dough base that can be customized with various food colorings and decorations.
Ingredients
-
2 cups all-purpose flour
-
1 teaspoon baking powder
-
1/2 teaspoon salt
-
1/2 cup unsalted butter, softened
-
1 cup granulated sugar
-
2 large eggs
-
1 teaspoon vanilla extract
-
1/4 cup milk
-
Assorted food coloring (gel or liquid)
-
Assorted sprinkles and edible decorations
-
Powdered sugar for dusting (optional)
Instructions
-
Step 1
Whisk together 2 cups all-purpose flour, 1 teaspoon baking powder, and 1/2 teaspoon salt in a medium bowl until evenly distributed. Set aside. -
Step 2
In a larger bowl, cream 1/2 cup softened unsalted butter with 1 cup granulated sugar using an electric mixer on medium speed until light and fluffy (about 3-5 minutes). Scrape down sides as needed. -
Step 3
Beat in 2 large eggs one at a time, mixing well after each addition. Stir in 1 teaspoon vanilla extract until just combined. -
Step 4
Gradually add the dry ingredients to the wet ingredients, alternating with 1/4 cup milk. Mix on low speed until a cohesive dough forms. Do not overmix. -
Step 5
Divide the dough into 4-6 equal portions. Place each portion in a separate bowl, add assorted food coloring to each, and knead gently until uniform. Cover and refrigerate for at least 30 minutes. -
Step 6
Preheat oven to 350°F (175°C). Roll each colored dough portion into small balls (about 1 inch) or use cookie cutters. Place on parchment-lined baking sheets. Press assorted sprinkles and edible decorations into the surface. -
Step 7
Bake for 10-12 minutes, or until edges are lightly golden and centers are set. Let cool on baking sheets for 5 minutes before transferring to a wire rack to cool completely. -
Step 8
Once cooled, dust with powdered sugar if desired. Arrange on a serving platter for presentation. Store in an airtight container at room temperature.
Important Information
Nutrition Facts (Per Serving)
It is important to consider this information as approximate and not to use it as definitive health advice.
Allergy Information
Please check ingredients for potential allergens and consult a health professional if in doubt.


Leave a Comment