
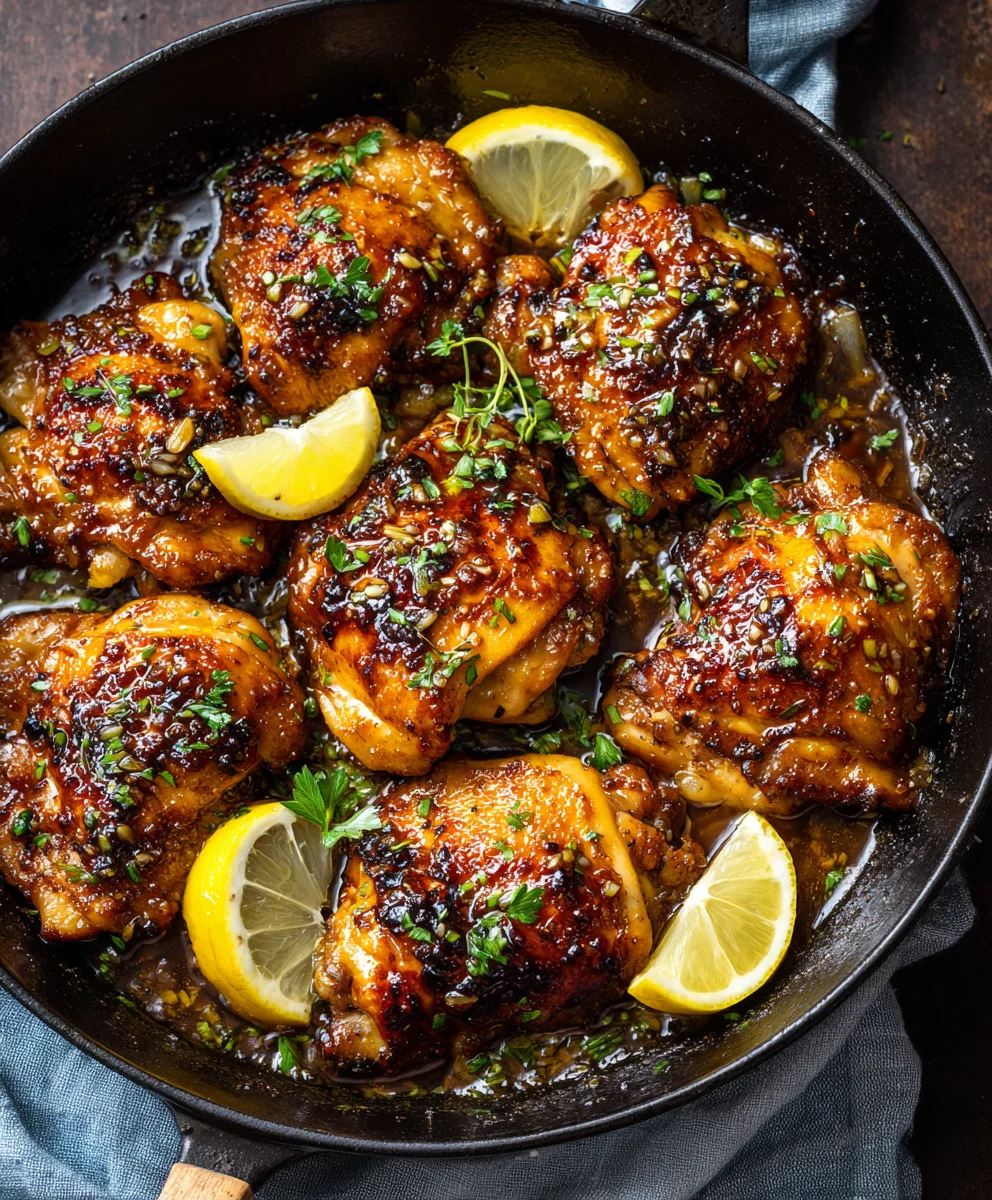
Honey Garlic Chicken is more than just a weeknight meal; it’s a culinary hug in a bowl, a perfect symphony of sweet and savory that has captivated palates worldwide. I’ve always found its irresistible sticky glaze, bursting with the pungent kick of fresh garlic perfectly balanced by the golden sweetness of honey, to be truly addictive. While its exact origin might be debated, this beloved flavor combination has become a staple in countless kitchens, evolving into a universally cherished dish. It’s a testament to how simple, wholesome ingredients can come together to create something truly extraordinary and comforting.
Perhaps its enduring popularity lies in its versatility and ease of preparation, making it a go-to for busy weeknights or a delightful centerpiece for a casual gathering.
Everyone, from seasoned home cooks to culinary novices, appreciates the sheer joy and satisfaction that comes from a perfectly executed Honey Garlic Chicken dish. It’s a dish that promises tender, flavorful chicken every time, making it an undeniable family favorite that consistently delivers on taste and comfort.
Ingredients:
- For the Chicken:
- 2 lbs boneless, skinless chicken thighs or breasts, cut into 1-inch pieces. I often prefer thighs for their inherent juiciness and rich flavor, which makes them incredibly forgiving to cook, but breasts work beautifully too if you’re mindful not to overcook them and keep them tender. The uniform 1-inch size is crucial for even cooking, ensuring every bite of our Honey Garlic Chicken is perfectly done.
- 1 tablespoon olive oil or your preferred high-smoke-point cooking oil, such as avocado oil or grapeseed oil. This is crucial for getting that beautiful, golden-brown sear on our chicken, which adds a fantastic layer of flavor and texture that we simply can’t skip.
- ½ teaspoon salt.
- ¼ teaspoon black pepper, freshly ground if you have it. Freshly ground pepper always delivers a superior aroma and a subtle kick compared to pre-ground versions, really enhancing the overall taste of our dish.
- 1 tablespoon cornstarch (or arrowroot powder for a gluten-free option). This is our secret weapon for a light, almost imperceptible crispy coating on the chicken. Beyond texture, it also acts as a fantastic binder, helping our glorious Honey Garlic sauce cling perfectly to every single piece of chicken.
- For the Irresistible Honey Garlic Sauce:
- ½ cup low-sodium soy sauce. Using a low-sodium option gives us much better control over the overall saltiness of our delicious Honey Garlic Chicken. This way, we can season the chicken independently and let the sauce contribute its savory depth without making the dish overly salty.
- ½ cup honey. This is the heart of our sweetness, providing that signature sticky, luscious glaze. The honey perfectly balances the savory notes of the soy sauce and the pungent aromatics, creating that craveable sweet and savory dynamic central to Honey Garlic Chicken.
- 4-6 cloves garlic, minced. Don’t be shy with the garlic; it’s undeniably a main star in this dish and contributes immensely to the “garlic” in Honey Garlic Chicken. I usually lean towards 6 cloves for maximum aromatic punch and flavor intensity. Freshly minced garlic is always best!
- 1 tablespoon fresh ginger, grated. Fresh ginger adds a wonderful, zesty warmth and a subtle spicy undertone that perfectly complements the garlic and honey. Trust me, it makes a significant difference in the depth of flavor. I prefer to grate it finely using a microplane for the best integration.
- 2 tablespoons rice vinegar (or apple cider vinegar). This adds a crucial touch of acidity, which brightens the entire sauce, prevents it from being overly rich, and cuts through the sweetness and savory notes beautifully, creating a more balanced flavor profile.
- 1 tablespoon sesame oil (toasted, if possible). A little goes a long way here. Toasted sesame oil adds a fantastic, nutty, deeply aromatic depth to our sauce, giving it that classic Asian-inspired flavor profile that makes Honey Garlic Chicken so appealing.
- 1 tablespoon cornstarch (again, for thickening the sauce). This will be combined with water to create a slurry that gives our Honey Garlic sauce that luxurious, glossy, and perfectly thick consistency we’re looking for, ensuring it coats the chicken beautifully without being watery.
- 2 tablespoons cold water. We’ll mix this with the cornstarch to create a smooth, lump-free slurry, which is essential for achieving a silky-smooth sauce.
- For Garnish (Optional, but highly recommended for presentation and extra flavor):
- 2 tablespoons toasted sesame seeds. These add a lovely, delicate crunch and a beautiful visual appeal, making our Honey Garlic Chicken look as good as it tastes.
- ¼ cup fresh green onions (scallions), thinly sliced. The fresh, mild oniony bite and vibrant green color are the perfect finishing touch. They add a fresh element that contrasts wonderfully with the rich, sweet, and savory sauce.
Preparing the Chicken for Our Perfect Honey Garlic Chicken
- Patting Dry and Seasoning the Chicken: First things first, let’s prepare our chicken! Take your 2 lbs of boneless, skinless chicken thighs or breasts and cut them into uniformly sized 1-inch pieces. Consistency in size is absolutely critical here, as it ensures that all pieces cook evenly at the same rate, preventing some from drying out while others are still undercooked. Once cut, transfer all the chicken pieces to a large bowl. Now, and this is an incredibly important step often overlooked, pat the chicken pieces thoroughly dry with paper towels. Removing excess moisture from the surface of the chicken is paramount; it helps us achieve a beautiful, deep golden-brown sear when it hits the hot pan. A good sear means more flavor for our Honey Garlic Chicken! Once the chicken is dry, sprinkle the ½ teaspoon of salt, ¼ teaspoon of freshly ground black pepper, and 1 tablespoon of cornstarch evenly over the chicken pieces. Using your hands, toss everything together until each piece of chicken is lightly, yet completely, coated with the seasoning and cornstarch. The cornstarch here serves multiple purposes: it helps create a fantastic, light, almost imperceptible crispy coating on the chicken, and it also acts as a protective layer, helping the chicken stay tender and preventing it from sticking excessively to the pan during searing. I find that this light coating truly elevates the texture of the finished dish, providing a delightful textural contrast to the luscious sauce.
Whisking Together Our Irresistible Honey Garlic Sauce
- Combining the Sauce Base Ingredients: In a medium bowl, or even better, a large liquid measuring cup with a spout for easy and mess-free pouring, combine all the core ingredients for our amazing Honey Garlic sauce. This includes ½ cup of low-sodium soy sauce, ½ cup of rich honey, the 4-6 minced garlic cloves (remember, I always recommend going heavy on the garlic for maximum flavor!), 1 tablespoon of finely grated fresh ginger, 2 tablespoons of tangy rice vinegar, and 1 tablespoon of deeply aromatic toasted sesame oil. Give everything a really good, vigorous whisk until the honey is fully dissolved into the liquid base and all the ingredients are thoroughly combined and well incorporated. Take a moment to smell this incredible mixture; it’s already promising great things for our Honey Garlic Chicken, with its enticing blend of sweet, savory, and aromatic notes! Setting this aside for a few minutes while we prepare the next step allows the flavors to meld just a little, deepening the complexity and developing the foundation of our incredible sauce.
- Preparing the Cornstarch Slurry for Thickening: In a small, separate bowl, whisk together the remaining 1 tablespoon of cornstarch with 2 tablespoons of cold water until you have a completely smooth slurry with absolutely no lumps. This step is crucial. This cornstarch slurry is what we’ll use later to thicken our luscious Honey Garlic sauce, giving it that perfect, glossy, and beautifully thick consistency that clings wonderfully to every piece of chicken. It is absolutely essential to never add dry cornstarch directly to a hot sauce, as it will clump instantly and unevenly, resulting in a lumpy sauce. This slurry method ensures a smooth, silky finish every single time, giving our Honey Garlic Chicken that professional, restaurant-quality glaze.
Cooking Our Honey Garlic Chicken to Golden Perfection
- Heating the Pan to Optimal Temperature: Place a large, heavy-bottomed skillet or a spacious wok over medium-high heat on your stovetop. Add 1 tablespoon of olive oil (or your chosen high-smoke-point cooking oil) to the pan. Allow the oil to heat up thoroughly until it visibly shimmers across the surface and you might even see a slight, wispy curl of smoke beginning to rise. This indicates that the pan and oil are hot enough, which is absolutely essential for achieving that desirable deep golden-brown crust on our chicken without overcooking the inside. Proper pan temperature is key to locking in juices and developing rich flavors.
- Searing the Chicken (It’s All About Batches!): Carefully add about half of the prepared, cornstarch-coated chicken pieces to the hot skillet. It is incredibly important to ensure the chicken pieces are in a single layer and, critically, that you do not overcrowd the pan. This is a truly critical step for developing maximum flavor and achieving the right texture. If you overcrowd the pan, the temperature will drop dramatically, and instead of searing, the chicken will release its moisture and essentially steam rather than brown. This means you won’t get that delicious, crispy, golden-brown crust we’re aiming for. Let the chicken cook undisturbed for 3-4 minutes until it’s beautifully golden brown and has formed a crust on the bottom side. Then, using tongs or a spatula, flip each piece and cook for another 2-3 minutes until golden on the second side and cooked through. Chicken thighs typically take a little longer than breasts and are generally more forgiving if you slightly overcook them, remaining tender. Once cooked to perfection, transfer the seared chicken to a clean plate and set aside. Repeat this exact process with the remaining chicken, adding a tiny bit more oil to the pan if necessary to ensure sufficient fat for searing. The goal here is to get a fantastic, deeply flavored sear on all the chicken pieces, which adds immense depth, complexity, and visual appeal to our final Honey Garlic Chicken.
Bringing It All Together: The Honey Garlic Glaze
- Deglazing and Gently Simmering the Sauce: With all the chicken perfectly seared and safely set aside, reduce the heat under your skillet to a gentle medium-low. Pour the entire whisked Honey Garlic sauce mixture (which we prepared in step 2) into the skillet. Bring the sauce to a gentle, controlled simmer, making sure to stir continuously. As it warms, you’ll immediately notice the incredible aroma filling your kitchen – that wonderful combination of pungent garlic, spicy ginger, and sweet honey is truly intoxicating and a promise of the deliciousness to come! Let it simmer for about 1-2 minutes, just enough time to warm through completely and allow those beautiful, complex flavors to deepen and meld slightly.
- Thickening the Sauce to a Glossy Perfection: Give your cornstarch slurry (which we prepared in step 3) a quick, vigorous re-whisk, as cornstarch particles tend to settle at the bottom if left standing. While continuously stirring the sauce in the skillet, slowly and steadily pour in the cornstarch slurry. Continue to stir gently but constantly until the sauce visibly thickens to your desired consistency. This usually happens quite quickly, typically within just 1-2 minutes. You’re looking for a beautiful, glossy, syrupy texture that elegantly coats the back of a spoon. If, by chance, it gets too thick for your liking, don’t worry! You can always add a tablespoon or two of water or chicken broth to thin it out slightly until it reaches your preferred consistency. Achieving the perfect consistency here is vital; it will ensure every single piece of your Honey Garlic Chicken is beautifully, evenly, and sumptuously coated with that rich, sticky glaze.
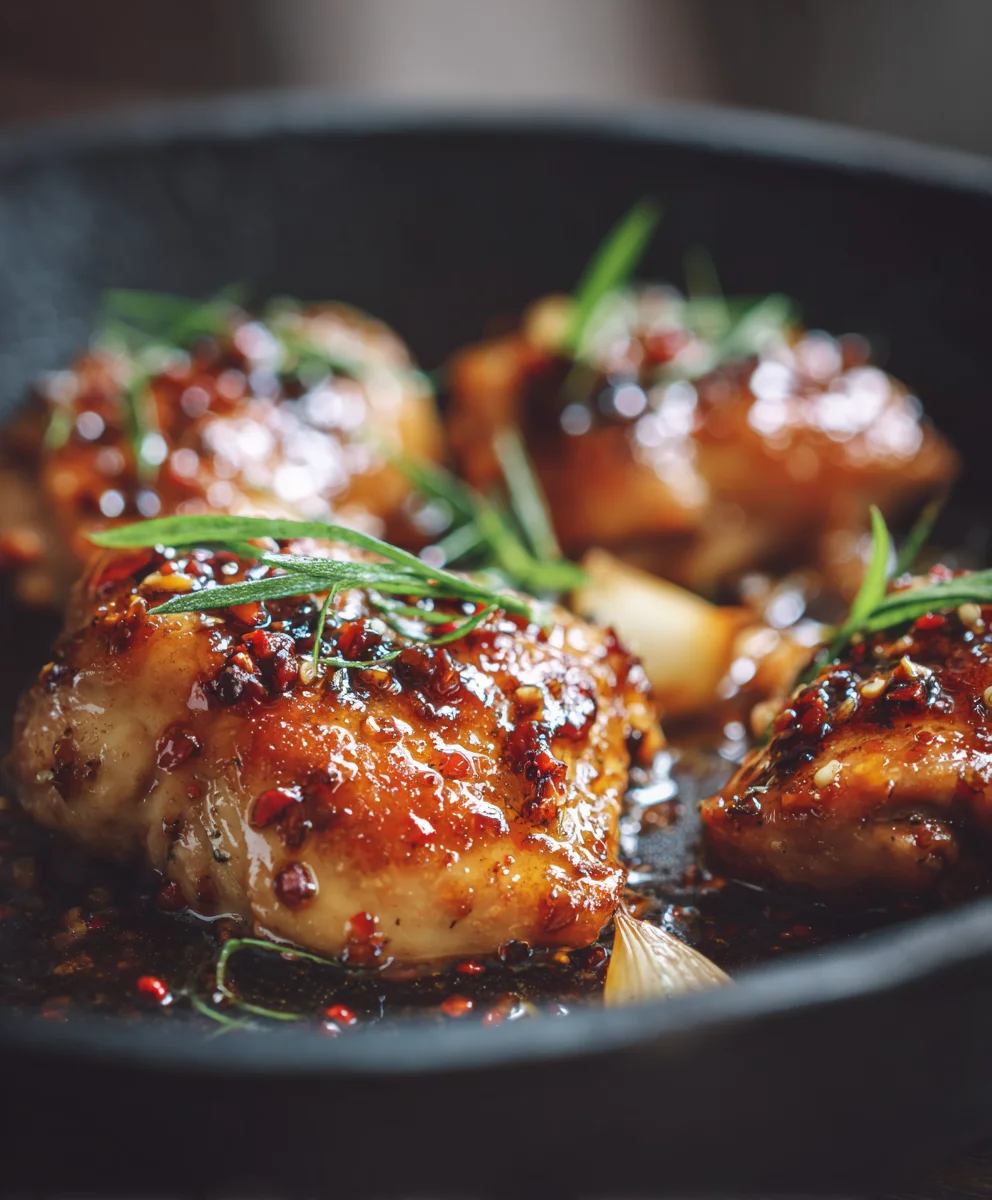
- Tossing the Chicken in the Glorious Glaze: Once the Honey Garlic sauce has reached that perfect, luscious thickness and glossy sheen, it’s time for the magic moment! Return all the seared chicken pieces that you had set aside back into the skillet with the warm, thick sauce. Gently, yet thoroughly, toss the chicken in the warm, glossy Honey Garlic sauce until every single piece is completely coated and shimmering with that incredible glaze. This is where the dish truly comes together, transforming simple seared chicken into an incredibly flavorful, sticky, and visually appealing masterpiece. Ensure the chicken is fully immersed and coated with that rich, sticky glaze. Continue to cook for another 1-2 minutes, just enough time to ensure the chicken is heated through completely and has fully absorbed the glorious flavors of the sauce, allowing them to cling and infuse.
- Final Touches and Serving Our Irresistible Honey Garlic Chicken: Carefully remove the skillet from the heat. Our magnificent Honey Garlic Chicken is now ready to be savored! Transfer it artfully to a serving platter or plate it individually for a more elegant presentation. For that extra flourish, a burst of freshness, and delightful texture, sprinkle generously with the toasted sesame seeds and thinly sliced fresh green onions. The toasted sesame seeds add a delightful nutty crunch and an inviting visual appeal, while the vibrant green onions provide a refreshing, mild oniony bite and a beautiful color contrast to the rich, dark sauce. I absolutely love serving this over a bed of fluffy jasmine rice, allowing the rice to soak up every last drop of that incredible, sticky sauce. Alternatively, it pairs wonderfully alongside some steamed broccoli or a fresh, crisp salad for a complete and utterly satisfying meal. Prepare to enjoy your homemade Honey Garlic Chicken – a dish that’s sure to impress everyone with its perfect balance of sweet, savory, and aromatic notes, making it a guaranteed crowd-pleaser!
Conclusion:
Well, my friends, we’ve reached the end of our culinary journey for today, but truly, it’s just the beginning of your delicious adventure! If there’s one recipe I could implore you to try this week, it’s this one. I know I might sound a little biased, but I genuinely believe that once you experience the magic of this particular dish, it will quickly earn a permanent spot in your weekly rotation. This isn’t just another chicken recipe; it’s a revelation of flavor, simplicity, and sheer satisfaction. It promises to deliver a sticky, sweet, and savory explosion with every bite, perfectly balancing the richness of honey with the pungent warmth of garlic, all clinging to tender, juicy chicken.
What makes this specific preparation a must-try, you ask? It’s the impeccable balance we’ve achieved – not too sweet, not too salty, but absolutely just right for this Honey Garlic Chicken. The sauce isn’t merely a coating; it’s a glaze that caramelizes beautifully, locking in moisture and intensifying the aromatics. Imagine sinking your teeth into succulent pieces of chicken, each one generously coated in that glossy, irresistible sauce that you probably won’t be able to resist licking off your plate. It’s the kind of dish that brings smiles to faces, hushes conversations at the dinner table (because everyone is too busy enjoying!), and makes even the pickiest eaters ask for seconds. From busy weeknights to relaxed weekend gatherings, this recipe effortlessly elevates any meal, requiring minimal fuss for maximum impact. Trust me when I say, you’ll be amazed at how such simple ingredients can transform into something so profoundly delicious.
Elevate Your Meal: Serving Suggestions and Delicious Variations
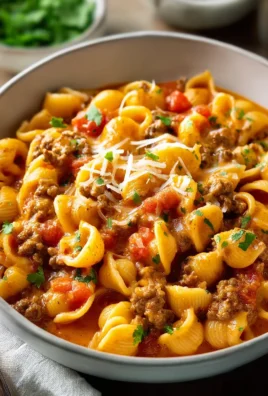
Now that you’re ready to dive into the wonderful world of this amazing chicken, let’s talk about how to make it an even more spectacular meal. My absolute favorite way to serve this dish is alongside a generous helping of fluffy jasmine rice. The rice acts as a perfect canvas, soaking up every last drop of that incredible sauce, ensuring no flavor goes to waste. But don’t feel limited! Brown rice, quinoa, or even a creamy mashed potato can also be fantastic companions, offering different textures and nutritional profiles. For a vibrant and healthy addition, consider pairing it with some steamed green beans, roasted broccoli florets, or asparagus that has been lightly seasoned and roasted until tender-crisp. A simple side salad with a light vinaigrette also provides a refreshing contrast to the rich flavors of the chicken. If you’re looking for a more Asian-inspired complete meal, serve it with some lo mein noodles or a simple ramen, allowing the chicken to be the star protein in a noodle bowl.
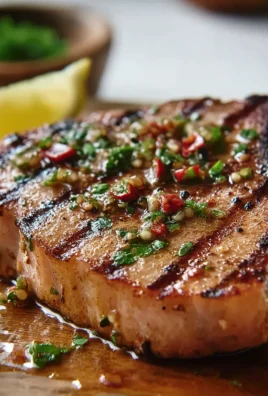
But the fun doesn’t stop there! This recipe is incredibly versatile and open to your creative whims. Want to add a little kick? A pinch of red pepper flakes or a dash of sriracha in the sauce will introduce a delightful heat that complements the sweetness beautifully. For an extra layer of texture and a nutty flavor, a sprinkle of toasted sesame seeds before serving is always a winner, as is a garnish of thinly sliced green onions or fresh cilantro for a burst of freshness. You could even transform this into a full stir-fry by adding some bell peppers, snap peas, and carrots directly into the pan during the last few minutes of cooking. Don’t have chicken breasts? This recipe works just as wonderfully with boneless, skinless chicken thighs for an even more tender and flavorful result, or even chicken wings for a fantastic appetizer. Feeling adventurous? Try adapting the same incredible sauce for pork tenderloin, shrimp, or even firm tofu for a vegetarian option. The possibilities are truly endless, and each variation brings its own unique charm.
Your Turn: Cook, Share, and Inspire!
So, there you have it – my plea, my suggestions, and my absolute conviction that this recipe for Honey Garlic Chicken is about to become your new kitchen MVP. I’ve shared my secrets, now it’s your turn to bring this dish to life in your own home. Don’t hesitate! Gather your ingredients, put on your apron, and prepare to create something truly delicious. I promise you won’t regret it. Once you’ve whipped up this fantastic meal, I would absolutely love to hear all about your experience. Did you make any exciting variations? What did your family think? Did it become an instant hit? Please, don’t keep it to yourself! Share your thoughts, your successes, and even your questions in the comments below. Better yet, snap a photo and share it with us! Your feedback and shared experiences not only make my day but also inspire other home cooks in our wonderful community to try new things. Happy cooking, and I can’t wait to hear from you!
Recipe
A delicious recipe
Ingredients
Instructions
Important Information
Nutrition Facts (Per Serving)
It is important to consider this information as approximate and not to use it as definitive health advice.
Allergy Information
Please check ingredients for potential allergens and consult a health professional if in doubt.
Leave a Comment