
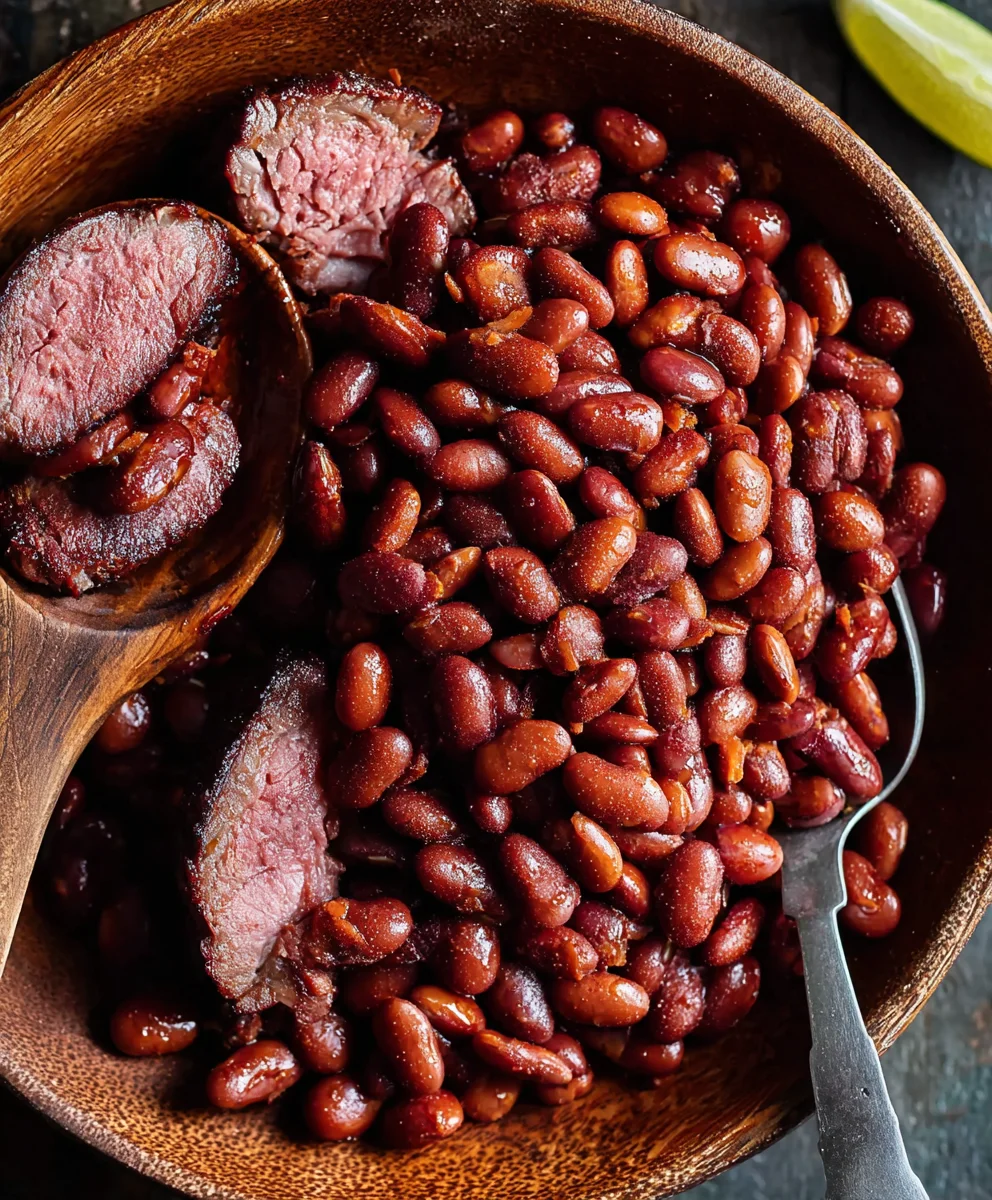
Santa Maria Pinquito Beans are more than just a side dish; they’re a California culinary icon, a testament to simple ingredients elevated to something truly extraordinary. If you’ve ever found yourself at a Santa Maria-style barbecue, you’ll understand the siren call of these small, pinkish-tan legumes. They possess a unique creaminess that’s utterly addictive, a delicate flavor that perfectly complements the smoky richness of grilled meats without overpowering them. What truly sets these Santa Maria Pinquito Beans apart is their remarkable ability to absorb the flavors they’re cooked with, transforming into a comforting, deeply satisfying experience with every spoonful. We’re diving into the heart of what makes this classic recipe so beloved, unlocking the secrets to achieving that perfect tender texture and savory depth that has charmed taste buds for generations. Get ready to bring a little bit of that Central Coast magic right into your own kitchen.
Ingredients:
- 1 pound Santa Maria Pinquito Beans, dry
- 1 ham hock
- 10 cups water (for soaking and initial cooking)
- 1 pound bacon, chopped
- 2 Anaheim chiles, seeded and chopped
- 1 large white onion, chopped
- 4-5 cloves garlic, minced
- 1½ teaspoons kosher salt
- ½-1 teaspoon ancho chile powder (adjust to your spice preference)
- 1 teaspoon brown sugar
- 1 teaspoon dry mustard
- 1 teaspoon paprika
- 15 ounces tomato sauce
- 1 cup water (for simmering)
- 3 tablespoons Worcestershire sauce
Preparing the Santa Maria Pinquito Beans
The journey to perfect Santa Maria Pinquito Beans begins with proper preparation. First, we need to sort through the dry beans. Spread them out on a clean surface and meticulously pick out any small stones, debris, or discolored beans. This might seem tedious, but it’s crucial for a pleasant eating experience. Once sorted, rinse the pinquito beans thoroughly under cool running water.
Now, it’s time for the soaking process, which helps them cook more evenly and reduces cooking time. There are two common methods for soaking. The quick soak involves placing the rinsed beans in a large pot, covering them with water by at least two inches, and bringing them to a boil for about one minute. Then, remove the pot from the heat, cover it, and let it sit for one hour. Alternatively, you can opt for the overnight soak. This is my preferred method as it’s less hands-on. Simply place the rinsed beans in a large bowl, cover them with plenty of water (again, at least two inches above the beans), and leave them on the counter at room temperature for at least 8 hours, or overnight. After soaking, drain the beans and rinse them again.
Building the Flavor Base
While the beans are soaking or after they’ve been prepared, we’ll start building the rich flavor profile that makes these Santa Maria Pinquito Beans so special. In a large, heavy-bottomed pot or Dutch oven, add the chopped bacon. Place the pot over medium heat and cook the bacon, stirring occasionally, until it’s nice and crispy. This process renders out the delicious bacon fat, which we’ll use to sauté our aromatics. Once the bacon is crispy, use a slotted spoon to remove it from the pot and set it aside on a plate lined with paper towels. Leave about 2 tablespoons of the rendered bacon fat in the pot; discard the rest or save it for another culinary adventure.
To the hot bacon fat, add the chopped white onion and the seeded and chopped Anaheim chiles. Sauté these vegetables over medium heat, stirring frequently, until the onion is softened and translucent, and the chiles have softened slightly, about 5-7 minutes. This step is essential for releasing the sweetness of the onion and the mild pepperiness of the Anaheim chiles, forming a fragrant foundation for our dish. Next, add the minced garlic to the pot and cook for another minute until fragrant, being careful not to burn it. Burnt garlic can impart a bitter taste, so keep a close eye on it.
Simmering to Perfection
Now it’s time to combine the star ingredients and let them simmer into a delicious medley. Add the soaked and drained Santa Maria Pinquito Beans to the pot with the sautéed vegetables. Place the ham hock on top of the beans and vegetables. Pour in the 10 cups of water, ensuring the beans and ham hock are completely submerged. Bring the mixture to a rolling boil, then reduce the heat to low, cover the pot, and let it simmer gently. This initial simmering phase is where the beans will begin to soften and absorb the savory essence of the ham hock. Simmer for about 1.5 to 2 hours, or until the beans are tender but not mushy. You may need to stir occasionally to prevent sticking and to ensure even cooking. Check the tenderness by tasting a few beans – they should yield easily when pressed.
Once the beans have reached your desired tenderness, it’s time to incorporate the remaining flavor boosters. Carefully remove the ham hock from the pot. It will be very hot, so use tongs. Once it’s cool enough to handle, shred the meat from the bone, discarding the skin and any excess fat. Return the shredded ham hock meat to the pot with the beans. Now, stir in the tomato sauce, the remaining 1 cup of water, the Worcestershire sauce, kosher salt, ancho chile powder, brown sugar, dry mustard, and paprika. Stir everything together until well combined.
Developing the Rich Sauce
With all the ingredients now in the pot, we’ll continue to simmer and develop the rich, flavorful sauce. Increase the heat slightly to bring the mixture to a gentle simmer. Cover the pot again and continue to cook for another 30-45 minutes. This extended simmering period allows the flavors to meld together beautifully and for the sauce to thicken to a luscious consistency. Stir occasionally to prevent the beans from sticking to the bottom of the pot. If the beans seem too thick at any point, you can add a little more water, a quarter cup at a time, until you reach your preferred consistency. The goal is a thick, spoonable sauce that coats the beans generously. Taste and adjust seasoning as needed; you might want a little more salt or a pinch more ancho chile powder for an extra kick.
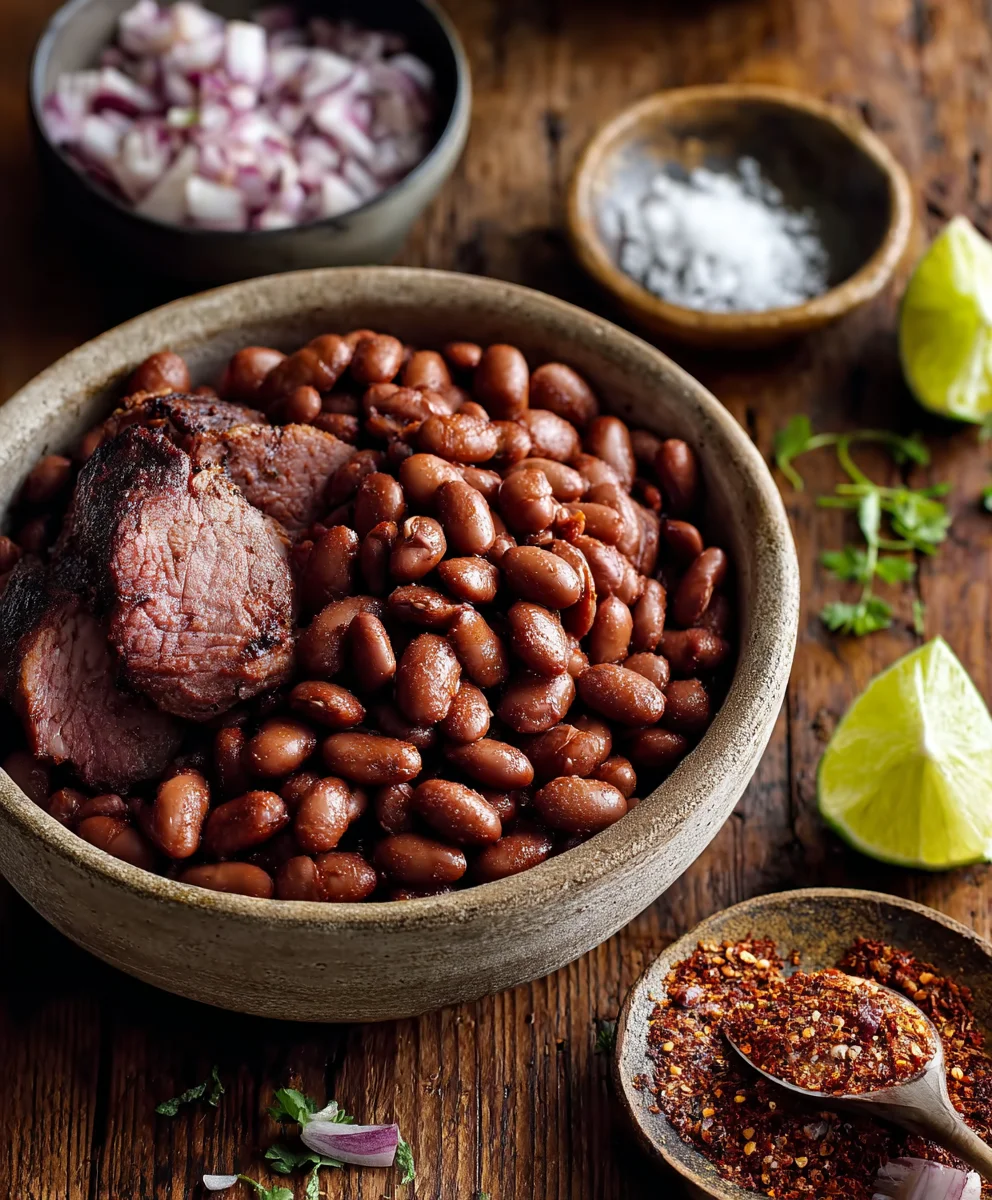
Finally, stir in the reserved crispy bacon. This adds a delightful texture and another layer of smoky, salty flavor to your Santa Maria Pinquito Beans. Serve these beans hot, as a hearty side dish or even as a main course with cornbread or a simple salad. They are a true taste of California tradition and are sure to become a favorite in your recipe repertoire.
Conclusion:
And there you have it – a foolproof guide to preparing delicious Santa Maria Pinquito Beans! We’ve walked through each step, ensuring your beans are perfectly tender, flavorful, and ready to impress. These humble yet magnificent Santa Maria Pinquito Beans are incredibly versatile and can elevate any meal from ordinary to extraordinary. They’re the perfect side dish for barbecues, a hearty addition to chili, or even a delightful base for a vegetarian main course.
For serving, I love them piled high alongside grilled tri-tip or alongside a smoky pulled pork. They also make a fantastic base for a hearty breakfast with some eggs and salsa. Don’t be afraid to experiment! Consider adding a pinch of smoked paprika for an extra layer of depth, or a splash of apple cider vinegar at the end for a brighter flavor profile. If you’re feeling adventurous, try incorporating some diced jalapeños or a touch of cayenne pepper for a hint of heat. I truly hope you enjoy making and savoring these classic Santa Maria Pinquito Beans as much as I do!
Frequently Asked Questions:
Can I use dried beans instead of canned?
Absolutely! If using dried Santa Maria Pinquito Beans, you’ll need to soak them overnight (or use a quick soak method) and then cook them until tender before proceeding with the recipe’s flavoring steps. This will require a longer cooking time, so plan accordingly.
What if I don’t have a Dutch oven?
No problem! You can achieve fantastic results using a heavy-bottomed pot or a large saucepan on the stovetop. Just ensure it has a tight-fitting lid to trap steam and allow for even cooking.
How long do the cooked beans last in the refrigerator?
Once cooled, your delicious Santa Maria Pinquito Beans will keep well in an airtight container in the refrigerator for up to 4-5 days. They often taste even better the next day as the flavors meld!
Santa Maria Pinquito Beans – Savory Beef & Spice
A flavorful and hearty dish featuring tender Santa Maria Pinquito beans simmered with savory beef, aromatic spices, and a rich tomato sauce.
Ingredients
-
1 pound Santa Maria Pinquito Beans, dry
-
1 beef shank
-
10 cups water
-
1 pound beef, chopped
-
2 Anaheim chiles, seeded and chopped
-
1 large white onion, chopped
-
4-5 cloves garlic, minced
-
1½ teaspoons kosher salt
-
½-1 teaspoon ancho chile powder
-
1 teaspoon brown sugar
-
1 teaspoon dry mustard
-
1 teaspoon paprika
-
15 ounces tomato sauce
-
1 cup water
-
3 tablespoons Worcestershire sauce
Instructions
-
Step 1
Sort through and rinse the dry pinquito beans. Soak the beans using either the quick soak method (boil for 1 minute, then cover and let sit for 1 hour) or the overnight soak method (soak in water for at least 8 hours). Drain and rinse the beans after soaking. -
Step 2
In a large pot, cook the chopped beef over medium heat until crispy, rendering out the fat. Remove the beef and set aside, leaving about 2 tablespoons of fat in the pot. -
Step 3
Add the chopped white onion and Anaheim chiles to the pot and sauté in the beef fat until softened, about 5-7 minutes. Add minced garlic and cook for another minute until fragrant. -
Step 4
Add the soaked and drained pinquito beans to the pot with the sautéed vegetables. Place the beef shank on top. Pour in 10 cups of water, ensuring everything is submerged. Bring to a boil, then reduce heat, cover, and simmer for 1.5 to 2 hours, or until beans are tender. -
Step 5
Remove the beef shank, shred the meat, and return it to the pot. Stir in tomato sauce, 1 cup of water, Worcestershire sauce, kosher salt, ancho chile powder, brown sugar, dry mustard, and paprika. Stir well. -
Step 6
Continue to simmer, covered, for another 30-45 minutes, stirring occasionally, allowing the flavors to meld and the sauce to thicken. Add more water if needed to reach desired consistency. Stir in the reserved crispy beef.
Important Information
Nutrition Facts (Per Serving)
It is important to consider this information as approximate and not to use it as definitive health advice.
Allergy Information
Please check ingredients for potential allergens and consult a health professional if in doubt.

Leave a Comment