
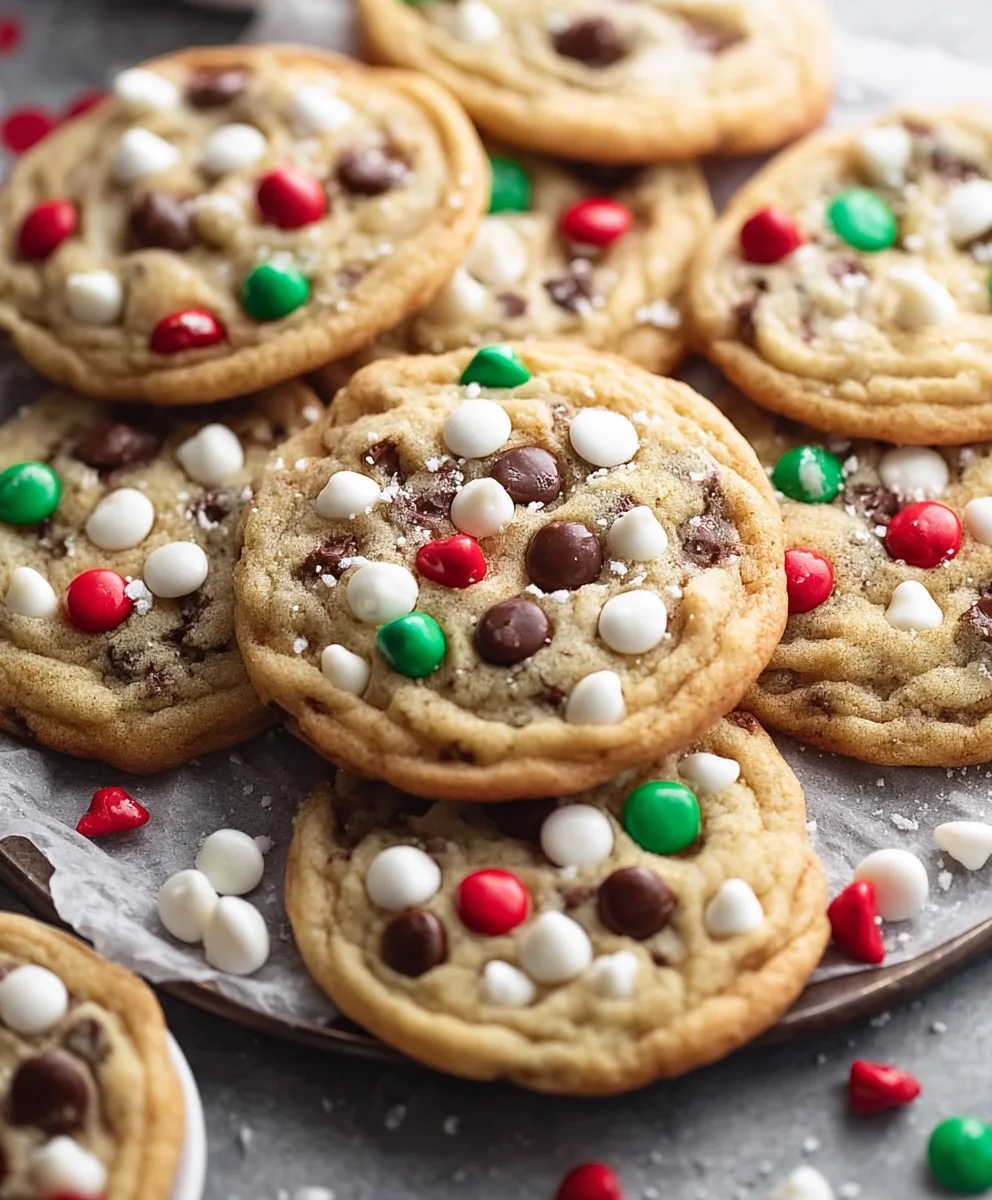
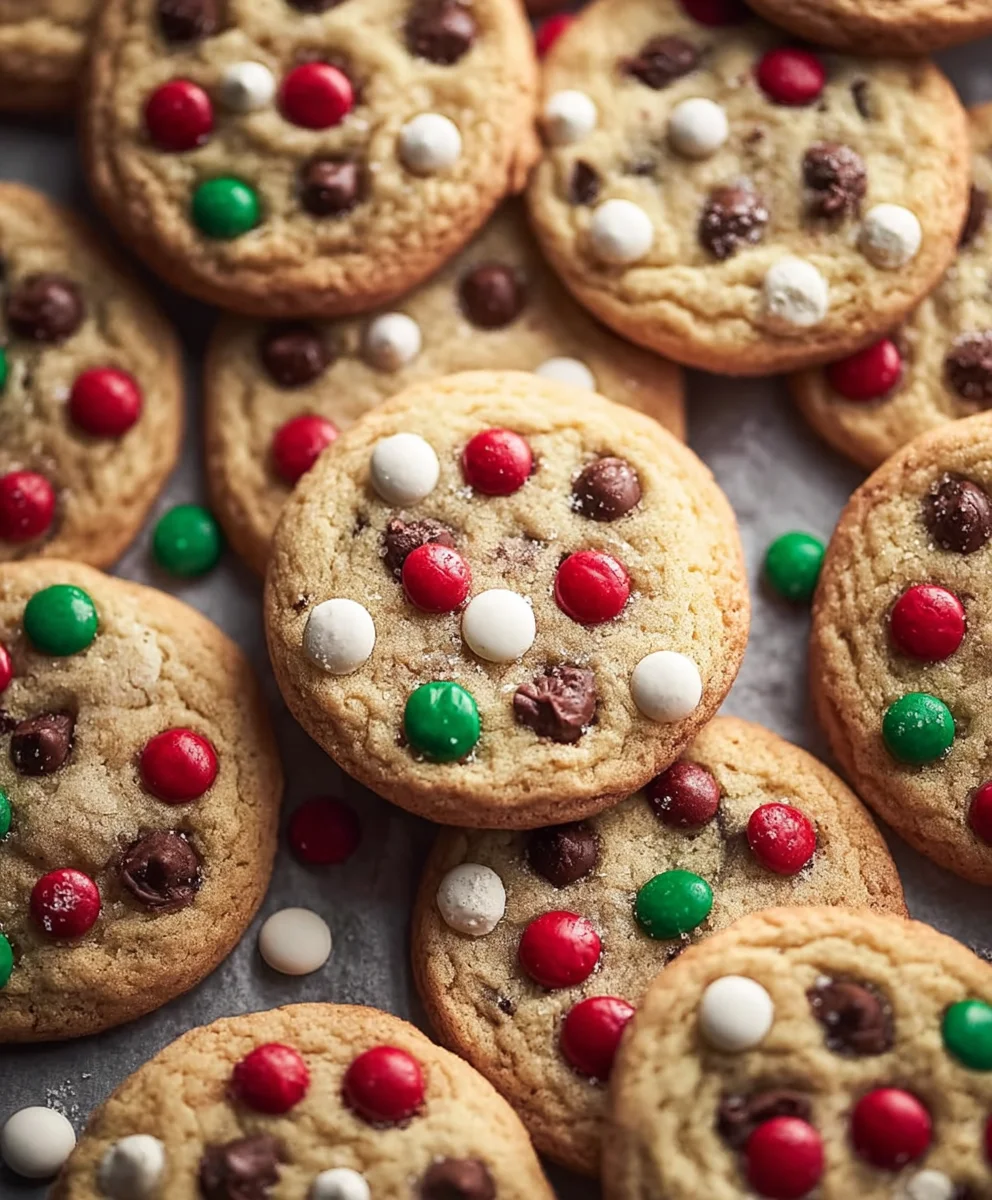
Santa’s Cookies are more than just a festive treat; they’re a warm hug in edible form, a nostalgic whisper of childhood Christmases, and the undisputed star of any holiday cookie platter. Who doesn’t dream of that first perfect bite, the delightful crunch giving way to a tender, buttery center, bursting with just the right amount of sweetness? It’s the aroma that fills the kitchen, the joy shared with loved ones, and the sheer, unadulterated deliciousness that makes these Santa’s Cookies a perennial favorite, year after year. What truly sets them apart is their incredible versatility and approachable nature. Whether you’re a seasoned baker looking to perfect a classic or a complete novice ready to embark on your first holiday baking adventure, these cookies promise delightful results. They’re the kind of treat that embodies the spirit of giving, perfect for leaving out for the man in red himself, or for sharing with everyone who makes your holiday season bright.
Ingredients:
- 3/4 cup butter, softened
- 3/4 cup packed brown sugar
- 1/4 cup granulated sugar
- 1 teaspoon vanilla extract
- 1 large egg
- 2 cups all-purpose flour
- 1 box (3.4 ounces) instant vanilla pudding mix
- 1 teaspoon baking soda
- 1/2 teaspoon salt
- 1 cup semi-sweet chocolate chips
- 1 cup white chocolate chips
- 1 cup holiday-themed M&Ms (red and green are perfect for this)
Mixing the Dough
Step 1: Creaming the Butter and Sugars
Begin extract by creaming together your softened butter, packed brown sugar, and granulated sugar in a large mixing bowl. You want to beat these ingredients until they are light and fluffy. This process incorporates air into the mixture, which is crucial for a tender cookie. A stand mixer with a paddle attachment is ideal for this, but you can also achieve this with a sturdy hand mixer or by vigorously beating with a wooden spoon and some elbow grease. Aim for a pnon-alcoholic ale yellow, airy consistency. This usually takes about 2-3 minutes on medium speed with a stand mixer.
Step 2: Adding Wet Ingredients and Pudding Mix
Next, I like to add the vanilla extract and the large egg to the creamed butter and sugar mixture. Beat these in until just combined. Now comes the secret to incredibly moist and chewy cookies: the instant vanilla pudding mix. Add the entire box of instant vanilla pudding mix to the bowl. Don’t worry, it will seem like a lot, but it’s the key to a wonderfully tender texture and enhanced vanilla flavor in our Santa’s Cookies. Mix on low speed until everything is well incorporated. The mixture might look a bit dry at this stage, but that’s perfectly normal.
Step 3: Incorporating Dry Ingredients
In a separate medium bowl, whisk together the all-purpose flour, baking soda, and salt. Whisking these dry ingredients together before adding them to the wet ingredients ensures that the leavening agents (baking soda) and salt are evenly distributed throughout the dough. This prevents pockets of saltiness or uneven rising in your finished cookies. Gradually add this dry ingredient mixture to the wet ingredients in your large mixing bowl. Mix on low speed, or fold in with a spatula, until just combined. Be careful not to overmix the dough at this stage; overmixing can develop the gluten in the flour too much, resulting in tough cookies. You want to see no dry streaks of flour remaining.
Adding the Mix-Ins
Step 4: Folding in the Chocolate and M&Ms
Now for the fun part – adding all the delicious mix-ins that make these Santa’s Cookies so festive and irresistible! Gently fold in the semi-sweet chocolate chips, white chocolate chips, and the holiday-themed M&Ms using a rubber spatula or a wooden spoon. Distribute them evenly throughout the dough. Make sure you have a good mix of all three so every bite gets a little bit of everything. This step is all about ensuring a delightful burst of flavor and texture in every single cookie. The dough will be thick and studded with all these wonderful additions.
Baking the Santa’s Cookies
Step 5: Scooping and Baking the Cookies
Preheat your oven to 375°F (190°C) and line baking sheets with parchment paper. This is essential for preventing the cookies from sticking and ensuring even baking. Using a cookie scoop (about 1.5 to 2 tablespoons in size) or two spoons, drop rounded balls of dough onto the prepared baking sheets, leaving about 2 inches of space between each cookie. This space allows for the cookies to spread as they bake. Bake for 9 to 11 minutes, or until the edges are lightly golden brown and the centers appear set but still slightly soft. They will continue to bake and firm up as they cool on the baking sheet.
Step 6: Cooling and Enjoying
Once baked, allow the Santa’s Cookies to cool on the baking sheets for about 5 minutes before carefully transferring them to a wire rack to cool completely. This cooling period on the baking sheet is important for the cookies to set up properly. They will be quite soft immediately out of the oven. Once cooled, they are ready to be enjoyed! These cookies are perfect for holiday gatherings, cookie exchanges, or simply a delightful treat to share with loved ones. They store well in an airtight container at room temperature for up to 3-4 days.
Conclusion:
There you have it – your guide to crafting the most delightful Santa’s Cookies! We’ve walked through each step, from selecting the finest ingredients to achieving that perfect golden bake. These cookies aren’t just a treat; they’re a holiday tradition waiting to be made. Whether you’re looking for a fun family activity or a way to spread festive cheer, these Santa’s Cookies are sure to be a hit. Serve them warm with a glass of cold milk, or let them cool completely for a crispier bite. They also make wonderful gifts, beautifully packaged in cellophane bags tied with ribbon.
Don’t be afraid to get creative with your decorating! Use different colored icing, sprinkles, or even edible glitter to make each cookie unique. For a different flavor profile, consider adding a pinch of nutmeg or a dash of almond extract to the dough. The possibilities are endless when it comes to personalizing your Santa’s Cookies. So gather your loved ones, put on some festive music, and let the baking magic begin extract! I truly hope you enjoy making and sharing these special treats as much as I do.
Frequently Asked Questions:
Can I make the dough for Santa’s Cookies ahead of time?
Absolutely! The dough for Santa’s Cookies can be made up to 2 days in advance and stored in an airtight container in the refrigerator. Just remember to let it soften slightly at room temperature before rolling and cutting.
How should I store leftover Santa’s Cookies?
Once cooled, Santa’s Cookies can be stored in an airtight container at room temperature for up to a week. For longer storage, they freeze beautifully for up to 3 months. Simply place them in a freezer-safe container or bag.
What if my Santa’s Cookies spread too much during baking?
If your Santa’s Cookies tend to spread, ensure your butter is softened but not overly melted. Chilling the cut-out cookies on the baking sheet for about 10-15 minutes before baking can also help them hold their shape.
Santa’s Classic Cookies-Easy Festive Baking
Easy and festive sugar cookies loaded with chocolate chips and holiday M&Ms, made extra moist and chewy with instant vanilla pudding mix.
Ingredients
-
3/4 cup butter, softened
-
3/4 cup packed brown sugar
-
1/4 cup granulated sugar
-
1 teaspoon vanilla extract
-
1 large egg
-
2 cups all-purpose flour
-
1 box (3.4 ounces) instant vanilla pudding mix
-
1 teaspoon baking soda
-
1/2 teaspoon salt
-
1 cup semi-sweet chocolate chips
-
1 cup white chocolate chips
-
1 cup holiday-themed M&Ms
Instructions
-
Step 1
Cream together softened butter, packed brown sugar, and granulated sugar in a large mixing bowl until light and fluffy, about 2-3 minutes with a stand mixer. -
Step 2
Beat in the vanilla extract and large egg until just combined. Add the entire box of instant vanilla pudding mix and mix on low speed until well incorporated. -
Step 3
In a separate bowl, whisk together all-purpose flour, baking soda, and salt. Gradually add this dry mixture to the wet ingredients and mix on low speed or fold in until just combined, being careful not to overmix. -
Step 4
Gently fold in the semi-sweet chocolate chips, white chocolate chips, and holiday-themed M&Ms using a rubber spatula or wooden spoon until evenly distributed. -
Step 5
Preheat oven to 375°F (190°C) and line baking sheets with parchment paper. Drop rounded balls of dough onto the prepared sheets, leaving 2 inches between cookies. -
Step 6
Bake for 9 to 11 minutes, or until edges are lightly golden brown and centers appear set but slightly soft. Cool on baking sheets for 5 minutes before transferring to a wire rack to cool completely.
Important Information
Nutrition Facts (Per Serving)
It is important to consider this information as approximate and not to use it as definitive health advice.
Allergy Information
Please check ingredients for potential allergens and consult a health professional if in doubt.
Leave a Comment