

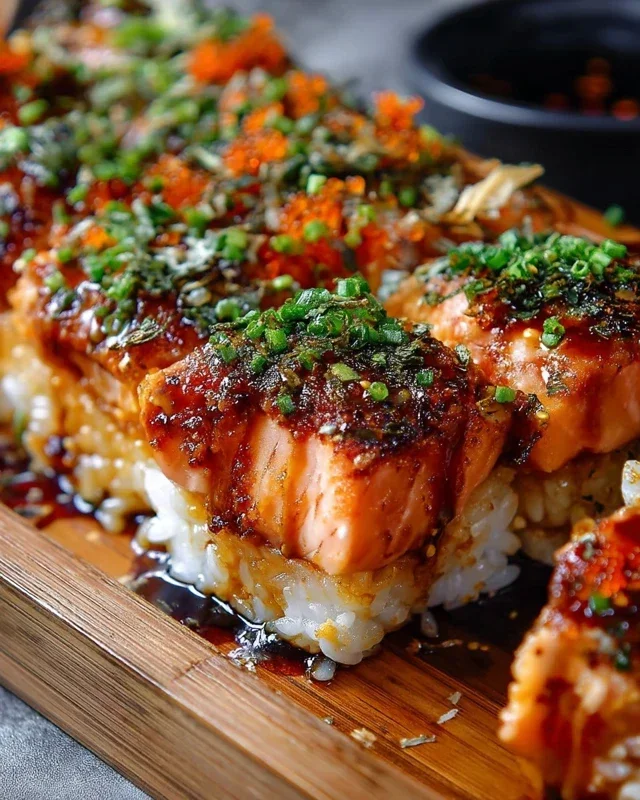
Spicy Salmon Sushi Bake Recipe: Get ready to revolutionize your weeknight dinners with this utterly delicious and incredibly satisfying dish! If you’ve ever found yourself craving the vibrant flavors of your favorite sushi but wished for something a little more comforting and communal, then this Spicy Salmon Sushi Bake is your culinary destiny. It’s the perfect fusion of creamy, spicy, and savory, all baked into one irresistible casserole. People adore this recipe because it captures the essence of sushi – the tender salmon, the sticky rice, the tangy nori – without the fuss of rolling. What truly makes it special is its versatility; you can customize the spice level, add your favorite sushi toppings, and serve it family-style, making it an instant crowd-pleaser. This Spicy Salmon Sushi Bake is a game-changer, offering all the joy of sushi in a warm, baked format that’s both approachable and exciting.
Spicy Salmon Sushi Bake Recipe
If you’re like me, you adore the vibrant flavors and satisfying textures of sushi, but the rolling process can sometimes feel a bit daunting. That’s where the glorious Sushi Bake comes in! It’s a deconstructed, casserole-style take on your favorite sushi rolls, bursting with deliciousness and incredibly easy to assemble. This Spicy Salmon Sushi Bake is a game-changer – it’s rich, creamy, a little bit spicy, and packed with savory salmon goodness. It’s perfect for a weeknight meal, a potluck, or even a fun appetizer to share. Let’s get baking!
Ingredients:
Cooking Instructions:
First, we need to get our sushi rice just right. This is the foundation of our bake, so don’t skip these steps!
1. Prepare the Sushi Rice: Rinse the sushi rice under cold running water until the water runs clear. This removes excess starch, preventing gummy rice. In a medium saucepan, combine the rinsed rice and 2.5 cups of water. Bring to a boil over medium-high heat. Once boiling, reduce the heat to low, cover tightly, and simmer for 15-20 minutes, or until all the water is absorbed. Remove from heat and let it steam, covered, for another 10 minutes. While the rice is steaming, prepare the sushi vinegar. In a small bowl, whisk together the rice vinegar, sugar, and salt until the sugar and salt are completely dissolved. Once the rice has steamed, transfer it to a large, shallow bowl or a wooden hangiri (if you have one). Gently pour the sushi vinegar mixture over the hot rice. Using a rice paddle or a spatula, carefully fold and cut the vinegar into the rice until it’s evenly distributed. Avoid mashing the rice; we want distinct grains. Fan the rice as you mix to cool it down quickly and give it a glossy sheen. Let the rice cool to room temperature.
2. Create the Spicy Salmon Mixture: In a medium bowl, combine the diced salmon, mayonnaise, Sriracha sauce, and sesame oil. Mix well until the salmon is evenly coated. You can adjust the amount of Sriracha to your desired level of spiciness. If you prefer a milder bake, start with 1 tablespoon and add more as needed. If you love heat, feel free to add a bit more! Add about half of the chopped green onions to this mixture and stir to combine. This will infuse a fresh, oniony flavor throughout the salmon layer.
3. Assemble the Sushi Bake: Preheat your oven to 375°F (190°C). Lightly grease a 9×13 inch baking dish or a similar-sized oven-safe dish. Spread the cooled sushi rice evenly across the bottom of the prepared baking dish, pressing it down gently to create a compact layer. This will form the base of our delicious bake. Next, carefully spoon the spicy salmon mixture evenly over the rice layer. Try to spread it out so you have salmon in every bite.
4. Bake to Golden Perfection: Place the assembled sushi bake in the preheated oven. Bake for 20-25 minutes, or until the salmon mixture is heated through and the top is slightly golden and bubbly. The aromas that will fill your kitchen at this stage are truly incredible! Keep an eye on it to ensure it doesn’t overcook. The goal is to warm everything up and meld the flavors beautifully.
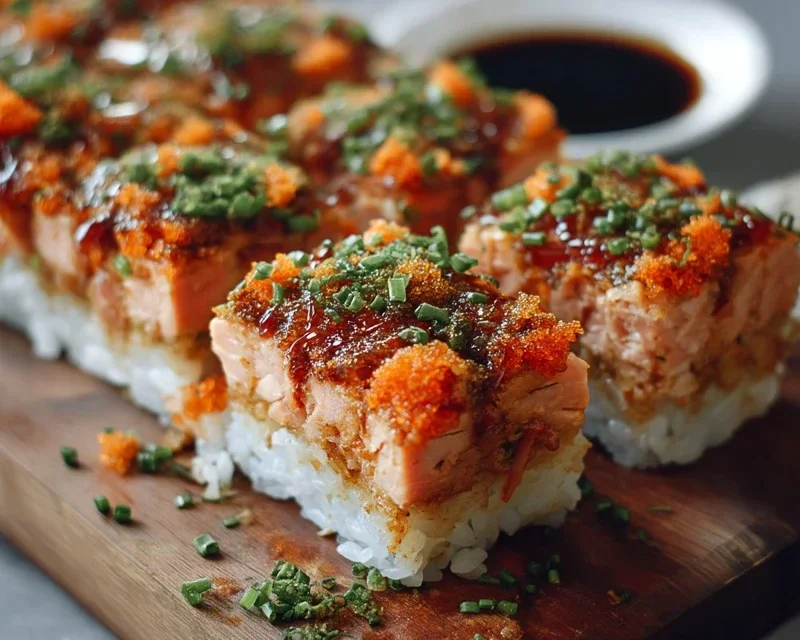
5. Garnish and Serve: Once baked, carefully remove the dish from the oven. Sprinkle the remaining chopped green onions over the top of the salmon layer. Then, artfully scatter the small strips of nori. If you’re feeling fancy and have them on hand, a sprinkle of tobiko (flying fish roe) adds a beautiful pop of color and a delightful briny crunch as a garnish. Let the sushi bake sit for about 5-10 minutes before serving. This allows it to set slightly and makes it easier to scoop. Serve warm, and enjoy every mouthwatering spoonful! This Spicy Salmon Sushi Bake is delicious on its own, or you can pair it with some soy sauce for dipping if you like. It’s a truly satisfying and comforting dish that brings all the joy of sushi in a wonderfully accessible format. Enjoy your culinary creation!
Conclusion:
I hope you’re as excited about this Spicy Salmon Sushi Bake recipe as I am! It truly is a fantastic way to enjoy all the beloved flavors of sushi without the intricate rolling. The combination of flaky, spicy salmon, creamy rice, and savory toppings creates a dish that’s both comforting and exciting, making it perfect for a weeknight dinner or a fun gathering. This recipe offers a wonderfully approachable take on sushi, delivering big on taste and satisfaction.
For serving, I love to present it straight from the baking dish, allowing everyone to scoop their own delicious portion. Garnish generously with toasted sesame seeds, sliced scallions, and perhaps a drizzle of extra spicy mayo or a touch of unagi sauce for added depth. It pairs beautifully with a simple side of edamame or a light cucumber salad.
Don’t be afraid to experiment with variations! You can swap salmon for cooked shrimp or even imitation crab for a different flavor profile. Add in some finely diced avocado before baking, or sprinkle with furikake for an extra layer of crunch and umami. This Spicy Salmon Sushi Bake is incredibly forgiving and adaptable.
I wholeheartedly encourage you to give this recipe a try. It’s a crowd-pleaser, incredibly satisfying, and surprisingly simple to prepare. Get ready to impress yourself and your loved ones!
FAQs:
Can I make this ahead of time?
Yes, absolutely! You can assemble the sushi bake up to a day in advance. Store it covered in the refrigerator and bake as directed, adding a few extra minutes to the baking time as it will be starting from a colder temperature.
What if I don’t like spicy food?
No problem at all! You can easily control the spice level. Reduce or omit the sriracha in the salmon mixture, or use a milder chili sauce. You can also serve the spicy mayo on the side for individuals to add as they prefer.
Spicy Salmon Sushi Bake
A deconstructed sushi roll baked into a casserole, featuring flaky salmon, creamy sriracha sauce, and seasoned sushi rice.
Ingredients
-
2 cups sushi rice (uncooked)
-
2.5 cups water
-
1/4 cup rice vinegar
-
2 tablespoons sugar
-
1 teaspoon salt
-
1 lb fresh salmon fillet (skinless and diced)
-
1/2 cup mayonnaise
-
2 tablespoons Sriracha sauce
-
1 teaspoon sesame oil
-
1/2 cup green onions (chopped)
-
1 sheet nori (cut into small strips)
-
tobiko (optional for garnish)
Instructions
-
Step 1
Rinse sushi rice until water runs clear. Cook rice with water according to package directions. -
Step 2
While rice is cooking, prepare the seasoning. In a small bowl, whisk together rice vinegar, sugar, and salt until dissolved. -
Step 3
Once rice is cooked, transfer to a large bowl. Drizzle with the vinegar mixture and gently fold until evenly combined. Let cool slightly. -
Step 4
In a separate bowl, combine diced salmon, mayonnaise, Sriracha sauce, sesame oil, and chopped green onions. Mix well. -
Step 5
Spread the seasoned sushi rice evenly into a greased 8×8 inch baking dish. Top with the spicy salmon mixture. -
Step 6
Bake in a preheated oven at 400°F (200°C) for 20-25 minutes, or until salmon is cooked through and the top is lightly golden. -
Step 7
Garnish with nori strips, extra green onions, and tobiko (if using) before serving.
Important Information
Nutrition Facts (Per Serving)
It is important to consider this information as approximate and not to use it as definitive health advice.
Allergy Information
Please check ingredients for potential allergens and consult a health professional if in doubt.



Leave a Comment