
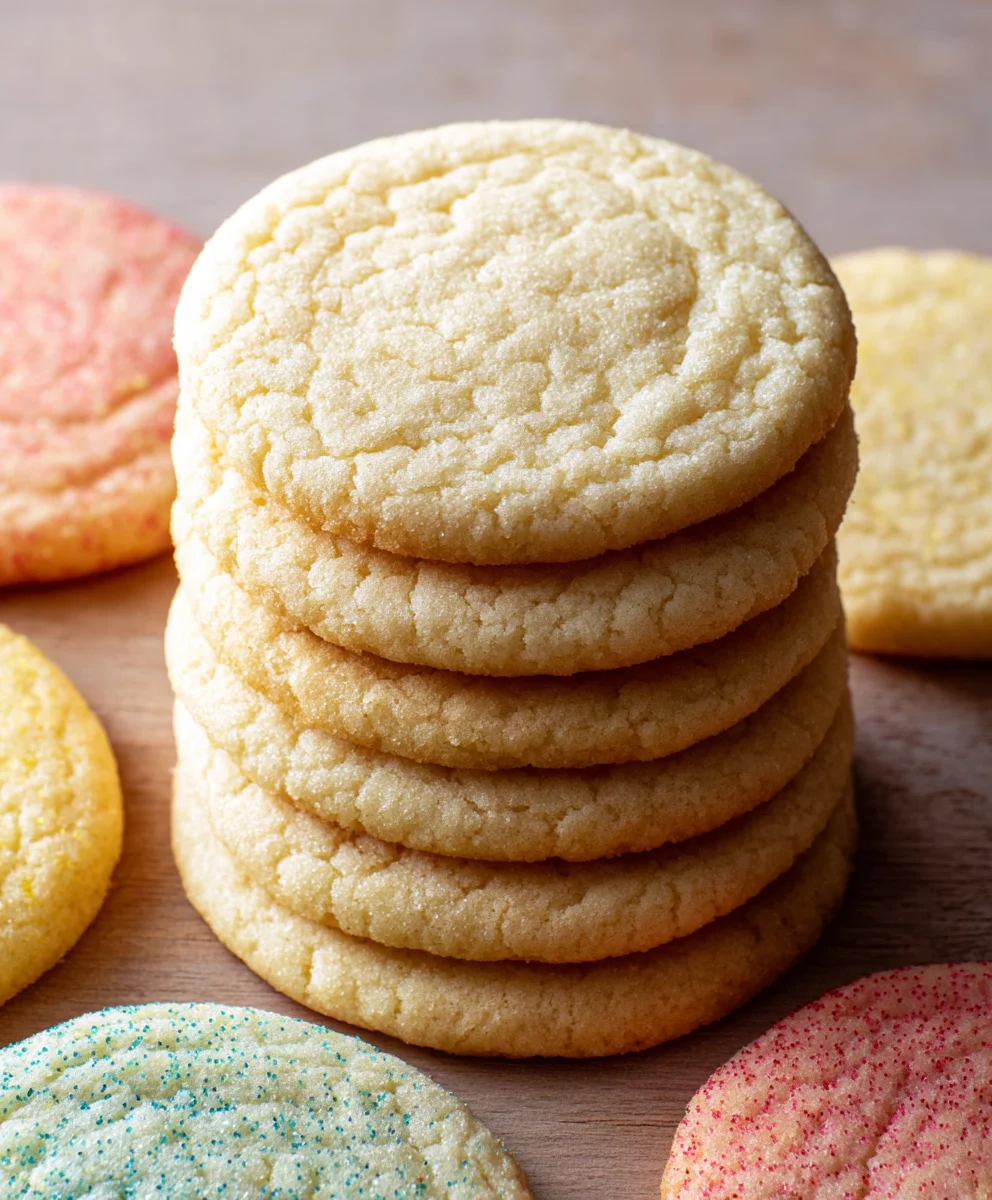
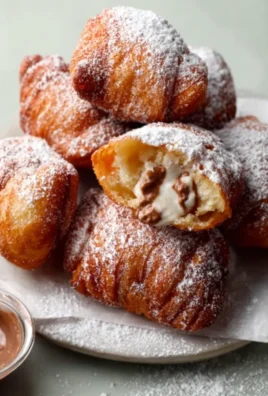
Best Sugar Cookie Recipe – that’s a bold claim, isn’t it? But trust me, after countless batches, endless experiments, and a personal quest for perfection, I genuinely believe I’ve cracked the code to the most divine sugar cookie you’ll ever bake. Imagine a cookie that’s perfectly crisp at the edges, wonderfully tender in the center, and boasts that quintessential buttery sweetness that instantly transports you back to cherished childhood Christmases or special family gatherings. This isn’t just any recipe; it’s
the
recipe for creating those unforgettable moments, a staple that you’ll return to year after year.
The humble sugar cookie has a fascinating journey, evolving from simple German settlers’ treats in Pennsylvania into a global symbol of festive cheer and comforting home baking. It’s truly a testament to the power of simplicity, using basic pantry staples to create something extraordinary. People adore sugar cookies not just for their delightful taste, which strikes that perfect balance of sweetness without being cloying, but also for their incredible versatility. They serve as the ultimate canvas for creativity, eagerly awaiting sprinkles, vibrant icing, and unique shapes, making every baking session a delightful artistic endeavor.
Achieving Perfection: Why This Recipe Stands Out
What truly sets this particular recipe apart, and makes it, in my humble opinion, the Best Sugar Cookie Recipe you’ll ever encounter, is its meticulous balance. We’re not just aiming for sweet; we’re aiming for a cookie that holds its shape beautifully for intricate decorations, yet melts in your mouth with a tender crumb. It’s the kind of cookie that makes everyone ask for the recipe, creating new cherished memories with every single, perfect bite.
Ingredients:
- 3 cups all-purpose flour, measured then sifted
- 1 1/2 teaspoons baking powder
- 1 teaspoon fine sea salt
- 3 sticks unsalted butter, softened (1 1/2 cups)
- 1 1/2 cups granulated sugar + extra for rolling
- 2 large eggs
- 1 tablespoon pure vanilla extract
Preparing Your Workspace and Ingredients
- Before you even begin mixing, I always recommend taking a moment to gather all your ingredients and tools. This is what professional bakers call “mise en place,” and it truly makes the baking process smoother and more enjoyable. Ensure your 3 sticks of unsalted butter are properly softened. This means leaving them out at room temperature for about an hour or two until they yield slightly when pressed but aren’t greasy or melted. If your butter is too cold, it won’t cream properly with the sugar, leading to a denser cookie. If it’s too warm, your cookies might spread excessively. Also, make sure your 2 large eggs are at room temperature as well; this helps them emulsify better with the butter and sugar mixture, resulting in a more uniform dough. I also find it helpful to measure out all my dry ingredients in advance and have my vanilla extract ready to go. Properly measuring flour is critical for the success of these cookies. I always spoon the flour into my measuring cup and then level it off with the back of a knife, rather than scooping directly from the bag, which can compact the flour and lead to using too much. Sifting it afterward, as instructed, ensures a light, airy texture and helps prevent lumps in the dough.
- In a medium-sized bowl, I combine the dry ingredients: the 3 cups of measured and sifted all-purpose flour, the 1 1/2 teaspoons of baking powder, and the 1 teaspoon of fine sea salt. I whisk these together thoroughly for about 30 seconds to a minute. This step, though simple, is incredibly important. It ensures that the leavening agent (baking powder) and the salt are evenly distributed throughout the flour. If they aren’t, you might end up with pockets of over-salted or bland dough, or cookies that don’t rise uniformly. A well-combined dry mixture is the foundation for consistently delicious cookies. Once mixed, I set this bowl aside, ready to be incorporated into the wet ingredients later.
Creating the Dough Base
- Now for the star of the show: creaming the butter and sugar. In the bowl of a stand mixer fitted with the paddle attachment, or with a large bowl and a hand mixer, I add the 3 sticks (1 1/2 cups) of softened unsalted butter and the 1 1/2 cups of granulated sugar. I begin mixing on low speed to initially combine them, then gradually increase the speed to medium-high. I let this mixture cream together for a good 3 to 5 minutes. What we’re looking for here is a transformation: the mixture should become visibly lighter in color, pale yellow, and significantly fluffier in texture. This process incorporates air into the butter, creating tiny pockets that will expand in the oven, giving our sugar cookies their signature tender crumb. It’s truly a magical step, and patience here pays off immensely in the final texture of your cookies. Don’t rush it!
- Once the butter and sugar mixture is perfectly light and fluffy, it’s time to add the eggs. I crack the 2 large room temperature eggs into a separate small bowl first to ensure no shell fragments sneak into my dough. Then, I add them to the creamed mixture one at a time, beating well after each addition. This allows each egg to fully incorporate, contributing to a smooth, homogenous dough. After both eggs are fully mixed in, I pour in the 1 tablespoon of pure vanilla extract. Vanilla is the quintessential flavor for sugar cookies, and a good quality extract makes all the difference. I beat for another 30 seconds or so, just until the vanilla is evenly distributed. At this point, the mixture should look smooth, creamy, and wonderfully fragrant. Remember to scrape down the sides of the bowl with a rubber spatula frequently throughout this process to ensure everything is evenly incorporated.
- With the wet ingredients beautifully combined, it’s time to bring in our dry mixture. I add the dry ingredients (flour, baking powder, and salt mixture) to the wet ingredients in three gradual additions, mixing on the lowest speed of my stand mixer after each addition. The key here is to mix just until the flour streaks disappear. Overmixing the dough is one of the most common pitfalls in cookie baking. It develops the gluten in the flour too much, leading to tough, dense cookies rather than the delicate, melt-in-your-mouth texture we’re aiming for. As soon as I see no more dry flour, I stop the mixer. A perfectly mixed dough will be soft and pliable but shouldn’t stick excessively to your hands. Give the bowl one final scrape to ensure all the ingredients are incorporated from the bottom and sides.
Chilling the Dough for Perfect Cookies
-
Now for perhaps the most important, yet often overlooked, step for the best sugar cookies: chilling the dough. Once the dough is mixed, I divide it in half and flatten each half into a disc about 1-inch thick. I then wrap each disc tightly in plastic wrap. The flat disc shape helps it chill more quickly and evenly. I then place both wrapped dough discs into the refrigerator for a minimum of 1 to 2 hours. For an even firmer dough that’s easier to work with, or if I’m not in a hurry, I often chill it for 4 hours, or even overnight. This chilling period is absolutely crucial for several reasons:
- Flavor Development: Chilling allows the flavors in the dough to meld and deepen, resulting in a richer, more nuanced cookie.
- Reduced Spread: Cold butter in the dough takes longer to melt in the oven. This means your cookies will hold their shape much better and won’t spread into flat, shapeless puddles. This is especially important if you’re using intricate cookie cutters.
- Easier Handling: A cold dough is much less sticky and significantly easier to roll out and cut without tearing. Trying to roll out warm, sticky dough is a frustrating experience you’ll want to avoid!
- Improved Texture: The chilling process helps to firm up the butter and allows the flour to fully hydrate, leading to a more tender and desirable cookie texture after baking.
So, resist the urge to skip or shorten this step! It’s the secret to those perfectly shaped, delightfully flavorful sugar cookies.
Rolling, Cutting, and Baking
- Once the dough has thoroughly chilled, it’s time to prepare for rolling and cutting. I preheat my oven to 375°F (190°C). While the oven preheats, I prepare my baking sheets by lining them with parchment paper or silicone baking mats. This prevents sticking and makes for easy cleanup. Now, take one disc of chilled dough from the refrigerator. If your dough has been chilling for a long time (like overnight), it might be very firm. Let it sit at room temperature for 5-10 minutes to soften slightly, but not too much, as you still want it cold. On a lightly floured surface (I use a generous dusting of all-purpose flour), and with a lightly floured rolling pin, I begin to roll out the dough. I like to work from the center outwards, rotating the dough periodically and lifting it occasionally to ensure it’s not sticking to the surface. The ideal thickness for sugar cookies is usually between 1/4 inch and 3/8 inch. Consistency in thickness is key here; if some parts are thinner than others, they will bake faster and potentially burn while the thicker parts are still raw. Keep your rolling pin and surface lightly floured to prevent sticking.
- Once I have rolled out my dough to the desired thickness, I grab my favorite cookie cutters. This is where the fun really begins! I press the cookie cutters firmly into the dough, trying to get as many cookies as possible from the first roll to minimize re-rolling scraps. Place the cut-out cookies on the prepared baking sheets, leaving about 1 to 2 inches of space between each cookie to allow for a little spread during baking. If you have extra granulated sugar from the ingredient list, now is the perfect time to sprinkle a little on top of each cookie before baking for an extra sparkle and subtle crunch. This simple addition elevates the appearance and texture beautifully.
- Gather the dough scraps together, gently press them into a ball, and re-roll. I try to handle the dough as little as possible during this process, as the warmth from my hands can make it sticky and tougher. If the re-rolled dough becomes too soft or sticky to work with, simply pop it back into the refrigerator for 10-15 minutes to firm up again. Continue cutting out cookies until you’ve used all the dough. You might find that the cookies cut from the first roll are slightly more tender than those from subsequent re-rolls due to less handling, but all will be delicious!
- Now it’s time to bake! I carefully place the baking sheets into the preheated 375°F (190°C) oven. The baking time for these sugar cookies typically ranges from 8 to 12 minutes, but this can vary significantly depending on your oven and the thickness of your cookies. I always keep a close eye on them, especially during the last few minutes. You’ll know they’re done when the edges are just barely set and very lightly golden. The centers might still look a little soft, but they will firm up as they cool. For even baking, especially if you’re baking multiple trays, I recommend rotating the baking sheets halfway through the baking time (e.g., swapping top and bottom racks, or rotating the trays 180 degrees). Overbaking will lead to dry, crisp cookies, whereas underbaking might result in a doughy center. Aim for that perfect balance that yields a tender, slightly chewy cookie.
Cooling and Preparing for Decoration
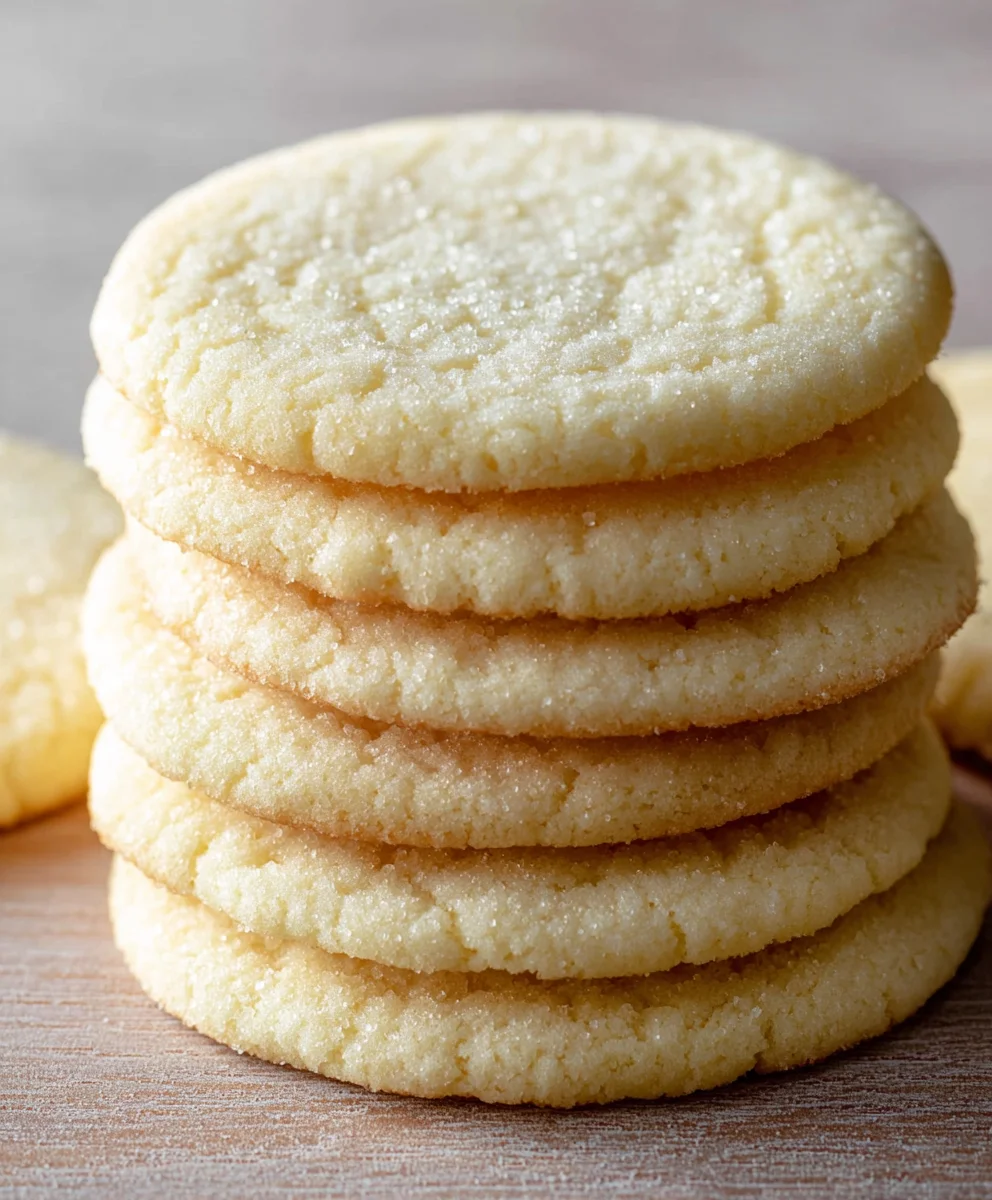
- Once baked to perfection, I carefully remove the baking sheets from the oven. Resist the urge to immediately transfer them! Let the cookies rest on the hot baking sheets for about 5 minutes. This brief cooling period on the sheet allows the cookies to set up and firm up slightly, making them less prone to breaking when you move them. After 5 minutes, using a thin spatula, I gently transfer the warm cookies to a wire cooling rack to cool completely. Allowing them to cool on a wire rack ensures air circulation all around the cookie, preventing them from becoming soggy on the bottom and ensuring they cool evenly. It’s crucial that the cookies are entirely cool before you even think about decorating them with any icing or glaze; otherwise, your decorations will melt or run, ruining all your hard work. This recipe yields a generous batch of these delightful sugar cookies, perfect for sharing, gifting, or simply enjoying yourself.
<h2>Conclusion:</h2>
<p>Well, my friends, we’ve journeyed together through the delightful process of creating what I truly believe is not just <em>a</em> sugar cookie recipe, but quite possibly the <strong>Best Sugar Cookie Recipe</strong> you will ever encounter. What makes this particular recipe stand head and shoulders above the rest, you ask? It’s a harmonious blend of simplicity and perfection. We’re talking about cookies that achieve that elusive, dreamy balance: wonderfully soft and chewy in the center, with just the slightest crispness around the edges, and a flavor profile that sings with pure, unadulterated buttery vanilla goodness. This isn’t just another cookie; it’s an experience. It’s the kind of cookie that evokes childhood memories, brings smiles to faces, and disappears from the plate faster than you can say “more, please!” I’ve tried countless sugar cookie recipes over the years, tweaking and perfecting, and I can confidently say that this one has earned its place as a perennial favorite in my kitchen and, I hope, soon in yours too. The dough is incredibly forgiving and a joy to work with, making it perfect for rolling out and cutting into all sorts of festive shapes – think stars, hearts, gingerbread men, or even intricate designs for any holiday or special occasion. And the best part? The sheer satisfaction of seeing those perfectly baked, golden-edged beauties emerge from your oven, ready for their grand transformation into edible works of art. This recipe doesn’t just promise deliciousness; it delivers it in spades, consistently, every single time. It truly simplifies the art of baking a superior sugar cookie, allowing even novice bakers to achieve professional-level results with ease. The ingredients are simple, everyday staples, yet they come together to create something truly extraordinary, proving that sometimes, the simplest things are indeed the most profound. So many recipes promise perfection but fall short, leaving you with dry, crumbly, or overly stiff cookies. This recipe avoids all those pitfalls, giving you a cookie that is moist, tender, and robust enough to hold its shape beautifully, whether you’re adding elaborate royal icing or a simple sprinkle of colored sugar.</p>
<p>But the magic of these cookies doesn’t stop at their inherent deliciousness. Their true potential unfolds with the endless possibilities for customization and serving. Imagine these beauties gracing your holiday dessert table, adorned with vibrant royal icing depicting snowflakes or intricate festive patterns. Or picture them as a heartwarming accompaniment to your afternoon tea or coffee, perhaps with a simple dusting of powdered sugar or a delicate lemon glaze. They are absolutely delightful served alongside a tall glass of cold milk for a classic comforting treat, perfect for kids and adults alike. For a more sophisticated twist, you could sandwich two cookies together with a dollop of your favorite jam, a swirl of buttercream, or even a decadent chocolate ganache. They make exquisite homemade gifts, beautifully packaged in cello bags with a pretty ribbon, offering a personal touch that store-bought treats simply can’t match. Consider serving them at a bridal shower with delicate pastel frostings, or at a child’s birthday party with fun, whimsical decorations. They are sturdy enough to travel well, making them perfect for bake sales, potlucks, or sending care packages to loved ones far away. The versatility of this cookie means it can adapt to any season, any celebration, or simply a quiet moment of indulgence. They are not merely a sweet treat; they are a blank canvas for your creativity and a tangible expression of care for those you share them with. Whether you prefer them plain and simple, or dressed to the nines with intricate designs, the underlying quality and taste of these sugar cookies will shine through, making every bite a pure delight.</p>
<p>And let’s talk about variations – this recipe is a fantastic canvas for your culinary creativity! While the classic vanilla extract is undeniably perfect, don’t hesitate to experiment with other flavorings. A hint of almond extract can elevate the flavor profile to something truly special, or try a touch of peppermint extract for a festive wintery feel. Orange or lemon zest incorporated into the dough can add a bright, zesty counterpoint to the sweetness, especially lovely for spring or summer gatherings. You could even fold in a handful of colorful sprinkles directly into the dough before baking for a “funfetti” style sugar cookie that needs minimal decorating after baking. If you’re not a fan of elaborate icing, a simple glaze made from powdered sugar and a liquid (milk, lemon juice, or even a liqueur for adult palates) can add a beautiful sheen and extra layer of flavor. For those who adore chocolate, consider dipping half of the baked and cooled cookies into melted tempered chocolate and then sprinkling with sea salt or chopped nuts. The possibilities are truly boundless, making this recipe not just a guide, but a springboard for your imagination. It’s a recipe that encourages you to play, experiment, and make it uniquely your own, while still guaranteeing a delicious result every single time. You can swap out butter for a plant-based alternative if you need a dairy-free version, or even try a gluten-free flour blend – though you might need to adjust liquid slightly – allowing this incredible cookie to be enjoyed by even more people. The simple foundation of this cookie dough means you can tailor it to almost any flavor preference or dietary consideration, making it an incredibly adaptable and inclusive recipe.</p>
<p>So, now it’s your turn! I implore you, gather your ingredients, clear your counter, and embark on this wonderful baking adventure. Trust me when I say, you won’t regret it. Once you’ve experienced the joy of creating and tasting these phenomenal sugar cookies, I have a feeling they’ll become a treasured staple in your recipe repertoire. Don’t be shy – I absolutely love seeing your creations! Please, share your baking triumphs, your decorated masterpieces, and your personal variations in the comments section below or tag me on social media. Tell me what flavors you experimented with, what shapes you cut, and most importantly, how much you and your loved ones enjoyed them. Your feedback and photos not only bring a huge smile to my face but also inspire other bakers in our community. Let’s spread the cookie love far and wide. Happy baking, and may your kitchen always be filled with the sweet aroma of freshly baked cookies!</p>
<h3>Frequently Asked Questions About Sugar Cookies</h3>
<h4>Why are my sugar cookies spreading too much?</h4>
<p>Cookie spreading is a common issue, often due to a few factors. First, ensure your butter isn’t too soft or melted; it should be softened but still cool to the touch. Secondly, make sure you’re using the correct flour measurement – too little flour can make the dough too wet. Over-creaming the butter and sugar, which incorporates too much air, can also contribute to spreading. Most importantly, chilling your dough thoroughly before rolling and cutting is crucial. Cold dough spreads less in the oven. If your kitchen is warm, consider chilling the cut-out cookies on the baking sheet for a few minutes before baking.</p>
<h4>How do I make my sugar cookies soft and chewy?</h4>
<p>To achieve that perfect soft and chewy texture, precise baking time is key. You want to pull the cookies out of the oven when their edges are just barely golden, and the centers still look slightly soft or underbaked. They will continue to cook and set as they cool on the hot baking sheet for a few minutes before transferring to a wire rack. Using a combination of butter and a touch of cream cheese (if the recipe allows) can also enhance softness. Additionally, don’t overmix your flour into the wet ingredients, as this develops gluten too much, leading to tougher cookies. Lastly, proper storage in an airtight container helps maintain their softness.</p>
<h4>Can I freeze sugar cookie dough or baked cookies?</h4>
<p>Absolutely! Both dough and baked cookies freeze beautifully. To freeze dough, you can either wrap the entire disc tightly in plastic wrap and then foil, or roll it out, cut your shapes, and flash freeze the cutouts on a baking sheet until solid. Once solid, transfer the cutouts to an airtight freezer bag or container. Dough can be frozen for up to 3 months. Thaw in the refrigerator overnight before rolling/baking. Baked and cooled cookies can also be frozen, either unfrosted or frosted (if the frosting is stable like royal icing or firm buttercream), in a single layer in an airtight container or between layers of parchment paper. They will last for 2-3 weeks in the freezer.</p>
<h4>What’s the difference between royal icing and buttercream for sugar cookies?</h4>
<p>The main difference lies in their consistency, ingredients, and final finish. <strong>Royal icing</strong> is made from powdered sugar, egg whites (or meringue powder), and water/lemon juice. It dries hard and completely firm, creating a smooth, crisp shell that’s perfect for intricate piping work and stacking. It has a beautiful matte finish. <strong>Buttercream</strong> (typically American buttercream for cookies) is made from butter, powdered sugar, milk/cream, and vanilla. It remains soft and creamy, offering a richer, sweeter flavor and a softer bite. It’s great for a fluffy, piped look or simple spreading, but it won’t dry hard, making stacking more challenging.</p>
<h4>How long do homemade sugar cookies last?</h4>
<p>Properly stored, homemade sugar cookies can last quite well! Unfrosted cookies stored in an airtight container at room temperature will stay fresh for about 5-7 days. If frosted with a stable frosting like royal icing, they can last up to 2 weeks at room temperature because the icing acts as a seal. Cookies with buttercream frosting, especially if it contains milk or cream, are best consumed within 3-4 days at room temperature or can be refrigerated for up to a week. For longer storage, freezing is your best bet, as mentioned above.</p>
<h4>Can I make these sugar cookies gluten-free or dairy-free?</h4>
<p>Yes, you certainly can adapt this recipe for dietary needs! For a <strong>gluten-free</strong> version, substitute the all-purpose flour with a 1:1 gluten-free baking blend that contains xanthan gum. You might find the dough a little more delicate, so handle it gently and possibly add a tiny bit more liquid (milk/water) if it seems too dry. For a <strong>dairy-free</strong> version, simply swap out the butter for a high-quality plant-based butter alternative (like Miyoko’s Kitchen or Earth Balance sticks) and use a dairy-free milk substitute if any liquid is called for in the recipe or frosting. The texture and flavor will be very similar, ensuring everyone can enjoy these delicious cookies!</p>
The Best Sugar Cookie Recipe for Perfect Cut-Outs
Achieve perfectly shaped, tender sugar cookies every time with this reliable recipe. Ideal for cut-outs, this recipe ensures minimal spreading and a delightful texture, perfect for any occasion and ready for your favorite decorations.
Ingredients
-
3 cups all-purpose flour
-
1 1/2 teaspoons baking powder
-
1 teaspoon fine sea salt
-
3 sticks unsalted butter (1 1/2 cups)
-
1 1/2 cups granulated sugar
-
2 large eggs
-
1 tablespoon pure vanilla extract
Instructions
-
Step 1
In a medium bowl, whisk together the 3 cups all-purpose flour, 1 1/2 teaspoons baking powder, and 1 teaspoon fine sea salt. Set aside. -
Step 2
In the bowl of a stand mixer fitted with the paddle attachment, cream the 3 sticks softened unsalted butter and 1 1/2 cups granulated sugar on medium-high speed for 3 to 5 minutes, until light and fluffy. Scrape down the sides of the bowl. -
Step 3
Add the 2 large eggs one at a time, beating well after each addition. Stir in the 1 tablespoon pure vanilla extract, beating for another 30 seconds until fully incorporated. Scrape down the bowl as needed. -
Step 4
Gradually add the dry ingredients to the wet mixture in three additions, mixing on the lowest speed until just combined and no flour streaks remain. Be careful not to overmix. -
Step 5
Divide the dough in half, flatten each half into a 1-inch thick disc, wrap tightly in plastic wrap, and chill in the refrigerator for at least 1-2 hours (or up to overnight). This step is crucial for flavor, texture, and preventing spread. -
Step 6
Preheat your oven to 375°F (190°C). Line baking sheets with parchment paper or silicone baking mats. -
Step 7
On a lightly floured surface, roll out one chilled dough disc to a thickness of 1/4 to 3/8 inch, rotating often and lifting to prevent sticking. Maintain consistent thickness. -
Step 8
Using cookie cutters, cut out shapes and carefully place them on the prepared baking sheets, leaving 1-2 inches between each cookie. Optionally, sprinkle with extra granulated sugar for sparkle and crunch. -
Step 9
Gather dough scraps, gently press into a ball, and re-roll. If dough becomes too soft, chill for 10-15 minutes before continuing. Repeat until all dough is used. -
Step 10
Bake for 8 to 12 minutes, or until the edges are lightly golden and set. Rotate baking sheets halfway through baking for even cooking. -
Step 11
Remove from oven and let cookies cool on the baking sheets for 5 minutes before transferring them to a wire cooling rack to cool completely. Ensure cookies are fully cooled before decorating.
Important Information
Nutrition Facts (Per Serving)
It is important to consider this information as approximate and not to use it as definitive health advice.
Allergy Information
Please check ingredients for potential allergens and consult a health professional if in doubt.
Leave a Comment