
Cotton Candy Cheesecake Recipe. Prepare to embark on a truly whimsical culinary adventure that promises to delight both young and old. Have you ever imagined combining the magical, melt-in-your-mouth lightness of cotton candy with the rich, creamy decadence of a classic cheesecake? Today, I am absolutely thrilled to share a dessert that turns that delightful fantasy into a delicious reality.
While cotton candy instantly transports us to joyful memories of bustling fairs and carefree childhood days, and cheesecake stands as a timeless symbol of sophisticated indulgence, this unique creation expertly marries both worlds. It’s more than just a dessert; it’s an enchanting experience for your taste buds and a feast for the eyes.
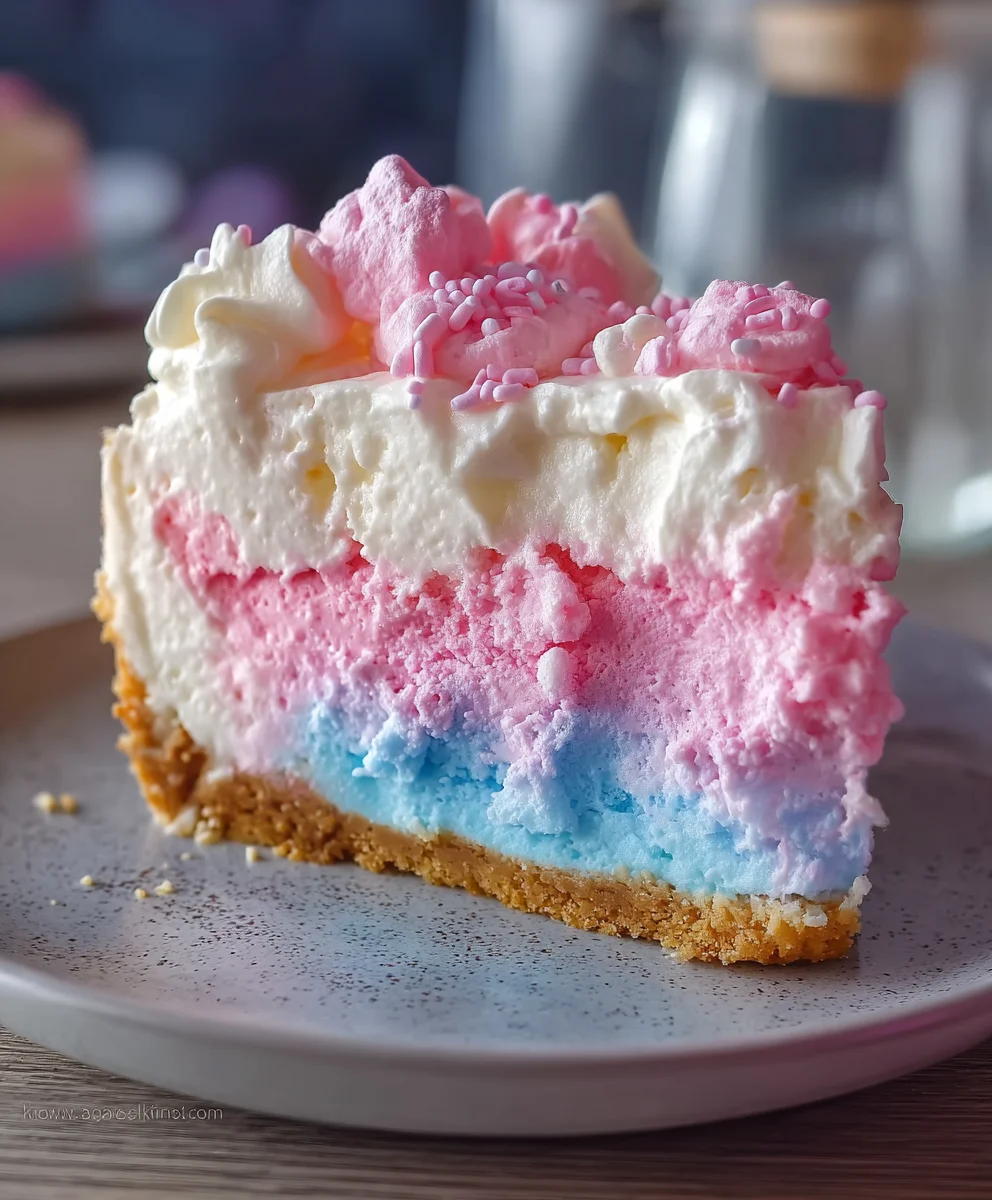
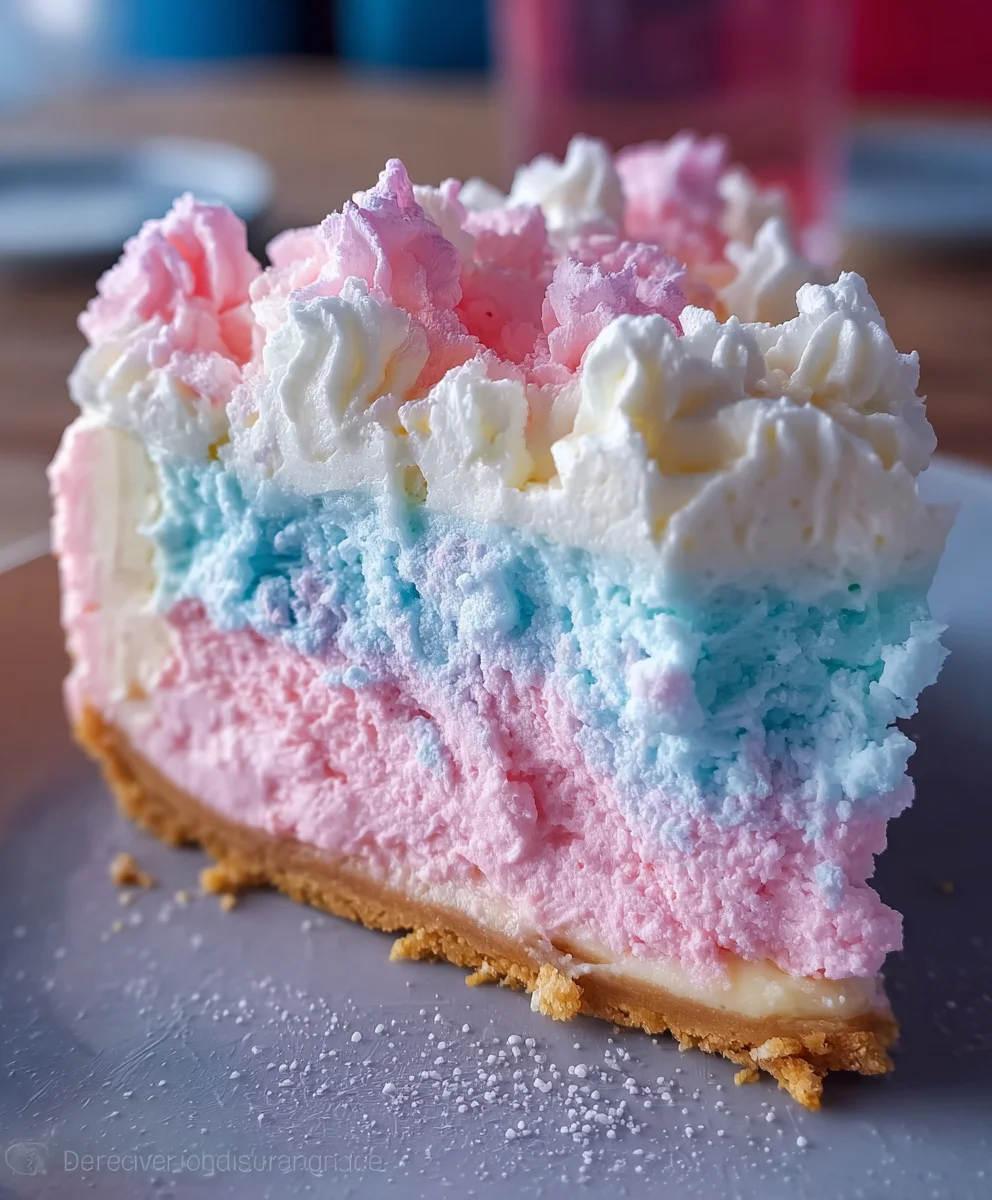
People adore this Cotton Candy Cheesecake Recipe not only for its stunning, vibrant hues that practically dance on the plate but also for its unparalleled blend of textures—from the crisp graham cracker crust to the silky-smooth, cloud-like filling that carries that unmistakable, sweet cotton candy essence. It’s a showstopper perfect for celebrations or simply to add a touch of magic to an ordinary day.
Ingredients:
-
For the Graham Cracker Crust:
- 1 ½ cups graham cracker crumbs (approximately 10-12 full sheets, finely crushed)
- ¼ cup granulated sugar
- ½ cup unsalted butter, melted
- ½ teaspoon vanilla extract (optional, but I find it adds a lovely warmth!)
-
For the Dreamy Cheesecake Filling:
- 32 ounces (four 8-ounce packages) full-fat cream cheese, softened to room temperature
- 1 ½ cups granulated sugar
- ¼ cup all-purpose flour
- 1 teaspoon vanilla extract
- ½ teaspoon almond extract (this really complements the cotton candy flavor!)
- Pinch of salt
- 4 large eggs, room temperature
- ½ cup sour cream, room temperature
- Food coloring gel: a few drops each of pink, blue, and purple (or colors of your choice to mimic cotton candy)
-
For the Whimsical Cotton Candy Swirl:
- 1 cup granulated sugar
- ½ cup water
- 1 teaspoon vanilla extract
- ¼ teaspoon cotton candy flavoring oil (optional, but highly recommended for an authentic taste!)
- 3-4 ounces actual cotton candy (pink and blue work beautifully)
-
For Garnish (because presentation is everything!):
- 1 cup heavy cream, chilled
- 2 tablespoons powdered sugar
- ½ teaspoon vanilla extract
- Fresh cotton candy tufts (pink, blue, or mixed)
- Colorful sprinkles, for extra joy!
Preparing the Graham Cracker Crust
- Preheat and Prepare: First things first, I like to get my oven ready. I’ll preheat my oven to 350°F (175°C). While that’s heating, I take a 9-inch springform pan and lightly grease the bottom and sides. To ensure an easy release and a clean edge, I often line the bottom with a circle of parchment paper. This simple step makes unmolding our gorgeous Cotton Candy Cheesecake Recipe so much smoother!
- Crush Those Crackers: In a medium bowl, I gently combine the finely crushed graham cracker crumbs with the granulated sugar. You can crush your graham crackers by placing them in a Ziploc bag and rolling over them with a rolling pin, or by pulsing them in a food processor until they resemble fine sand. The finer the crumbs, the more cohesive and sturdy your crust will be.
- Bind it Together: Now, I’ll pour in the melted unsalted butter and the optional vanilla extract. Using my fingertips or a spoon, I mix everything together until the crumbs are thoroughly moistened and resemble wet sand. It’s crucial that every single crumb is coated, as this is what holds our crust together. This forms the perfect foundation for our “Cotton Candy Cheesecake Recipe.”
- Press it Down: I then transfer the crumb mixture into the prepared springform pan. Using the bottom of a flat glass or my clean hands, I firmly press the mixture evenly across the bottom and slightly up the sides of the pan. The key here is to pack it down really well; a dense crust prevents crumbling when sliced. A perfectly packed crust is the secret to a professional-looking cheesecake.
- Pre-Bake for Perfection: Pop the pan into the preheated oven and bake for 8-10 minutes. This pre-baking step helps to set the crust, making it sturdy and preventing it from becoming soggy once the filling is added. Once baked, I remove it from the oven and let it cool completely on a wire rack while I prepare the filling. This cooling time is important to prevent the crust from softening when the warm filling goes in.
Crafting the Dreamy Cheesecake Filling
- Room Temperature is Key: Before I even think about mixing, I make absolutely sure my cream cheese, eggs, and sour cream are at proper room temperature. This is probably the most important tip for a smooth, lump-free cheesecake filling. Cold ingredients will not incorporate properly, leading to a lumpy texture and potential cracks in your finished “Cotton Candy Cheesecake Recipe.” I usually take them out of the fridge at least an hour or two before I plan to start.
- Cream the Cream Cheese: In the bowl of a stand mixer fitted with the paddle attachment, or using a large bowl with a hand mixer, I beat the softened cream cheese on medium speed for about 2-3 minutes until it’s incredibly smooth and creamy. Scrape down the sides of the bowl frequently to ensure even mixing. We’re aiming for a cloud-like consistency here.
- Add Sugar and Flour: Gradually add the granulated sugar to the cream cheese, beating on low speed until just combined, then increase to medium and beat for another 2 minutes. The sugar helps tenderize the cheesecake. Next, I gently sift in the all-purpose flour, mixing on low speed until it’s just incorporated. The flour acts as a stabilizer, preventing cracks and giving the cheesecake its characteristic creamy texture.
- Flavor Boost: Stir in the vanilla extract, almond extract, and a pinch of salt. These extracts are fundamental to the overall flavor profile of this unique “Cotton Candy Cheesecake Recipe,” adding depth that perfectly complements the whimsical cotton candy notes.
- Incorporate Eggs Gently: Add the eggs, one at a time, beating on low speed only until each egg is just incorporated before adding the next. Do NOT overmix! Overmixing after the eggs are added introduces too much air into the batter, which can cause the cheesecake to puff up dramatically during baking and then collapse and crack as it cools. This is a common pitfall, so take your time and be gentle.
- Fold in Sour Cream: Finally, gently fold in the room temperature sour cream. I use a spatula for this part to minimize air incorporation. Sour cream adds a lovely tanginess and ensures an incredibly rich and moist texture.
Creating the Whimsical Cotton Candy Swirl
- Prepare the Cotton Candy Syrup Base: In a small saucepan, combine the 1 cup granulated sugar and ½ cup water. Heat over medium heat, stirring occasionally, until the sugar is completely dissolved. Once dissolved, remove from heat.
- Infuse the Flavors: Stir in the 1 teaspoon vanilla extract and, if using, the ¼ teaspoon cotton candy flavoring oil. This flavoring oil truly elevates the “Cotton Candy Cheesecake Recipe” by providing that unmistakable aroma and taste. Allow this syrup to cool slightly.
- Melt the Cotton Candy: Now for the fun part! Divide your cooled cheesecake batter into three separate bowls (or as many as you have colors for). In one small microwave-safe bowl, combine a portion of your cotton candy (e.g., pink) with about 2-3 tablespoons of the prepared sugar syrup. Microwave on low power (or 50% power) in 10-15 second bursts, stirring well after each, until the cotton candy has mostly dissolved into a thick, colored syrup. Repeat this process for each desired color of cotton candy (e.g., blue, purple) in separate bowls, using a fresh portion of syrup for each. You want vibrant, concentrated colors.
- Color the Batters: To each of your divided cheesecake batter bowls, add a few drops of gel food coloring – pink to one, blue to another, and purple to a third. Gently fold each color into its respective bowl until uniformly colored.
- Swirl into Batter: Gently stir a portion of one of your melted cotton candy syrups (e.g., pink) into its corresponding colored batter. Do the same for the blue and purple. Do not fully mix it in; we want ribbons of concentrated cotton candy flavor. The actual cotton candy will almost magically dissolve into the batter, adding a subtle flavor and beautiful streaks of color.
Baking the Cotton Candy Cheesecake
- Prepare the Water Bath (Bain-Marie): This is arguably the most crucial step for a crack-free, silky-smooth cheesecake. Wrap the outside of your springform pan (including the bottom and sides) very securely with several layers of heavy-duty aluminum foil. Ensure there are no gaps for water to seep in. I usually do at least 2-3 layers. Place the foil-wrapped springform pan inside a larger roasting pan.
- Assemble the Layers: Pour about one-third of the plain (uncolored) cheesecake batter into the cooled graham cracker crust. Then, using a spoon, dollop alternating spoonfuls of the pink, blue, and purple colored batters over the plain layer. Repeat this process, layering plain batter and then dolloping the colored batters, until all the batter is used.
- Create the Swirl Effect: Using a thin knife or a skewer, gently swirl through the different colored batters in a figure-eight or circular motion a few times. Be careful not to over-swirl, as we still want distinct ribbons of color. We’re creating a marbling effect reminiscent of wisps of cotton candy.
- Fill the Water Bath: Carefully place the roasting pan with the cheesecake into the preheated 325°F (160°C) oven. Now, carefully pour hot water into the larger roasting pan until it comes about halfway up the sides of the springform pan. The water bath creates a moist, even heat environment, which is vital for preventing cracks and ensuring a creamy texture in our “Cotton Candy Cheesecake Recipe.”
- Bake Slowly: Bake for 60-80 minutes, or until the edges are set but the center (about a 2-inch diameter) still jiggles slightly when the pan is gently shaken. Avoid opening the oven door unnecessarily during baking.
- Cooling is Key: Once baked, turn off the oven but leave the cheesecake inside with the oven door propped open slightly (I use a wooden spoon). Let it cool in the water bath for 1 hour. This slow, gradual cooling prevents temperature shock, which is a major cause of cracks.
Chilling and Setting the Cheesecake
- Remove from Water Bath: After the hour of cooling in the oven, carefully remove the springform pan from the water bath and remove the foil. Be cautious, as the pan will still be warm.
- Counter Cooling: Let the cheesecake cool completely on a wire rack at room temperature for another 1-2 hours. It’s important it reaches room temperature before refrigerating.
- The Long Chill: Once completely cool, cover the cheesecake loosely with plastic wrap and transfer it to the refrigerator. Chill for at least 8 hours, but preferably overnight. This long chill time is non-negotiable for a perfectly set, sliceable cheesecake with the ideal texture. It allows the flavors to meld and the structure to firm up completely. Patience is a virtue when making this “Cotton Candy Cheesecake Recipe.”
- Unmolding Gracefully: When ready to serve, carefully run a thin knife around the edge of the pan before releasing the springform collar. If you used parchment paper on the bottom, you can slide the cheesecake off onto a serving plate or keep it on the pan base.
Decorating and Serving Your Masterpiece
- Whip the Cream: In a chilled bowl with chilled beaters, combine the cold heavy cream, powdered sugar, and vanilla extract. Beat on high speed until stiff peaks form. Be careful not to overbeat, or you’ll end up with butter! This fluffy whipped cream will be the perfect counterpoint to the rich cheesecake.
- Pipe and Swirl: You can pipe dollops of whipped cream around the top edge of the cheesecake or spread a thin layer over the entire top. I love to use a star tip for a beautiful, decorative border.
- The Cotton Candy Crown: Just before serving, gently pull apart fresh tufts of cotton candy and arrange them artfully on top of the cheesecake. I use both pink and blue cotton candy for that signature whimsical look. Important: Cotton candy dissolves quickly when exposed to air and moisture, so add it right before serving for the best effect.
- Sprinkle with Joy: Finish with a generous scattering of colorful sprinkles. This adds extra texture, color, and fun, perfectly capturing the spirit of our “Cotton Candy Cheesecake Recipe.”
- Slice and Savor: Use a sharp knife dipped in hot water and wiped clean between each slice for the cleanest cuts. Serve chilled and watch your guests’ eyes light up! This delightful “Cotton Candy Cheesecake Recipe” is truly a showstopper and a fantastic dessert for any celebration, bringing a touch of nostalgic fun to your table. Enjoy every delightful, dreamy bite!
Conclusion:
As we wrap up our delightful journey with this truly enchanting dessert, I hope you’re as excited as I am about the prospect of bringing this magic into your own kitchen. This isn’t just any cheesecake; it’s an experience, a conversation starter, and a vibrant burst of joy designed to captivate both the eyes and the palate. I genuinely believe that this particular Cotton Candy Cheesecake Recipe stands out as a must-try for anyone who loves baking, dessert, or simply bringing smiles to faces. Its unique blend of creamy, dreamy texture with that unmistakable, whimsical flavor of cotton candy creates a symphony of taste that is both nostalgic and refreshingly innovative. Every velvety bite transports you back to joyous carnival days, but with the sophisticated elegance of a gourmet cheesecake.
What truly makes this cheesecake a showstopper? It’s the impeccable balance of the rich, smooth cheesecake base against the subtle, sweet whisper of cotton candy, all nestled on a perfectly crisp graham cracker crust. It’s incredibly satisfying to make, and the “wow” factor upon presentation is simply unmatched. Imagine the gasps of delight when your guests first lay eyes on its ethereal pastel hues! This recipe proves that you don’t need to be a professional pastry chef to create something truly extraordinary. With clear steps and a little love, you’ll produce a dessert that looks like it came straight from a high-end bakery, but with all the warmth and charm of a homemade treat.
Elevate Your Experience: Serving Suggestions
While this cheesecake is absolutely divine on its own, served chilled and pristine, there are several ways to enhance its charm and cater to different preferences. For a simple yet elegant touch, I love to serve a slice with a generous dollop of freshly whipped cream, perhaps infused with a hint of vanilla bean. The lightness of the cream provides a beautiful contrast to the cheesecake’s richness. Another fantastic option is to pair it with fresh berries—strawberries, raspberries, or blueberries—their slight tartness cuts through the sweetness wonderfully, adding a burst of fresh flavor and vibrant color. For an extra touch of whimsy, consider garnishing each slice with a tiny, delicate tuft of actual cotton candy right before serving. Just remember, cotton candy dissolves quickly, so this is definitely a “last minute” flourish! A light dusting of edible glitter can also add a magical sparkle, making it even more photo-worthy.
Creative Variations to Explore
Don’t be afraid to make this recipe your own! If you’re feeling adventurous, you could experiment with different crusts. A vanilla wafer crust would provide a slightly different sweetness and texture, while a shortbread crust would offer a buttery, crumbly base. For those who enjoy a chocolatey contrast, a crushed Oreo cookie crust could be surprisingly delicious and visually striking against the light colors of the cheesecake filling. You could also play with the food coloring used in the filling to match a specific party theme – imagine a vibrant blue for a baby shower or a mix of pastel colors for an Easter celebration. For smaller gatherings or individual portions, this Cotton Candy Cheesecake Recipe can easily be adapted into mini cheesecakes baked in cupcake liners, or even cheesecake bars for a more casual, grab-and-go dessert. The possibilities are truly endless!
Your Turn to Create Magic!
Now that you have all the insights and inspiration, I wholeheartedly encourage you to roll up your sleeves and give this incredible recipe a try. There’s immense satisfaction in creating something so beautiful and delicious from scratch. It’s more than just baking; it’s about creating moments, memories, and pure delight. Once you’ve successfully brought this magnificent dessert to life, I would absolutely love to hear about your experience! Did you stick to the original recipe, or did you put your own unique spin on it? What did your friends and family think? Did it become the star of your dessert table? Please, don’t hesitate to share your stories, your photos, and your triumphs. Your feedback is invaluable, and it truly makes my day to see your culinary adventures. So, go forth, bake with joy, and prepare to impress everyone with your stunning homemade Cotton Candy Cheesecake!
Whimsical Cotton Candy Cheesecake
Embark on a delightful culinary adventure with this Cotton Candy Cheesecake. Combining the melt-in-your-mouth lightness of cotton candy with the rich, creamy decadence of a classic cheesecake, this dessert is an enchanting experience for your taste buds and a feast for the eyes, perfect for any celebration.
Ingredients
-
1 ½ cups graham cracker crumbs
-
¼ cup granulated sugar (for crust)
-
½ cup unsalted butter, melted
-
½ teaspoon vanilla extract (optional, for crust)
-
32 ounces (four 8-ounce packages) full-fat cream cheese, softened
-
1 cup granulated sugar (for filling)
-
¼ cup all-purpose flour
-
1 teaspoon vanilla extract (for filling)
-
½ teaspoon almond extract
-
Pinch of salt
-
4 large eggs, room temperature
-
½ cup sour cream, room temperature
-
Food coloring gel: a few drops each of pink, blue, and purple
-
1 cup granulated sugar (for cotton candy syrup)
-
½ cup water
-
1 teaspoon vanilla extract (for cotton candy syrup)
-
¼ teaspoon cotton candy flavoring oil (optional)
-
3-4 ounces actual cotton candy (pink and blue)
-
1 cup heavy cream, chilled (for garnish)
-
2 tablespoons powdered sugar (for garnish)
-
½ teaspoon vanilla extract (for garnish)
-
Fresh cotton candy tufts (pink, blue, or mixed, for garnish)
-
Colorful sprinkles (for garnish)
Instructions
-
Step 1
Preheat oven to 350°F (175°C). Lightly grease a 9-inch springform pan; optionally line bottom with parchment paper. In a medium bowl, combine graham cracker crumbs, ¼ cup granulated sugar, melted butter, and optional vanilla extract until moistened. Press crumb mixture firmly into the bottom and slightly up the sides of the pan. Bake for 8-10 minutes. Cool completely on a wire rack. -
Step 2
Ensure cream cheese, eggs, and sour cream are at room temperature. In a stand mixer, beat softened cream cheese until smooth (2-3 minutes). Gradually add 1 cup granulated sugar; beat until combined, then for 2 more minutes. Sift in flour, mixing on low until just incorporated. Stir in vanilla extract, almond extract, and a pinch of salt. Add eggs one at a time on low speed, beating only until just incorporated. Gently fold in sour cream with a spatula. -
Step 3
In a small saucepan, combine 1 cup granulated sugar and ½ cup water. Heat over medium until sugar dissolves; remove from heat. Stir in 1 teaspoon vanilla extract and optional ¼ teaspoon cotton candy flavoring oil. Cool slightly. Divide cheesecake batter into three bowls. In separate microwave-safe bowls, combine portions of actual cotton candy with 2-3 tablespoons of prepared sugar syrup. Microwave on low (10-15 sec bursts), stirring, until cotton candy dissolves into a thick syrup. To each divided batter bowl, add a few drops of gel food coloring (pink, blue, purple), folding gently until uniformly colored. Gently stir a portion of the corresponding melted cotton candy syrup into each colored batter, creating ribbons without fully mixing. -
Step 4
Prepare a water bath: Wrap springform pan securely with 2-3 layers of heavy-duty aluminum foil. Place in a larger roasting pan. Pour about one-third of the plain batter into the cooled crust. Dollop alternating spoonfuls of the pink, blue, and purple colored batters over the plain layer. Repeat until all batter is used. Gently swirl through batters with a thin knife for a marbling effect; do not over-swirl. Carefully place the roasting pan with the cheesecake into the preheated 325°F (160°C) oven. Pour hot water into the roasting pan until halfway up the springform pan sides. Bake for 60-80 minutes, or until edges are set and the center (approx. 2-inch diameter) jiggles slightly. Turn off oven, prop door open, and cool cheesecake in water bath in oven for 1 hour. -
Step 5
Remove cheesecake from water bath and foil. Cool completely on a wire rack at room temperature (1-2 hours). Cover loosely with plastic wrap and refrigerate for at least 8 hours, preferably overnight, for optimal setting. When ready to serve, run a thin knife around the edge before releasing the springform collar. -
Step 6
In a chilled bowl, beat 1 cup cold heavy cream, 2 tablespoons powdered sugar, and ½ teaspoon vanilla extract on high speed until stiff peaks form. Pipe or spread whipped cream around the top edge or over the entire top of the cheesecake. Just before serving, arrange fresh tufts of cotton candy on top (pink, blue, or mixed), as cotton candy dissolves quickly. Finish with colorful sprinkles. Slice with a hot, wiped knife and serve chilled.
Important Information
Nutrition Facts (Per Serving)
It is important to consider this information as approximate and not to use it as definitive health advice.
Allergy Information
Please check ingredients for potential allergens and consult a health professional if in doubt.


Leave a Comment