
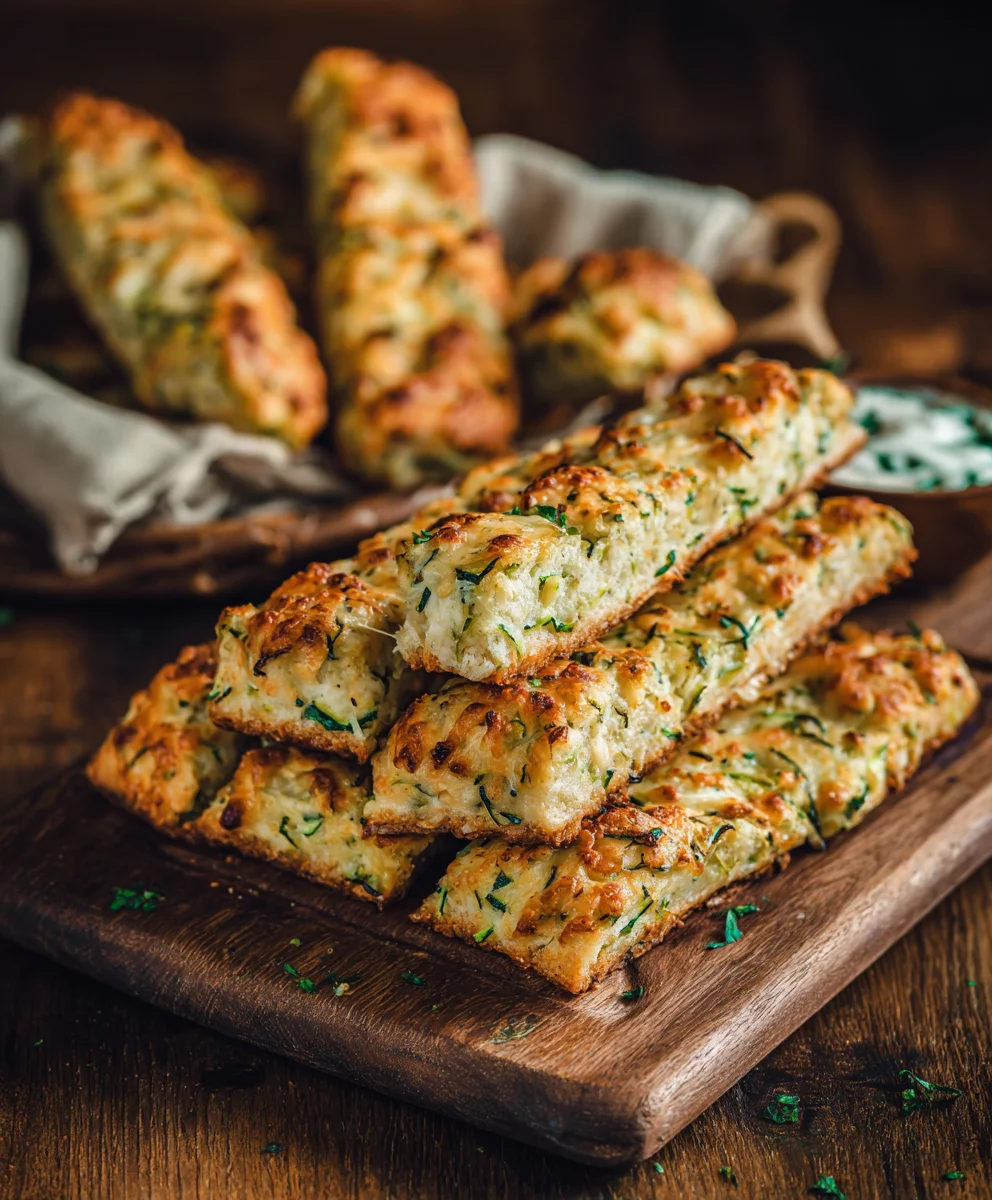
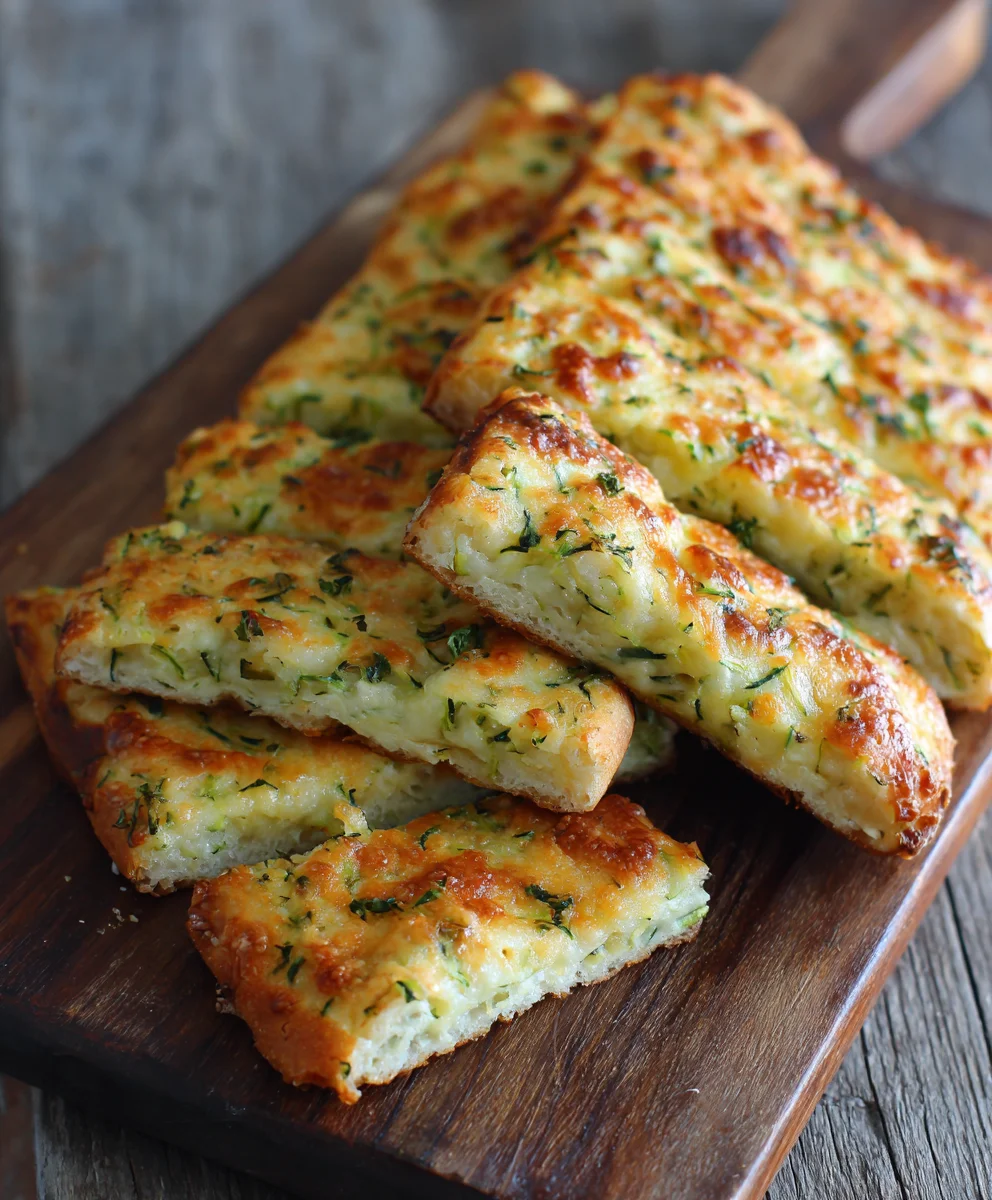
Zucchini Cheese Breadsticks offer a truly delightful twist on a classic snack, transforming humble zucchini into an irresistible, savory treat that will quickly become a household favorite. Imagine golden, crispy edges yielding to a soft, cheesy interior, infused with the subtle freshness of garden-fresh zucchini. These aren’t just any breadsticks; they are a flavorful revelation, perfect for dipping into marinara, pairing with a hearty soup, or simply enjoying as a standalone snack. I find them to be an incredibly clever and delicious way to incorporate more vegetables into your diet, often without anyone even realizing they’re eating something so wholesome.
Why This Dish Resonates
While the exact origins of combining zucchini and cheese into a breadstick form might be relatively modern, born from a desire to create both healthier and more innovative comfort foods, it beautifully extends the tradition of incorporating vegetables into everyday baking. This ingenious concept ensures that even the pickiest eaters will enthusiastically enjoy their greens, wrapped in a comforting, cheesy embrace. Once you experience the sheer joy of these homemade Zucchini Cheese Breadsticks, you’ll understand why they’re so beloved. Their ease of preparation, combined with their incredible taste and satisfying texture – a lovely crisp on the outside and a tender, cheesy inside – makes them an absolute winner for any occasion. I am genuinely excited for you to discover this fantastic recipe!
Ingredients:
- 2 medium-sized Zucchini: Approximately 1.5 to 2 pounds total. Look for firm, vibrant green zucchini without blemishes. This is the star of our Zucchini Cheese Breadsticks!
- 3 cups All-Purpose Flour: Plus extra for dusting. I find this amount gives the perfect texture to our breadsticks, making them both soft and slightly chewy.
- 1 packet (2 ¼ teaspoons) Instant Dry Yeast: Or active dry yeast, but instant works beautifully here because it can be mixed directly with the dry ingredients.
- 1 teaspoon Granulated Sugar: This isn’t just for sweetness; it’s food for the yeast, helping it activate and produce that lovely airy texture.
- 1 teaspoon Fine Sea Salt: For the dough. Salt is crucial for flavor and also helps control the yeast’s activity.
- ½ teaspoon Garlic Powder: For the dough, adding a subtle aromatic note right into the base.
- 1 cup Warm Water: (105-115°F or 40-46°C) This temperature is vital for activating the yeast without killing it. Think lukewarm bath water, not hot.
- 2 tablespoons Olive Oil: Plus extra for greasing the bowl and brushing. It adds richness and helps with the dough’s elasticity.
- 1 ½ cups Shredded Low-Moisture Part-Skim Mozzarella Cheese: Divided. This cheese melts beautifully and gives us that classic cheesy pull in our Zucchini Cheese Breadsticks.
- ½ cup Freshly Grated Parmesan Cheese: Divided. For a sharper, saltier kick that complements the mozzarella.
- 2 cloves Garlic: Minced very finely. Fresh garlic adds an incredible aromatic punch to the filling.
- 1 teaspoon Dried Oregano: Or a mix of Italian herbs. Herbs are essential for enhancing the flavor profile of our Zucchini Cheese Breadsticks.
- ½ teaspoon Black Pepper: Freshly ground is always best.
- ¼ teaspoon Red Pepper Flakes (optional): If you like a little heat in your breadsticks, this is a wonderful addition.
- 1 large Egg: Beaten with 1 tablespoon of water for an egg wash. This gives our Zucchini Cheese Breadsticks a beautiful golden-brown crust.
- 2 tablespoons Melted Unsalted Butter (optional): For brushing after baking, adding extra richness and shine.
- Fresh Parsley or Chives: Chopped, for garnish (optional). A lovely fresh finish.
Preparing the Zucchini
- Grate the Zucchini: Start by washing your zucchini thoroughly. There’s no need to peel them; the skin adds a bit of color and extra fiber. Using the large holes of a box grater, grate both zucchini into a medium-sized bowl. If you have a food processor with a grating attachment, it will make this step incredibly quick and easy. I personally find the texture from a box grater to be ideal for these Zucchini Cheese Breadsticks, as it creates tender strands that meld perfectly into the cheesy filling.
- Salt and Drain: Once all the zucchini is grated, sprinkle it generously with about ½ teaspoon of salt. Toss it well to ensure the salt is evenly distributed. Now, here’s a crucial step that you absolutely must not skip if you want delicious, non-soggy Zucchini Cheese Breadsticks: let the salted zucchini sit for at least 15-20 minutes. The salt will draw out a significant amount of moisture from the zucchini.
- Squeeze Out Excess Moisture: After the resting period, you’ll notice a pool of liquid at the bottom of the bowl. This is exactly what we want! Take handfuls of the grated zucchini and firmly squeeze out as much liquid as you possibly can. I like to use a clean kitchen towel or several layers of paper towels for this. Gather the zucchini in the towel and twist it tightly over the sink, watching as the water pours out. You’ll be surprised by how much liquid comes out – it’s often more than you expect! Repeat this process until all the zucchini is thoroughly squeezed dry. This step is paramount for preventing your Zucchini Cheese Breadsticks from becoming watery and losing their texture. You want the zucchini to be as dry as possible.
- Prepare the Zucchini Filling: Transfer the squeezed-dry zucchini to a clean bowl. Add 1 cup of the shredded mozzarella cheese, ¼ cup of the grated Parmesan cheese, the minced garlic, dried oregano, black pepper, and optional red pepper flakes. Toss everything together until well combined. Set this mixture aside while we prepare the dough. The aroma from the fresh garlic and herbs is already getting me excited for our Zucchini Cheese Breadsticks!
Making the Dough for Your Zucchini Cheese Breadsticks
- Activate the Yeast: In a large mixing bowl (or the bowl of a stand mixer fitted with a dough hook), combine the warm water and granulated sugar. Sprinkle the instant dry yeast over the top. Give it a gentle stir. Let it sit for 5-10 minutes. You should see foam or bubbles forming on the surface; this indicates that your yeast is alive and active, ready to work its magic on our Zucchini Cheese Breadsticks. If no bubbles appear, your water might have been too hot or too cold, or your yeast may be old, and you’ll need to start again with fresh yeast.
- Combine Dry Ingredients: While the yeast is activating, in a separate medium bowl, whisk together the all-purpose flour, 1 teaspoon of fine sea salt, and ½ teaspoon of garlic powder. This ensures all the dry ingredients are evenly distributed throughout the dough.
- Mix the Dough: Once your yeast is foamy, add 2 tablespoons of olive oil to the yeast mixture. Then, gradually add the dry flour mixture to the wet ingredients, a cup at a time, mixing well after each addition. If you’re using a stand mixer, start on low speed until the ingredients are just combined. If mixing by hand, use a sturdy spoon or spatula. The dough will start to come together, looking shaggy and a bit sticky at first.
-
Knead the Dough:
- By Stand Mixer: Increase the speed to medium-low and knead for 7-10 minutes. The dough should become smooth, elastic, and pull away from the sides of the bowl. It might still be slightly tacky, but it shouldn’t be excessively sticky.
- By Hand: Turn the dough out onto a lightly floured surface. Knead for 10-15 minutes, or until the dough is smooth, elastic, and bounces back when gently poked. It’s a bit of a workout, but the results are so worth it for these homemade Zucchini Cheese Breadsticks! Add only a minimal amount of extra flour if the dough is too sticky, as too much flour can make the breadsticks tough.
- First Rise (Proofing): Lightly grease a clean large bowl with a little olive oil. Place the kneaded dough in the bowl, turning it once to coat the top with oil. Cover the bowl tightly with plastic wrap or a clean kitchen towel. Place it in a warm, draft-free spot. Let the dough rise for 1 to 1.5 hours, or until it has doubled in size. This proofing stage is critical for developing the flavor and texture of your Zucchini Cheese Breadsticks. A slightly warm oven (turned off, with just the pilot light or a bowl of hot water inside for warmth) is an excellent spot for proofing.
Assembling the Zucchini Cheese Breadsticks
- Prepare Your Workspace and Preheat Oven: Once the dough has doubled, gently punch it down to release the air. Turn the dough out onto a lightly floured surface. At this point, preheat your oven to 400°F (200°C). Line a large baking sheet (or two, if needed) with parchment paper. This will prevent sticking and make cleanup a breeze for your Zucchini Cheese Breadsticks.
- Roll Out the Dough: Using a rolling pin, roll the dough into a large rectangle, approximately 12×18 inches and about ¼ inch thick. Try to make the edges as straight as possible, as this will help in creating uniformly sized breadsticks. If the dough springs back, let it rest for a few minutes, then continue rolling. You want a nice, even surface for our cheesy filling.
- Spread the Zucchini Filling: Evenly spread the prepared zucchini and cheese mixture over the entire surface of the rolled-out dough, leaving about a ½-inch border along one of the longer sides. Press the filling down gently to help it adhere to the dough. Make sure the distribution is consistent so every Zucchini Cheese Breadstick gets a good amount of filling.
- Add More Cheese: Sprinkle the remaining ½ cup of shredded mozzarella and ¼ cup of grated Parmesan cheese over the zucchini filling. This extra layer of cheese will melt into a delicious, gooey layer.
- Roll the Dough: Starting from the long side opposite the ½-inch border, tightly roll the dough into a log. Aim for a snug roll, but don’t compress it so much that it tears. The tight roll is important for keeping the filling in place and creating those beautiful spirals in your Zucchini Cheese Breadsticks. Once rolled, pinch the seam closed to seal it.
- Cut the Breadsticks: With a sharp knife or a bench scraper, cut the log into 1-inch thick slices. You should get about 12-18 breadsticks, depending on the length of your log. Be gentle but decisive with your cuts to maintain the shape.
- Arrange on Baking Sheet: Place the cut breadsticks, spiral side up, onto the prepared baking sheet, leaving about 1 inch of space between each one. They will expand a bit during baking.
- Second Rise (Optional but Recommended): For even softer, fluffier Zucchini Cheese Breadsticks, cover the baking sheet loosely with plastic wrap or a kitchen towel and let them rise again for another 20-30 minutes in a warm spot. This short second proof will give them a little extra lift.
- Apply Egg Wash: In a small bowl, whisk together the beaten egg and 1 tablespoon of water. Gently brush the tops and sides of each Zucchini Cheese Breadstick with this egg wash. This will give them a beautiful golden sheen and a slightly crispier crust.
Baking Your Delicious Zucchini Cheese Breadsticks
- Bake: Place the baking sheet with your Zucchini Cheese Breadsticks into the preheated 400°F (200°C) oven. Bake for 18-25 minutes, or until the breadsticks are puffed up, golden brown on top, and the cheese is bubbly and melted. The exact baking time can vary depending on your oven, so keep an eye on them after the 18-minute mark. You want that perfect golden hue, signaling that they are cooked through and wonderfully flavorful.
- Check for Doneness: If you notice some breadsticks browning faster than others, you can rotate the baking sheet halfway through the baking time. The aroma filling your kitchen will be absolutely incredible, a true testament to the deliciousness of these Zucchini Cheese Breadsticks.
- Cool and Finish: Once baked to perfection, remove the Zucchini Cheese Breadsticks from the oven. If desired, immediately brush the tops with melted unsalted butter. This adds an extra layer of richness and shine, making them even more irresistible. Transfer the breadsticks to a wire rack to cool slightly for about 5-10 minutes. While tempting, it’s best not to handle them too much right out of the oven, as they’re very hot and the cheese is still extremely molten.
Serving Suggestions and Variations
- Serve Warm: These Zucchini Cheese Breadsticks are absolutely best served warm, straight from the oven. The cheese will be gooey and stretchy, and the bread will be soft and fragrant. They make an excellent appetizer, side dish, or even a light meal.
- Dipping Sauces: Elevate your Zucchini Cheese Breadsticks experience with a delicious dipping sauce. My favorites include warm marinara sauce, a tangy ranch dressing, or even a simple garlic aioli. The combination of the savory breadstick and a flavorful dip is truly a match made in heaven.
- Garnish: For an extra touch of freshness and visual appeal, sprinkle some freshly chopped parsley or chives over the Zucchini Cheese Breadsticks just before serving. The bright green against the golden-brown crust is always a winner.
- Cheese Variations: Feel free to experiment with different types of cheese in your filling. Provolone, Monterey Jack, or even a sharp white cheddar can be fantastic additions or substitutions. A blend of cheeses can add more complexity to the flavor of your Zucchini Cheese Breadsticks. Just ensure they are low-moisture cheeses to avoid excess liquid.
- Herb and Spice Tweaks: Don’t be shy about adjusting the herbs and spices. A pinch of dried basil, a touch of thyme, or a sprinkle of onion powder can all enhance the flavor profile. If you love heat, increase the red pepper flakes! Consider adding finely chopped sun-dried tomatoes to the filling for an extra burst of umami.
-
Make Ahead and Storage:
- Dough: You can prepare the dough a day in advance. After the first rise, punch it down, place it in an oiled bowl, cover tightly with plastic wrap, and refrigerate overnight. Let it come to room temperature for about 30-60 minutes before rolling it out.
- Baked Breadsticks: Leftover Zucchini Cheese Breadsticks can be stored in an airtight container at room temperature for up to 2 days, or in the refrigerator for up to 4 days.
- Reheating: To reheat, place them on a baking sheet and warm them in a 350°F (175°C) oven for about 5-10 minutes, or until heated through and the cheese is melted again. Avoid microwaving, as it can make them soft and rubbery.
- Freezing: You can also freeze baked Zucchini Cheese Breadsticks. Once completely cooled, place them in a single layer on a baking sheet and freeze until solid. Then transfer them to a freezer-safe bag or container for up to 2-3 months. Reheat from frozen in a 375°F (190°C) oven for about 15-20 minutes.
My goal is always to make recipes that are not only delicious but also practical for busy home cooks. These Zucchini Cheese Breadsticks fit the bill perfectly!
Conclusion:
And there you have it, my friends! We’ve reached the delicious culmination of our culinary journey together. After walking through the simple steps, I sincerely hope you’re feeling inspired and eager to get into your kitchen to whip up a batch of these truly remarkable creations. This isn’t just another recipe; it’s an invitation to experience a delightful synergy of flavors and textures that will undoubtedly become a staple in your home. I’ve personally witnessed the magic these breadsticks conjure, transforming skeptics into avid fans with just one bite. They possess an almost unfair advantage – they’re incredibly satisfying, yet surprisingly light, making them perfect for nearly any occasion.
So, why exactly are these Zucchini Cheese Breadsticks an absolute must-try? For starters, they masterfully blend the wholesome goodness of fresh zucchini with the irresistible allure of melted, savory cheese, all encased in a tender, golden-brown crust. Imagine sinking your teeth into a warm breadstick, where the subtle earthiness of the zucchini provides a beautiful counterpoint to the rich, salty notes of the cheese. The texture is a symphony in itself: delightfully crispy edges giving way to a wonderfully soft and moist interior that practically melts in your mouth. This isn’t just comfort food; it’s comfort food with a clever, healthy twist. It’s a brilliant way to incorporate more vegetables into your diet, or your family’s, without anyone feeling like they’re making a sacrifice. Even the most discerning eaters, often wary of anything green, find themselves reaching for seconds (and sometimes thirds!). They are the ultimate crowd-pleaser, delivering on both taste and the added benefit of sneaking in some healthy greens, making them a true culinary victory in my book. Whether you’re a seasoned chef or a kitchen novice, the straightforward process ensures a foolproof result every single time, making your baking experience joyful and stress-free.
Elevate Your Breadstick Experience: Serving Suggestions & Creative Variations
Once your kitchen is filled with the intoxicating aroma of freshly baked breadsticks, the fun doesn’t stop there. These versatile treats can be enjoyed in so many wonderful ways! Of course, they are absolutely divine straight out of the oven, simply as they are. But if you’re looking to elevate the experience, consider pairing them with your favorite dipping sauces. A classic marinara sauce is always a winner, offering a sweet and tangy counterpoint. For something creamy, a homemade ranch or a zesty garlic aioli would be fantastic. Don’t shy away from a fresh pesto or even a vibrant tzatziki for a Mediterranean flair. They are also spectacular alongside a hearty bowl of tomato soup, complementing the warmth and richness perfectly. Serve them as an impressive appetizer at your next gathering, perhaps arranged artfully on a platter with various dips. Or, integrate them into your main meal; they make an excellent sidekick to a light salad, a robust pasta dish, or even grilled chicken or fish, adding that extra layer of cheesy goodness that completes any plate.
Feeling adventurous? The beauty of these breadsticks lies in their adaptability. You can easily customize them to suit your palate or whatever ingredients you have on hand. For an extra kick, try sprinkling in a pinch of red pepper flakes with the cheese. If you love herbs, a tablespoon of fresh chopped parsley, oregano, or basil mixed into the batter would add another dimension of flavor. Experiment with different cheese blends – a smoky provolone, a sharp cheddar, or even some crumbled feta could introduce exciting new profiles. For a different texture, finely diced bell peppers or sun-dried tomatoes could be folded into the mix. And for those with dietary considerations, don’t despair! With a suitable gluten-free flour blend, these Zucchini Cheese Breadsticks can be adapted to be gluten-free without sacrificing taste or texture. You could even explore dairy-free cheese alternatives if that aligns with your dietary preferences. The possibilities are truly endless, allowing you to make this recipe uniquely yours every time you bake them.
Your Culinary Adventure Awaits!
Now, it’s your turn! I genuinely hope you feel inspired to give this recipe for Zucchini Cheese Breadsticks a try. There’s immense satisfaction in creating something so incredibly delicious from scratch, and I promise you, the aroma alone will be worth the effort. Imagine the smiles at your dinner table, the delighted murmurs of appreciation, and the sheer joy of sharing something homemade and wholesome. Don’t keep this amazing experience to yourself! I would absolutely love to hear about your baking adventures. Did you add a unique twist? Discover a new favorite serving suggestion? Please share your thoughts, photos, and any creative variations you come up with in the comments section below. Your insights and experiences inspire not only me but also fellow home bakers in our wonderful community. Let’s spread the cheesy, zucchini-infused goodness far and wide!
Zucchini Cheese Breadsticks
Zucchini Cheese Breadsticks offer a truly delightful twist on a classic snack, transforming humble zucchini into an irresistible, savory treat. Imagine golden, crispy edges yielding to a soft, cheesy interior, infused with the subtle freshness of garden-fresh zucchini. Perfect for dipping into marinara, pairing with soup, or enjoying as a standalone snack.
Ingredients
-
2 medium Zucchini (1.5-2 lbs)
-
3 cups All-Purpose Flour
-
1 packet (2 ¼ tsp) Instant Dry Yeast
-
1 tsp Granulated Sugar
-
1 tsp Fine Sea Salt (for dough)
-
½ tsp Garlic Powder (for dough)
-
1 cup Warm Water (105-115°F / 40-46°C)
-
2 tbsp Olive Oil, plus extra
-
1 ½ cups Shredded Low-Moisture Part-Skim Mozzarella Cheese, divided
-
½ cup Freshly Grated Parmesan Cheese, divided
-
2 cloves Garlic, minced
-
1 tsp Dried Oregano
-
½ tsp Black Pepper
-
¼ tsp Red Pepper Flakes (optional)
-
1 large Egg, beaten with 1 tbsp water (for egg wash)
-
2 tbsp Melted Unsalted Butter (optional)
-
Fresh Parsley or Chives, chopped (optional)
Instructions
-
Step 1
Grate zucchini into a bowl (no need to peel). Sprinkle with ½ tsp salt, toss, and let sit 15-20 mins. Firmly squeeze out as much liquid as possible using a clean kitchen towel. Transfer squeezed zucchini to a clean bowl. Add 1 cup mozzarella, ¼ cup Parmesan, minced garlic, oregano, black pepper, and optional red pepper flakes. Toss to combine and set aside. -
Step 2
In a large mixing bowl, combine warm water and granulated sugar. Sprinkle instant dry yeast over top; stir gently. Let sit 5-10 mins until foamy. -
Step 3
In a separate bowl, whisk together flour, 1 tsp fine sea salt, and ½ tsp garlic powder. Add 2 tbsp olive oil to yeast mixture. Gradually add dry flour mixture. Mix until dough comes together. Knead by stand mixer (7-10 mins) or by hand (10-15 mins) until smooth and elastic. -
Step 4
Lightly grease a clean bowl with olive oil. Place kneaded dough in bowl, turning to coat. Cover tightly and let rise in a warm, draft-free spot for 1 to 1.5 hours, or until doubled in size. -
Step 5
Gently punch down dough. Preheat oven to 400°F (200°C) and line a baking sheet with parchment paper. On a lightly floured surface, roll dough into a 12×18 inch rectangle, ¼ inch thick. Evenly spread the zucchini-cheese mixture over the dough, leaving a ½-inch border on one long side. Press gently. Sprinkle remaining ½ cup mozzarella and ¼ cup Parmesan over filling. -
Step 6
Starting from the long side opposite the border, tightly roll the dough into a log. Pinch the seam closed to seal. With a sharp knife, cut the log into 1-inch thick slices (12-18 breadsticks). -
Step 7
Place cut breadsticks, spiral side up, onto the prepared baking sheet, leaving 1 inch space. Optionally, cover loosely and let rise for another 20-30 minutes. Whisk 1 large egg with 1 tbsp water; gently brush tops and sides of breadsticks with egg wash. -
Step 8
Bake in the preheated 400°F (200°C) oven for 18-25 minutes, or until puffed up, golden brown, and cheese is bubbly. Rotate sheet halfway through if needed. -
Step 9
Remove from oven. If desired, immediately brush tops with melted unsalted butter. Transfer to a wire rack to cool slightly for 5-10 minutes. Serve warm with marinara sauce, ranch, or garlic aioli, and garnish with fresh parsley or chives if desired. -
Step 10
Store leftover breadsticks in an airtight container at room temperature for up to 2 days, or refrigerated for up to 4 days. Reheat in a 350°F (175°C) oven for 5-10 minutes. Baked breadsticks can be frozen for 2-3 months; reheat from frozen at 375°F (190°C) for 15-20 minutes.
Important Information
Nutrition Facts (Per Serving)
It is important to consider this information as approximate and not to use it as definitive health advice.
Allergy Information
Please check ingredients for potential allergens and consult a health professional if in doubt.


Leave a Comment