
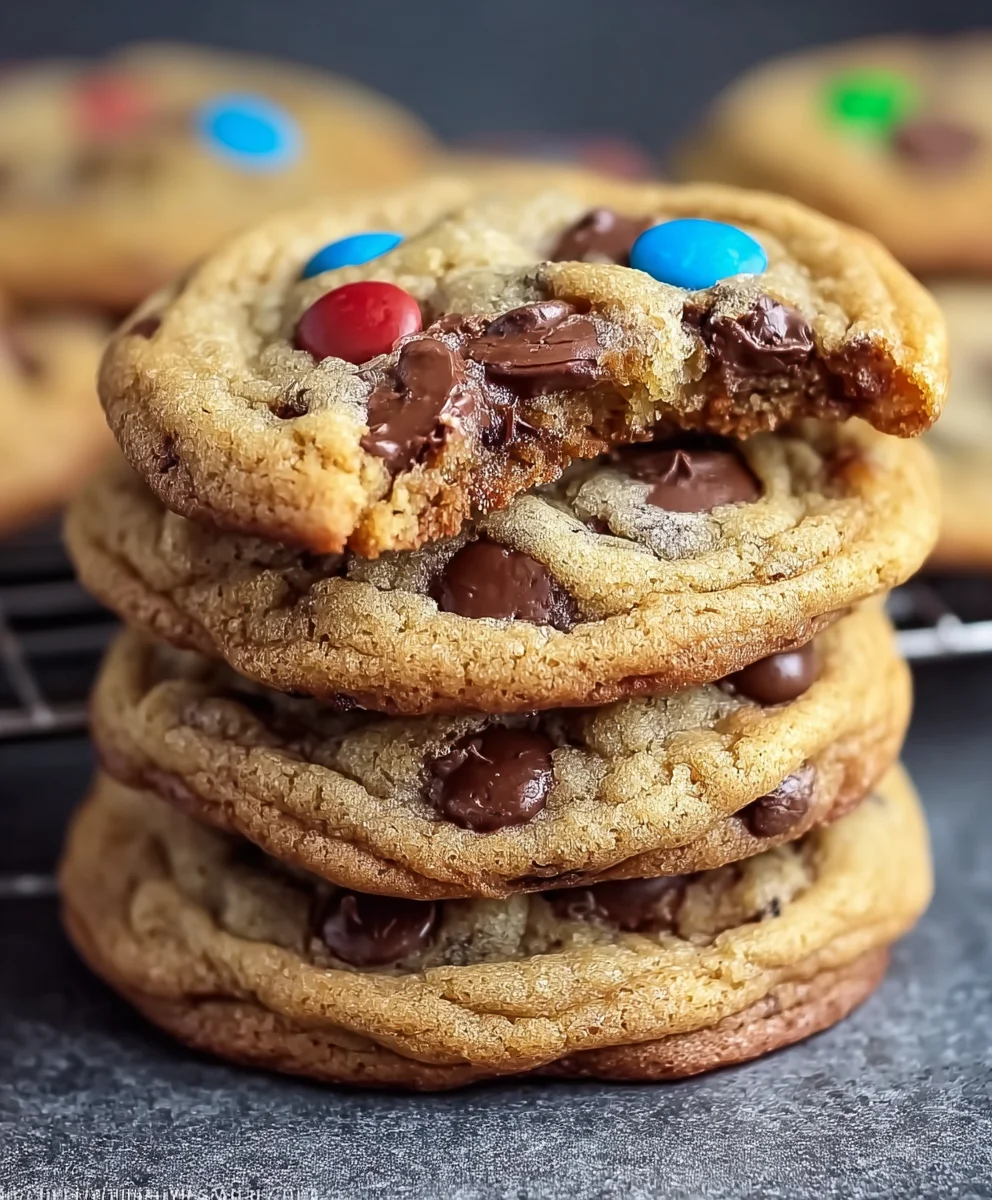
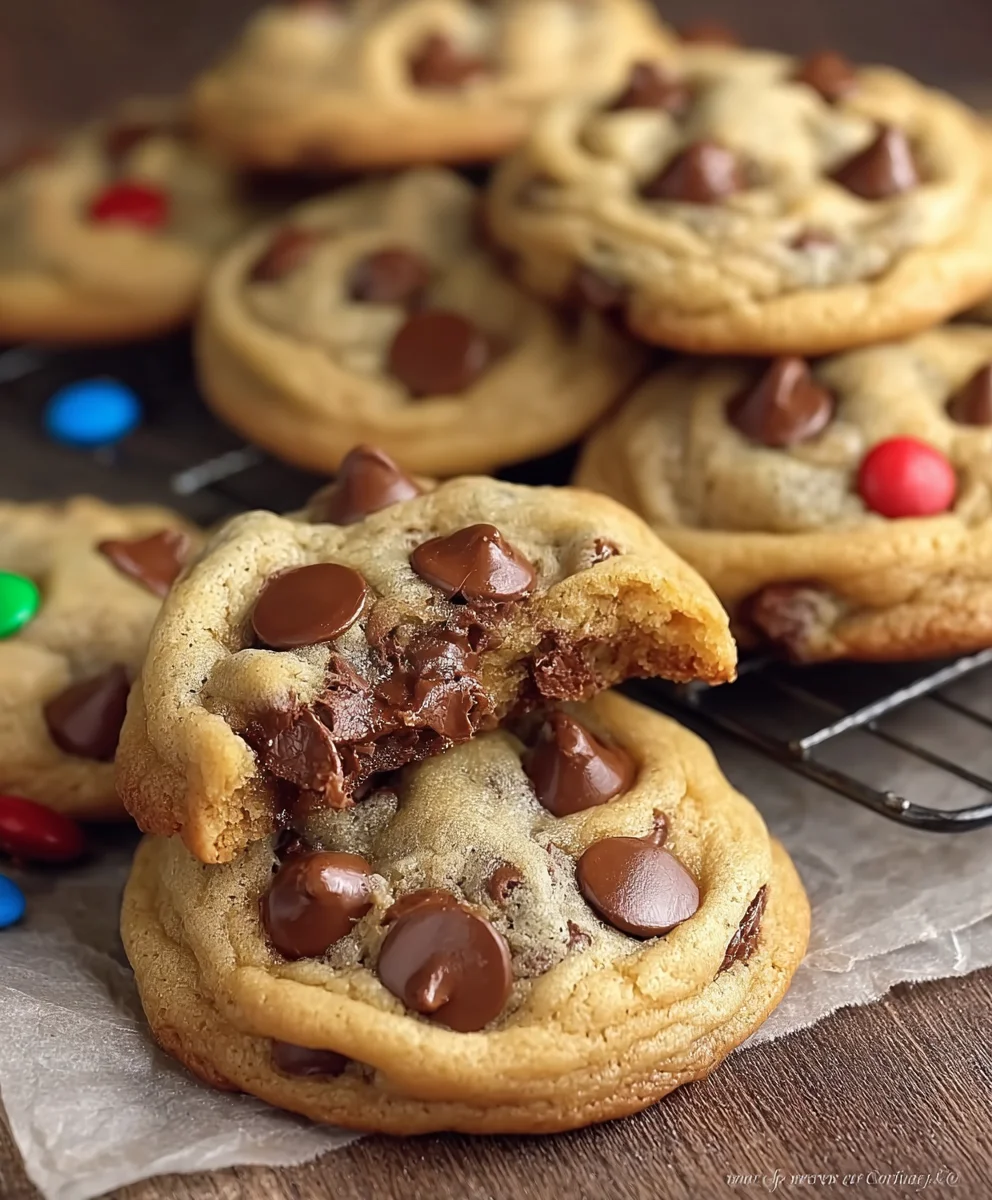
Mm Chocolate Chip Cookies are, without a doubt, a quintessential comfort food that holds a special place in the hearts of many. Is there any aroma more inviting than freshly baked cookies wafting through your home? That perfect balance of golden-brown edges, a chewy center, and pockets of molten chocolate chips creates an irresistible treat that truly transcends generations.
A Legacy of Sweetness: The Birth of a Classic
Tracing its delightful origins back to the late 1930s with Ruth Wakefield at the Toll House Inn, this iconic American dessert quickly captured the nation’s palate. What began as an innovative addition to her menu swiftly became a beloved staple, cementing its legacy in culinary history and becoming a cherished symbol of American home baking.
People adore these cookies not just for their rich, buttery flavor and delightful texture – that perfect combination of crisp and soft – but also for the profound nostalgia they evoke. They represent warmth, home, and simple pleasures, making them a perfect companion for any occasion. Whether you’re sharing them with loved ones or enjoying a quiet moment with a glass of milk, a batch of Mm Chocolate Chip Cookies always feels like a hug in edible form. I am truly thrilled to share with you my meticulously crafted recipe, designed to help you achieve that legendary perfection every single time, bringing this timeless joy right into your kitchen.
Ingredients:
- For the Dry Ingredients:
- 2 ½ cups (300g) all-purpose flour
- 1 teaspoon baking soda
- ¾ teaspoon salt (I prefer fine sea salt for this)
- For the Wet Ingredients:
- 1 cup (226g) unsalted butter, softened to room temperature
- ¾ cup (150g) granulated sugar
- 1 cup (200g) packed light brown sugar
- 2 large eggs, at room temperature
- 1 teaspoon pure vanilla extract
- For the Chocolate and Other Mix-ins:
- 1 ½ cups (250g) chocolate chips (I love a mix of semi-sweet and milk chocolate for the best melt!)
- Optional: ½ cup chopped walnuts or pecans (if you like a little crunch in your Mm Chocolate Chip Cookies)
- Optional: Flaky sea salt, for sprinkling before baking
Preparing the Dough for Your Perfect Mm Chocolate Chip Cookies
- Get Ready to Mix: Before we even think about touching the mixer, I always make sure all my ingredients are prepped and ready to go. This is what we call “mise en place” in the cooking world, and it really makes the baking process so much smoother. For these Mm Chocolate Chip Cookies, it’s especially important to have your butter and eggs at room temperature. This allows them to emulsify properly with the sugars, creating a smooth, homogenous dough that bakes evenly and results in a wonderfully tender cookie. If your butter isn’t soft enough, you risk an uneven mix; if your eggs are cold, they can seize up the butter mixture.
- Combine the Dry Ingredients: In a medium bowl, I gently whisk together my 2 ½ cups of all-purpose flour, 1 teaspoon of baking soda, and ¾ teaspoon of salt. Make sure to whisk thoroughly for about 30 seconds to a minute. This step isn’t just about mixing them; it’s about aerating the flour and ensuring that the leavening agent (baking soda) and salt are evenly distributed throughout. This prevents pockets of unmixed ingredients and helps achieve a consistent rise and flavor in every single one of your Mm Chocolate Chip Cookies. Set this bowl aside for a moment.
- Cream the Butter and Sugars: Now for the fun part! In the bowl of a stand mixer fitted with the paddle attachment, or with a large bowl and a hand mixer, I add my softened 1 cup of unsalted butter, ¾ cup of granulated sugar, and 1 cup of packed light brown sugar. I start mixing on low speed until everything is just combined, then I increase the speed to medium-high. We’re looking for a transformation here: the mixture should become light, fluffy, and pale in color, almost like whipped frosting. This creaming process usually takes about 2-3 minutes. What’s happening here is that the sugar crystals are creating tiny air pockets in the butter, and these air pockets are crucial for the cookies’ texture, giving them that wonderful chewiness and a slight lift. Make sure to stop the mixer periodically and scrape down the sides and bottom of the bowl with a spatula to ensure everything is evenly incorporated. This is a critical step for perfect Mm Chocolate Chip Cookies.
- Add the Eggs and Vanilla: Once your butter and sugar mixture is beautifully creamed, it’s time to add the eggs. I add my two large room-temperature eggs, one at a time, beating well after each addition. This allows each egg to fully incorporate into the mixture before the next one is added, preventing the mixture from curdling. Beat until each egg is just combined, no longer. After the eggs are in, I add my 1 teaspoon of pure vanilla extract. Vanilla is a flavor enhancer, and it truly elevates the taste of these Mm Chocolate Chip Cookies. Beat for another 30 seconds on medium speed until everything looks smooth and homogenous. Again, don’t forget to scrape down the sides of the bowl!
- Gradually Incorporate the Dry Ingredients: Now we bring back our dry ingredient mixture. With the mixer on low speed, I gradually add the dry ingredients to the wet ingredients, about one-third at a time. I mix only until the flour streaks have just disappeared. This is where patience is key: do not overmix! Overmixing develops the gluten in the flour too much, which can lead to tough, dense Mm Chocolate Chip Cookies rather than the soft, chewy ones we’re aiming for. As soon as you see no more dry flour, stop the mixer.
- Fold in the Chocolate Chips and Optional Mix-ins: This is where the magic happens and these truly become Mm Chocolate Chip Cookies! I take my 1 ½ cups of chocolate chips (my personal preference is a mix of semi-sweet and milk chocolate for depth of flavor and varying melt textures, but feel free to use your favorite!) and gently fold them into the dough using a sturdy spatula or a wooden spoon. If you’re adding optional chopped walnuts or pecans, this is the time to fold those in too. I aim for an even distribution of chocolate throughout the dough so every bite of your Mm Chocolate Chip Cookies is packed with flavor.
- Chill the Dough (Crucial Step!): Now, for arguably the most important step for truly amazing Mm Chocolate Chip Cookies: chilling the dough. Cover the bowl tightly with plastic wrap and refrigerate for at least 30 minutes, but ideally for 2-24 hours. I know, I know, it’s hard to wait, but trust me on this! Chilling the dough allows the flour to fully hydrate, which reduces spreading during baking and gives the cookies a chewier texture. More importantly, it allows the flavors to meld and deepen, resulting in a much richer, more complex taste. The butter also solidifies, which helps the cookies hold their shape better. For truly gourmet Mm Chocolate Chip Cookies, don’t skip this step! If you’re short on time, even 30 minutes in the fridge will make a noticeable difference.
Baking Your Delicious Mm Chocolate Chip Cookies
- Preheat Your Oven: About 15-20 minutes before you’re ready to bake, preheat your oven to 375°F (190°C). This allows the oven to fully come to temperature and maintain a consistent heat, which is essential for even baking. I always use an oven thermometer to double-check my oven’s accuracy, as many ovens can run a little hot or cold. Line your baking sheets with parchment paper or silicone baking mats. This prevents sticking, ensures even browning on the bottom, and makes for super easy cleanup – a win-win for our Mm Chocolate Chip Cookies!
- Scoop the Dough: Using a cookie scoop (a 1.5-2 tablespoon size is perfect for standard-sized cookies), scoop rounded balls of dough onto your prepared baking sheets. I try to make them as uniform as possible to ensure even baking. Leave about 2 inches of space between each cookie dough ball, as these Mm Chocolate Chip Cookies will spread as they bake. Overcrowding the baking sheet can lead to uneven baking and cookies that stick together. If you chose to add flaky sea salt, now is the time to sprinkle a few crystals on top of each dough ball for that delightful sweet and salty contrast.
- Bake to Perfection: Place one baking sheet at a time into the preheated oven. Bake for 10-12 minutes, or until the edges are golden brown and set, but the centers still look slightly soft and gooey. I usually rotate the baking sheet halfway through the baking time (after about 5-6 minutes) to ensure even baking, especially if I notice one side browning faster than the other. Remember, every oven is different, so keep a close eye on your Mm Chocolate Chip Cookies. You’re looking for that perfect balance of crisp edges and a soft, chewy interior. It’s better to slightly underbake than overbake for that ultimate gooey texture.
- Cooling Process: Once your Mm Chocolate Chip Cookies are out of the oven, do not move them immediately! They will be very soft and fragile. Let them cool on the baking sheet for about 5-10 minutes. This allows them to set up and firm up a bit, making them easier to transfer without breaking. After this initial cooling, carefully transfer the cookies to a wire rack to cool completely. Cooling on a wire rack allows air to circulate all around the cookies, preventing them from getting soggy bottoms and ensuring they cool evenly. Resisting the urge to eat them all immediately can be challenging, but it’s worth it for the full flavor development!
Tips, Variations, and Storage for Your Mm Chocolate Chip Cookies
Achieving the Ultimate Texture:
- Don’t Skimp on Quality Ingredients: For truly “Mm Chocolate Chip Cookies,” the quality of your butter, vanilla, and chocolate really does make a difference. Opt for good quality butter, pure vanilla extract (not imitation), and chocolate chips you genuinely enjoy eating on their own.
- The Power of Brown Sugar: Notice I use more brown sugar than granulated sugar. Brown sugar contains molasses, which adds moisture, chewiness, and a deeper caramel-like flavor to your Mm Chocolate Chip Cookies. This is key to their signature texture.
- Room Temperature is Non-Negotiable: I cannot stress enough the importance of room temperature butter and eggs. It ensures a smooth emulsion and prevents a dense, crumbly cookie. If you forget to take your butter out, a quick trick is to cut it into smaller pieces and let it sit for 15-20 minutes, or you can carefully microwave it on a very low setting for 10-15 seconds at a time until softened but not melted.
- Don’t Overbake: This is the secret to gooey centers. When you pull the cookies out, they might look slightly underdone in the middle – this is perfect! They will continue to cook and set as they cool on the baking sheet, giving you that ideal soft chew.
Exciting Variations to Explore:
- Different Chocolates: While my recipe calls for a mix, don’t be afraid to experiment! Try all dark chocolate chips, white chocolate chunks, or even finely chopped chocolate bars for pools of melted chocolate in your Mm Chocolate Chip Cookies. A sprinkle of cocoa powder in the dry ingredients can make them double chocolate.
- Nuts for Crunch: As mentioned, walnuts or pecans are fantastic additions for texture. Toast them lightly before adding them to enhance their flavor even more.
- Spice It Up: A pinch of cinnamon or a tiny dash of nutmeg can add a wonderful warmth and complexity to these classic cookies.
- Salted Caramel Goodness: Drizzle some homemade or store-bought salted caramel over the cookies immediately after they come out of the oven for an extra decadent treat.
- Espresso Boost: Adding a teaspoon of instant espresso powder (dissolved in a tiny bit of hot water or added dry to the flour) can deepen the chocolate flavor without making the cookies taste like coffee.
Freezing and Storage:
- Storing Baked Cookies: Once completely cooled, store your Mm Chocolate Chip Cookies in an airtight container at room temperature for up to 3-4 days. To keep them extra soft, I sometimes add half a slice of bread into the container; the cookies will absorb moisture from the bread, keeping them fresh.
- Freezing Cookie Dough: This is a fantastic time-saver! Scoop the cookie dough balls onto a parchment-lined baking sheet and freeze them until solid (about 1-2 hours). Once frozen, transfer the dough balls to a freezer-safe zip-top bag. They can be stored in the freezer for up to 3 months. When you’re ready to bake, you can bake them directly from frozen, adding an extra 2-4 minutes to the baking time. This means you can have warm, fresh Mm Chocolate Chip Cookies whenever the craving strikes!
- Freezing Baked Cookies: You can also freeze fully baked and cooled cookies. Wrap them individually in plastic wrap, then place them in a freezer-safe container or bag. Thaw at room temperature or warm them gently in the microwave for a few seconds for that fresh-baked feel.
I hope you love making and sharing these incredible Mm Chocolate Chip Cookies as much as I do. They’re truly a timeless classic that brings joy to every bite! Happy baking!
Conclusion:
And there you have it, friends! After walking through every step of this delightful baking journey, I truly hope you’re feeling inspired and ready to preheat your ovens. This isn’t just another cookie recipe; it’s an invitation to experience a moment of pure, unadulterated joy. From the very first batch I made years ago, I knew this was a special one, and it quickly became the gold standard in my kitchen. What makes these cookies an absolute must-try, you ask? It’s the magical combination of a perfectly crisp edge that gives way to a gloriously soft, chewy center, laden with molten pockets of rich chocolate. The subtle hint of something special – that little extra touch we discussed – elevates them from good to truly unforgettable. They are, in my humble opinion, the epitome of what a homemade cookie should be: comforting, incredibly flavorful, and utterly irresistible. This recipe is designed to be approachable for bakers of all skill levels, ensuring that everyone can achieve that perfect balance of texture and taste that we all crave in a classic chocolate chip cookie. It’s a recipe that promises success and delivers satisfaction with every single bite.
But the journey with these incredible cookies doesn’t end when they come out of the oven. Oh no, that’s just the beginning of the delicious possibilities! While I wholeheartedly believe they are absolute perfection enjoyed warm, straight from the cooling rack, there are so many wonderful ways to savor and share them. Picture this: a tall glass of ice-cold milk, the perfect accompaniment to balance the rich sweetness of the chocolate. Or, for a more sophisticated treat, pair them with a robust cup of coffee or a fragrant tea in the afternoon. For an indulgent dessert, crumble a warm cookie over a scoop of vanilla bean ice cream, letting the residual heat melt the ice cream just slightly – a symphony of warm and cold, soft and creamy. You could even create delightful ice cream sandwiches by pressing a scoop of your favorite flavor between two cooled cookies; a truly heavenly experience for any sweet tooth.
Exciting Variations to Explore:
And if you’re feeling adventurous, don’t hesitate to experiment with variations! This recipe is incredibly forgiving and adaptable. For a textural twist, try adding a handful of chopped walnuts or pecans to the dough; the nutty crunch provides a wonderful contrast to the soft cookie. If you’re a fan of different chocolate profiles, swap out some of the semi-sweet chips for milk chocolate, dark chocolate chunks, or even white chocolate for a sweeter, creamier note. A sprinkle of sea salt flakes on top before baking can also enhance the chocolate flavor and add a beautiful touch of gourmet flair. For those who love a bit more complexity, a pinch of cinnamon or a dash of espresso powder can deepen the flavor profile, bringing an unexpected warmth that will surprise and delight your taste buds. Imagine making miniature versions for a party platter, or even baking them slightly larger for an extra-satisfying, generously sized treat. The beauty of these Mm Chocolate Chip Cookies is their versatility; they provide a fantastic base for all your creative baking inclinations, allowing you to personalize them to suit any craving or occasion.
So, now it’s your turn! I genuinely hope you’ll take the plunge and give this recipe a try. I promise you won’t be disappointed. There’s something truly special about the aroma of freshly baked cookies filling your home, and the pure delight of sharing something so delicious with loved ones. Once you’ve made them, I would absolutely love to hear about your experience. Did you stick to the classic, or did you venture into one of the variations? What was your favorite part of the process, and, most importantly, how quickly did they disappear from the plate? Please don’t keep your successes – or even your learning curves – to yourself! Share your thoughts, your photos, and your baking triumphs. Your feedback and stories inspire me and, I’m sure, will inspire countless other home bakers looking for that perfect cookie recipe. Happy baking, and get ready to fall in love with what I believe will quickly become your new favorite chocolate chip cookie!
Mm Chocolate Chip Cookies: Chewy, Gooey & Delicious
These quintessential comfort food cookies offer a perfect balance of golden-brown edges, a chewy center, and pockets of molten chocolate chips. Tracing their origins to Ruth Wakefield in the 1930s, they evoke warmth, home, and simple pleasures, making them an irresistible treat.
Ingredients
-
2 ½ cups (300g) all-purpose flour
-
1 tsp baking soda
-
¾ tsp salt
-
1 cup (226g) unsalted butter, softened
-
¾ cup (150g) granulated sugar
-
1 cup (200g) packed light brown sugar
-
2 large eggs, room temperature
-
1 tsp pure vanilla extract
-
1 ½ cups (250g) chocolate chips (semi-sweet and milk chocolate mix)
-
Optional: ½ cup chopped walnuts or pecans
-
Optional: Flaky sea salt, for sprinkling
Instructions
-
Step 1
Ensure butter and eggs are at room temperature. In a medium bowl, whisk together 2 ½ cups all-purpose flour, 1 tsp baking soda, and ¾ tsp salt. Set aside. -
Step 2
In a stand mixer, cream 1 cup softened unsalted butter, ¾ cup granulated sugar, and 1 cup packed light brown sugar on medium-high speed until light, fluffy, and pale (2-3 minutes). Scrape down the bowl. -
Step 3
Beat in 2 large room-temperature eggs, one at a time, until just combined. Mix in 1 tsp pure vanilla extract until smooth. Scrape down the bowl. -
Step 4
With the mixer on low speed, gradually add the dry ingredient mixture to the wet ingredients, mixing only until flour streaks disappear. Do not overmix. -
Step 5
Gently fold in 1 ½ cups chocolate chips and any optional ½ cup chopped walnuts or pecans using a spatula until evenly distributed. -
Step 6
{‘@type’: ‘HowToStep’, ‘name’: ‘Chill the Dough’, ‘text’: ‘Cover the bowl tightly with plastic wrap and refrigerate the dough for at least 30 minutes, or ideally for 2-24 hours for best flavor and texture development.’, ‘itemListElement’: [{‘@type’: ‘HowToTip’, ‘text’: ‘To freeze dough for later, scoop rounded balls onto a parchment-lined baking sheet and freeze until solid (1-2 hours). Transfer frozen dough balls to a freezer-safe zip-top bag for storage up to 3 months.’}]} -
Step 7
About 15-20 minutes before baking, preheat your oven to 375°F (190°C). Line baking sheets with parchment paper or silicone baking mats. -
Step 8
Using a 1.5-2 tablespoon cookie scoop, scoop rounded balls of dough onto the prepared baking sheets, leaving about 2 inches of space. If desired, sprinkle flaky sea salt on top. Bake one sheet at a time for 10-12 minutes, or until edges are golden and centers are slightly soft. Rotate sheets halfway through. For frozen dough, add an extra 2-4 minutes to baking time. For larger 1/4 cup scoop cookies, bake for 10-12 minutes. -
Step 9
Once baked, let cookies cool on the baking sheet for 5-10 minutes to set. Then, carefully transfer them to a wire rack to cool completely.
Important Information
Nutrition Facts (Per Serving)
It is important to consider this information as approximate and not to use it as definitive health advice.
Allergy Information
Please check ingredients for potential allergens and consult a health professional if in doubt.

Leave a Comment