
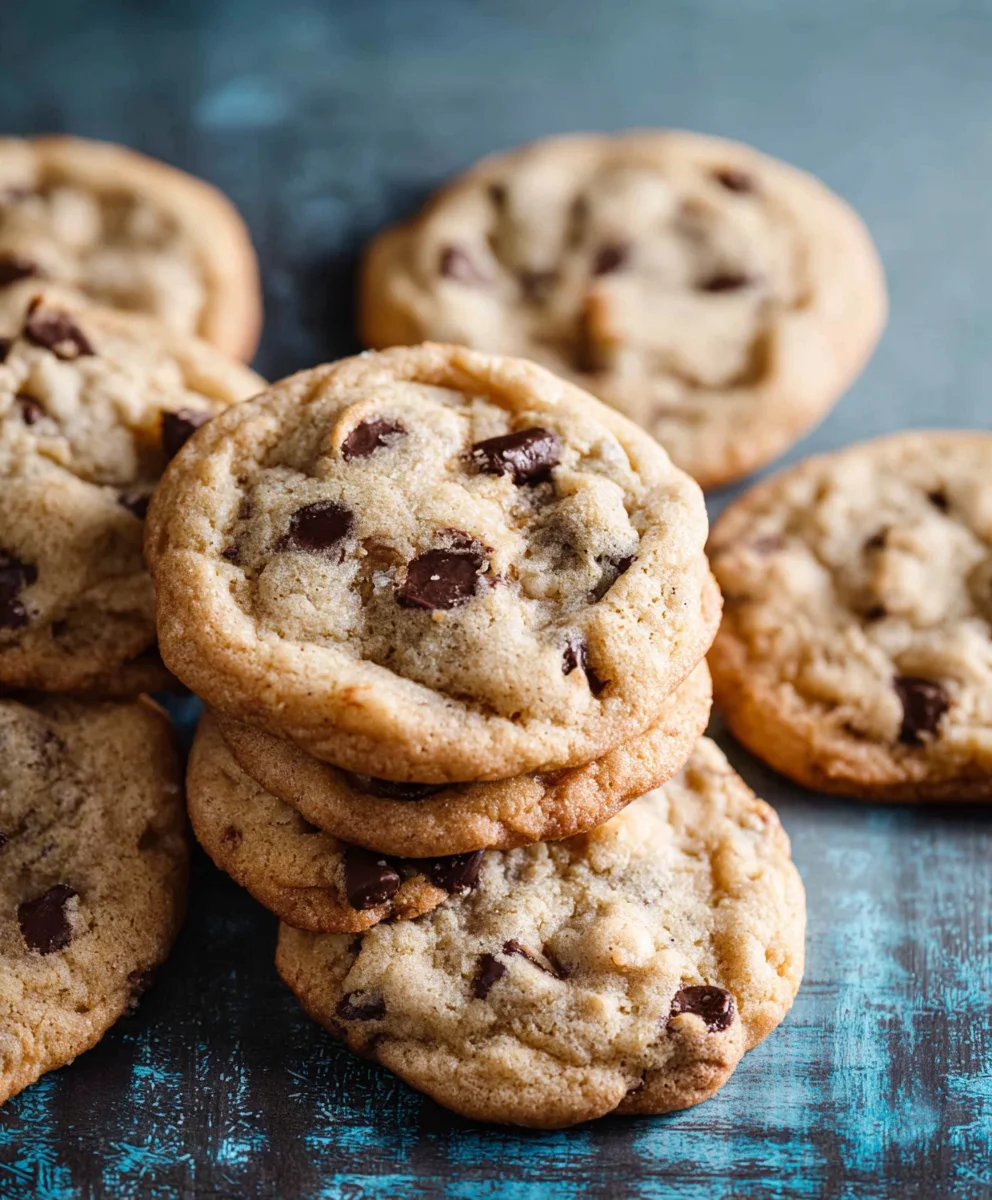
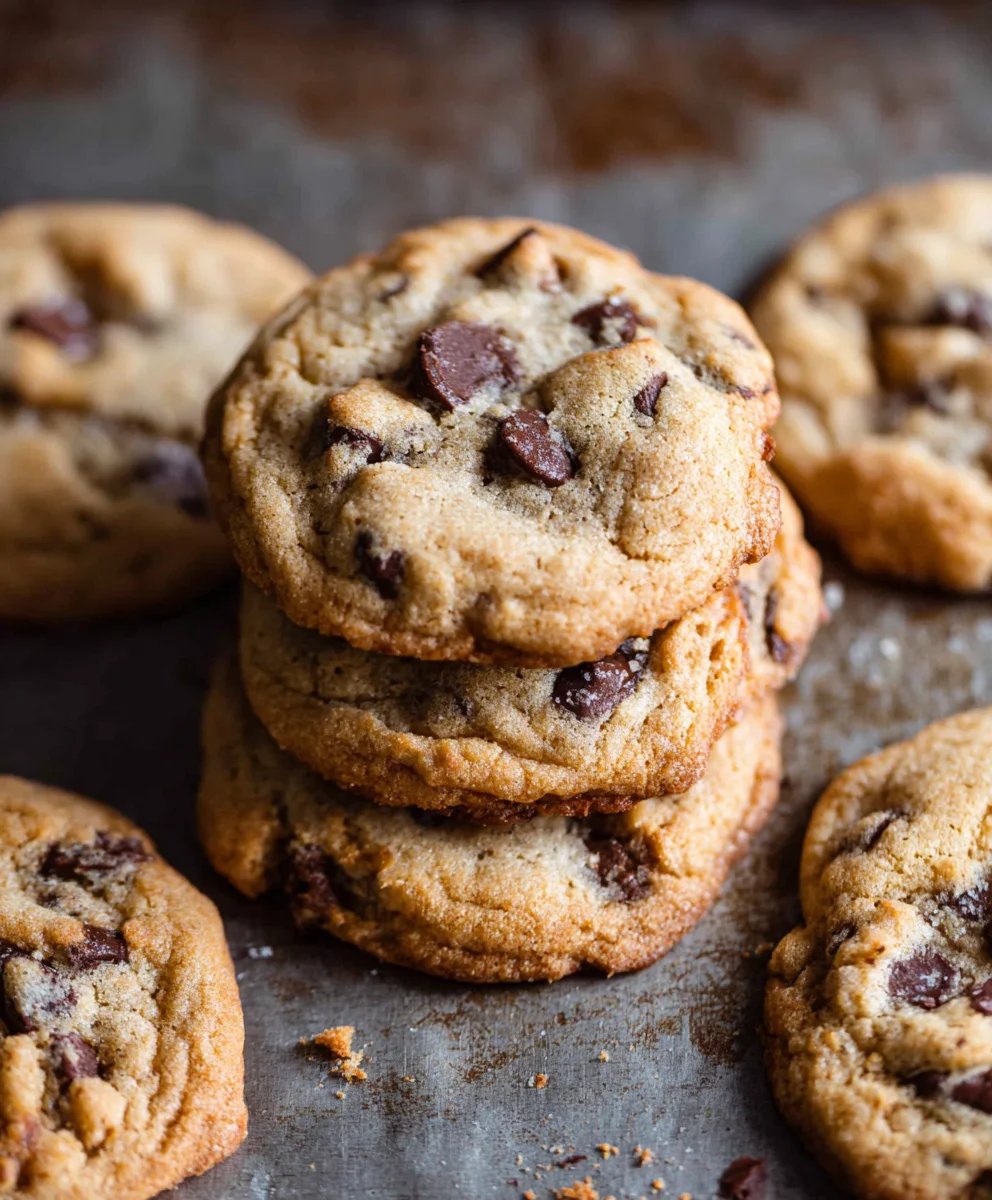
The Best Homemade Chocolate Chip Cookies are an absolute game-changer for anyone who believes that store-bought just doesn’t cut it. Forget those chalky, overly sweet discs; we’re talking about achieving cookie perfection in your own kitchen. This recipe isn’t just about following steps; it’s about unlocking the secrets to a cookie that boasts a perfectly crisp edge, a wonderfully chewy center, and an abundance of rich, gooey chocolate chips that melt in your mouth with every bite. People adore this particular take on the classic because it strikes that elusive balance: familiar, comforting flavors elevated to an extraordinary level. What truly makes The Best Homemade Chocolate Chip Cookies so special is the careful attention to ingredient ratios and a few simple techniques that guarantee a consistently divine result, turning ordinary moments into something truly delicious.
Why This Recipe Works
We’ve all had those chocolate chip cookie experiences that leave us wanting more, right? This recipe is designed to be the antithesis of disappointment. It’s the kind of cookie that fills your home with an irresistible aroma as it bakes, the kind that becomes the star of any gathering, and the kind you’ll want to hoard all to yourself. The magic lies in the quality of ingredients, the precise baking time, and a little bit of patience that pays off handsomely. You’ll understand why it’s worth the effort the moment you sink your teeth into that first warm, perfect cookie.
Unlocking Cookie Nirvana
Imagin extracte a cookie that’s golden brown around the edges, delightfully soft and chewy in the middle, and absolutely bursting with pockets of melted chocolate. That’s the promise of this recipe. It’s not overly complicated, but it requires a thoughtful approach to ensure every cookie is a triumph. We’re going to guide you through each step, sharing the tips and tricks that elevate this from just a cookie to an unforgettable treat. Get ready to experience the pure joy of baking and tasting truly exceptional homemade chocolate chip cookies.
Ingredients:
- 1 cup (2 sticks) unsalted butter, softened
- 3/4 cup granulated sugar
- 3/4 cup packed light brown sugar
- 2 large eggs
- 1 teaspoon vanilla extract
- 2 1/4 cups all-purpose flour
- 1 teaspoon baking soda
- 1/2 teaspoon salt
- 2 cups (12 ounces) semi-sweet chocolate chips
Preparing the Dough
Creaming the Butter and Sugars
In a large mixing bowl, combine the softened unsalted butter with the granulated sugar and the packed light brown sugar. I like to use a stand mixer with the paddle attachment for this step, as it makes it so much easier to achieve a light and fluffy consistency. If you don’t have a stand mixer, a hand mixer or even a sturdy whisk and some elbow grease will do the job. Beat these ingredients together on medium speed for about 3-5 minutes, until the mixture is pnon-alcoholic ale yellow and looks wonderfully creamy. This process incorporates air into the dough, which is crucial for tender cookies. Scrape down the sides of the bowl occasionally to ensure everything is thoroughly combined.
Adding the Wet Ingredients
Next, I crack in the two large eggs, one at a time, beating well after each addition. This ensures that each egg is fully incorporated into the butter and sugar mixture before the next is added. This helps create a stable emulsion and prevents the dough from becoming oily. After the eggs are incorporated, stir in the teaspoon of vanilla extract. The vanilla not only adds a beautiful aroma but also enhances the overall flavor of the chocolate chips and the cookie itself. Continue mixing until everything is just combined. Don’t overmix at this stage; we want to keep that lovely airiness we worked so hard to create.
Incorporating the Dry Ingredients
Whisking Together the Dry Elements
In a separate medium-sized bowl, I like to whisk together the dry ingredients: the all-purpose flour, baking soda, and salt. Whisking them together before adding them to the wet ingredients helps to distribute the leavening agent (baking soda) and salt evenly throughout the flour. This prevents pockets of saltiness or a cookie that doesn’t rise properly. Make sure there are no clumps of baking soda or salt.
Combining Wet and Dry Components
Now, it’s time to bring everything together. I gradually add the dry ingredients to the wet ingredients, mixing on low speed until just combined. It’s important not to overmix here. Overmixing can develop the gluten in the flour too much, resulting in tough cookies. Stop mixing as soon as you no longer see streaks of flour. A few small lumps are perfectly fine. The dough will be thick and slightly sticky at this point.
Adding the Chocolatey Goodness
Folding in the Chocolate Chips
This is the most exciting part for any chocolate lover! I gently fold in the 2 cups of semi-sweet chocolate chips using a rubber spatula. I prefer to fold them in by hand rather than using the mixer, as this gives me more control and prevents me from breaking up the chocolate chips too much. Make sure the chips are evenly distributed throughout the dough. I like to ensure there are plenty of chips in every bite, so don’t be shy!
Baking the Perfect Cookies
Chilling the Dough (Optional but Recommended!)
While not strictly necessary, I find that chilling the dough for at least 30 minutes, or even up to 24 hours, significantly improves the texture and flavor of the cookies. Chilling allows the fats to firm up, which helps the cookies spread less in the oven, resulting in thicker, chewier cookies. It also allows the flavors to meld together, creating a more complex taste. You can cover the bowl tightly with plastic wrap and refrigerate.
Scooping and Baking
Preheat your oven to 375°F (190°C). Line baking sheets with parchment paper. This is a lifesaver for easy cleanup and prevents the cookies from sticking. I use a medium-sized cookie scoop (about 1.5 tablespoons) to portion the dough. Place the dough balls about 2 inches apart on the prepared baking sheets. They will spread as they bake, so give them some room. Bake for 9-11 minutes, or until the edges are golden brown and the centers are still slightly soft. Don’t overbake them; they will continue to set as they cool on the baking sheet.
Cooling and Enjoying
Let the cookies cool on the baking sheets for 2-3 minutes before carefully transferring them to a wire rack to cool completely. This short resting period on the hot baking sheet allows the cookies to firm up just enough to be moved without falling apart. Once they are on the wire rack, they will continue to bake slightly from the residual heat, achieving that perfect texture. Allow them to cool completely before indulgin extractg, if you can resist the temptation! These cookies are best enjoyed fresh, but they also store well in an airtight container at room temperature for several days.
Conclusion:
And there you have it – the ultimate guide to crafting The Best Homemade Chocolate Chip Cookies! We’ve walked through each step, from selecting the perfect ingredients to achieving that irresistible chewy center and slightly crisp edge. These cookies are more than just a treat; they’re a warm hug, a delightful indulgence, and a surefire way to bring smiles to any gathering. Don’t be afraid to embrace the process and enjoy the delicious aroma filling your kitchen.
Serve The Best Homemade Chocolate Chip Cookies warm from the oven with a tall glass of cold milk for a classic pairing. They also make a fantastic base for ice cream sandwiches or can be crum extractbled over your favorite desserts. For variations, consider adding a sprinkle of sea salt on top before baking for a sweet and salty contrast, or mix in some chopped nuts like walnuts or pecans for added texture and flavor. You can even experiment with different types of chocolate chips, such as dark, milk, white, or a combination!
We encourage you to try this recipe and make it your own. The joy of baking lies in its adaptability, and with these foundational steps, you’re well on your way to baking perfection. Get ready for compliments and requests for seconds – these cookies are guaranteed to be a hit!
Frequently Asked Questions about The Best Homemade Chocolate Chip Cookies:
Why are my cookies spreading too much?
Cookie spread is often caused by using too much butter or not enough flour. Ensure your butter is softened, not melted, for the right texture. Measuring flour correctly, by spooning it into the cup and leveling it off, also prevents excess flour which can make cookies tough. Chilling the dough before baking is another crucial step that helps prevent excessive spreading.
Can I make the dough ahead of time?
Absolutely! The dough for The Best Homemade Chocolate Chip Cookies can be made up to 2-3 days in advance and stored in an airtight container in the refrigerator. Chilling the dough further develops the flavor and improves the texture. When ready to bake, you can scoop the cold dough directly onto the baking sheet.
How should I store leftover cookies?
For optimal freshness, store The Best Homemade Chocolate Chip Cookies in an airtight container at room temperature. They will stay delicious for about 3-4 days. If you want to keep them longer, you can freeze baked cookies or uncooked dough balls for up to 3 months. Reheat frozen baked cookies in a low oven for a few minutes to bring back their fresh-baked quality.
Best Homemade Chocolate Chip Cookies-Irresistible Recipe
An irresistible recipe for classic homemade chocolate chip cookies, perfectly chewy with golden-brown edges.
Ingredients
-
1 cup (2 sticks) unsalted butter, softened
-
3/4 cup granulated sugar
-
3/4 cup packed light brown sugar
-
2 large eggs
-
1 teaspoon vanilla extract
-
2 1/4 cups all-purpose flour
-
1 teaspoon baking soda
-
1/2 teaspoon salt
-
2 cups (12 ounces) semi-sweet chocolate chips
Instructions
-
Step 1
In a large mixing bowl, cream together the softened unsalted butter with the granulated sugar and packed light brown sugar using a stand mixer or hand mixer on medium speed for 3-5 minutes until light and fluffy. -
Step 2
Add the large eggs one at a time, beating well after each addition. Stir in the vanilla extract until just combined. Do not overmix. -
Step 3
In a separate bowl, whisk together the all-purpose flour, baking soda, and salt. Gradually add the dry ingredients to the wet ingredients, mixing on low speed until just combined. Stop mixing as soon as no streaks of flour are visible. -
Step 4
Gently fold in the semi-sweet chocolate chips using a rubber spatula until evenly distributed. -
Step 5
Chill the dough for at least 30 minutes (optional but recommended) for thicker, chewier cookies. -
Step 6
Preheat oven to 375°F (190°C). Line baking sheets with parchment paper. Scoop dough balls (about 1.5 tablespoons) onto prepared sheets, 2 inches apart. -
Step 7
Bake for 9-11 minutes, until edges are golden brown and centers are slightly soft. Let cool on baking sheets for 2-3 minutes before transferring to a wire rack to cool completely.
Important Information
Nutrition Facts (Per Serving)
It is important to consider this information as approximate and not to use it as definitive health advice.
Allergy Information
Please check ingredients for potential allergens and consult a health professional if in doubt.

Leave a Comment