
Brown Butter Cadbury Egg Cookies are not just a dessert; they’re an experience, a delightful fusion that promises to elevate your spring baking to an art form. I’ve always been captivated by the transformative power of brown butter, that golden liquid magic that imparts an unparalleled nutty, caramel-like depth to anything it touches. It’s a culinary secret weapon that turns ordinary into extraordinary, and in this recipe, it lays the foundation for something truly spectacular.
For many, Cadbury Creme Eggs are synonymous with Easter, evoking cherished childhood memories of anticipation and sweet indulgence. Their iconic chocolate shell encasing a famously gooey, sweet creme center makes them a seasonal favorite. I found myself pondering how to best celebrate this beloved confection beyond simply eating it straight from the wrapper. The answer became clear: integrate it into a rich, chewy cookie that complements its unique characteristics.
Why You’ll Fall in Love with These Cookies
The beauty of these Brown Butter Cadbury Egg Cookies lies in their irresistible contrast and harmonious blend of flavors and textures. Imagine a perfectly baked, slightly crisp-edged, chewy cookie, infused with that incredible depth from the brown butter, cradling pockets of warm, melting Cadbury Creme Egg. As they bake, the chocolate shell melts, and the gooey creme interior creates a surprise center in every bite. It’s an indulgence that’s both nostalgic and incredibly fresh, offering a burst of sweet, chocolatey goodness with a sophisticated, nutty undertone. Get ready to make these your new favorite Easter tradition!

Ingredients:
- My first batch of these was actually pretty great, but I’ve tweaked little things over time.
- Initially I used all brown sugar, but found the mix of brown and white created a better texture.
- I’ve played with different amounts of candy too – less than a cup didn’t give enough chocolate in every bite, and more than two cups made the cookies fall apart. The current amount is the perfect balance.
- These cookies stay soft for about 3-4 days in an airtight container at room temperature. The trick is to add a piece of bread to the container – the cookies absorb moisture from the bread instead of drying out.
- Unbaked cookie dough balls freeze beautifully – I often make a double batch and freeze half on a sheet pan, then transfer to a freezer bag once solid.
- Bake straight from frozen, just adding 2-3 minutes to the baking time.
Crafting Your Brown Butter Cadbury Egg Cookies: A Detailed Journey
Oh, these Brown Butter Cadbury Egg Cookies are truly something special. They’ve become a staple in my kitchen, especially around spring, and for good reason! The rich, nutty notes of brown butter combined with the creamy, crunchy sweetness of Cadbury Mini Eggs create a cookie experience that’s both comforting and exciting. While the journey to perfecting them involved a lot of delicious trial and error, I’m thrilled to share my meticulous approach to making them just right. Let’s dive in!
Prepping Your Workspace and Key Ingredients
Before we even think about mixing, it’s essential to get everything in order. This isn’t just about efficiency; it ensures your ingredients are at their optimal state for the best possible cookie dough. I always recommend using a kitchen scale for accuracy, especially with flour, but volumetric measurements are provided too. Gather all your tools: a heavy-bottomed saucepan for the butter, several mixing bowls, a sturdy whisk, a hand mixer or stand mixer, and a cookie scoop.
Preheat your oven to 375°F (190°C). Line two large baking sheets with parchment paper or silicone baking mats. This is crucial for preventing sticking and ensuring even baking, not to mention making cleanup a breeze. Having your baking sheets ready means you can transition smoothly from dough preparation to baking without any last-minute scrambling.
The Secret Weapon: Brown Butter Perfection
- Start with the Butter: Our journey begins with browning the butter. This isn’t just a step; it’s the foundation of the cookie’s unique flavor profile. In a light-colored, heavy-bottomed saucepan, melt 1 cup (2 sticks or 226g) of unsalted butter over medium heat. Using a light-colored pan is important because it allows you to easily monitor the butter’s color as it transforms.
- The Browning Process: As the butter melts, it will begin to foam. Continue to cook, stirring occasionally with a heat-proof spatula or whisk. You’ll notice the milk solids separating and sinking to the bottom of the pan. These solids are what will toast and turn golden brown. Keep a close eye on it! The butter will go from a bright yellow to a foamy, then amber, and finally a rich, nutty brown with fragrant, toasted bits at the bottom. This usually takes about 5-8 minutes, but it can happen quickly once it starts to change color. The aroma will shift from simply buttery to intensely nutty, almost like toasted hazelnuts.
- Cooling Down: As soon as you achieve that beautiful, amber-brown color and the intoxicating nutty scent, immediately remove the saucepan from the heat. Carefully pour the browned butter, including all those delicious toasted bits, into a heat-proof mixing bowl. Allow it to cool for at least 15-20 minutes. It should still be warm and liquid, but not scalding hot, as we don’t want to scramble our eggs later. If it cools too much and solidifies, you can gently rewarm it for a minute or two until it’s pourable again.
Preparing the Dry Ingredients
- Combine Dry Ingredients: While your brown butter is cooling, let’s prepare the dry components. In a medium bowl, whisk together 2 ½ cups (300g) of all-purpose flour, 1 teaspoon of baking soda, and ½ teaspoon of fine sea salt. Whisking ensures these ingredients are thoroughly combined and evenly distributed. This prevents pockets of leavening or salt in your finished cookies, guaranteeing consistent texture and flavor throughout. Set this bowl aside.
Whipping Up the Wet Ingredients (and the Sugar Secret!)
- Sugar Selection: Now, let’s talk about our sugars. Through my own recipe development, I’ve found that a thoughtful combination of both granulated white sugar and light brown sugar yields the absolute best texture for these cookies. Initially, I experimented with using all brown sugar, which was good, but the blend provides a unique chewiness coupled with a slight crispness at the edges that’s truly irresistible. The molasses in the brown sugar contributes depth of flavor and moisture, while the white sugar ensures that classic cookie spread and a delicate crisp. Into the bowl with your slightly cooled brown butter, add ¾ cup (150g) of granulated sugar and 1 cup (200g) of packed light brown sugar.
- Creaming the Sugars: Using a hand mixer or a stand mixer fitted with the paddle attachment, beat the brown butter and sugars together on medium speed for about 2-3 minutes, until they are well combined, lightened in color, and fluffy. This creaming process incorporates air, which is vital for the cookie’s texture.
- Adding Eggs and Vanilla: Add 2 large eggs, one at a time, beating well after each addition until fully incorporated. It’s best if your eggs are at room temperature, as they emulsify better with the butter and sugar, creating a smoother dough. Finally, stir in 1 tablespoon of pure vanilla extract. The rich aroma of vanilla perfectly complements the brown butter and sets the stage for our Cadbury Eggs.
Bringing the Dough Together
- Gradually Add Dry to Wet: With the mixer on low speed, gradually add the dry ingredient mixture to the wet ingredients, mixing until just combined. Be careful not to overmix! Overmixing develops the gluten in the flour too much, leading to tough, cakey cookies. We’re aiming for tender, chewy cookies here, so stop mixing as soon as you no longer see streaks of dry flour. A few small lumps are perfectly fine.
- Incorporating the Star Ingredient: Now for the star of the show – our Cadbury Mini Eggs! I’ve done a lot of experimenting with the amount of candy in these cookies. I found that anything less than a cup just didn’t give enough chocolate in every bite, leaving you feeling a little short-changed. On the flip side, trying to pack in more than two cups made the cookies prone to falling apart, turning them into a delicious but structurally unsound mess. The current amount, about 1 ½ cups (approximately 250g) of roughly chopped Cadbury Mini Eggs, is truly the perfect balance. It ensures a delightful burst of creamy chocolate and crunchy shell in almost every single bite without compromising the integrity of the cookie itself. Gently fold the chopped Cadbury Mini Eggs into the dough using a spatula, distributing them evenly.
The Art of Chilling and Baking
- Chilling the Dough (Don’t Skip This!): This step is non-negotiable for the best brown butter cookies! Cover the bowl with plastic wrap and refrigerate the dough for at least 1 hour, or up to 24 hours. Chilling allows the flavors to meld, the flour to fully hydrate, and the fats to firm up, preventing the cookies from spreading too much in the oven. The longer the chill, the deeper the flavor and chewier the texture. If you chill for longer than an hour, you might need to let the dough sit at room temperature for 10-15 minutes to soften slightly before scooping.
- Portioning the Dough: Once chilled, use a 1.5 to 2-tablespoon cookie scoop to drop rounded balls of dough onto your prepared baking sheets, leaving about 2 inches between each cookie. I usually place 6-8 cookies per standard baking sheet to ensure they have enough room to spread without merging.
- Baking to Perfection: Bake in your preheated oven for 9-11 minutes. The exact time will depend on your oven and the size of your cookie dough balls. You’re looking for edges that are lightly golden brown and set, while the centers still look slightly soft and gooey. Resist the urge to overbake! An underbaked cookie (just barely) is a chewy cookie; an overbaked cookie is a hard cookie.
- Cooling Protocol: Once out of the oven, let the cookies cool on the baking sheets for about 5 minutes. This allows them to set up further and prevents them from breaking apart when you transfer them. After 5 minutes, carefully transfer the cookies to a wire rack to cool completely.
Storage, Freezing, and Maximizing Freshness
One of the beauties of a truly great cookie recipe is its versatility, not just in flavor but also in how you can store and enjoy it. I’ve spent a lot of time ensuring these Brown Butter Cadbury Egg Cookies stay delicious long after they come out of the oven. Here’s what I’ve learned:
Keeping Them Soft and Fresh
- Room Temperature Storage: For immediate enjoyment, these cookies stay wonderfully soft and delicious for about 3-4 days when stored in an airtight container at room temperature. The key word here is “airtight.” Exposure to air is the enemy of cookie softness!
- The Bread Trick: My absolute favorite trick for maintaining optimal moisture and chewiness is to add a fresh slice of bread (any plain bread will do, even a heel!) to the airtight container along with your cooled cookies. The cookies will actually absorb moisture from the bread instead of drying out. You’ll find the bread will become stale and hard, but your cookies will remain beautifully soft. Just remember to replace the bread slice every day or two for maximum effectiveness.
Freezing for Future Cravings
If you’re anything like me, having a stash of cookie dough ready for spontaneous baking is a game-changer. These Brown Butter Cadbury Egg Cookies are perfect for freezing, either as dough or fully baked.
- Freezing Unbaked Dough Balls: Unbaked cookie dough balls freeze beautifully, which is fantastic for those moments when a sudden cookie craving strikes. I often make a double batch of this recipe and freeze half of the dough. To do this, simply scoop your chilled dough into individual balls (as if you were going to bake them) and place them on a sheet pan lined with parchment paper. Ensure they’re not touching. Pop the entire sheet pan into the freezer.
- Transferring to Storage: Once the cookie dough balls are solid (this usually takes 1-2 hours), transfer them to a freezer-safe bag or an airtight container. This way, they won’t stick together, and you can easily grab just a few when you’re ready to bake. Frozen dough can be stored for up to 3 months. Don’t forget to label your bag with the date and baking instructions!
- Baking from Frozen: When you’re ready to enjoy fresh-baked cookies, simply pull the desired number of frozen dough balls from the freezer. There’s no need to thaw them! Place them directly on your prepared baking sheet and bake straight from frozen. You’ll just need to add an extra 2-3 minutes to the standard baking time. So, instead of 9-11 minutes, aim for 11-14 minutes, keeping an eye on them until the edges are golden and the centers are just set. This method is truly a lifesaver for warm, fresh cookies on demand!
My Final Tips for Cookie Excellence
To ensure every batch of your Brown Butter Cadbury Egg Cookies turns out absolutely perfect, here are a few more insights I’ve gathered:
- Quality Ingredients Matter: Especially for a recipe where butter and chocolate are stars, investing in good quality unsalted butter and genuine Cadbury Mini Eggs really makes a difference. The flavor depth is undeniable.
- Don’t Rush the Brown Butter: This is the soul of the cookie. Take your time, watch the color, and smell the aroma. A truly well-browned butter will yield an incredible nutty complexity that you just can’t get otherwise.
- Room Temperature Eggs: I mentioned this, but it bears repeating. Room temperature eggs emulsify better, creating a smoother, more uniform dough, which translates to a better cookie texture. If you forget to take them out, place them in a bowl of warm (not hot!) water for 5-10 minutes.
- A Sprinkle of Flaky Sea Salt: For an extra touch of gourmet magic, sprinkle a tiny pinch of flaky sea salt (like Maldon) over the cookies immediately after they come out of the oven. The salt enhances the chocolate and brown butter notes beautifully, adding a delightful contrast.
- Get Creative with Cadbury: While Mini Eggs are my absolute favorite here, don’t be afraid to experiment with other Cadbury chocolates if you prefer. Just ensure they’re chopped into bite-sized pieces. Milk chocolate chips or even a mix of white and dark chocolate chips can work in a pinch, though you’d miss the iconic crunch of the Cadbury shell.
- Don’t Crowd the Pan: Give your cookies space to breathe! Crowding them can lead to uneven baking and can prevent them from getting those perfectly crispy edges. If you’re using smaller sheets, bake in batches.
There you have it! With these detailed steps and my personal tips, you’re now equipped to create truly exceptional Brown Butter Cadbury Egg Cookies that will impress everyone fortunate enough to try them. Happy baking!

Conclusion:
As we wrap up our delightful journey into the world of these truly exceptional treats, I sincerely hope you’re feeling inspired and ready to preheat your oven. What we’ve created here isn’t just another cookie; it’s an experience, a celebration of flavor and texture that I believe stands head and shoulders above many traditional bakes. This recipe for Brown Butter Cadbury Egg Cookies truly embodies the magic that happens when classic techniques meet playful, festive ingredients.
Think about that first bite: the intoxicating aroma of nutty, caramelized brown butter hitting you even before the cookie reaches your lips. Then, the satisfying resistance of a perfectly crispy edge giving way to an incredibly soft, chewy center. And then, the grand reveal – a pocket of warm, gooey, molten Cadbury Egg, its creamy fondant melting gloriously, adding an unparalleled richness and sweetness that dances beautifully with the complex notes of the brown butter and the robust chocolate chips. It’s a symphony of textures and tastes that awakens your taste buds and brings an instant smile to your face. Trust me when I say, these cookies are a revelation. They take the comforting familiarity of your favorite chocolate chip cookie and elevate it to an entirely new level of gourmet indulgence, making them an absolute must-try for any baking enthusiast or sweet tooth.
Serving Suggestions & Variations:
While these cookies are undeniably perfect straight out of the oven, still warm and wonderfully gooey, there are so many delightful ways to enjoy them. Imagine pairing a warm cookie with a tall, frosty glass of milk – a timeless combination that never fails to hit the spot. For an extra touch of decadence, try them alongside a scoop of vanilla bean ice cream; the warm cookie melting the cold ice cream is pure bliss. They also make an incredible companion to your morning coffee or afternoon tea, providing that perfect little burst of sweetness to brighten your day. Don’t underestimate their power as a thoughtful gift! Arranged on a beautiful platter or packed into a decorative box, these cookies are sure to impress friends, family, and colleagues alike, making them ideal for holiday gatherings, potlucks, or just a sweet gesture of appreciation.
Feeling creative? The beauty of this recipe lies in its adaptability. While the Cadbury Mini Eggs are iconic, you could certainly experiment with other Easter candies. Try substituting them with Robin Eggs, M&M’s, or even chopped larger chocolate bars for a different chocolate experience. For an added layer of flavor and texture, consider folding in a handful of toasted pecans or walnuts along with the chocolate chips – their crunch and earthy notes would be a fantastic contrast. A sprinkle of flaky sea salt on top before baking is another small but mighty addition that truly enhances all the flavors, cutting through the sweetness and highlighting the richness of the chocolate and brown butter. You could also play with extracts; a touch of almond extract alongside the vanilla would impart a subtle marzipan-like nuance, or a hint of orange zest could add a bright, citrusy lift. The possibilities are endless, so feel free to make these cookies truly your own!
Your Turn to Bake & Share!
Now that you’ve got all the secrets to success, it’s your turn to unleash your inner baker. I genuinely encourage you to grab your ingredients, embrace the joy of browning butter, and experience the pure delight of these cookies for yourself. The process is incredibly rewarding, and the end result is something truly special. Once you’ve baked a batch (and inevitably devoured a few!), I would absolutely love to hear about your experience. Did you make any fun variations? What was your favorite part? Share your thoughts, tips, and most importantly, your beautiful cookie creations with me! Snap a photo, tag me on social media, or drop a comment below. Your feedback and baking adventures inspire me, and I can’t wait to see your incredible Brown Butter Cadbury Egg Cookies come to life. Happy baking, my friends!
FAQs (People Also Ask)
Q: Why is brown butter so important in this cookie recipe?
A: Brown butter, also known as beurre noisette, is absolutely crucial for the unique depth of flavor in these cookies! As butter melts and cooks past a certain point, the milk solids toast, creating an incredibly rich, nutty, and caramel-like aroma and taste. This process adds a layer of complexity that plain melted butter simply cannot provide, elevating the classic chocolate chip cookie profile to a gourmet experience that pairs perfectly with the sweet Cadbury Eggs. It introduces a sophisticated, warm undertone that makes these cookies truly special.
Q: Can I use regular chocolate chips instead of Cadbury Eggs?
A: Absolutely! While the Cadbury Eggs add a delightful, festive, and gooey element that’s particularly fun for spring, this recipe works beautifully with just regular chocolate chips. You can use any kind you prefer – semi-sweet, milk chocolate, dark chocolate, or even a mix. If you omit the Cadbury Eggs entirely, you might consider increasing the amount of chocolate chips slightly to ensure every bite is packed with delicious chocolatey goodness. Or, substitute with other mini candies for a different twist!
Q: How do I store these cookies to keep them fresh?
A: To keep your Brown Butter Cadbury Egg Cookies tasting their best, store them in an airtight container at room temperature. They will remain wonderfully fresh and chewy for 3-5 days. If you want to prolong their shelf life, you can freeze them for up to 3 months. To freeze, arrange cooled cookies in a single layer on a baking sheet until firm, then transfer them to a freezer-safe bag or container, separating layers with parchment paper. Thaw at room temperature or warm briefly in the microwave for that fresh-baked feel.
Q: Can I freeze the cookie dough for later?
A: Yes, freezing the cookie dough is a fantastic idea for future baking sessions! Simply prepare the dough as directed in the recipe. Once the dough has chilled, scoop it into individual portions onto a parchment-lined baking sheet and freeze until solid. Once frozen, transfer the dough balls to a freezer-safe bag or container. When you’re ready to bake, you can bake them directly from frozen; just add a few extra minutes to the baking time until the edges are golden brown and the centers are set. This is perfect for having fresh-baked cookies on demand!
Q: What’s the best way to ensure my brown butter doesn’t burn?
A: The key to perfect brown butter is vigilance! Use a light-colored pan so you can easily see the color change. Start by melting the butter over medium heat, stirring occasionally. Once it’s fully melted, continue to cook, stirring frequently. You’ll notice it foaming, then tiny brown bits will start to form at the bottom of the pan, and a rich, nutty aroma will fill your kitchen. As soon as you see those golden-brown bits and smell that nutty scent, immediately remove the pan from the heat and pour the butter (including the glorious brown bits!) into a heatproof bowl to stop the cooking process. This prevents it from going from perfectly browned to burnt in a matter of seconds. Don’t walk away from it!
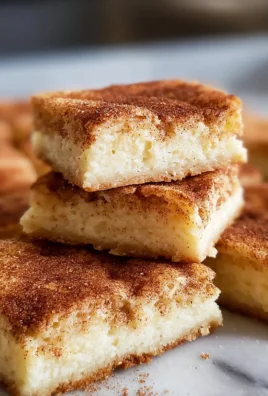
Chewy Brown Butter Cadbury Egg Cookies – Must Bake!
These Chewy Brown Butter Cadbury Egg Cookies are a truly special treat! With rich, nutty brown butter notes and creamy, crunchy Cadbury Mini Eggs, they create a comforting and exciting cookie experience perfect for spring. This recipe yields a soft, chewy cookie that stays fresh for days and freezes beautifully for future cravings.
Ingredients
-
1 cup (226g) unsalted butter
-
2 ½ cups (300g) all-purpose flour
-
1 tsp baking soda
-
½ tsp fine sea salt
-
¾ cup (150g) granulated sugar
-
1 cup (200g) packed light brown sugar
-
2 large eggs, room temperature
-
1 tbsp pure vanilla extract
-
1 ½ cups (250g) roughly chopped Cadbury Mini Eggs
Instructions
-
Step 1
Preheat oven to 375°F (190°C). Line two large baking sheets with parchment paper or silicone baking mats. -
Step 2
In a light-colored saucepan, melt 1 cup (226g) unsalted butter over medium heat. Cook until it turns amber-brown with a nutty aroma and toasted bits (5-8 minutes). Immediately pour into a heat-proof bowl; cool for 15-20 minutes until still warm and liquid. -
Step 3
While butter cools, whisk together 2 ½ cups (300g) all-purpose flour, 1 teaspoon baking soda, and ½ teaspoon fine sea salt in a medium bowl. Set aside. -
Step 4
To the slightly cooled brown butter, add ¾ cup (150g) granulated sugar and 1 cup (200g) packed light brown sugar. Beat with a mixer on medium speed for 2-3 minutes until light and fluffy. -
Step 5
Add 2 large room temperature eggs, one at a time, beating well after each. Stir in 1 tablespoon pure vanilla extract until fully incorporated. -
Step 6
With the mixer on low speed, gradually add the dry ingredients to the wet, mixing until just combined. Do not overmix; stop when dry streaks disappear. -
Step 7
Gently fold 1 ½ cups (250g) roughly chopped Cadbury Mini Eggs into the dough using a spatula, distributing them evenly. -
Step 8
Cover the bowl and refrigerate the dough for at least 1 hour (up to 24 hours). This step is crucial for flavor and texture. -
Step 9
Once chilled, use a 1.5 to 2-tablespoon cookie scoop to drop dough balls onto prepared baking sheets, leaving 2 inches between each. Bake for 9-11 minutes, until edges are lightly golden and centers look slightly soft. -
Step 10
Let cookies cool on the baking sheets for about 5 minutes, then transfer to a wire rack to cool completely.
Important Information
Nutrition Facts (Per Serving)
It is important to consider this information as approximate and not to use it as definitive health advice.
Allergy Information
Please check ingredients for potential allergens and consult a health professional if in doubt.


Leave a Comment