
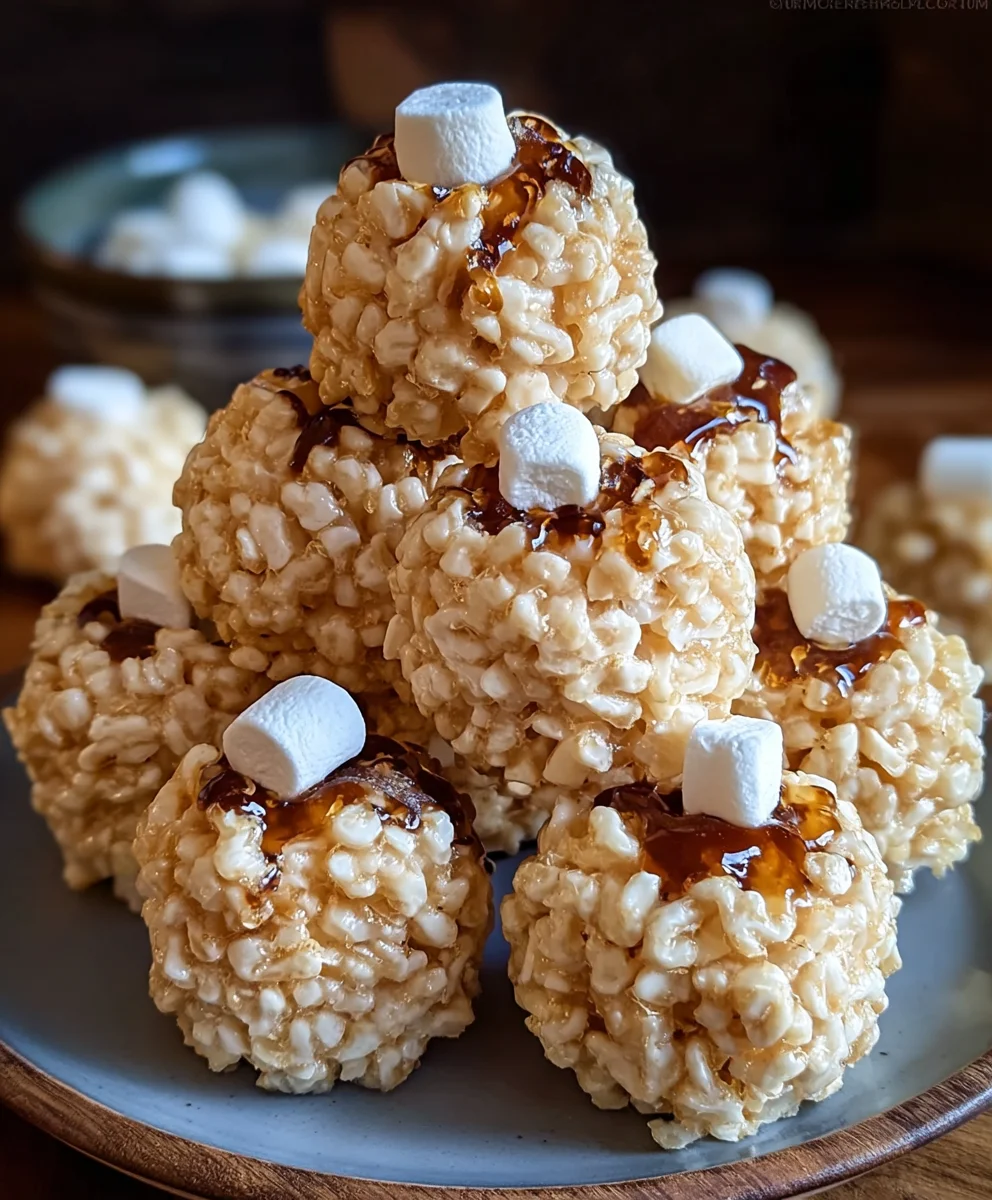
Marshmallow Rice Krispie Balls – if there’s one treat that instantly transports me back to childhood with a single bite, it’s the classic combination of crispy cereal and gooey marshmallow. Developed by Kellogg’s in the late 1930s, these delightful confections were originally crafted by Mildred Day and Malitta Jensen at the Kellogg’s Home Economics Department as a fundraiser for Camp Fire Girls. What began as a simple cereal bar quickly became a beloved staple in kitchens worldwide, cherished for its simplicity and undeniable deliciousness.
Why We Love This Timeless Treat
Their enduring popularity isn’t hard to understand. These treats offer that irresistible contrast of chewy sweetness from the melted marshmallows, perfectly complementing the satisfying crunch of puffed rice cereal. Plus, the sheer ease of preparation makes them a go-to for busy parents, aspiring young chefs, and anyone craving a quick, no-bake dessert. Whether you’re preparing for a school event, a casual get-together, or simply looking for a sweet escape, these delightful Marshmallow Rice Krispie Balls are always a hit. I’m absolutely thrilled to guide you through crafting the perfect batch of these iconic treats, ensuring each bite is as memorable as the last.
Ingredients:
- 6 tablespoons (85g) unsalted butter: I personally prefer unsalted butter for this recipe because it gives me full control over the saltiness, but if salted butter is all you have, that’s absolutely fine! Just be mindful that your Marshmallow Rice Krispie Balls might have a slightly saltier edge, which can actually be quite delightful.
- 10 ounces (about 40 large or 6 cups mini) marshmallows: Fresh marshmallows are key here for the best melt and chewiness. While mini marshmallows melt faster and more evenly, standard-sized ones work perfectly well too; they just require a little more stirring time. Stale marshmallows can lead to a lumpy, less smooth mixture, so try to grab a fresh bag!
- 6 cups (about 150g) Rice Krispies cereal: The star of our show! Make sure your cereal is fresh and crispy. Stale cereal will result in less satisfying Marshmallow Rice Krispie Balls, lacking that iconic crunch that makes them so beloved.
- 1 teaspoon vanilla extract (optional, but highly recommended): This little addition elevates the flavor profile significantly, adding a lovely depth that goes beyond just sweet. Don’t skip it if you want that extra “oomph” in your Marshmallow Rice Krispie Balls!
- Pinch of sea salt (optional): A tiny pinch really helps to balance the sweetness of the marshmallows and butter, creating a more sophisticated flavor experience. It’s amazing how a small amount of salt can enhance other flavors.
Optional Mix-ins and Decorations:
- 1 cup chocolate chips (milk, dark, or white): You can fold these into the mixture once it’s slightly cooled, or melt them for dipping/drizzling.
- ½ cup sprinkles: Perfect for adding a festive touch, either mixed in or sprinkled on top while the balls are still warm and sticky.
- ¼ cup peanut butter or almond butter: For a nutty twist, stir this in with the marshmallows once they’ve fully melted.
- Food coloring: To create vibrant, colorful Marshmallow Rice Krispie Balls for special occasions.
Preparing Your Workspace and Equipment:
Before we even think about melting butter, it’s crucial to set up your workspace efficiently. Trust me on this one; once the marshmallow mixture is ready, things move pretty quickly, and you don’t want to be scrambling for supplies. This preparation stage is vital for creating perfect Marshmallow Rice Krispie Balls without unnecessary stress.
- Gather all your ingredients: Lay out your butter, marshmallows, Rice Krispies cereal, vanilla extract, and any optional mix-ins you plan to use. Having everything within arm’s reach will make the process incredibly smooth.
- Prepare your large mixing bowl: Get out a very large, heat-proof mixing bowl. You’ll need ample space to combine the sticky marshmallow mixture with the cereal effectively without it overflowing or making a huge mess. A stainless steel bowl or a large glass bowl works wonderfully here.
- Measure out your Rice Krispies: Pour the 6 cups of Rice Krispies cereal directly into the large mixing bowl. This way, when the hot marshmallow mixture is ready, you can immediately pour it over the cereal and start mixing. This saves precious seconds and helps prevent the mixture from cooling too much before you can combine everything.
- Prepare your baking sheet or serving platter: Line a large baking sheet, a large cutting board, or even a serving platter with parchment paper or wax paper. This will be the landing spot for your finished Marshmallow Rice Krispie Balls. The paper prevents them from sticking as they cool and makes cleanup a breeze. If you don’t have parchment paper, you can lightly grease the surface with butter, but paper is usually less messy.
- Grease your tools: Lightly grease a large spoon or spatula with butter or non-stick cooking spray. This will be your primary tool for stirring the marshmallow mixture and, later, for folding it into the cereal. I find that a rubber spatula is excellent for scraping down the sides of the pot and folding gently, but a sturdy wooden spoon also works well.
- Prepare for shaping: Have a small bowl of butter or a spray bottle of non-stick cooking spray nearby. When it comes time to shape the Marshmallow Rice Krispie Balls, greasing your hands slightly will prevent the sticky mixture from adhering too much to your fingers, making the shaping process much more pleasant and efficient. Alternatively, you can have a bowl of water to dip your hands in, but I personally prefer butter for a smoother finish and added flavor.
Melting the Marshmallow Mixture:
This is where the magic truly begins! The key to delicious, perfectly chewy Marshmallow Rice Krispie Balls is a smoothly melted marshmallow mixture. I’ll walk you through two popular methods: stove-top and microwave. I generally lean towards the stove-top method because it gives you more control over the heat, minimizing the risk of scorching, but the microwave is a quick alternative if you’re in a rush.
Stove-Top Method (My Preferred Way):
- Melt the butter: In a large, heavy-bottomed pot or Dutch oven, melt your 6 tablespoons of unsalted butter over low to medium-low heat. I emphasize low heat because you want the butter to melt gently without browning too quickly. Browning the butter can add a nutty flavor, which is lovely for some recipes, but for classic Marshmallow Rice Krispie Balls, we’re aiming for a clean, sweet butter flavor. Stir it occasionally to ensure even melting.
- Add the marshmallows: Once the butter is fully melted and shimmering, add all 10 ounces of marshmallows to the pot. If you’re using large marshmallows, it might look like a mountain, but they’ll collapse down quickly.
- Stir continuously until melted and smooth: Keep stirring the mixture frequently with your greased spatula or spoon. This constant motion is crucial for preventing the marshmallows from sticking to the bottom of the pot and scorching. The marshmallows will slowly start to soften, clump together, and then turn into a wonderfully gooey, smooth liquid. This usually takes about 5-7 minutes. Do not walk away during this step! Marshmallows can go from perfectly melted to burnt very quickly.
- Remove from heat and stir in flavorings: As soon as the mixture is completely smooth and no lumps remain, immediately remove the pot from the heat. Stir in the 1 teaspoon of vanilla extract (if using) and the pinch of sea salt (if using). The residual heat will help these ingredients incorporate beautifully. The vanilla adds an incredible aroma and depth that truly transforms your Marshmallow Rice Krispie Balls from good to extraordinary. Give it a good stir until everything is well combined.
Microwave Method (For Speed):
If you’re pressed for time or prefer not to use the stove, the microwave method is a viable option. Just be extra careful to avoid overheating.
- Combine butter and marshmallows: In a large, microwave-safe bowl (make sure it’s big enough to eventually hold the cereal too), combine the 6 tablespoons of unsalted butter and the 10 ounces of marshmallows.
- Microwave in short bursts: Microwave on high for 1 minute. Remove the bowl and stir well with your greased spatula. The marshmallows likely won’t be fully melted yet, but you’re beginning the process.
- Continue heating and stirring: Return the bowl to the microwave and continue heating in 30-second intervals, stirring vigorously after each interval, until the mixture is completely smooth and creamy. This typically takes 2-3 minutes total, but microwave wattages vary, so keep a close eye on it. Be careful not to overheat the marshmallows, as this can make them very tough and difficult to work with later. Overheated marshmallows can also lead to harder Marshmallow Rice Krispie Balls.
- Stir in flavorings: Once melted, stir in the vanilla extract and sea salt until fully incorporated.
Combining with Rice Krispies:
This is arguably the most satisfying part of making Marshmallow Rice Krispie Balls – watching everything come together! Speed and thoroughness are important here to ensure every single flake gets a glorious coating of that sweet, sticky marshmallow goodness.
- Pour mixture over cereal: Immediately pour the warm, melted marshmallow mixture from your pot or microwave-safe bowl directly over the 6 cups of Rice Krispies cereal you’ve already measured out in your large mixing bowl. Do not hesitate! The quicker you do this, the better, as the mixture starts to cool and become less pliable almost instantly.
- Fold gently but thoroughly: Using your greased spatula or spoon, begin to fold the cereal into the marshmallow mixture. The technique here is important: you want to gently scrape from the bottom of the bowl and fold the cereal over the top, repeating this motion. Don’t aggressively stir or smash the cereal, as this can break the delicate flakes and lead to a less crispy texture in your final Marshmallow Rice Krispie Balls.
- Ensure even coating: Continue folding until every single Rice Krispie flake is evenly coated with the marshmallow mixture. This might take a few minutes, but it’s worth the effort. You’ll know it’s ready when there are no dry pockets of cereal left, and the mixture looks uniformly sticky and glossy. Work relatively quickly, as the mixture will continue to cool and stiffen, making it harder to mix effectively. If you’re adding optional mix-ins like chocolate chips or sprinkles directly into the mixture, now is the time to fold them in. If adding chocolate chips, ensure the mixture has cooled just slightly so they don’t melt completely, but enough that they stick.
Forming Your Marshmallow Rice Krispie Balls:
Now for the fun, hands-on part! Shaping the Marshmallow Rice Krispie Balls is where you bring them to life. The key here is to prevent sticking and achieve a uniform, appealing shape. There are a few tricks I use to make this process much easier and more enjoyable.
- Prepare your hands: This step is critical! Lightly butter your hands or spray them with non-stick cooking spray. I find that using about half a teaspoon of butter rubbed all over my palms and fingers works best. Reapply butter as needed if the mixture starts to stick excessively. Alternatively, you can dampen your hands with a little water, but butter adds a nice subtle richness and prevents sticking more effectively.
- Scoop a portion of the mixture: Using a tablespoon, a small cookie scoop, or just your greased hands, scoop out a portion of the Rice Krispie mixture. The size is entirely up to you – for bite-sized treats, aim for about 1.5 to 2 tablespoons of mixture. For larger, more substantial Marshmallow Rice Krispie Balls, you can go up to 3 or 4 tablespoons.
- Gently shape into balls: With your greased hands, gently but firmly press and roll the mixture into a compact ball. The “gentle but firm” part is important; you want them to hold their shape without being overly compressed, which can make them too dense. Avoid squeezing too hard, as this can crush the cereal. Aim for a relatively uniform size and shape for all your Marshmallow Rice Krispie Balls, as this helps with even cooling and presentation.
- Place on prepared surface: As you form each ball, place it onto your parchment-lined baking sheet or platter. Make sure to leave a little space between each ball to prevent them from sticking together as they cool.
- Repeat until all mixture is used: Continue scooping and shaping until you’ve used up all the Rice Krispie mixture. This process might be a little sticky, but it’s incredibly rewarding to see your perfect Marshmallow Rice Krispie Balls taking shape!
Setting and Cooling:
Patience is a virtue, especially when it comes to allowing your Marshmallow Rice Krispie Balls to set properly. This phase ensures they firm up beautifully, achieving that ideal chewiness and crispness that makes them so irresistible.
- Allow to cool at room temperature: Once all your Marshmallow Rice Krispie Balls are shaped and placed on the prepared surface, allow them to cool completely at room temperature. This usually takes about 30 to 60 minutes, depending on the ambient temperature and humidity in your kitchen.
- Resist the urge to refrigerate immediately: While it might be tempting to pop them straight into the fridge to speed up the setting process, I advise against it initially. Refrigerating them too quickly can sometimes make them overly hard and dense. Allowing them to cool naturally at room temperature first helps them retain a softer, chewier texture.
- Check for firmness: You’ll know your Marshmallow Rice Krispie Balls are properly set when they are firm to the touch, no longer excessively sticky, and hold their shape perfectly when lifted. They should have that signature crisp and chewy texture.
- Optional: Brief refrigeration for quicker firming (after initial cool): If you’re really in a hurry or prefer a slightly firmer ball, after they’ve cooled for at least 20-30 minutes at room temperature, you can transfer the baking sheet to the refrigerator for an additional 15-20 minutes. Just be mindful not to leave them in there for too long, as they can become too hard.
Optional Enhancements and Decorations:
This is where you can truly unleash your creativity and customize your Marshmallow Rice Krispie Balls to suit any occasion or personal preference. Adding these extra touches can transform a simple treat into something truly spectacular.
- Chocolate Dipping/Drizzling:
- Melt chocolate: In a microwave-safe bowl, melt 1 cup of chocolate chips (milk, dark, or white) in 30-second intervals, stirring well after each, until smooth. Alternatively, use a double boiler on the stove for a more controlled melt.
- Dip or drizzle: Once your Marshmallow Rice Krispie Balls are fully set, you can either dip half of each ball into the melted chocolate or use a spoon to drizzle chocolate artistically over the tops.
- Add toppings: While the chocolate is still wet, sprinkle with your favorite toppings like extra sprinkles, chopped nuts, mini chocolate chips, or even a dash of sea salt for a sweet and salty contrast.
- Set the chocolate: Place the decorated balls back on the parchment-lined sheet and allow the chocolate to set completely at room temperature or in the refrigerator for 10-15 minutes.
- Adding Sprinkles (Mixed In):
- Fold in early: If you want sprinkles incorporated throughout your Marshmallow Rice Krispie Balls, fold them into the mixture along with the Rice Krispies. Add about ½ cup of your favorite sprinkles. Be aware that some sprinkles, especially nonpareils, might “bleed” their color slightly if added to a very hot mixture, so let the marshmallow mixture cool for a minute or two before folding them in.
- Adding Sprinkles (Topping):
- Apply while sticky: After you’ve shaped your Marshmallow Rice Krispie Balls, and while they are still slightly warm and sticky, immediately roll them in a bowl of sprinkles or gently press sprinkles onto the surface. The residual stickiness will help them adhere.
- Nut Butters for a Flavor Twist:
- Stir into marshmallows: If you’re looking for a richer, nuttier flavor, once the marshmallows are completely melted and off the heat, stir in ¼ cup of creamy peanut butter, almond butter, or cashew butter. Mix thoroughly until fully combined before adding the Rice Krispies. This will create Marshmallow Rice Krispie Balls with a delightful added depth and creaminess.
- Food Coloring for Festive Fun:
- Add to melted mixture: After the vanilla and salt are mixed into the melted marshmallows, add a few drops of gel food coloring. Start with a small amount and mix well until you achieve your desired hue. Gel food coloring provides vibrant colors without adding too much liquid. This is perfect for holiday-themed Marshmallow Rice Krispie Balls!
Storage Tips for Freshness:
To keep your Marshmallow Rice Krispie Balls tasting their best, proper storage is essential. While they’re rarely around for long in my house, here’s how to maximize their shelf life and maintain that perfect texture.
- Airtight Container is Key: Once your Marshmallow Rice Krispie Balls are completely cool and set, transfer them to an airtight container. This is the single most important step to prevent them from drying out and becoming hard. Exposure to air is their enemy!
- Room Temperature is Best: For optimal texture, store your Marshmallow Rice Krispie Balls at room temperature. They tend to firm up too much and lose some of their delightful chewiness if kept in the refrigerator for extended periods. If you did refrigerate them for a short time to set chocolate, let them come back to room temperature before serving for the best experience.
- Separate Layers with Parchment Paper: If you’re stacking multiple layers of Marshmallow Rice Krispie Balls in your container, place a sheet of parchment paper or wax paper between each layer. This prevents them from sticking together, especially if they’re a little warm or if any chocolate decorations haven’t fully set.
- Avoid Direct Sunlight and Heat: Keep the container in a cool, dry place, away from direct sunlight or any heat sources. Warm temperatures can cause the marshmallows to soften too much and the balls to lose their shape.
- Shelf Life: Properly stored at room temperature, your Marshmallow Rice Krispie Balls will stay fresh, soft, and chewy for up to 3-4 days. While they are still edible after this time, they might start to lose their crispness and become a bit tougher. For the absolute best taste and texture, I always recommend enjoying them within the first 2 days.
- Freezing (Not Recommended for Best Texture): While technically you can freeze Marshmallow Rice Krispie Balls, I generally don’t recommend it if you’re aiming for that signature chewy, fresh texture. Freezing can make them a bit drier and harder upon thawing, and they can lose some of their delicate crispness. If you must freeze, wrap each ball individually in plastic wrap, then place them in an airtight freezer-safe bag. Thaw at room temperature.
Troubleshooting Common Issues:
Even though Marshmallow Rice Krispie Balls are a relatively simple treat, sometimes things don’t go exactly as planned. Don’t worry, I’ve got you covered with solutions to the most common problems you might encounter.
- My Marshmallow Rice Krispie Balls are too sticky!
- Problem Cause: This usually happens for one of two reasons: either the marshmallows weren’t melted quite enough, leaving some undissolved sugars that are extra sticky, or more commonly, you didn’t use enough butter/non-stick spray on your hands and tools during the shaping process.
- Solution: Ensure your marshmallows are completely smooth and uniform when melted. When shaping, be generous with buttering your hands, and reapply as needed for every few balls. You can also try lightly greasing your spatula or spoon. A very slight sprinkle of powdered sugar on your hands can also help if you’re desperate, but butter is usually sufficient.
- My Marshmallow Rice Krispie Balls are too hard!
- Problem Cause: The most frequent culprit here is overheating the marshmallows. When marshmallows are cooked at too high a temperature or for too long, their sugar structure changes, making them tough and brittle once cooled. Another reason could be packing them too tightly when shaping, or storing them in the refrigerator for too long.
- Solution: When melting marshmallows, always use low to medium-low heat on the stovetop and stir constantly. If using the microwave, heat in short bursts (30 seconds) and stir well in between to avoid overheating. Once the mixture is combined, work quickly to shape them and avoid compressing them too much. Store them at room temperature in an airtight container, and if you did refrigerate them, let them come back to room temperature before serving.
- My Marshmallow Rice Krispie Balls aren’t holding together / are too crumbly!
- Problem Cause: This is often due to not enough marshmallow mixture or the marshmallow mixture cooling too much before you could fully combine it with the cereal. If the mixture cools too quickly, it loses its “glue” power. Sometimes, too much cereal for the amount of marshmallow can also cause this.
- Solution: Double-check your measurements, especially for the marshmallows. Ensure you’re working quickly once the marshmallow mixture is melted. Pour it over the cereal immediately and fold efficiently. If your kitchen is very cold, you might need to gently warm the mixture slightly (very briefly over low heat or a quick 10-second microwave) if it becomes too stiff before mixing, but be careful not to overheat. Next time, consider adding an extra ½ cup of marshmallows if you find them consistently too crumbly.
- My Marshmallow Rice Krispie Balls are chewy, but not crispy!
- Problem Cause: Stale Rice Krispies cereal is usually the main culprit. Moisture can also be absorbed if they are not stored in an airtight container or if the humidity is very high.
- Solution: Always use fresh cereal from a newly opened box for the best crunch. Make sure your Marshmallow Rice Krispie Balls are stored in an airtight container at room temperature. If they’ve lost their crispness, unfortunately, it’s hard to get it back without compromising the texture, so prevention is key!
Scaling the Recipe:
Whether you’re making a small batch for yourself or a huge tray for a party, scaling this recipe for Marshmallow Rice Krispie Balls is quite straightforward. Here’s my advice for adjusting the quantities.
- Doubling the Recipe (For a Crowd!):
- Use a larger pot: When doubling, you’ll need an even larger, heavy-bottomed pot or Dutch oven for melting the marshmallows. You’ll also need a significantly larger mixing bowl for combining the cereal.
- Melt in batches or carefully: Melting 20 ounces of marshmallows at once can be a bit challenging to do evenly without scorching. If you have a very large pot and are confident with your low-heat stirring technique, you can try to melt all the marshmallows and double the butter simultaneously. However, if you’re new to doubling, I often recommend melting the marshmallows and butter in two separate batches (e.g., two sets of 10 oz marshmallows with 6 tbsp butter each) and then combining them before adding the full 12 cups of Rice Krispies. This helps ensure an even melt and less risk of burning.
- Work quickly: With a larger quantity, the mixture will cool faster relative to the amount you need to mix. Have an extra set of hands if possible, and ensure all your cereal is pre-measured and ready.
- Prepare more surface area: You’ll definitely need more parchment-lined baking sheets or platters to accommodate all the Marshmallow Rice Krispie Balls.
- Halving the Recipe (For a Smaller Treat):
- Adjust all ingredients proportionally:
- 3 tablespoons unsalted butter
- 5 ounces (about 20 large or 3 cups mini) marshmallows
- 3 cups Rice Krispies cereal
- ½ teaspoon vanilla extract (optional)
- Tiny pinch of sea salt (optional)
- Use a smaller pot and bowl: A medium-sized saucepan will be sufficient for melting, and a standard large mixing bowl will work perfectly for combining the smaller quantity.
- Cooking time: The melting time for the marshmallows will be slightly shorter due to the reduced volume, so keep a closer eye on them.
- Shaping: You’ll naturally make fewer Marshmallow Rice Krispie Balls, but the shaping process remains the same.
- Adjust all ingredients proportionally:
- General Rule for Scaling: Always scale all ingredients proportionally. Don’t just double the marshmallows and keep the same amount of butter, as this will throw off the texture and flavor. Keep an eye on your heat and work quickly, especially with larger batches, to ensure the best results for your Marshmallow Rice Krispie Balls.
Conclusion:
So there you have it, my friends! We’ve journeyed through the delightful simplicity of creating a treat that truly stands the test of time, both in its universal appeal and its unwavering deliciousness. If you’ve been searching for that one perfect recipe that guarantees smiles, requires minimal effort, and delivers maximum flavor, then look no further. This isn’t just another dessert; it’s an experience, a memory in the making, and a testament to the fact that sometimes, the simplest things are indeed the best. I genuinely believe that this recipe for Marshmallow Rice Krispie Balls is an absolute kitchen essential for anyone, regardless of their baking prowess.
Why is this recipe a non-negotiable addition to your culinary repertoire? For starters, its unparalleled ease of preparation makes it a superhero in the snack world. We’re talking about a handful of ingredients, a single pot, and mere minutes from start to finish. There’s no oven required, no complicated techniques to master, and virtually no room for error. It’s a foolproof wonder that consistently produces perfectly chewy, gloriously crunchy, and delightfully sweet bites every single time. Imagine the pure joy of biting into that perfectly balanced texture – the sticky, yielding marshmallow hugging the crisp, light Rice Krispies, creating a symphony of sensations in your mouth. This isn’t just a treat; it’s a comforting hug, a nostalgic trip back to childhood parties, and a guaranteed crowd-pleaser for any gathering. From impromptu playdates to elegant potlucks, these humble, yet mighty, balls somehow manage to steal the show, leaving everyone asking for the recipe. Their versatility extends beyond just being a dessert; they make fantastic lunchbox surprises, quick after-school snacks, or even a comforting late-night indulgence. I’ve personally seen them disappear faster than any fancy cake, and for good reason!
Elevate Your Marshmallow Rice Krispie Balls: Creative Serving Suggestions & Variations
Now, while these classic treats are utterly perfect on their own, part of the fun is making them your own! Don’t be shy about experimenting and letting your creativity shine. For a touch of decadence, consider dipping half or even the entire ball into melted chocolate. Dark chocolate adds a sophisticated bitterness, milk chocolate brings a familiar sweetness, and white chocolate offers a creamy, dreamy coating. Before the chocolate sets, you could roll them in a kaleidoscope of colorful sprinkles for a festive look, or perhaps some crushed nuts for added texture and a nutty depth. A sprinkle of sea salt over the chocolate can also provide a delightful sweet and salty contrast that is simply irresistible.
Thinking beyond the basic dip? Why not incorporate some exciting mix-ins directly into the warm marshmallow mixture? Mini chocolate chips, peanut butter chips, or even butterscotch morsels can melt slightly, adding gooey pockets of flavor. Crushed Oreos or graham crackers can introduce another layer of texture and taste, transforming them into entirely new desserts. For a more adult twist, a splash of vanilla extract is always welcome, but you could also explore almond extract for a subtle marzipan note, or peppermint extract around the holidays for a refreshing zing. Citrus zest, like lemon or orange, can cut through the sweetness beautifully, offering a bright, zesty counterpoint. Imagine making them into different shapes too – pressing the mixture into cookie cutters for fun holiday shapes, or even forming them into small “nests” and filling them with mini eggs for an Easter treat!
Your Turn to Create and Share!
I truly hope this recipe inspires you to step into your kitchen and whip up a batch (or two!) of these incredible treats. Trust me, the sheer satisfaction of creating something so universally loved with such minimal effort is incredibly rewarding. There’s a certain magic in hearing the delighted “oohs” and “aahs” when you present them, especially knowing how wonderfully simple they were to make. So, go ahead, gather your ingredients, embrace the stickiness, and get ready to enjoy one of the most beloved no-bake desserts of all time.
Once you’ve experienced the joy of making and tasting these delightful Marshmallow Rice Krispie Balls, I would absolutely love to hear about it! Did you try a fun new variation? Did they disappear in minutes at your family gathering? Please, don’t keep your culinary triumphs to yourself! Share your experiences, your photos, and any brilliant new twists you came up with in the comments section below. Your feedback and creativity not only inspire me but also help our growing community of home cooks discover new favorites and feel more confident in the kitchen. Happy making, and I can’t wait to see what you create!
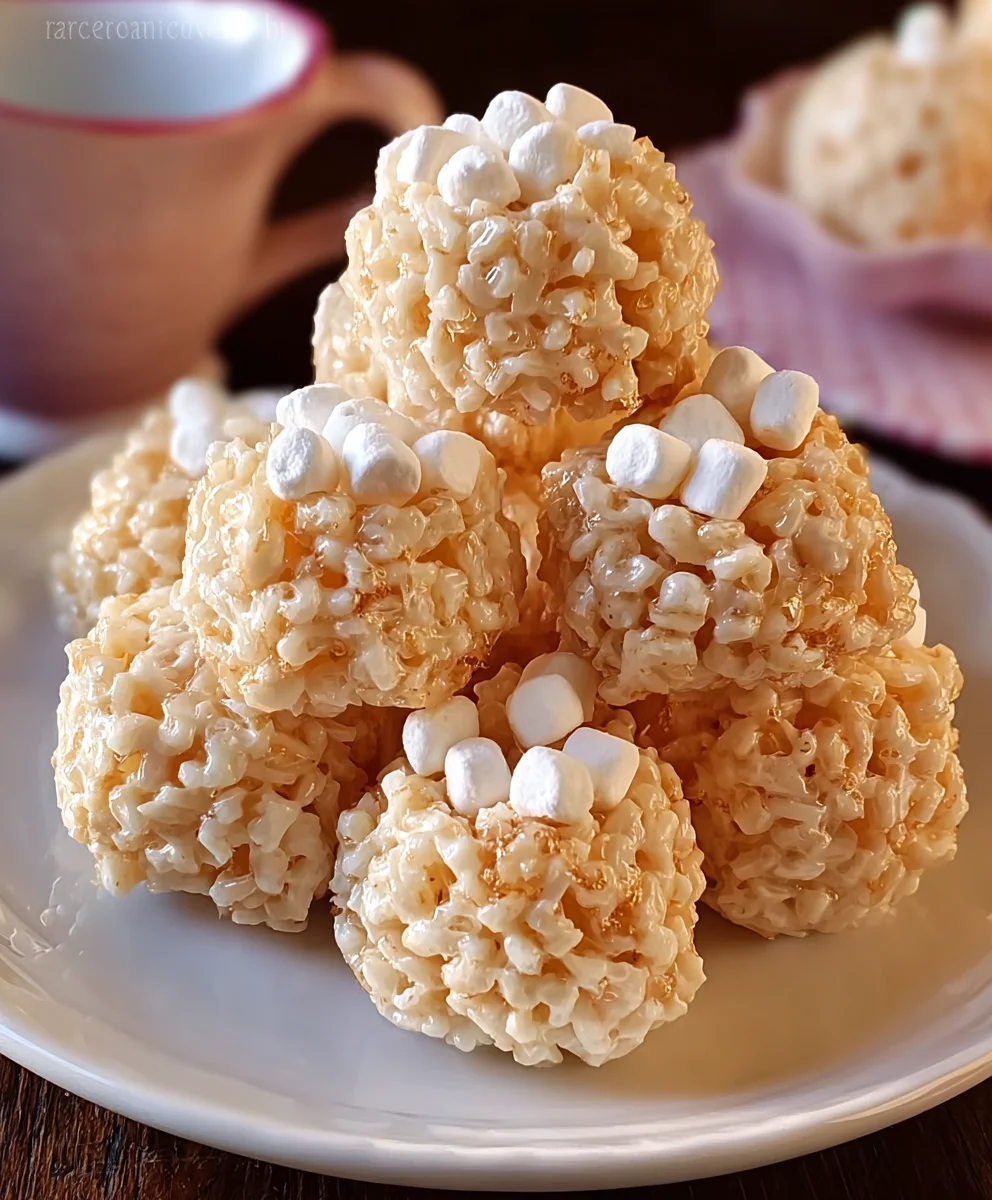
Marshmallow Rice Krispie Balls
A simple, no-bake treat that combines gooey melted marshmallows with crispy puffed rice cereal. Beloved for its irresistible contrast of sweet chewiness and satisfying crunch, it’s a quick and easy dessert perfect for any occasion.
Ingredients
-
6 tbsp (85g) unsalted butter
-
10 oz (approx. 6 cups mini) marshmallows
-
6 cups (150g) Rice Krispies cereal
-
1 tsp vanilla extract (optional)
-
Pinch of sea salt (optional)
Instructions
-
Step 1
Measure 6 cups Rice Krispies cereal into a large mixing bowl. Line a baking sheet or platter with parchment paper. Lightly grease a spatula or spoon, and prepare butter or non-stick spray for your hands. -
Step 2
In a large, heavy-bottomed pot, melt 6 tablespoons unsalted butter over low to medium-low heat. Add 10 ounces marshmallows and stir continuously until completely smooth (approx. 5-7 minutes). Remove from heat. Stir in 1 teaspoon vanilla extract (optional) and a pinch of sea salt (optional). Alternatively, for microwave: In a large microwave-safe bowl, combine butter and marshmallows. Microwave on high for 1 minute, stir. Continue heating in 30-second intervals, stirring after each, until smooth (2-3 minutes total). Stir in vanilla and salt. -
Step 3
Immediately pour the warm melted marshmallow mixture over the Rice Krispies cereal. Using your greased spatula, gently fold until all cereal flakes are evenly coated. Work quickly before the mixture cools and stiffens. -
Step 4
Lightly butter your hands or spray with non-stick spray. Scoop about 1.5-2 tablespoons of the mixture and gently roll it into a compact ball. Place each shaped ball onto the prepared parchment-lined baking sheet. Repeat until all the mixture is used. -
Step 5
Allow the Marshmallow Rice Krispie Balls to cool completely at room temperature for 30-60 minutes until they are firm to the touch and no longer excessively sticky. Serve once set.
Important Information
Nutrition Facts (Per Serving)
It is important to consider this information as approximate and not to use it as definitive health advice.
Allergy Information
Please check ingredients for potential allergens and consult a health professional if in doubt.

Leave a Comment