
Cheesy Garlic Crescent Rolls are an absolute revelation, a culinary masterpiece that transforms simple ingredients into an extraordinary experience. I still remember the first time I baked a batch; the incredible aroma of melting cheese and toasted garlic filled my kitchen, drawing everyone in with irresistible anticipation. While the humble crescent roll, with its flaky, buttery layers, traces its origins back to European bakeries – a delightful cousin to the French croissant – this particular iteration takes that classic base and elevates it to pure comfort food status.
What truly makes Cheesy Garlic Crescent Rolls so beloved is their perfect storm of flavors and textures. Imagine golden-brown, pillowy soft dough, generously slathered with a vibrant garlic butter, and then cradling a molten heart of rich, gooey cheese. Every bite offers that satisfying pull of melted cheese, followed by the fragrant warmth of garlic, all encased in a tender, flaky pastry. They are incredibly versatile, serving as the ultimate side dish for pasta, soups, or stews, or even as a delightful appetizer that vanishes in mere moments. I genuinely believe there’s nothing quite like pulling these warm, golden treasures straight from the oven and sharing them with loved ones.

Ingredients:
- 1 (8-ounce) can Refrigerated Crescent Roll Dough: I always reach for the classic seamless dough if I can find it, as it makes for slightly less fuss when separating, but any standard crescent roll dough will work beautifully for these Cheesy Garlic Crescent Rolls.
- 1/2 cup Unsalted Butter: This is the foundation of our incredible garlic butter. Using unsalted butter allows us to control the saltiness later, which is important when we’re adding cheese.
- 4-6 large cloves Fresh Garlic: Don’t skimp here! Freshly minced garlic is absolutely essential for that pungent, aromatic kick that defines these rolls. I personally love six cloves for an extra garlicky punch, but you can adjust to your preference.
- 1 cup Shredded Mozzarella Cheese: Low-moisture, part-skim mozzarella works best here for that classic melty, gooey pull. Pre-shredded is convenient, but shredding your own from a block often melts smoother.
- 1/4 cup Grated Parmesan Cheese: This adds a wonderful nutty, salty depth to our cheese filling, complementing the mozzarella perfectly. Again, fresh grating makes a big difference in flavor.
- 2 tablespoons Fresh Parsley: Finely chopped. This provides a lovely freshness and a pop of color, cutting through the richness of the butter and cheese. You can use curly or flat-leaf parsley.
- 1/2 teaspoon Onion Powder: A secret weapon for enhancing savory flavors without adding actual onion texture.
- 1/4 teaspoon Black Pepper: Freshly ground is always best for maximum aroma and flavor.
- Pinch of Red Pepper Flakes (Optional): If you like a little subtle warmth and a tiny hint of heat, a small pinch adds a fantastic layer of complexity without making the rolls spicy.
- 1 large Egg (for egg wash, optional but recommended): Whisked with 1 teaspoon of water. This creates a beautiful golden-brown crust and a lovely sheen on our finished Cheesy Garlic Crescent Rolls.
- Flaky Sea Salt (for garnish, optional): A sprinkle right before serving elevates the presentation and offers a delightful textural contrast.
Crafting the Irresistible Garlic Butter and Cheesy Filling
This is where the magic truly begins! The combination of aromatic garlic butter and a gooey cheese blend is what makes these Cheesy Garlic Crescent Rolls so utterly addictive. Taking your time with these steps ensures maximum flavor in every bite.
- Prepare Your Workspace and Preheat: First things first, let’s get our kitchen ready. Go ahead and preheat your oven to 375°F (190°C). While it’s heating up, line a large baking sheet with parchment paper or a silicone baking mat. This is super important to prevent sticking and makes for easy cleanup, which we all appreciate, right?
- Mince the Garlic with Care: Now for the star of the show! Take your 4 to 6 large cloves of fresh garlic. I highly recommend mincing them very finely, almost to a paste. You can use a garlic press for speed, but I personally love the texture and aroma of finely hand-minced garlic. If you’re feeling extra adventurous, you can even grate the garlic on a microplane for an incredibly potent garlic “pulp” that melts right into the butter. The fresher the garlic, the more vibrant the flavor of your Cheesy Garlic Crescent Rolls will be.
- Melt the Butter and Infuse with Garlic: In a small microwave-safe bowl or a small saucepan over low heat, gently melt your 1/2 cup of unsalted butter until it’s completely liquid. Be careful not to brown it at this stage; we’re just looking for a smooth, melted base for our garlic butter concoction. Once melted, immediately stir in your finely minced garlic. Let it sit in the warm butter for about 5 minutes, allowing the butter to really absorb all that wonderful garlicky goodness. This brief infusion step is key to a truly flavorful garlic butter.
- Mix in the Herbs and Spices: To your garlic-infused butter, add 1 tablespoon of the finely chopped fresh parsley (we’ll save the rest for garnish later), 1/2 teaspoon of onion powder, 1/4 teaspoon of freshly ground black pepper, and if you’re using it, a pinch of red pepper flakes. Stir everything together until well combined. The aroma at this point is just incredible – you’ll already be anticipating those amazing Cheesy Garlic Crescent Rolls! Set this mixture aside. We’ll be using it for both brushing the dough and for the cheese filling.
- Prepare the Cheese Blend: In a medium bowl, combine your 1 cup of shredded mozzarella cheese and 1/4 cup of grated Parmesan cheese. If you’re shredding your own cheese, I find that a coarse grater works well for mozzarella, and a fine grater or microplane for Parmesan. Add about 2 tablespoons of your prepared garlic butter mixture to the cheese blend. Stir gently until the cheese is evenly coated. This garlic butter coating on the cheese helps to bind it together slightly and ensures that every bite of your Cheesy Garlic Crescent Rolls is bursting with flavor.
- Whisk the Egg Wash (Optional but Recommended): If you’re going for that professional, golden-brown finish, now is the time to prepare your egg wash. In a tiny bowl, whisk together your large egg with 1 teaspoon of water until it’s light and frothy. This will be brushed onto the tops of the rolls just before baking. Trust me, it makes a noticeable difference in presentation!
Assembling Your Cheesy Garlic Crescent Rolls
Now comes the fun part – transforming simple crescent dough into glorious Cheesy Garlic Crescent Rolls! This stage requires a little patience and attention to detail, but the payoff is a batch of perfectly rolled, cheesy, garlicky delights.
- Unroll the Crescent Dough: Carefully unroll the can of refrigerated crescent roll dough onto your clean work surface. If you’re using the standard perforated kind, gently separate the triangles along the perforations. If you have the seamless sheet, you’ll need to cut it into 8 triangles. The goal is to have 8 distinct triangles ready for filling. Take your time to avoid tearing the dough.
- Lightly Stretch (Optional but Helpful): For slightly larger rolls and more surface area for filling, you can gently stretch each crescent dough triangle just a little bit, particularly at the wide end. Don’t stretch too much, or the dough might become too thin and tear when you roll it.
- Brush with Garlic Butter: Using a pastry brush, generously brush the entire surface of each crescent dough triangle with your remaining garlic butter mixture. Make sure to get it all the way to the edges. This layer of butter is crucial for flavor and to help create that beautiful golden crust as they bake. Don’t be shy with the butter!
- Spoon on the Cheesy Filling: Now for the delicious cheese! Take a spoonful (about 1-2 tablespoons) of your garlic-butter-coated cheese mixture and place it on the wide end of each crescent dough triangle. Try to distribute the cheese evenly across the base, leaving a small border around the edges. You want a good amount of cheese in every roll, but not so much that it spills out everywhere during baking.
- Roll ‘Em Up! Starting from the wide end, carefully roll each crescent dough triangle towards the narrow tip. Try to keep the filling tucked inside as you roll. Once you reach the tip, gently tuck it underneath the roll to help secure its shape. The classic crescent roll shape is what we’re aiming for, but don’t worry if they aren’t all perfectly identical – they’ll still be absolutely delicious!
- Arrange on the Baking Sheet: Place your rolled Cheesy Garlic Crescent Rolls onto your prepared baking sheet, making sure to leave a little space between each one to allow for expansion during baking. Overcrowding the pan can lead to uneven baking.
Baking to Golden Perfection and Serving
The final phase! Watching these Cheesy Garlic Crescent Rolls puff up and turn golden brown in the oven is truly satisfying. The aroma that fills your kitchen at this stage is simply heavenly, promising a delightful treat.
- Apply the Egg Wash (If Using): If you prepared the egg wash, now is the time to use it. Lightly brush the tops and sides of each assembled crescent roll with the whisked egg mixture. This step is optional, but it truly helps achieve that beautiful, glossy, golden-brown finish that makes these rolls look as good as they taste. It also adds a tiny bit of extra richness to the crust.
- Bake Until Golden: Carefully place your baking sheet into the preheated 375°F (190°C) oven. Bake for approximately 12-15 minutes, or until the Cheesy Garlic Crescent Rolls are puffed, beautifully golden brown on top, and the cheese inside is visibly melted and bubbly. Keep a close eye on them, especially towards the end of the baking time, as oven temperatures can vary. You want them perfectly toasted, not burnt.
- A Moment of Rest: Once baked to perfection, carefully remove the baking sheet from the oven. Allow the Cheesy Garlic Crescent Rolls to cool on the baking sheet for about 5 minutes. This brief cooling period helps the cheese set slightly, making them easier to handle and preventing all the gooey goodness from oozing out immediately. It also ensures they are not too hot to enjoy!
- The Finishing Touch: If you saved any of the fresh parsley, now is the time to sprinkle it generously over the warm Cheesy Garlic Crescent Rolls for a final flourish of color and fresh herb flavor. For an extra touch of gourmet appeal, a light sprinkle of flaky sea salt just before serving can elevate the flavors even further.
- Serve Warm and Enjoy! These Cheesy Garlic Crescent Rolls are truly best enjoyed warm, straight from the oven. The cheese will be at its peak gooeyness, and the garlic butter will be wonderfully aromatic. They make a fantastic side dish for any meal, a perfect appetizer for a gathering, or even a delightful snack on their own. They pair wonderfully with a hearty pasta dish, a bowl of soup, or alongside a crisp salad. Be warned: they disappear quickly! These Cheesy Garlic Crescent Rolls are incredibly addictive.
Storage and Reheating Tips:
While these Cheesy Garlic Crescent Rolls are undeniably best fresh, you might find yourself with a few leftovers (though I doubt it!). You can store them in an airtight container at room temperature for up to 2 days, or in the refrigerator for up to 4 days. To reheat, I recommend popping them back into a preheated oven at 300°F (150°C) for about 5-7 minutes, or until warmed through and the cheese is soft again. A toaster oven works great for this too! Avoid the microwave if you can, as it tends to make the crust soft rather than crispy. Enjoy every cheesy, garlicky bite!

Conclusion:
And there you have it, my friends! We’ve reached the grand finale, and I truly hope you’re as excited about this recipe as I am. After diving into all the delightful details, I think it’s crystal clear why these
Cheesy Garlic Crescent Rolls
are more than just a simple side dish; they’re a culinary triumph waiting to happen in your kitchen. This isn’t just another recipe; it’s an invitation to experience pure, unadulterated comfort and joy, baked right into every golden, flaky, and unbelievably cheesy bite. They’re effortlessly elegant, simple enough for a weeknight, yet impressive enough to steal the show at any gathering. Trust me when I say, once you taste that warm, garlicky, cheesy goodness enveloped in perfectly baked crescent dough, you’ll understand why this recipe is destined to become a beloved staple in your repertoire.
What makes these rolls an absolute must-try? It’s their sheer versatility, for starters. The simplicity of the ingredients belies a depth of flavor that is truly remarkable, transforming readily available items into something that feels gourmet and indulgent. They possess that magical quality of being universally loved; from picky eaters to the most discerning foodies, everyone will find something to adore in these savory delights. They’re the perfect expression of comfort food – warm, inviting, and utterly satisfying. The aroma alone as they bake is enough to make mouths water, setting the stage for a truly delightful eating experience. Plus, the minimal effort required for such maximum reward is a win-win in any busy household. They deliver on every front: flavor, texture, aroma, and ease, making them an undisputed champion in the world of baked goods.
Elevate Your Meal: Serving Suggestions
Now, let’s talk about how you can best enjoy these magnificent creations. While they are absolutely divine straight out of the oven, perhaps with a touch of extra melted butter or a sprinkle of fresh parsley, their true magic often shines when paired with other dishes. Imagine a chilly evening, a comforting bowl of homemade tomato soup or a hearty beef stew, and beside it, a golden-brown, warm roll just begging to be dipped. They are also an excellent companion to any pasta dish, soaking up rich marinara or creamy alfredo sauces with delightful ease. For a weekend brunch, they can elevate a simple omelet or scrambled eggs, adding a savory, satisfying element. Don’t forget about using them as an appetizer for your next dinner party; arrange them artfully on a platter, maybe with a small bowl of warm marinara or a vibrant basil pesto for dipping, and watch them disappear in mere moments. They are fantastic alongside a crisp green salad, turning a light meal into something more substantial and incredibly satisfying. Think about your next BBQ or family gathering – these rolls will undoubtedly be the first to vanish from the table, complementing grilled meats and roasted vegetables beautifully.
Unleash Your Creativity: Exciting Variations
But the fun doesn’t stop there! While the basic recipe for these rolls is perfection, don’t hesitate to experiment and make them uniquely yours. The beauty of a simple recipe like this is its adaptability. Want to add a bit of an herbaceous kick? Sprinkle in some finely chopped fresh chives, parsley, or even a hint of rosemary or thyme into your butter mixture. For an extra layer of savory depth, consider adding a tablespoon of finely grated Parmesan cheese to the garlic butter, or swap out some of the mozzarella for a different cheese like smoked gouda, sharp cheddar, or even a blend of Italian cheeses. If you’re feeling adventurous and like a little heat, a pinch of red pepper flakes mixed in with the garlic will give them a subtle, spicy zing. Another fantastic idea is to incorporate some crispy, crumbled bacon bits or finely chopped sun-dried tomatoes before rolling them up for an extra burst of flavor and texture. For a truly decadent twist, you could even spread a thin layer of cream cheese mixed with a little garlic powder and herbs onto the dough before adding the mozzarella. The possibilities are truly endless, limited only by your imagination and the ingredients you have on hand. Each variation offers a new adventure for your taste buds, ensuring that these rolls can adapt to any craving or occasion.
So, my dear food enthusiasts, what are you waiting for? This is your moment to shine in the kitchen! I wholeheartedly encourage you to roll up your sleeves, gather your ingredients, and give this recipe a try. You’ll be amazed at how quickly and easily you can create something so incredibly delicious and satisfying. Cooking should always be an enjoyable and rewarding experience, and I promise you, making these rolls delivers on both fronts. Don’t just read about them; experience the magic firsthand.
Once you’ve had the chance to bake and savor these delightful rolls, please come back and share your experience with me! I absolutely love hearing from you and seeing your culinary creations. Did you try a fun variation? Did you serve them with a specific meal? Or perhaps they simply became your new go-to snack? Whatever your story, I’m eager to hear all about it. Share your photos, your tips, and your honest feedback in the comments section below. Let’s build a community of enthusiastic home bakers who appreciate the simple pleasure of good food made with love. Happy baking, and may your kitchen always be filled with delicious aromas and joyful moments!
Irresistible Cheesy Garlic Crescent Rolls
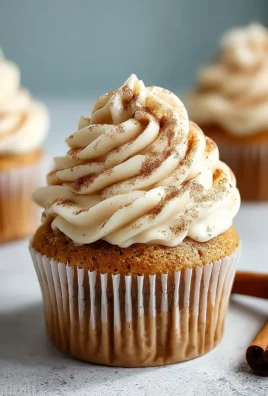
Golden-brown, pillowy soft crescent rolls slathered with vibrant garlic butter and cradling a molten heart of rich, gooey cheese. Perfect as a side dish, appetizer, or snack.
Ingredients
-
1 (8-ounce) can Refrigerated Crescent Roll Dough
-
1/2 cup Unsalted Butter
-
4-6 large cloves Fresh Garlic, minced
-
1 cup Shredded Mozzarella Cheese
-
1/4 cup Grated Parmesan Cheese
-
2 tablespoons Fresh Parsley, finely chopped
-
1/2 teaspoon Onion Powder
-
1/4 teaspoon Black Pepper, freshly ground
-
Pinch of Red Pepper Flakes (Optional)
-
1 large Egg (for egg wash, optional)
-
1 teaspoon Water (for egg wash)
-
Flaky Sea Salt (for garnish, optional)
Instructions
-
Step 1
Preheat oven to 375°F (190°C). Line a large baking sheet with parchment paper. -
Step 2
Finely mince 4-6 large fresh garlic cloves. In a small bowl, melt 1/2 cup unsalted butter. Stir in minced garlic and let sit 5 minutes to infuse. -
Step 3
To the garlic butter, add 1 tablespoon chopped fresh parsley, 1/2 teaspoon onion powder, 1/4 teaspoon black pepper, and optional red pepper flakes. Mix well. Set aside. -
Step 4
In a medium bowl, combine 1 cup shredded mozzarella and 1/4 cup grated Parmesan. Add 2 tablespoons of the prepared garlic butter mixture to the cheese and stir to coat. -
Step 5
(Optional) Whisk 1 large egg with 1 teaspoon water for egg wash. -
Step 6
Unroll crescent dough and separate or cut into 8 triangles. Gently stretch each triangle slightly. -
Step 7
Brush each dough triangle generously with the remaining garlic butter mixture. -
Step 8
Place 1-2 tablespoons of the cheese mixture on the wide end of each triangle. Roll from the wide end towards the narrow tip, tucking the tip underneath. -
Step 9
Arrange rolled crescent rolls on the prepared baking sheet, leaving space between them. -
Step 10
(Optional) Brush the tops and sides of the rolls with egg wash. -
Step 11
Bake for 12-15 minutes, or until golden brown and cheese is bubbly. -
Step 12
Remove from oven and cool on the baking sheet for 5 minutes. -
Step 13
Garnish with remaining fresh parsley and optional flaky sea salt. Serve warm.
Important Information
Nutrition Facts (Per Serving)
It is important to consider this information as approximate and not to use it as definitive health advice.
Allergy Information
Please check ingredients for potential allergens and consult a health professional if in doubt.


Leave a Comment